Category: Tips

  • What The Heck Are The Different Photography Filters Used For?

    What The Heck Are The Different Photography Filters Used For?

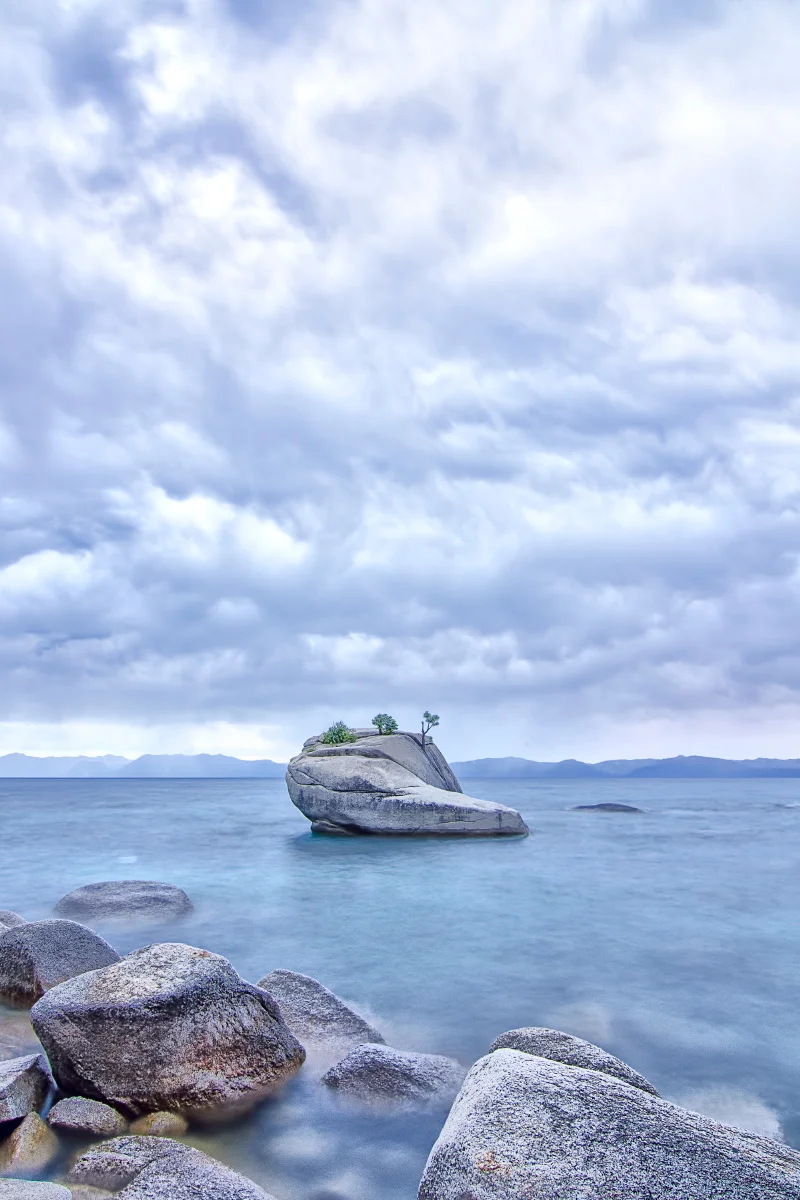
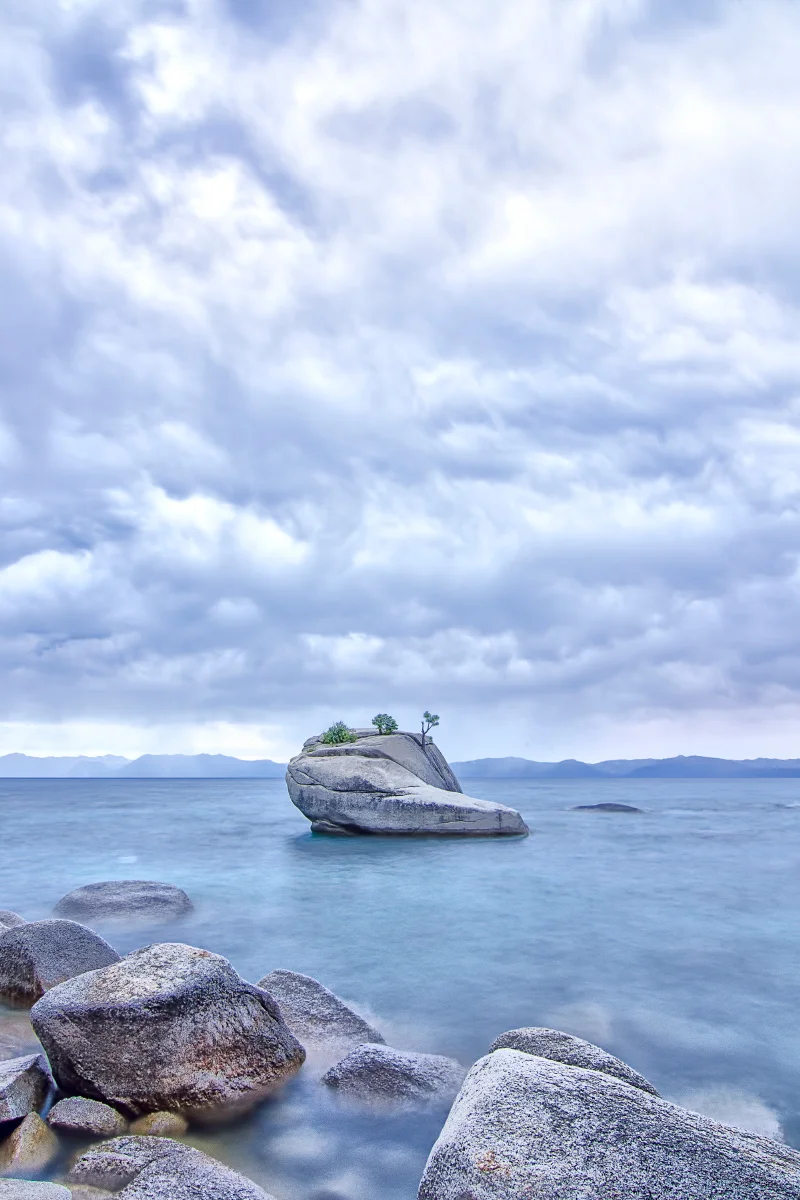
    Wasim Muklashy Photography_Bonzai Rock_Lake Tahoe_California_Graduated Neutral Density Photography Filter

    It eventually happens to every new photographer. You’re out in the field. You’re setting up to make a shot, and you see others around you setting up for a shot, only, some of these people have these strange contraptions attached to the front of their lens. It looks like a huge piece of square glass. You sit there. You stare. You wonder. And when you get back home, you Google ‘square things on lens.’ The first time this happened to me, I was set up to shoot some images of Bonsai Rock in Lake Tahoe, California several years back. It’s a rock about a hundred yards offshore that has miniature trees growing on it as a result of the trees roots not being able to penetrate the rock, effectively stunting their growth. Anyhow, I had my positioning, tripod locked down, and others began to show up and set up, and a few of them set up with these aforementioned chunks of glass. I had to know what they were, so I asked the photographer next to me, who kindly explained what they do and the effect they give. They lent me one, showed me a crude way of using it by holding it front of my lens (they had special holders for theirs) and I was immediately blown away. Everything became so clear to me. All those crazy images I see on 500px.com and around the web with milky smooth water and skye and clouds…I get it now.

    The one they let me use was a Graduated Neutral Density filter, and I explain what that does below, along with the 5 most popular photography filters used by photographers in the field.

    1. UV Filter – This filter does absolutely nothing, yet, it is by far the most popular. Huh? Well, because it does nothing to the image itself, many photographers will have them on their lens to protect the glass. While a lens can be in the thousands of dollars, a basic UV filter can be under 30, so it’s a minimal investment to protect your gear. Plus, it does actually help a little bit in minimizing haze and glare. These come in circular shape and screw onto the front of your lens so you forget it’s even there. They’re sold by the size of the lens, which is demonstrated on the barrel of the lens following the ø symbol. For example, in this image, you’ll see ø67, so the size of filter I’d shop for is 67mm.

    2. Polarizer – Essentially this one is most commonly used to darken and saturate skies, as well as reduce reflections in reflective surfaces such as water and glass. They can also be extremely effective in making colors pop in overcast conditions. Polarizers, like UV filters, also usually comes in the circular screw-on format. Once you screw it on, you can turn it and see the effects immediately through your viewfinder or LCD panel. On sunny days, they work best the closer you are to a 90 degree angle from the sun (when the sun is directly overhead or to either side of you).

    3. Graduated Neutral Density (Grad ND) – It’s basically a piece of glass that gradually moves from no tint to a dark tint, with a discernible line along the middle. What this does is it allows the proper amount of light through the part of the glass where there is no tint, to letting less light in the part of the glass with the tint. Essentially, this makes it so that whatever is under the tint is underexposed, allowing you to increase your exposure time to still get a proper exposure for the scene. Basically, you can decrease your shutter speed, allowing for a longer exposure in the lighter areas without overexposing the full image. For example, in the shot of Bonsai Rock, the sky was much brighter than the water and the foreground in my image, so it would have been impossible to get a good exposure of the entire scene. So I wanted to be able to allow less light into the bright areas while I expose for the darker areas. By placing the filter so that the dark tint is on the top half (or horizon) of my scene and darkening my sky, I am able to get a proper exposure preserving detail in both halves of the scene. These filters typically need a filter holder as explained below.

    4. Neutral Density (ND) – This is almost the same as the graduated neutral density filter described above. The only difference is that on a regular neutral density filter, the entire glass is one tint. They come in various degrees of tints, called stops. This is in relations to your f-stop, so a 3-stop ND filter will allow you to expose for 3 additional f-stops to get a proper exposure, a 6-stop ND will allow you to expose for 6 additional f-stops, and so on (which also applies for the Graduated Neutral Density filters). Neutral Density filters are best used on very bright days when you want to accomplish a long-exposure. This way, the filter darkens the glass, creating the opportunity to keep your shutter open for a longer exposure. Neutral Density filters also usually require a filter holder.

    5. Infrared – Madness! That’s what these create. Essentially, what Infrared filters do is block infrared light while letting through visible light. By blocking out certain spectrums of light, IR filters allow us to view spectrums of light that are normally lost to the human eye. Using an IR-transmitting filter will result in almost monochromatic surreal images with colors that we don’t normally see to the naked eye. The detail the provide can be insane! Click here for a few examples. (Edit: As pointed out by Google Plus user Jonathan Allen, “most cameras have built in infrared filters. Removing the infrared filter is what produces the effects in the photos you linked to under the infrared filter.” He is correct, to a degree. There are actually two things going on here. There is an IR-blocking filter, and an IR-transmitting filter. the IR-blocking filter is what the camera is equipped with in order to block the infrared spectrum from coming to the sensor and making your images unnatural looking. The IR-transmitting filter is what allows the infrared spectrum to hit the sensor, giving that surreal effect. It’s the same effect you’d get if you had the IR-filter that is built into the camera removed).

    So there’s the basic breakdown of five of the more popular filters. The other element here is the filter holder and that depends on your lens. Certain ones are made for wide angle lenses, others are made for more standard focal length lenses. They basically screw onto the front of your lens and then the filter slips into the grooves provided.

    While many manufacturers make them, the ones I use are the Cokin filter holders.

    And some of the best filter brands out there include Singh-Ray, Hoya, and Lee.

    If you’re on a budget and want to affordably play around a bit before committing to the higher-end brands and options, Cokin and Tiffen are worth checking out.
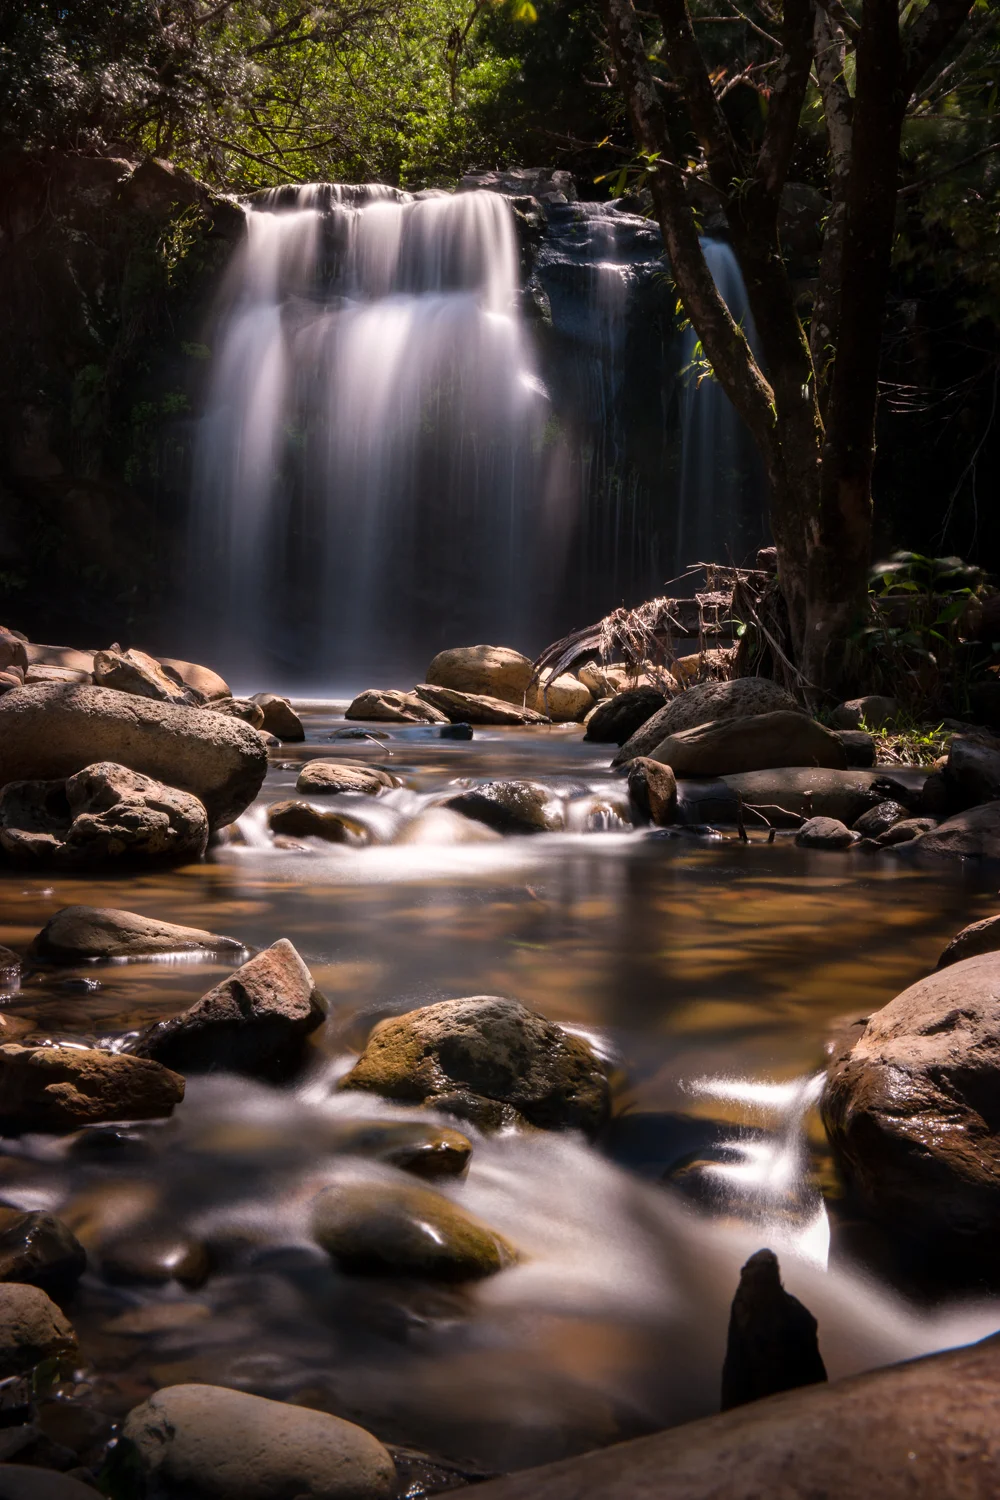
    Samsung NX500 Hawaii Waterfallformatoriginal

    And recently, I’ve been introduced to Haida, and got myself a 10-stop Neutral Density filter. They’re designed to compete with Lee’s Big Stopper and THEY DO THE TRICK!!! Here’s one, shot in Hawaii, literally at high noon, and I was able to get this gorgeous 30-second exposure shown here on the right.

    Try to stay away from the plastic filters and stick to the glass ones – you WILL notice the difference in quality.

    While I learned the lesson of the power of the filter in the field, that wasn’t the only lesson I learned on that shoot. The other was that no matter how warm the weather, do NOT ever ever EVER wear flip-flops, especially when you have to scale a small cliff to get into position. I tore the sucker on the way down and climbing with photo gear half-bare-foot along a rocky lakeside isn’t…eh…comfortable.

    Regardless, my resulting shot was worth it (or at least I thought so…).

    For more of my madness:
    Instagram: @wasimofnazareth
    Twitter: @wasimofnazareth
    Google+: www.Google.com/+WasimMuklashy
    Facebook: www.Facebook.com/WasimOfNazareth
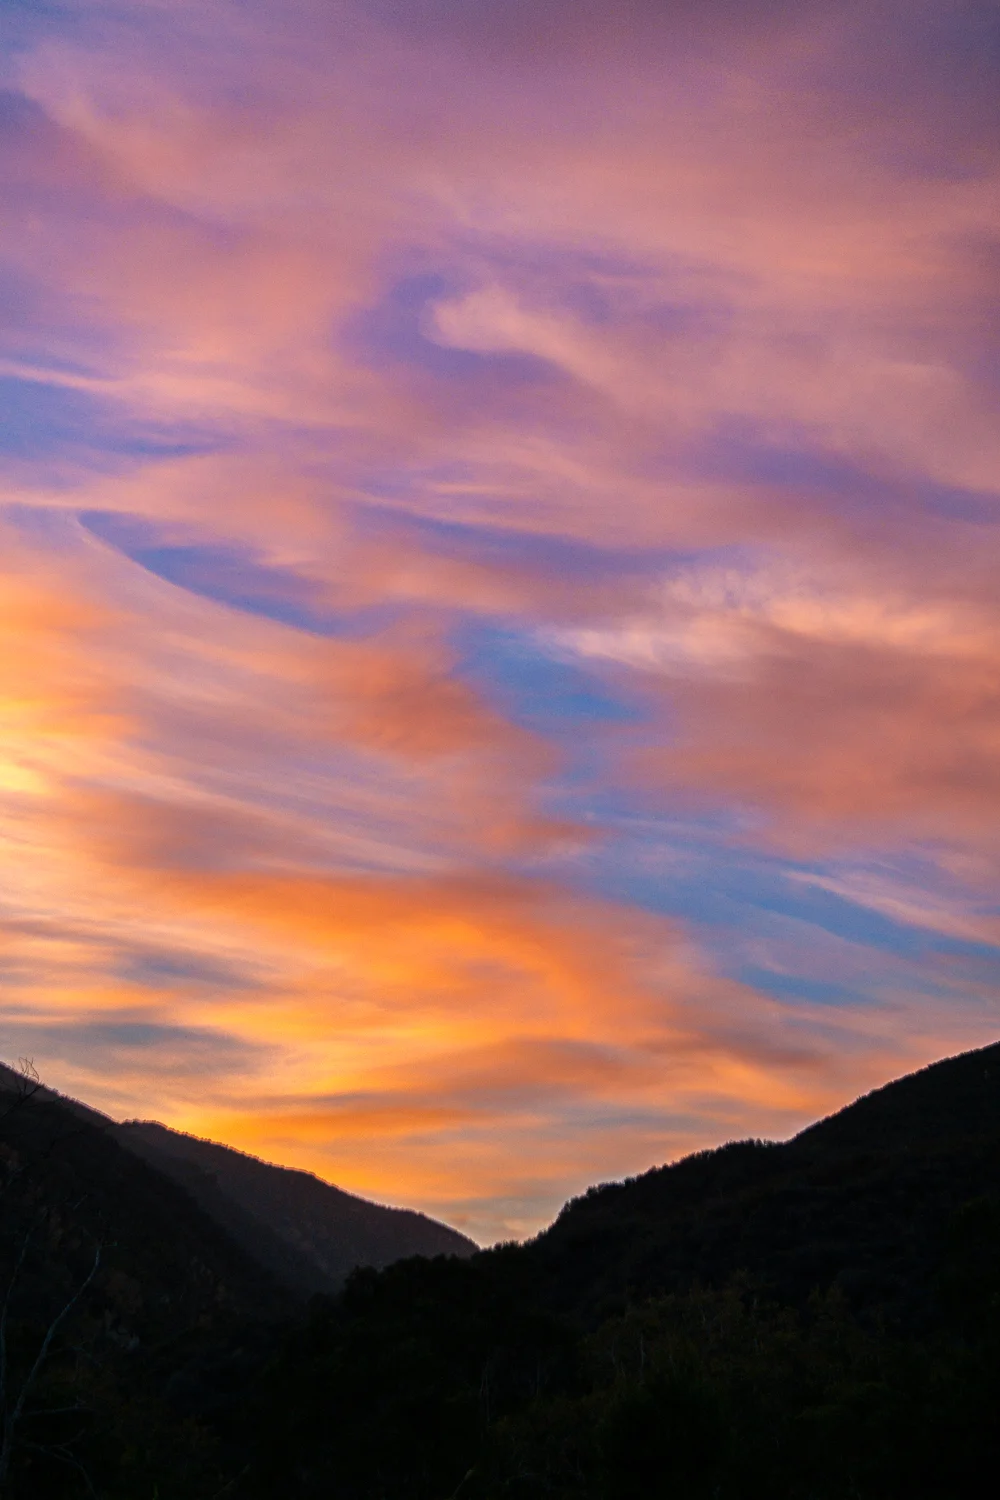
    Between A Rock And A Busted Flip Flop
    Between A Rock And A Busted Flip Flop
  • A Monday Motivational Kick In The Yahoo – July 21, 2014

    A Monday Motivational Kick In The Yahoo – July 21, 2014

    Wasim Muklashy Photography__Samsung NX30_Topanga Beach_Monday Motivational_July 21
    Wasim Muklashy Photography__Samsung NX30_Topanga Beach_Monday Motivational_July 21

    “Instead Of Trying To Be The Mountain,

    Be The Valley Of The Universe.

    All Things Will Come To You.”

    -Tao Te Ching

    **

    From me to you,
    There’s This Week’s

    Monday Kick In The Yahoo!

    **

    Be Inspired!

  • 5 Things To Remember When Assisting a Photographer

    5 Things To Remember When Assisting a Photographer

    SAMSUNG CSC

    So one of the best ways to learn photography is to assist another photographer, which I’ve had the pleasure of recently doing for photographer Stephen Chiang. While getting a photographer assistant gig may seem like a tough nut to crack, you’d be surprised at how many people can or will refer you just by putting out a simple call on your Facebook or Twitter or Google Plus account. Photographers are everywhere and every single one of them can use some help, and what separates those that are helping them and those that are thinking about helping them? Well…those that are helping them asked if they can. While it may not turn into a regular gig, it’s a marvelous step in building a new network, gaining some trust amongst your peers, and best of all, learning your craft hands on. And to maximize that effort, here are a few things to remember when assisting a photographer.

    Dress Up – Sure, you’re going to be running around and moving and carrying heavy stuff and MacGuyver’ing a piece of tissue paper and a paper clip into a diffuser or a dictionary and gaffer tape into a light stand, so you’ll want to be comfortable, so there’s no need for a tie and to tuck in, but business casual is a safe bet. At the very least, a polo or a button up with some clean pants. In any However, do keep a more casual outfit in the car just in case…you certainly don’t want to look better than the photographer! Also, it’s not a faux paus to ask the photographer for a dress code. Don’t be shy. Ask.

    Show Up Early – Try to show up to set or location before they do. Walk around and get a good feel for the space/area. That way, when the photographer shows up, you’ll at least already have a bit of a lay of the land and can offer suggestions and ideas right off the bat, which is a VERY valuable thing, especially if they haven’t had their coffee yet. If that’s the case, you’re gold!

    Find Your Place – Do not be afraid to ask the photographer you’ll be working with what your role should be. Some want more out of you, some want less, and you certainly don’t want to overstep any boundaries or sink too far into the background. So it’s safe and respectable to ask the photographer what s/he’d generally like you to do. Some, believe it or not, like setting up their own stuff so you’re mostly there for emotional support and to hurry up and wait, and then there’s some that hope you’d be able to set everything up so they can focus strictly on their viewfinder. As an assistant, it’s your responsibility to find out that information beforehand so as not to put either of yourselves in an awkward situation on set. That’s the worst. The worst. Just the worst.

    Always anticipate – Keep an eye on what the photographer is doing and anticipate any moves they might have. For example, I recently had the opportunity to assist professional photographer Stephen Chiang on a corporate headshot gig. While he was switching lenses and pow-wowing with makeup department on look and strategy, I took it on myself to explain to the subject how to stand, how to pose, and what the photographer was looking for. I knew this by paying close attention to the first couple of subjects. When the photographer came back to set, he was surprised that the subject was already in position, and knew where to stand, where to look, and what to do, saving him some time and trouble of repeating himself. It may seem like a small thing, but It’s things like that that let the photographer know you’re paying attention and s/he can trust you to make their lives easier.

    Pack For Two – Often times you’ll be working through many hours or in time constraints in which stopping to eat or refuel isn’t an option. If you’ve got multiple energy bars or candy bars in your bag, it’s a welcomed sight to any hard working photographer to randomly see an outstretched arm with a Clif Bar in front of them. Try to do this every 2-3 hours or so. Low blood sugar makes for lack of focus and stressful situations. Those suck. A lot. Oh, and pack gum! You (and your breath) will most likely be in close proximity of other humanoids all day.

    One final thing to keep in mind is if you have access to information and equipment before the shoot day, get acquainted with it. Or try to find out from the photographer or production manager what equipment you’ll be using so you can study up on it and have a good idea of what you’re in for. Surprises can be good, but not in situations in which you’re expected (and being paid) to be a smooooooth operrraattorrr…

    Welp, hope those tips help you out. Let me know of any disaster stories. While they’re never fun to be a part of, they’re certainly fun stories to hear!! J/K (sorta…)

    For more of my madness: Instagram: @wasimofnazareth Twitter: @wasimofnazareth Google+: www.Google.com/+WasimMuklashy Facebook: www.Facebook.com/WasimOfNazareth
    SAMSUNG CAMERA PICTURES

  • Why You Should Stop Paying Attention To The Focal Point Of Your Images

    Why You Should Stop Paying Attention To The Focal Point Of Your Images

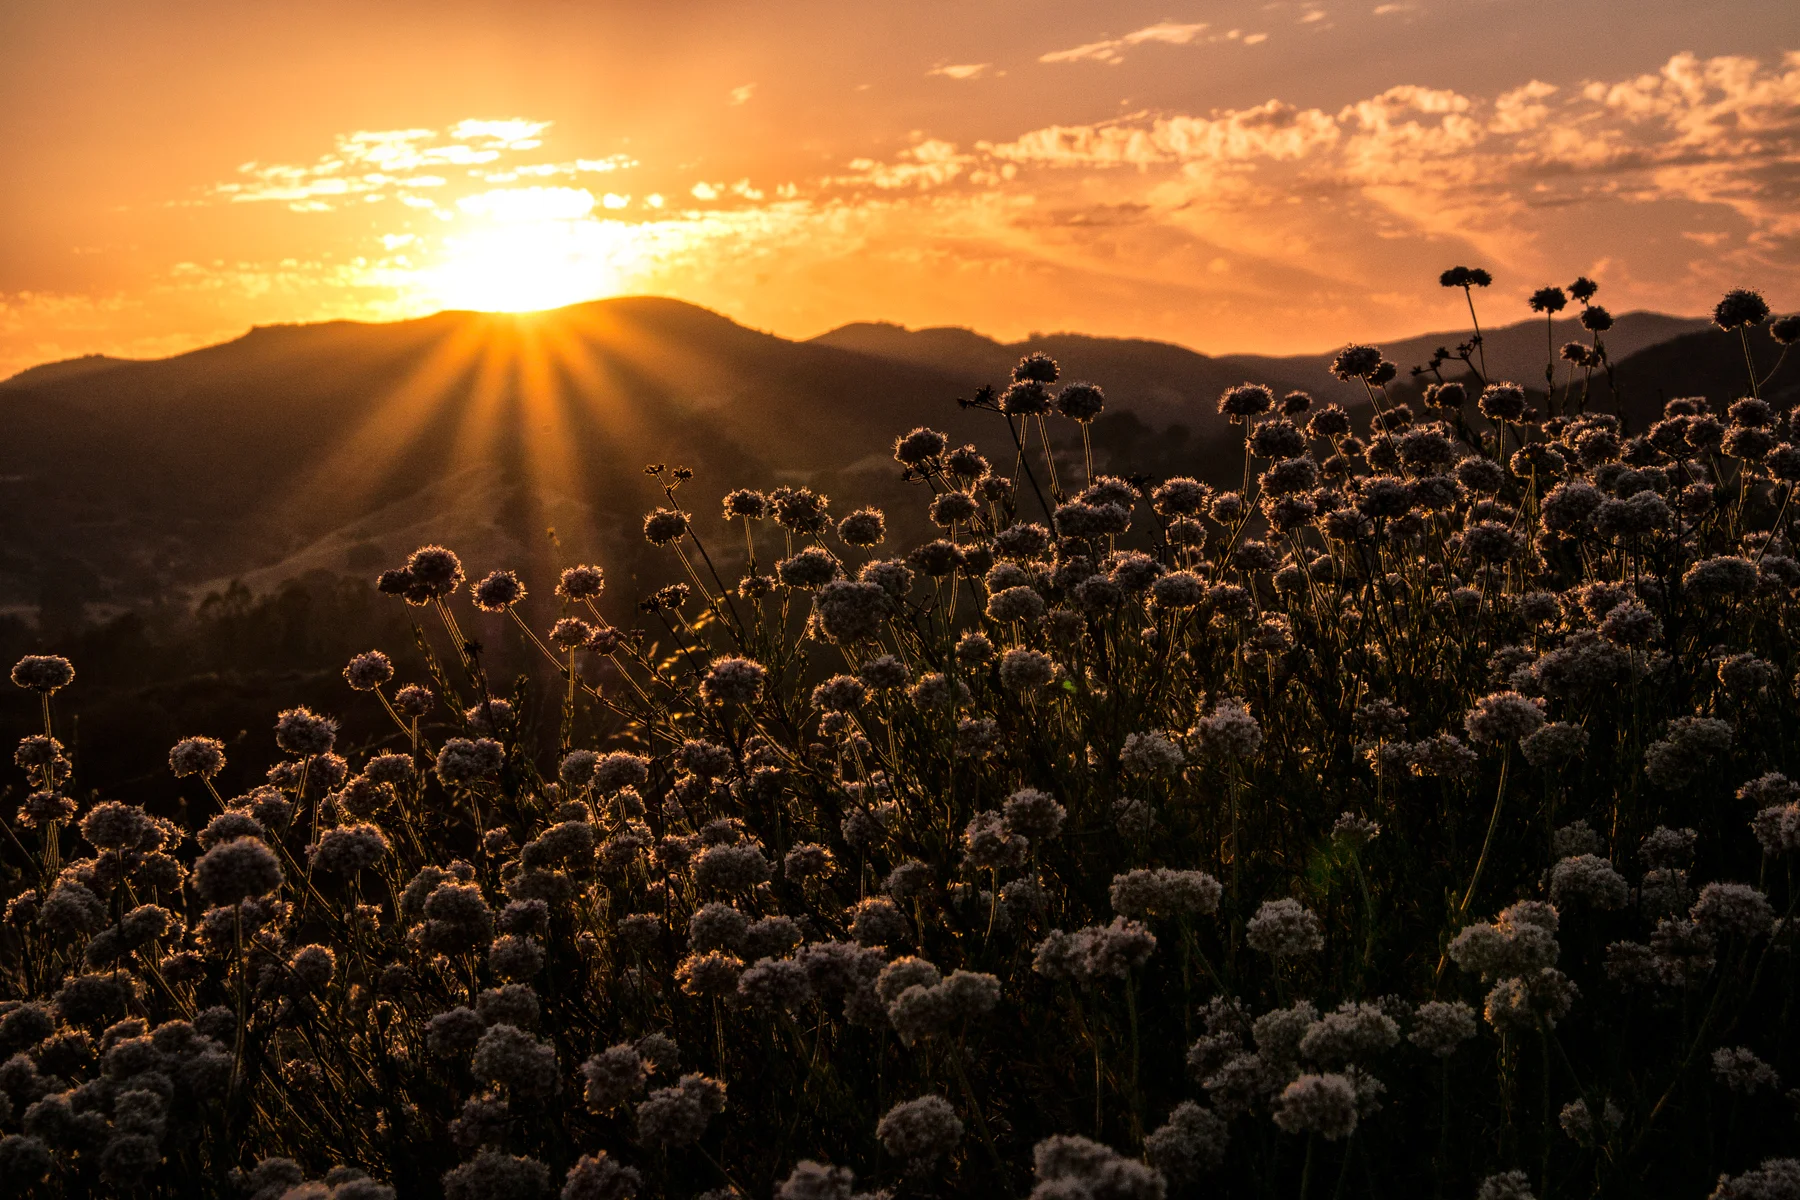
    Sunset Photography_Wasim Muklashy Photography

    I recently found myself standing in front of a stunning vista in the Santa Monica Mountains. It was June 21, 2014. The Summer Solstice. And the sun was just about to set behind the mountains, leaving a beautiful show of colors and clouds and reflections and highlights and vivid shadows in it’s wake. There was another group of photographers at the other end of the overlook and they were doing what most photographers first instinct is to do…pay full attention to the focal point of their image, the subject they wish to draw attention to, and everything else came secondary.

    In this case, the focal point was the sun.

    The images they got weren’t bad, they were wonderful images of the sun over the mountain range, but, well, that’s exactly the image that most people would expect to see, meaning, in essence, they weren’t very unique for the situation. For months, I’ve been tackling how to avoid this sort of image and so far my conclusion is, well, to avoid the focal point and subject of my image and, somehow, find a way to make that secondary.

    Make the sun secondary during a sunset shot? Huh? Let me explain.

    When I saw that group of photographers standing in a row next to each other, I couldn’t help but distance myself as far from them as possible. As a matter of fact, I went to the complete opposite end of the overlook. That was the first thing I did that I knew would differentiate my image from theirs, for better or for worse. The next thing I did was drop from eye level and look for a foreground subject. As soon as I dropped to ground level, I ran across a sagebush and it was impossible to ignore the highlights bouncing off the tops of the drying buds. They were stunning and I knew immediately this had to be incorporated into the image. This is an aspect of my final image that I would have completely missed had I joined the other photographers, an aspect that all of those standing eye level at the other end of the overlook had no idea even existed.

    I’m not in any way claiming my image was better, or more original than theirs, nor am I claiming that I have any sort of secret to making good images. That’s obviously in the eye of the beholder. All I’m claiming is that by simple physics, the fact that I consciously chose a different vantage point, made my image at least different than the other photographers there. And I personally liked what I came away with. And that’s at least a good first step towards a goal of finding uniqueness amongst a saturated photographer world out there.

    Had I joined the group, yes, no doubt I would have ended up with a very nice Summer Solstice sunset image, it would have been hard not to in that location at that time. But would I have ended up with this one? One I’m MUCH happier with? No. I wouldn’t have. The interplay between the sun setting behind the hills, and the highlights of that final light of the day bouncing off the tips of the sagebrush adding a sense of scale and depth that otherwise would have been missing, are what I feel helps this image stand apart from just focusing on the sunset itself.

    So the point here is basically to not settle for the obvious. You know that option is there, so you can always return to it if all else fails, but don’t be sedentary. Duck and dodge and move and try different things. Try to focus first on finding a foreground or an element that would normally be overlooked – the bark of a tree, the petals of a flower, the dust being kicked up by the wind – whatever other elements exist, are all parts of that landscape, and can all help in adding another dimension to what the main focus of the image was originally supposed to be.

    In other words…play!

    The image above was taken with a Samsung NX30 and a Samsung 18-200mm lens.

    For more of my madness:
    Instagram: @wasimofnazareth
    Twitter: @wasimofnazareth
    Google+: www.Google.com/+WasimMuklashy
    Facebook: www.Facebook.com/WasimOfNazareth
  • 7 Tips For Shooting Real Estate Photography

    7 Tips For Shooting Real Estate Photography

    property_photography_110

    If you read this blog regularly, you’ll know that one of my primary sources of income is photographing real estate and properties for various clients ranging from Airbnb to real estate companies and management companies. After doing this for the past 3 years, I’ve managed to pick up a few tips and pointers along the way that have made my job a LOT easier. Here are 7 of them:

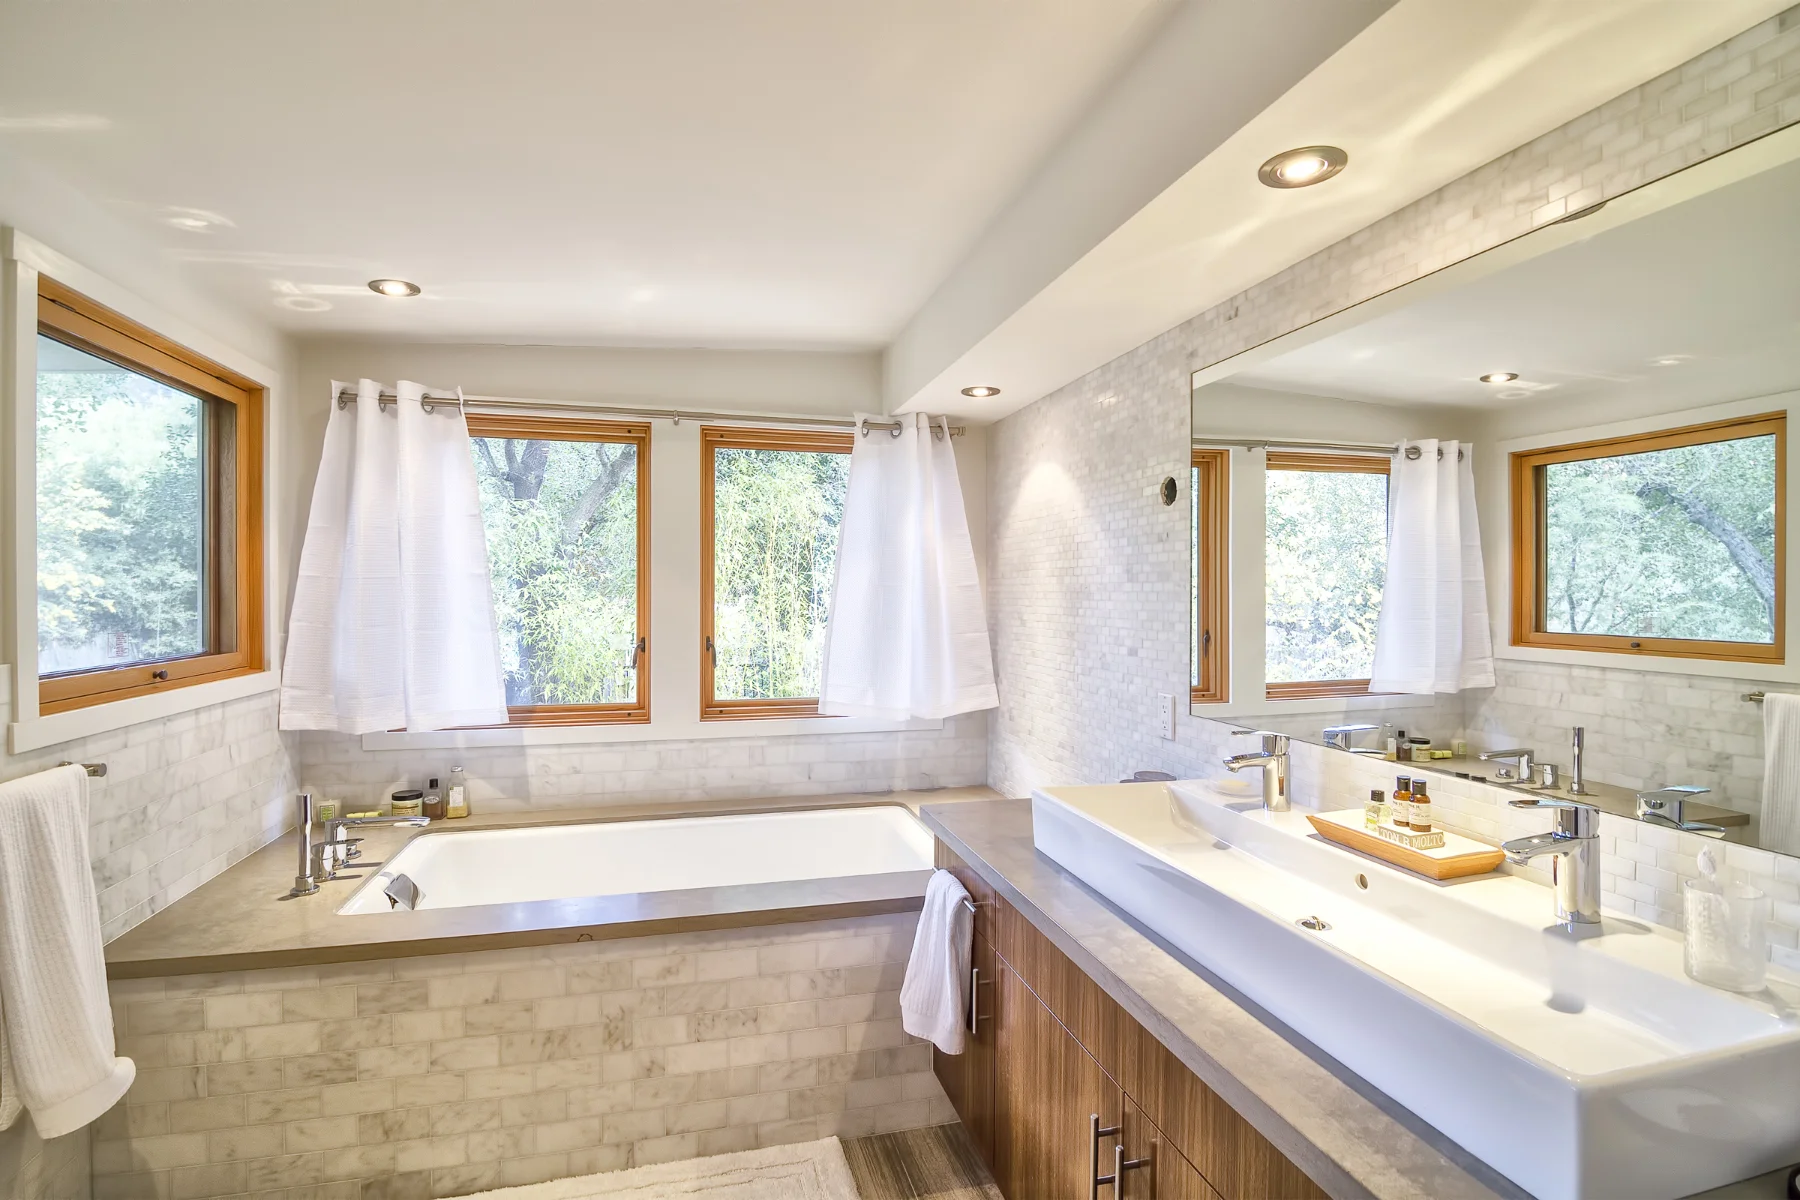
    1. Do A Walk-Through – Walk through the space before you begin. Have the host or the agent give you a quick tour so that your mind can begin to work out any issues that might arise ahead of time. Plus, sometimes they’ll have some ideas of what could make for special shots and features of the space that they’d like to highlight. What ends up happening is you find yourself subconsciously thinking of solutions as you shoot other parts of the house, so by the time you get to the problem or feature areas, you’ll have a few ideas up your sleeve.

    Wasim Muklashy Real Estate Photography

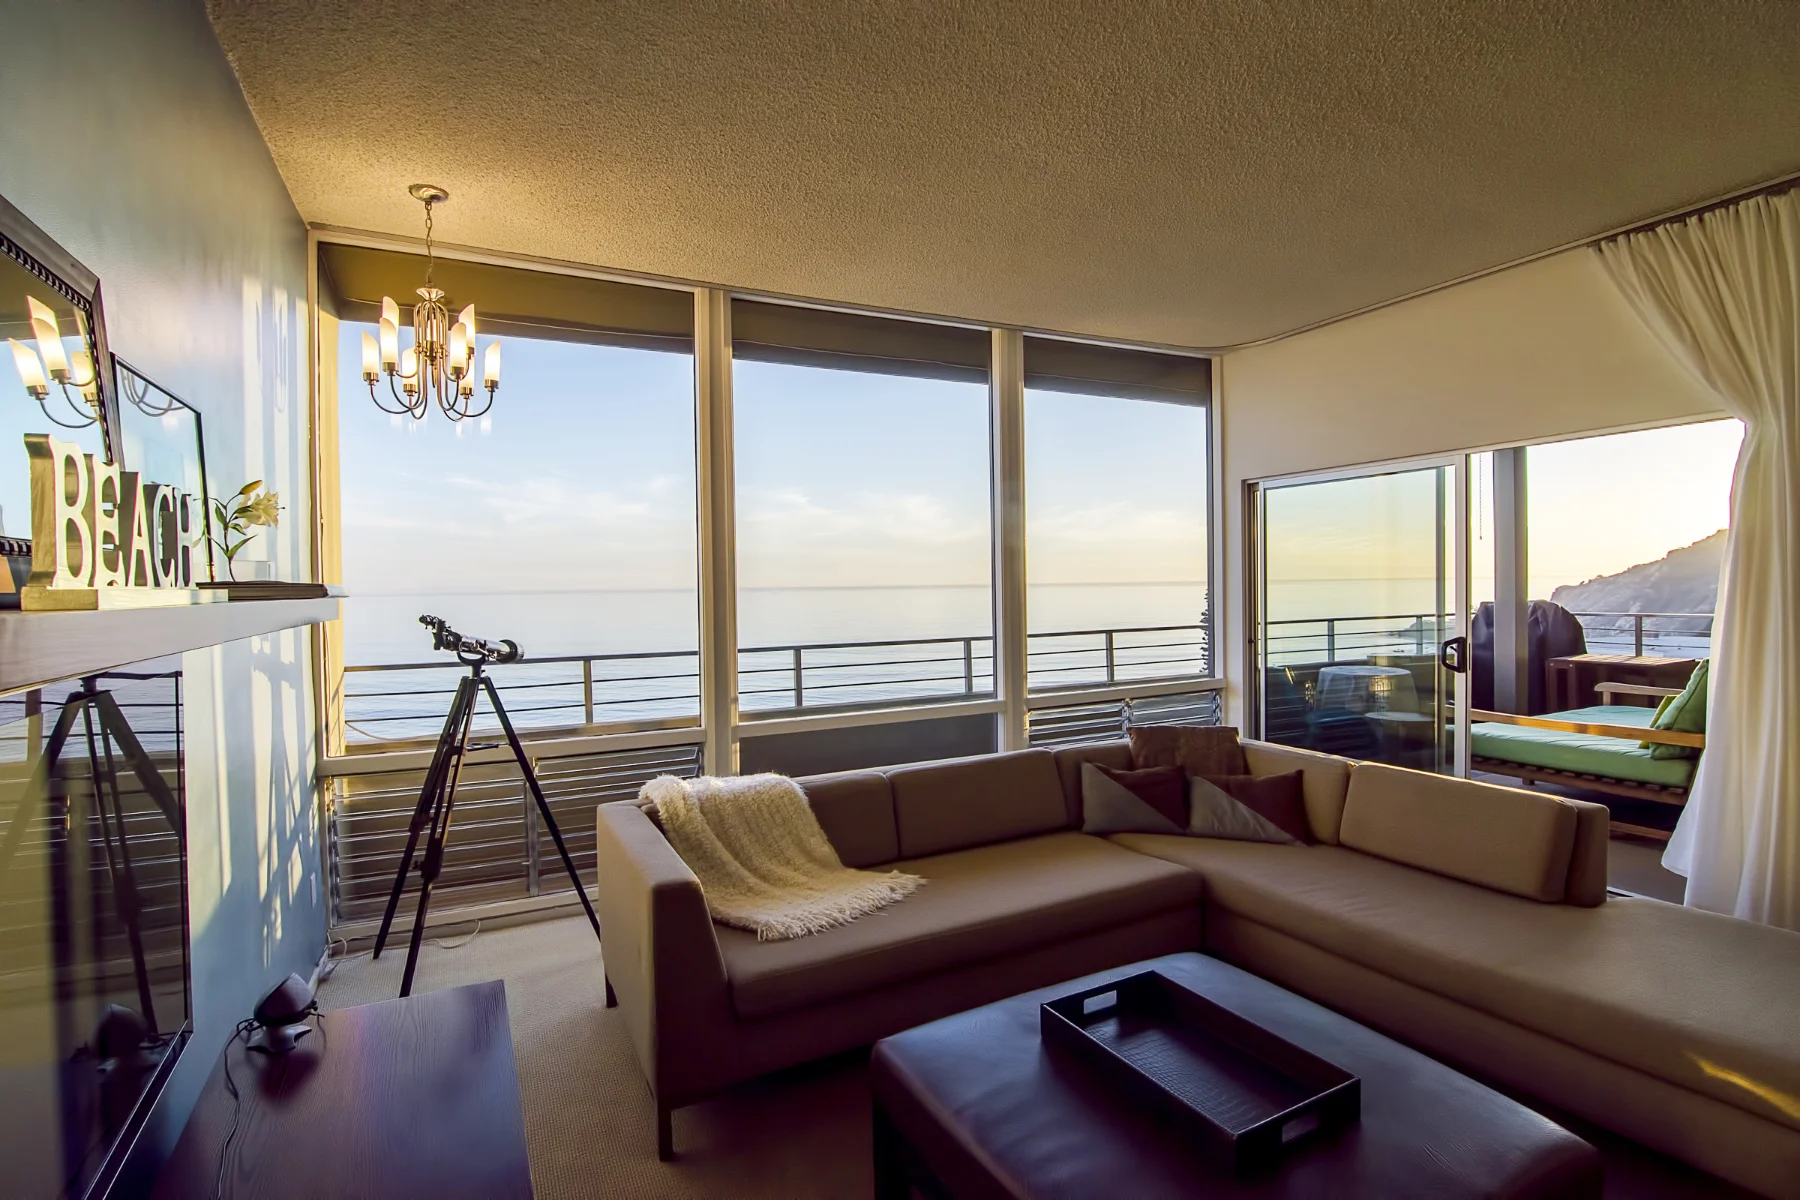
    2. Lights! Turn on every light you have available to you. It helps make the space look inviting and comfortable and homey instead of dry and sterile. The exception is if all the lights are fluorescent. If that’s the case, try to switch out the lights if you can for something warmer or perhaps use a piece of CTO gel (Color Temperature Orange) to wrap the bulbs in while you take the shots for those rooms. Warmer tones are more inviting. To avoid a lot of glare and light leak in rooms with lots of light, underexpose your shot by a stop or so and pull out the shadows and darker areas in post, or for more advanced techniques using multiple exposures, check out my post on Exposing For Interiors And Exteriors.

    Wasim Muklashy Real Estate Photography

    3. Lines. It’s all about the lines. Always be on the lookout for leading lines – the armrest of a couch leading into the fireplace, the line of barstools leading into the brick oven, a row of spice jars leading to the fridge, a shelf full of trophies leading towards the bed. Not only do they make for a more pleasing image, but they help make the viewer feel a sense of harmony to the space.

    Wasim Muklashy_Real Estate Photography

    4. Clutter Sucks. The less clutter the better. sometimes you can try to shoot around clutter, but it’s often much more effective to actually spend some time moving it out of the way. Yeah, it can be more work on set, but it will save you hours of frustration and clone tool mishaps in post-processing. This is especially evident in tight spaces like bathrooms, where even a toothbrush holder and hair dryer can ruin the aesthetics of a shot.

    5. Close Windows & Doors. Close the windows in all the rooms. The last thing you want is to go back to the studio or home to process the images and realize that there are obstructing window frame lines that end up super distracting and time consuming to fix in post-processing. They take focus away from the window and the scene or light outside. Regarding doors, when they’re wide open, they tend to distract from the room you’re trying to showcase. Often it’s aesthetically more pleasing when the doors are either closed all the way, or only left about 1/4 open, which can help show the flow of a room, especially if some warm light is leaking in from that crack in the door. That’s always swell.

    6. Deflect Reflections. When shooting in rooms with mirrors or reflective surfaces, like shower doors in a bathroom, and keeping yourself and your gear out of the shot is unavoidable, try to use the timer on your camera or a remote shutter release to fire the exposure(s). That’ll give you much less mass to have to clone out or clean up in post. It’s a LOT easier to just remove a camera and tripod than a camera, a tripod, and a human body…TRUST ME! Additionally, try to position the camera in a way to minimize any surrounding furniture or elements, so that when you do have to clean up your, or your equipments, reflections in post, you’ll have less that you’ll need to work around.

    Wasim Muklashy_Real Estate Photography_Detail_Lamp

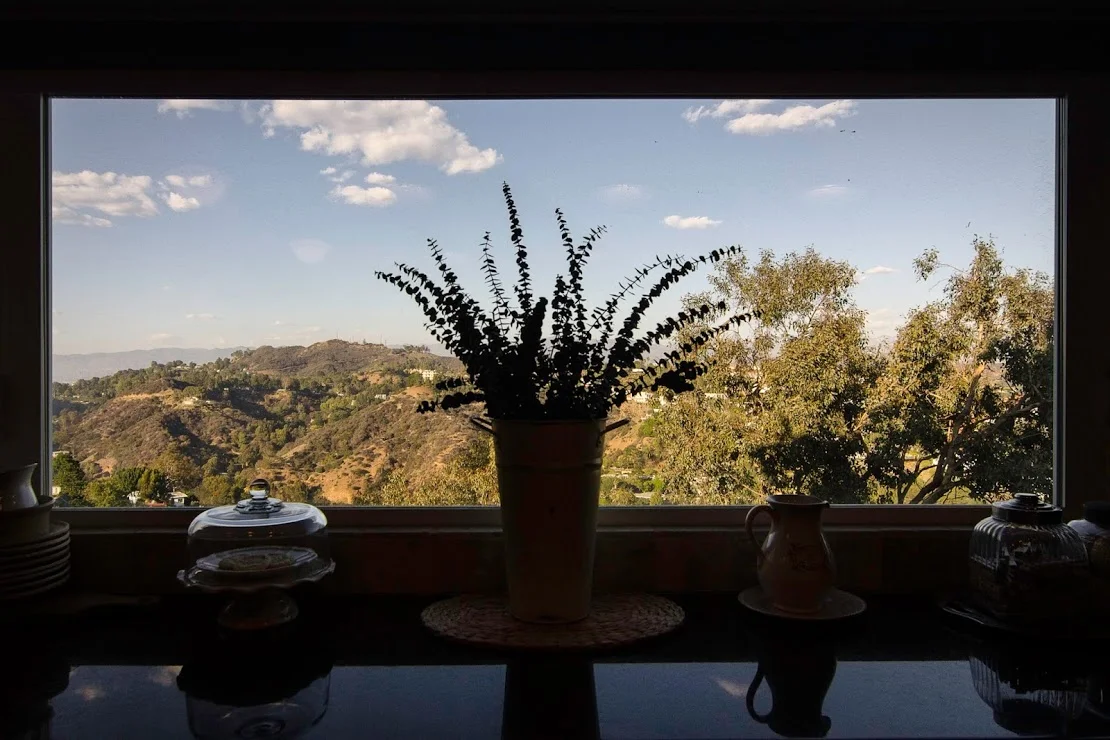
    Wasim Muklashy_Real Estate Photography_Kitchen Window

    Wasim Muklashy_Real Estate Photography_Bedroom_Vintage Dresser_Vignette

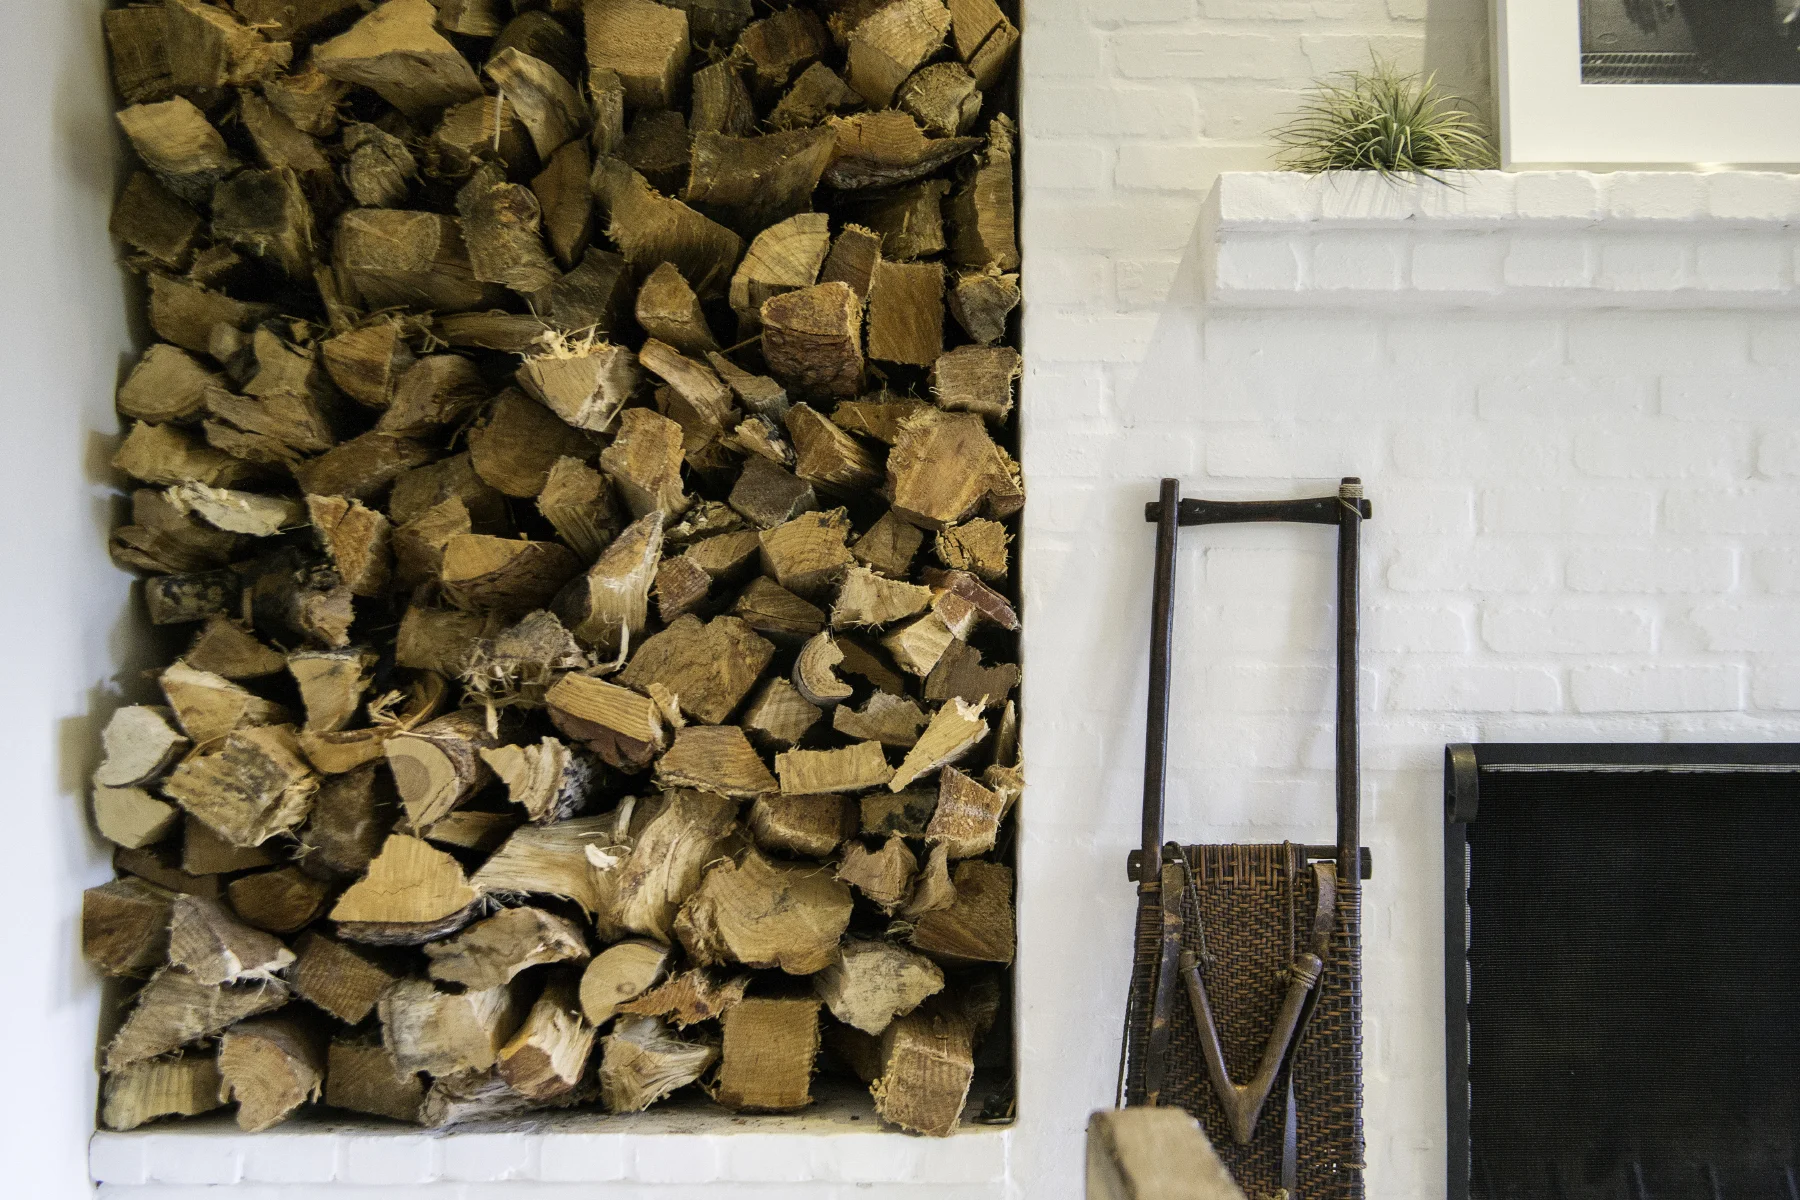
    Wasim Muklashy_Real Estate Photography_Fireplace_Vignette

    7. Mix It Up. Use a mixture of wide-angle and telephoto focal lengths. While wide angle lenses, from 11-24mm, show much more of the space and are pleasing to the eye, they can be a bit distorting, and this is where vignettes and tighter focal lengths come into play. That way you get the wide establishing shot, and you can have a focus on some unique details of that space using tighter lengths such as a 35mm, a 50mm, or even an 80mm. These are the shots that help a viewer more intimately connect to the space. Plus, if you’re ever intending on shooting for larger publications such as Architectural Digest or Dwell, if you notice, very few, if any, of their images are shot using wide-angle lenses.

    Also, I have an extensive post about Exposing For Interiors And Exteriors In Architecture Or Real Estate Photography that you might want to read. It’s a very detailed step-by-step guide to achieve proper exposures for both what’s inside the window and out, especially useful for rooms with great views or backdrops.

    I hope these tips help you get that ‘money’ shot every agent seeks. For them, that shot is the one that will bring potential buyers to the property. For you, that shot is the guaranteed call-back.

    And if you’re in need of real estate photography services, whether commercial or residential, please feel free to contact me or check out my Property Photography website.

    For more of my madness: Instagram: @wasimofnazareth Twitter: @wasimofnazareth Google+: www.Google.com/+WasimMuklashy Facebook: www.Facebook.com/WasimOfNazareth
    wampics-property-photography_55

  • A Monday Motivational Kick In The Yahoo – July 14, 2014

    A Monday Motivational Kick In The Yahoo – July 14, 2014

    Wasim Muklashy Photography_Solstice Canyon Afternoon_Buddha_for site
    Wasim Muklashy Photography_Solstice Canyon Afternoon_Buddha_for site

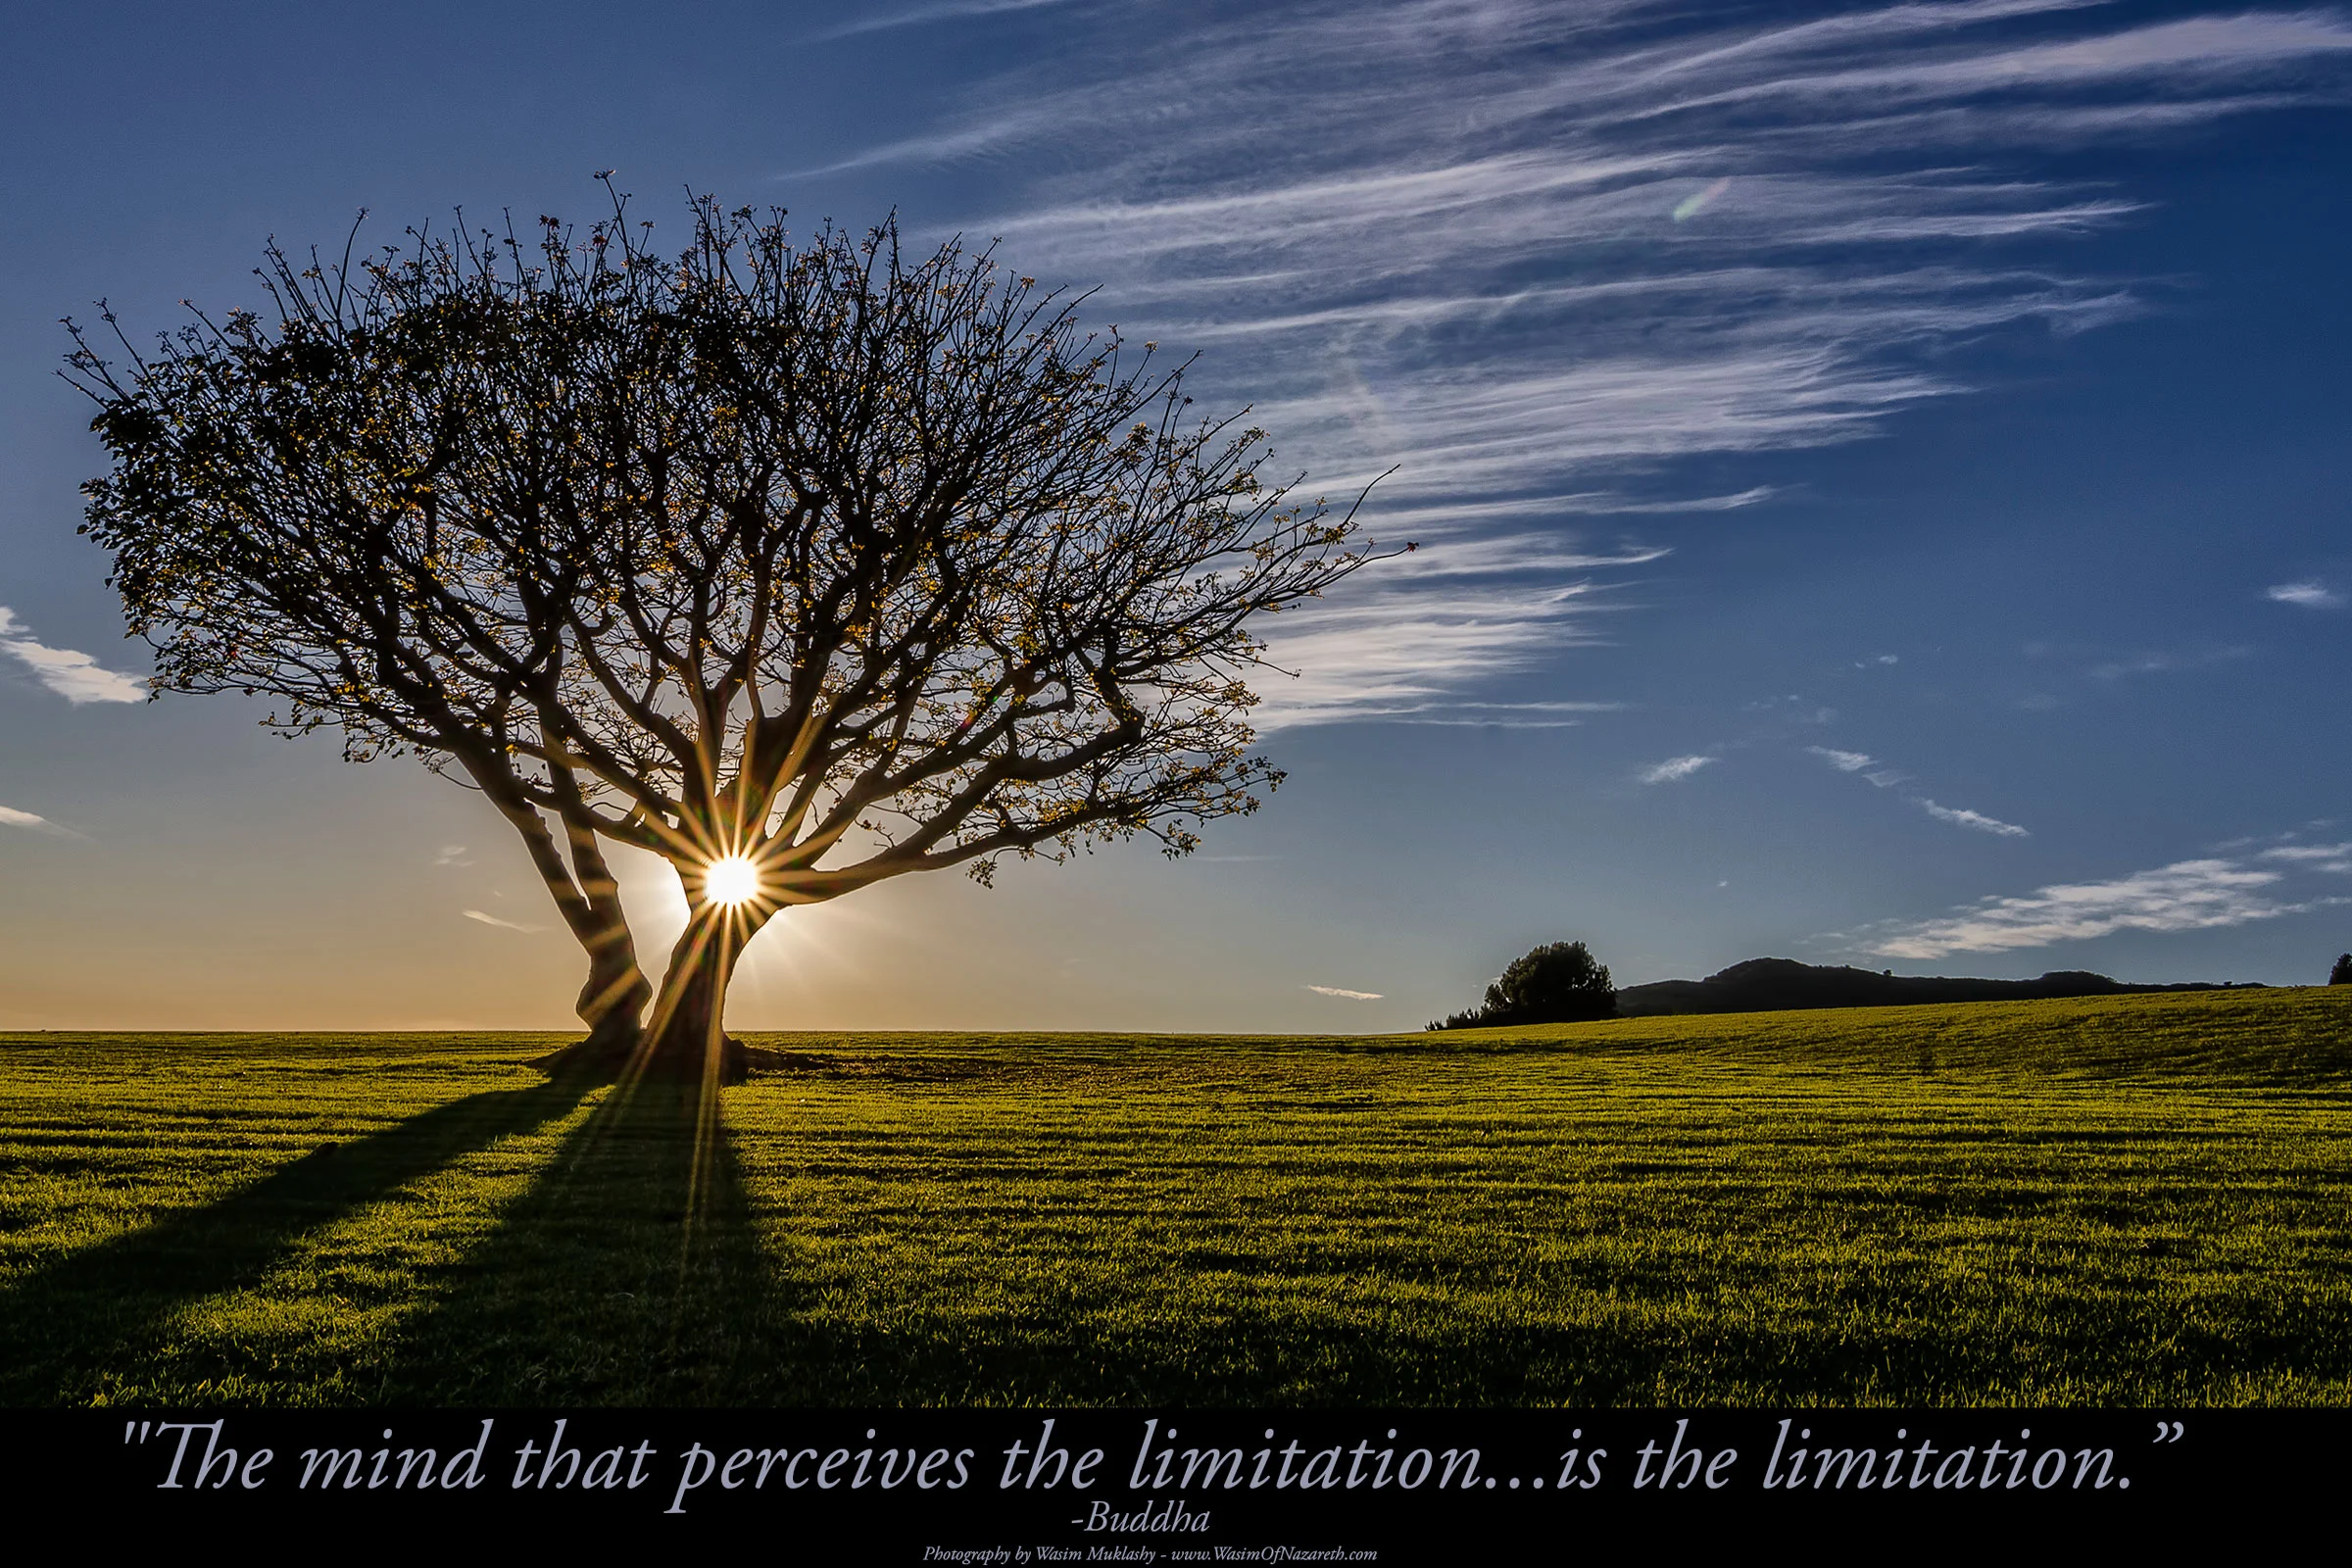
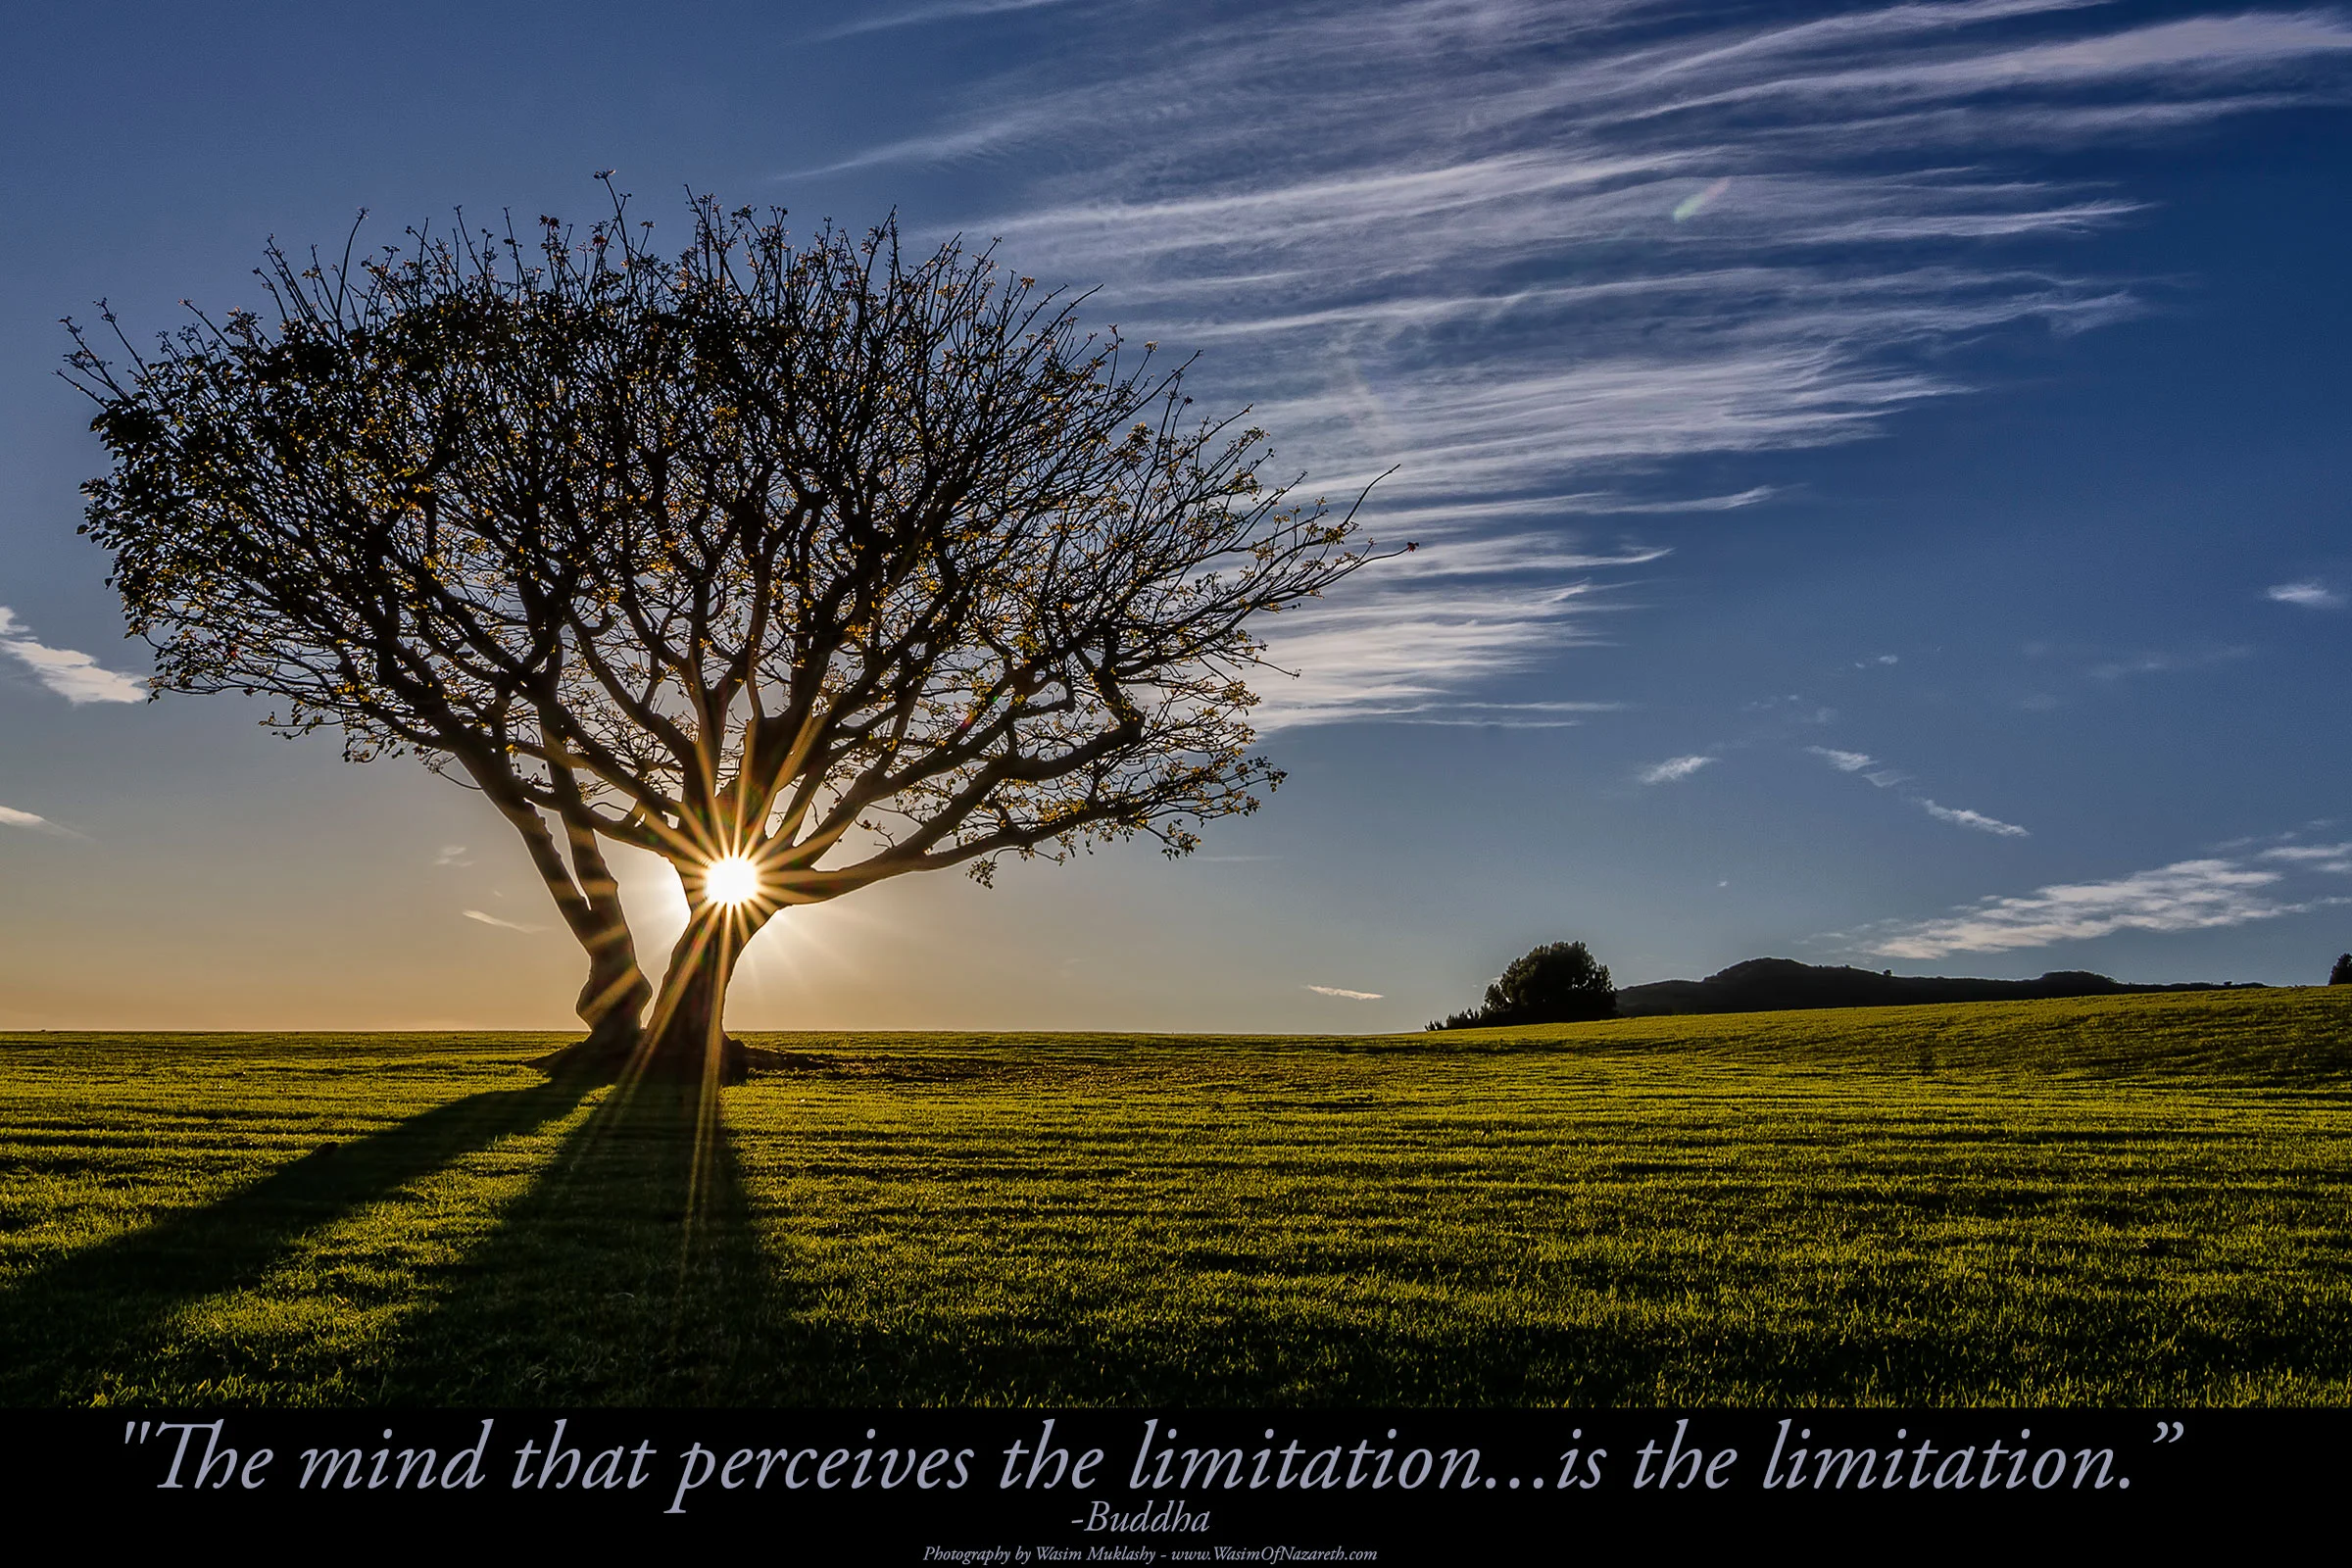
    “The Mind That Perceives The Limitation…Is The Limitation.” -Buddha

    From me to you,
    Here’s this week’s Monday Kick In The Yahoo!

    Be Inspired!

  • A Small Gesture Goes A Long Way – The Power Of (Baby) Photography

    A Small Gesture Goes A Long Way – The Power Of (Baby) Photography

    Image asset

    A few months back, I was on a photo trip up north in the Pacific Northwest and it was incredible. I’m sure you’ve already heard me gush enough about it. Anyhow, our hosts were friends of the guy that hired me, who not only graciously allowed us to commandeer their home for a week, but also one of their cars. They were some of the warmest, most hospitable people I’ve ever met and it was incredible how they were immediately able to diffuse any anxieties about staying with strangers.

    Wasim_Muklashy_Photography_Baby Photography

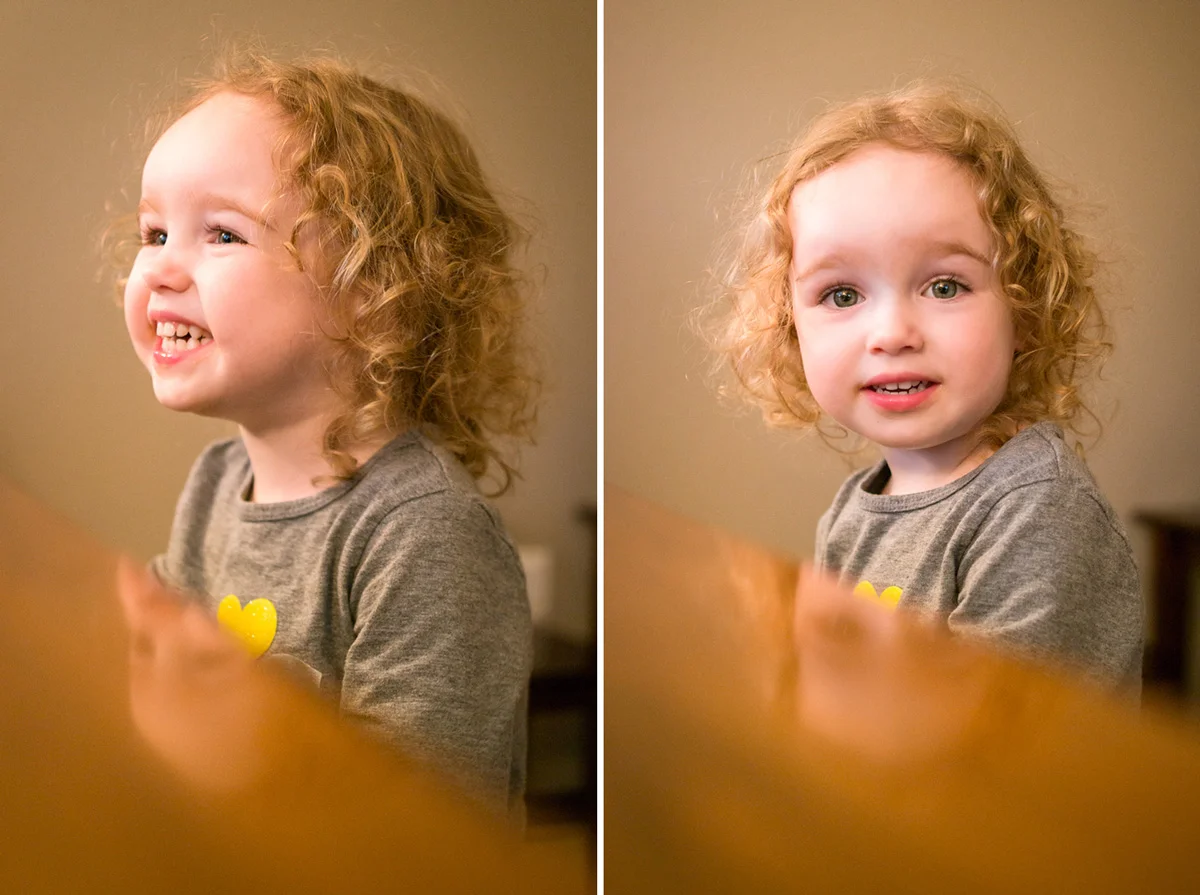
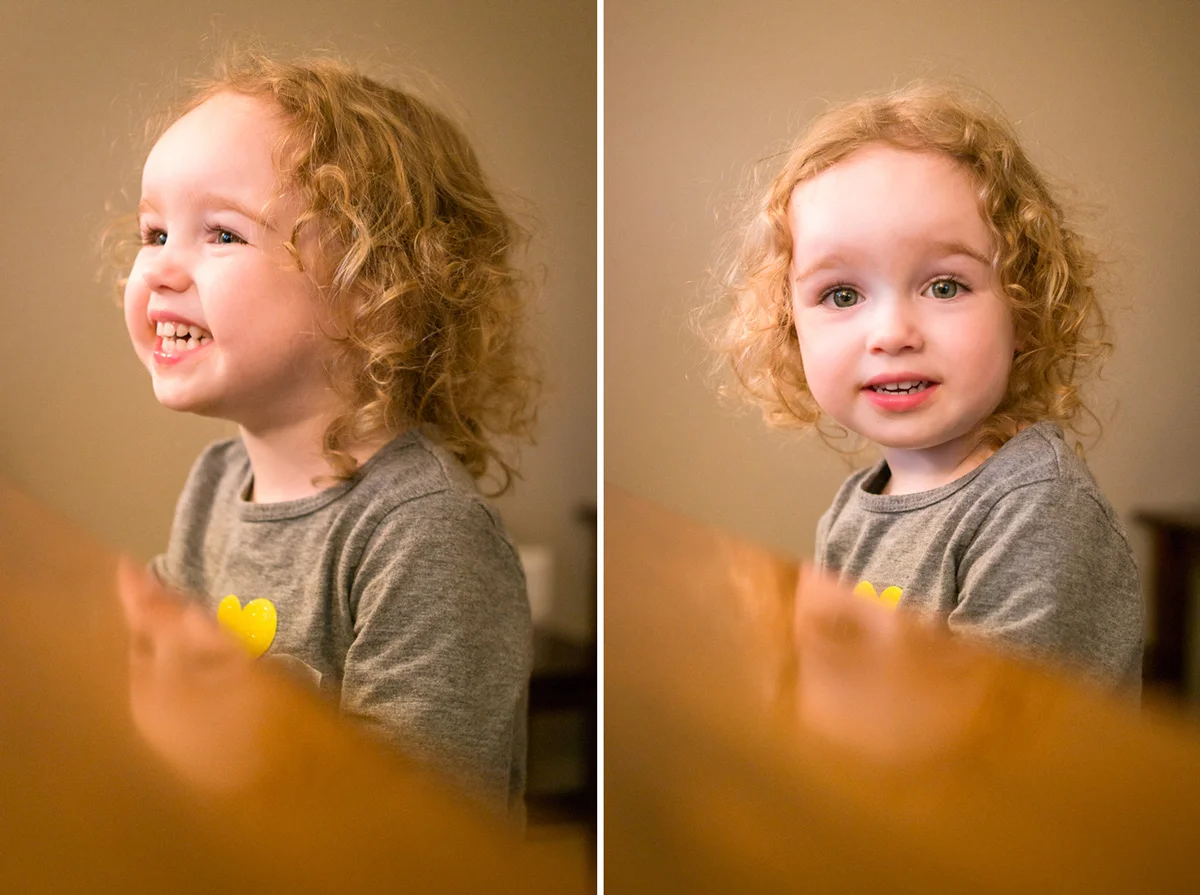
    One night after a string of a particularly long few days of shooting out in the field – the stunning forests and mountains landscapes and waterways of Washington and Oregon – we decided to take an afternoon off, take ‘er easy and hang out at the house with the hosts that took us in. Because we were there earlier than usual that afternoon, we got to spend some quality time not only with the host couple, but their gorgeous 3-year old daughter. We watched bits of “Frozen” (over and over and over and over and over again…), we sang songs, and, not surprisingly, we got silly with the camera.

    While she was shy at first, it didn’t take much to warm her up to the lens (when in doubt, always revert to the Frozen soundtrack…over and over and over and over again…). Anyhow, through this process and impromptu baby photography session, I managed to snap a few images I found completely adorable.

    Later on that evening as the family stuffs was winding down, I found some time to sit and process images from the day, and instead of the job we were there for, I decided to process a few of the images of their daughter. After I got 3 or 4 of them I was happy with, I posted them on Facebook to the parents’ pages and emailed them high resolution copies, and when they saw them, they damn near melted. It was beautiful. It instantly added another level of human connection, warmth, and appreciation to the relationship.

    Thing is, it wasn’t even planned that way. But it panned out that way – all due to circumstance and embracing a moment. And because of that, I learned yet another valuable lesson that I can take with me along my photographic journey:

    A small spontaneous gesture can go a long long way.

    To me, it was nothing, I love making images, so when there’s a compelling subject in front of me, I can’t help it. Whether or not I was ever able to share those images with anyone was besides the fact, I just simply enjoy the process of making a simple photograph.

    Baby Photography_Wasim Muklashy_SAM_2808_2400sfw

    But in some situations more than others, you are reminded of what a raw, engaging, emotional gift a ‘simple’ photograph can be. While many other artistic mediums all have their merits and their strengths, many, I might add, of which I’m particularly envious of, photography remains the only one, practically by definition, in which it is even remotely possible to capture an eternal visual reminder of a single moment.

    One single standout moment.

    One that you shared with someone else.

    One that you both existed in,

    when there was nothing else.

    Gagagoogoo.

    All images were taken using a Samsung NX30
    For more of my madness:
    Instagram: @wasimofnazareth
    Twitter: @wasimofnazareth
    Google+: www.Google.com/+WasimMuklashy
    Facebook: www.Facebook.com/WasimOfNazareth

  • 8 Quick Tips For Candid Pet Photography

    8 Quick Tips For Candid Pet Photography

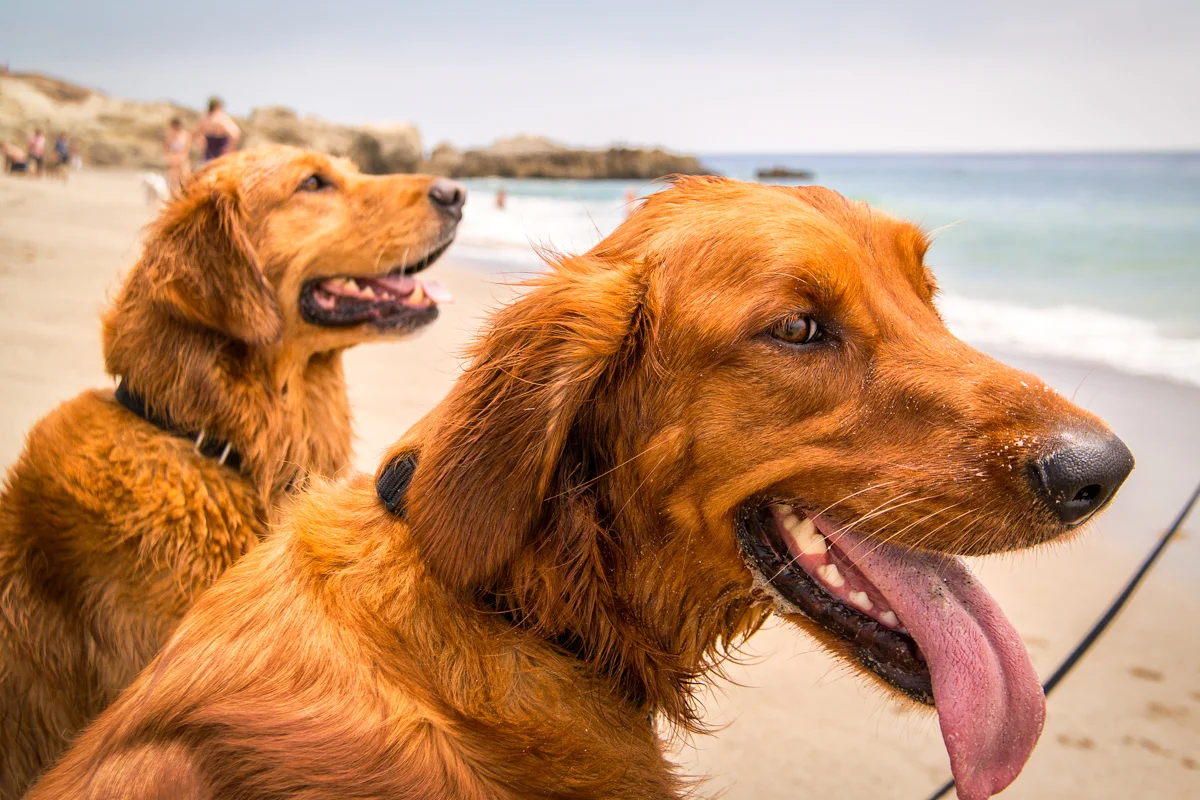
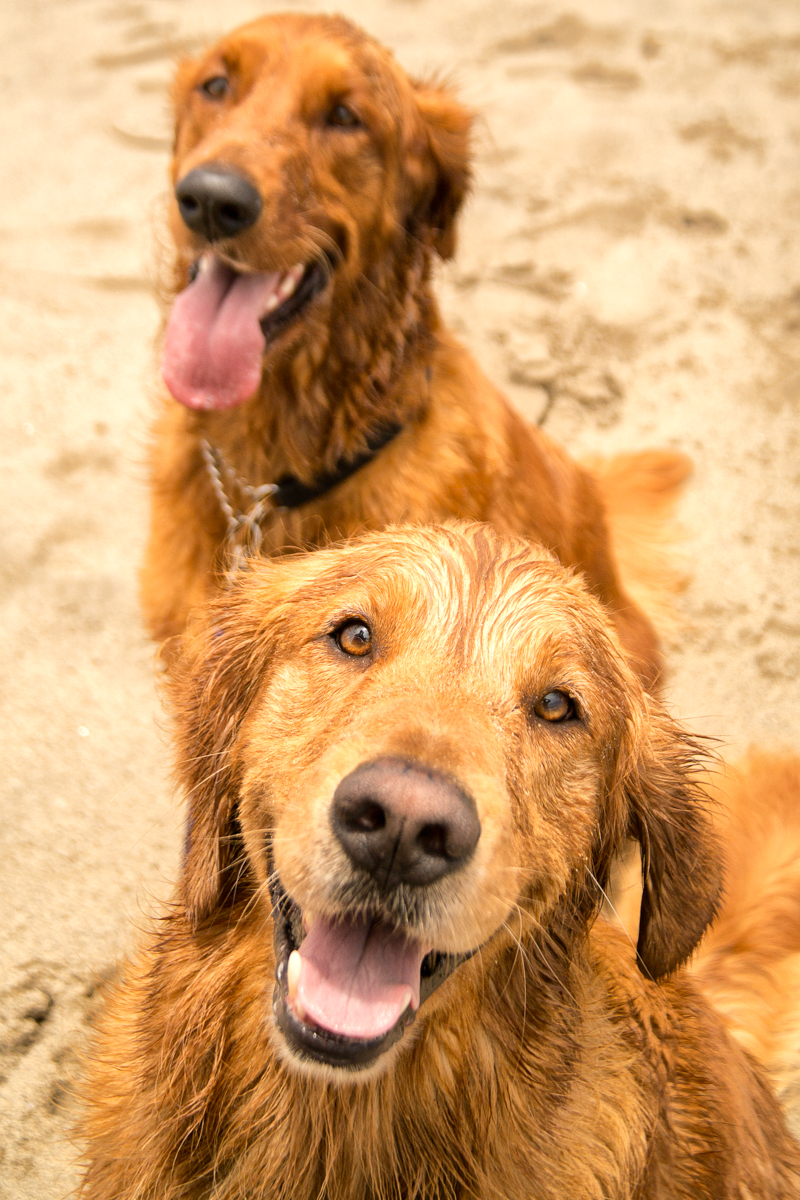
    Wasim Muklashy Photography_Pet Photography_Dogs_Ocean Walk Pet Sitting

    I was recently asked by a friend of mine who runs Ocean Walk Pet Sitting to shoot a few candid shots of one of his clients dogs so that he can present them as a gift to the client. Since this was, one, for a good friend, and two, another excuse to be outside in the sunshine on the beach with a camera, how could I say no? It’s not the first time I’ve done pet photography as I’ve shot some of his client’s pets in the past, so I knew a bit of what to expect, and I was able to draw on what I had learned the last time and apply them to this session.
    Here are 8 pet photography takeaway tips from those sessions that I wish I knew right away:

    1. Don’t Start Shooting Right Away. Get to know the pet first. Play with them, feed them, give them a treat, play fetch with them, get comfortable with the pet so the pet gets comfortable with you.

    2. Approach The Pet Gently. Don’t startle them. You won’t get the shot. Trust me. Sand in your lens? Yes, you’ll get that. The shot? Nope.

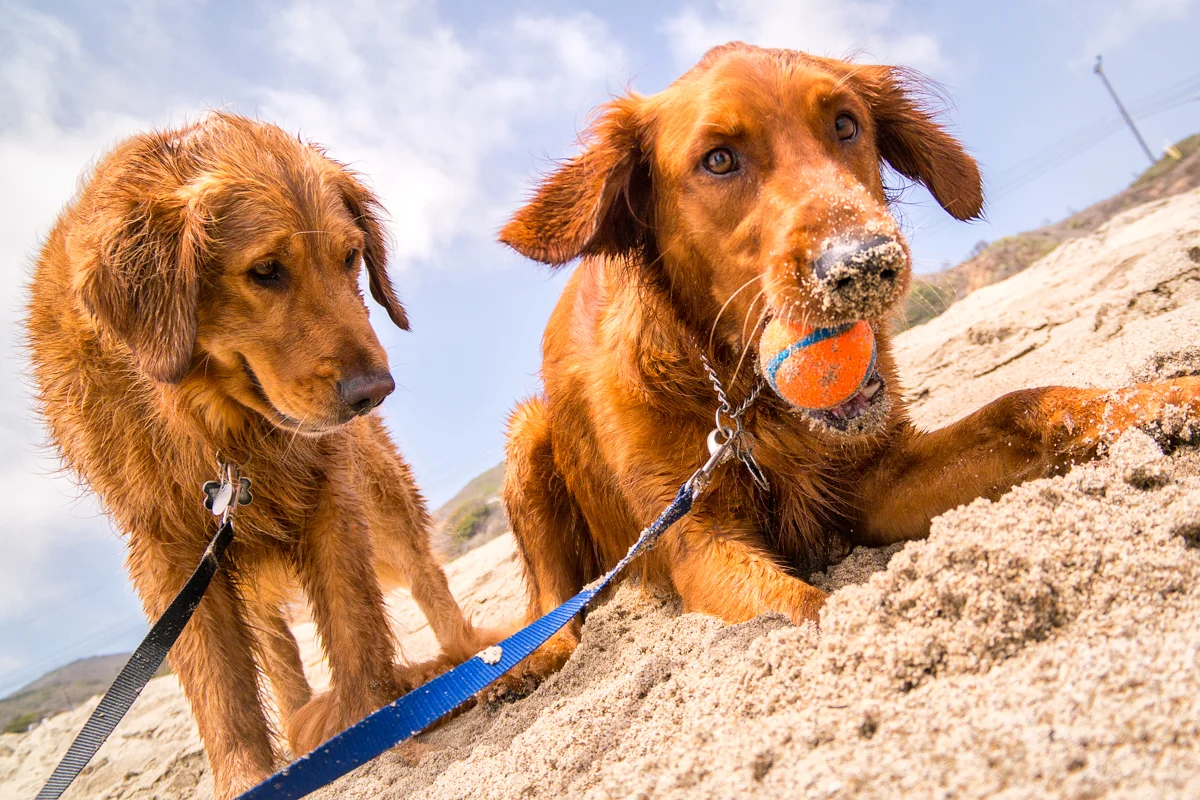
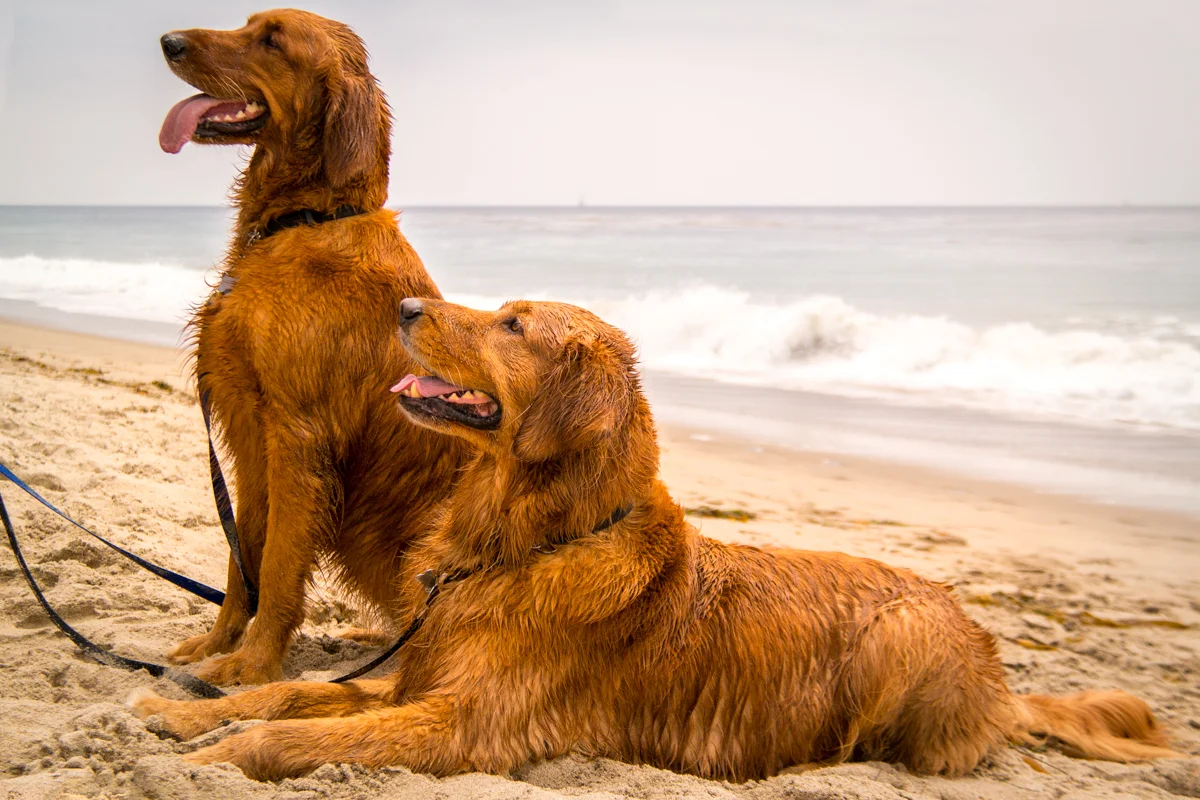
    3. Get Low. Try Low Angles. It’s always fun to lay down and have the camera at ground or grass or sand level and let the curious animal come towards the lens on it’s own. Then start snapping. This way, when something is below the level of the pet, especially dogs, they feel more in control and are more apt to be comfortable with the situation.

    Wasim Muklashy Photography_Pet Photography_Dogs_Low Angle_Ocean Walk Pet Sitting

    4. Be Patient. You can’t tell a pet how to pose and which way to turn and where to stand and where to look. This can get frustrating when you’re trying to get a shot that you have in your head, but let this play to your creative advantage. It’ll force you to think outside your box and, once you get over it, have fun with it. Unlike humans, most pets don’t really need to be anywhere at any particular time…take advantage of that!!

    5. Experiment. Play with focal lengths. You don’t have to get the entire pet in every shot. Don’t be afraid to just get detail shots of the face. Just like with people, the important thing is to make sure the eyes are in focus. A great 18-200mm can be super helpful due to it’s flexibility, but closeup portraits can make for very flattering and adorable pet images. Heck, you might even want to try using a macro lens as a portrait lens if you have that option. They’re very good at preserving incredibly sharp detail.

    Wasim Muklashy Photography_Pet Photography_Cat_Samsung NXMini

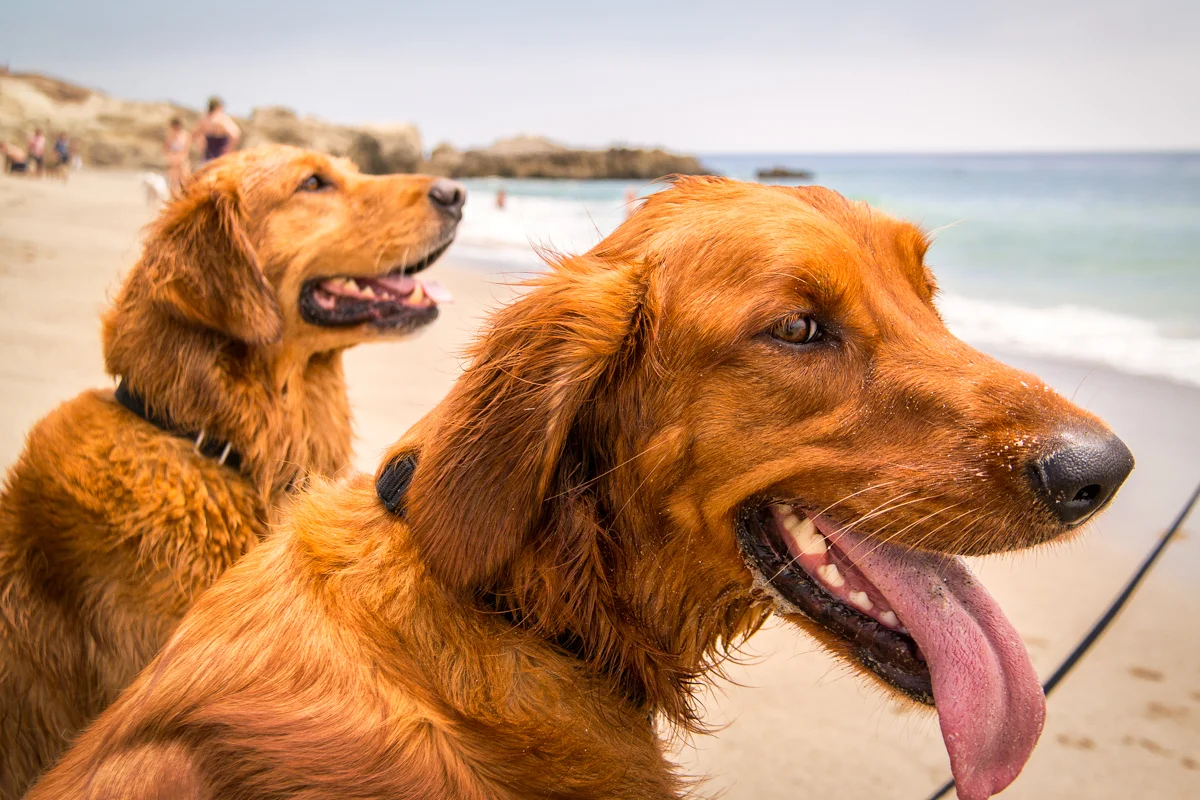
    Wasim Muklashy Photography_Pet Photography_Dogs_Ocean Walk Pet Sitting

    6. It’s All In The Eyes. Unless the pet you’re working with is an iguana or a turtle or something that doesn’t move all that much, this wouldn’t be the time to use a wide open aperture with a rail-thin depth of field, especially on a full-frame camera if that’s what you’re using. It won’t be easy to keep a dog or a cat still to get that eyeball in focus! You’ll want a shutter speed that’s quick, for sure, but if need be, increase the ISO rather than drop the aperture. If you’re outdoors or in a place with ample light, f5.6 should be plenty to get an attractive bokeh while maintaining a fast enough shutter speed to catch the wiley buggers!

    7. Take The Lead. If it’s dogs you’re working with, get ahead of the dogs, perhaps 10-15 yards away and face the dogs. Open your aperture to about f5.6 or smaller. Be steady, use the low angle again. If you have it, use a zoom lens so that you can still be about 20 feet from the dogs as they fill up the frame. Set your drive to shoot as many frames per second as your camera can handle. Have the handler begin to walk them towards you. As they start to approach, just as they begin to fill out the frame, hold your finger down on the shutter to snap rapid-fire. The first few might be throwaways, but the sound will usually grab their attention to look right into the lens and they’ll begin to come towards it. And what’s cuter than a schnauzer’s sniffer all up in your glass?

    8. Play Ball. An effective method for dogs if you have someone with you, is to have them hold up a ball or a dog toy so the dog looks up at it in anticipation. Crouch right next to handler on the side of the arm they’re holding up and get super close to them, aiming your camera at the dogs from about hip level. Make sure to have your settings set to employ a fast shutter speed. When ready, cue the handler move the ball to right above your head. You’ll have a few split seconds to snap away at an excited dog who’s appearing to look up into the camera. This method also works great for profile shots when you’re off to the side, perpendicular to the dogs, as the handler holds the ball above his head.

    And with that, I bid you fare-woof! (Yup…I did…)

    All dog images shown here were shot with a Samsung NX30 with a Samsung 18-200mm lens. The cat was shot with a Samsung NXMini.

    For more of my madness:
    Instagram: @wasimofnazareth
    Twitter: @wasimofnazareth
    Google+: www.Google.com/+WasimMuklashy
    Facebook: www.Facebook.com/WasimOfNazareth
    Wasim Muklashy Photography_Dogs_-SAM_5779-Edit

  • A Quick, Easy And Effective Alternative Method Of Sharpening Your Images

    A Quick, Easy And Effective Alternative Method Of Sharpening Your Images

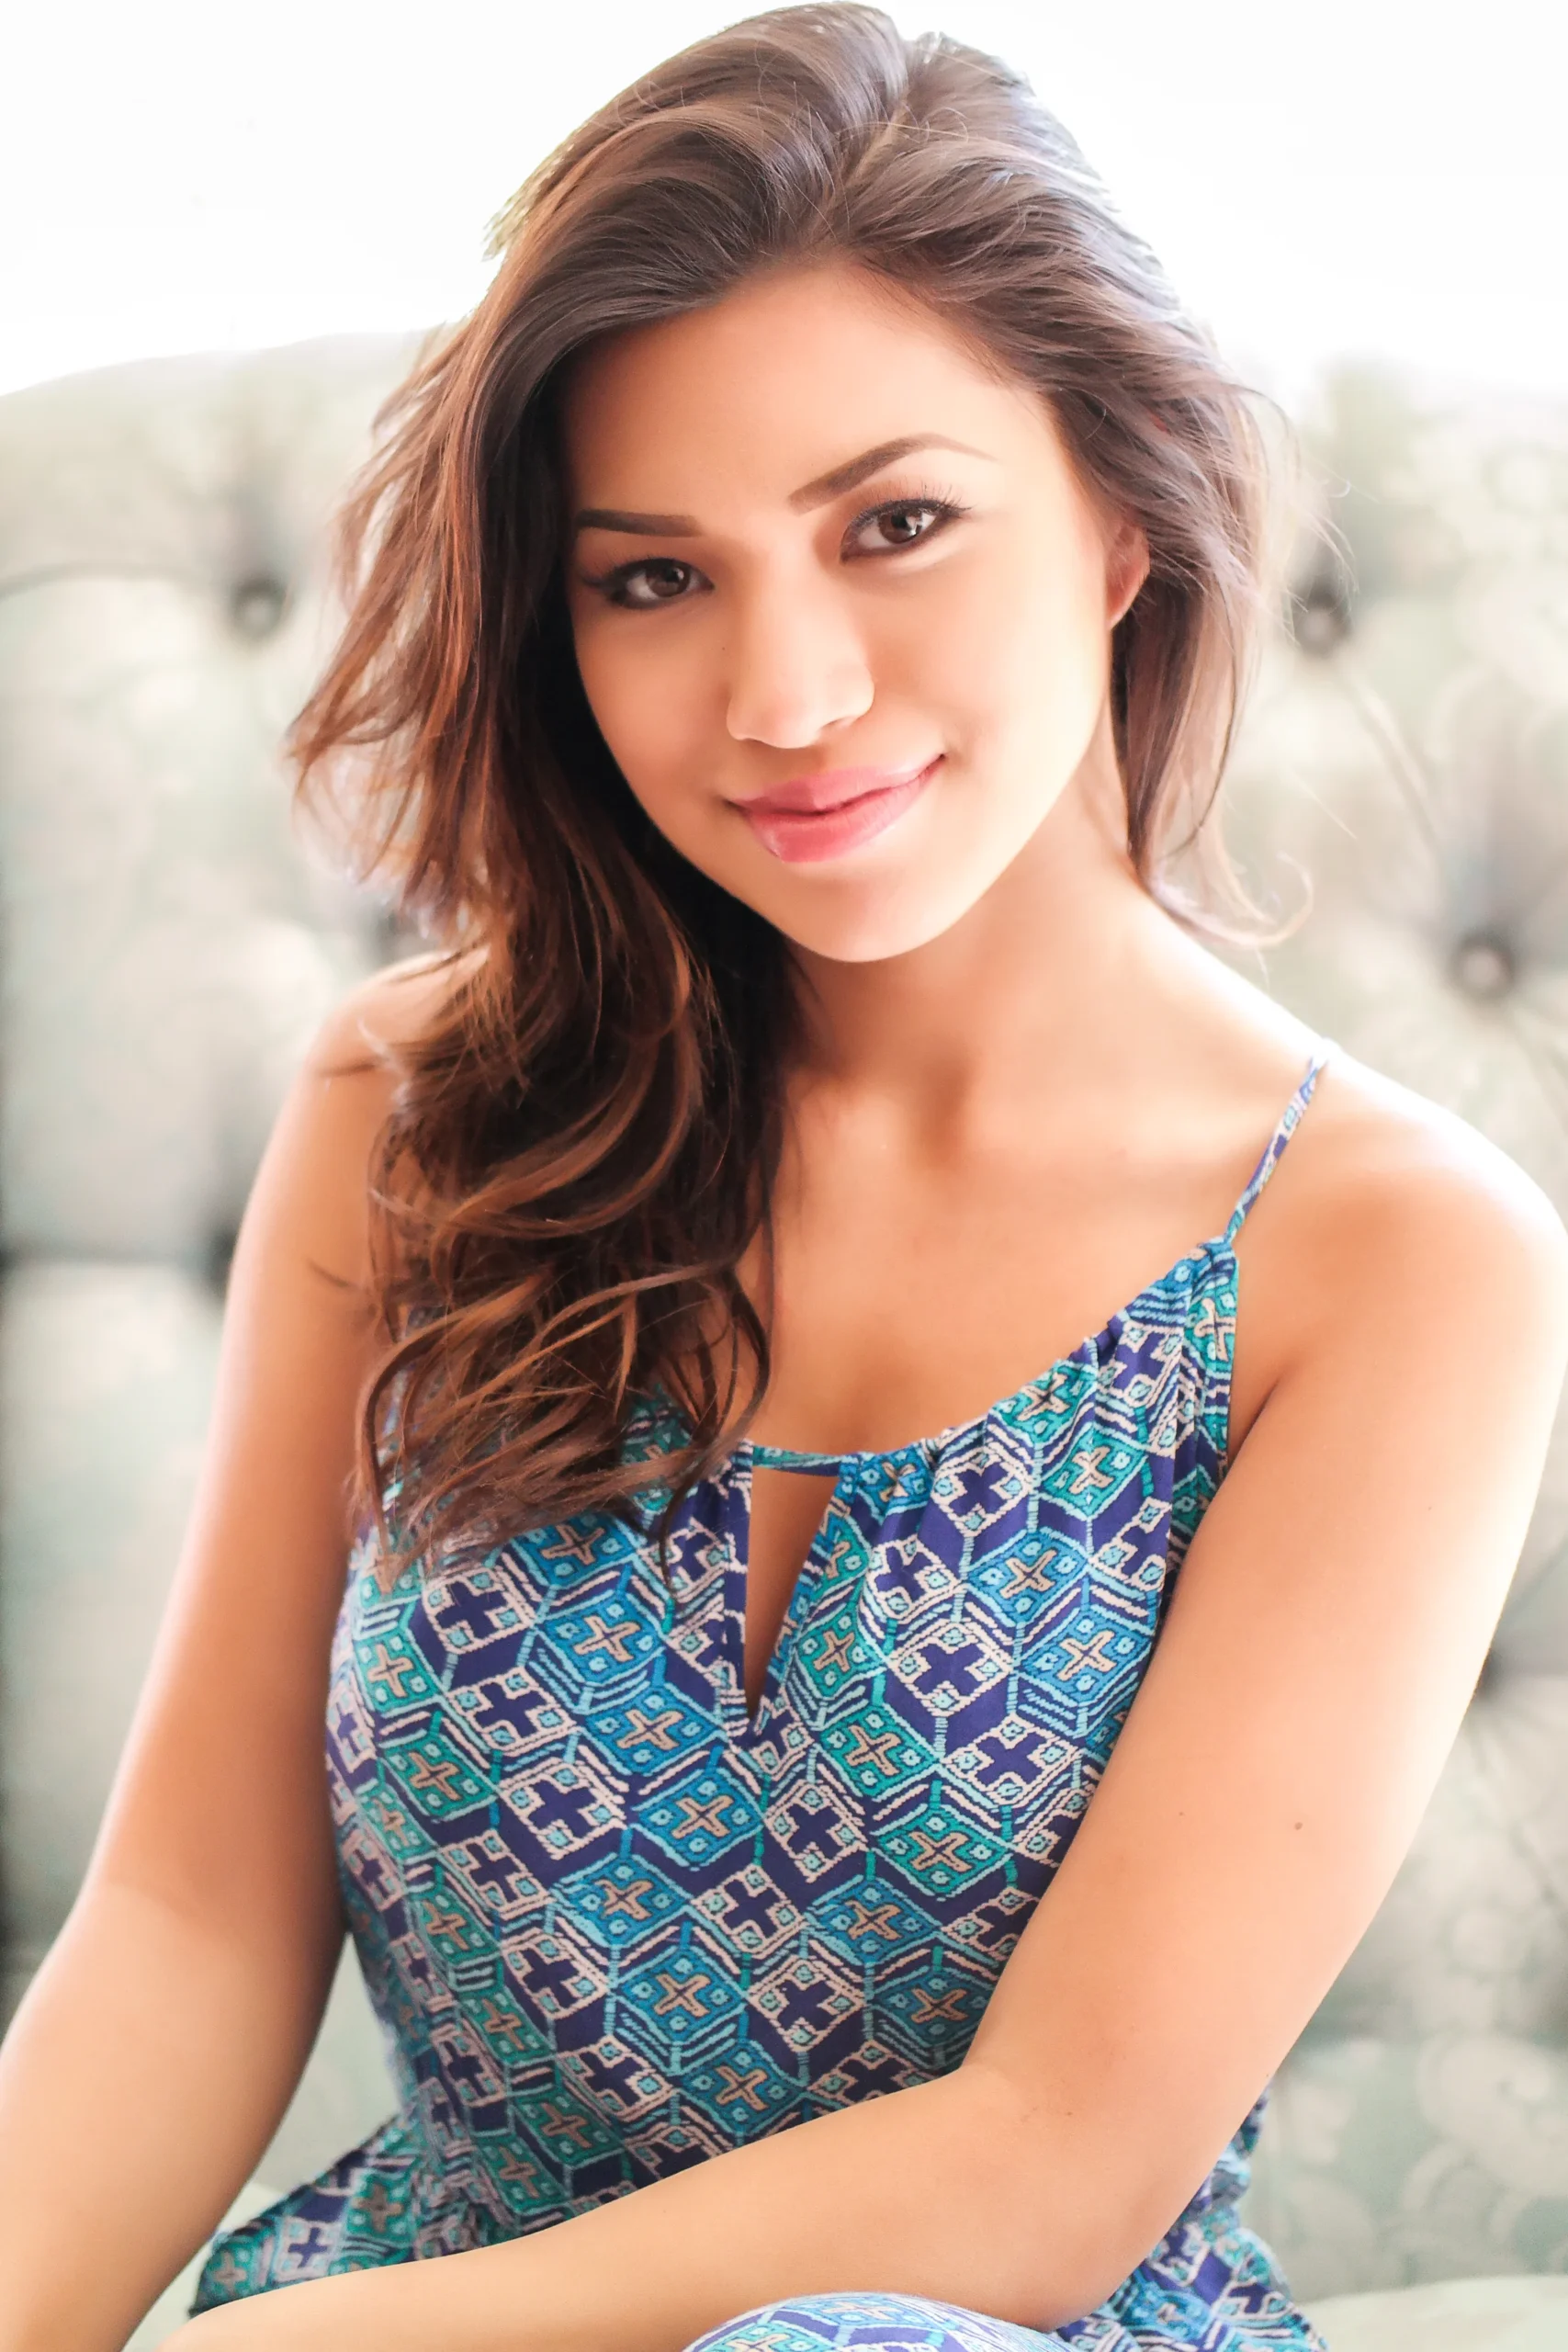
    Julia Kelly_Wasim Muklashy Photography_Samsung NX30

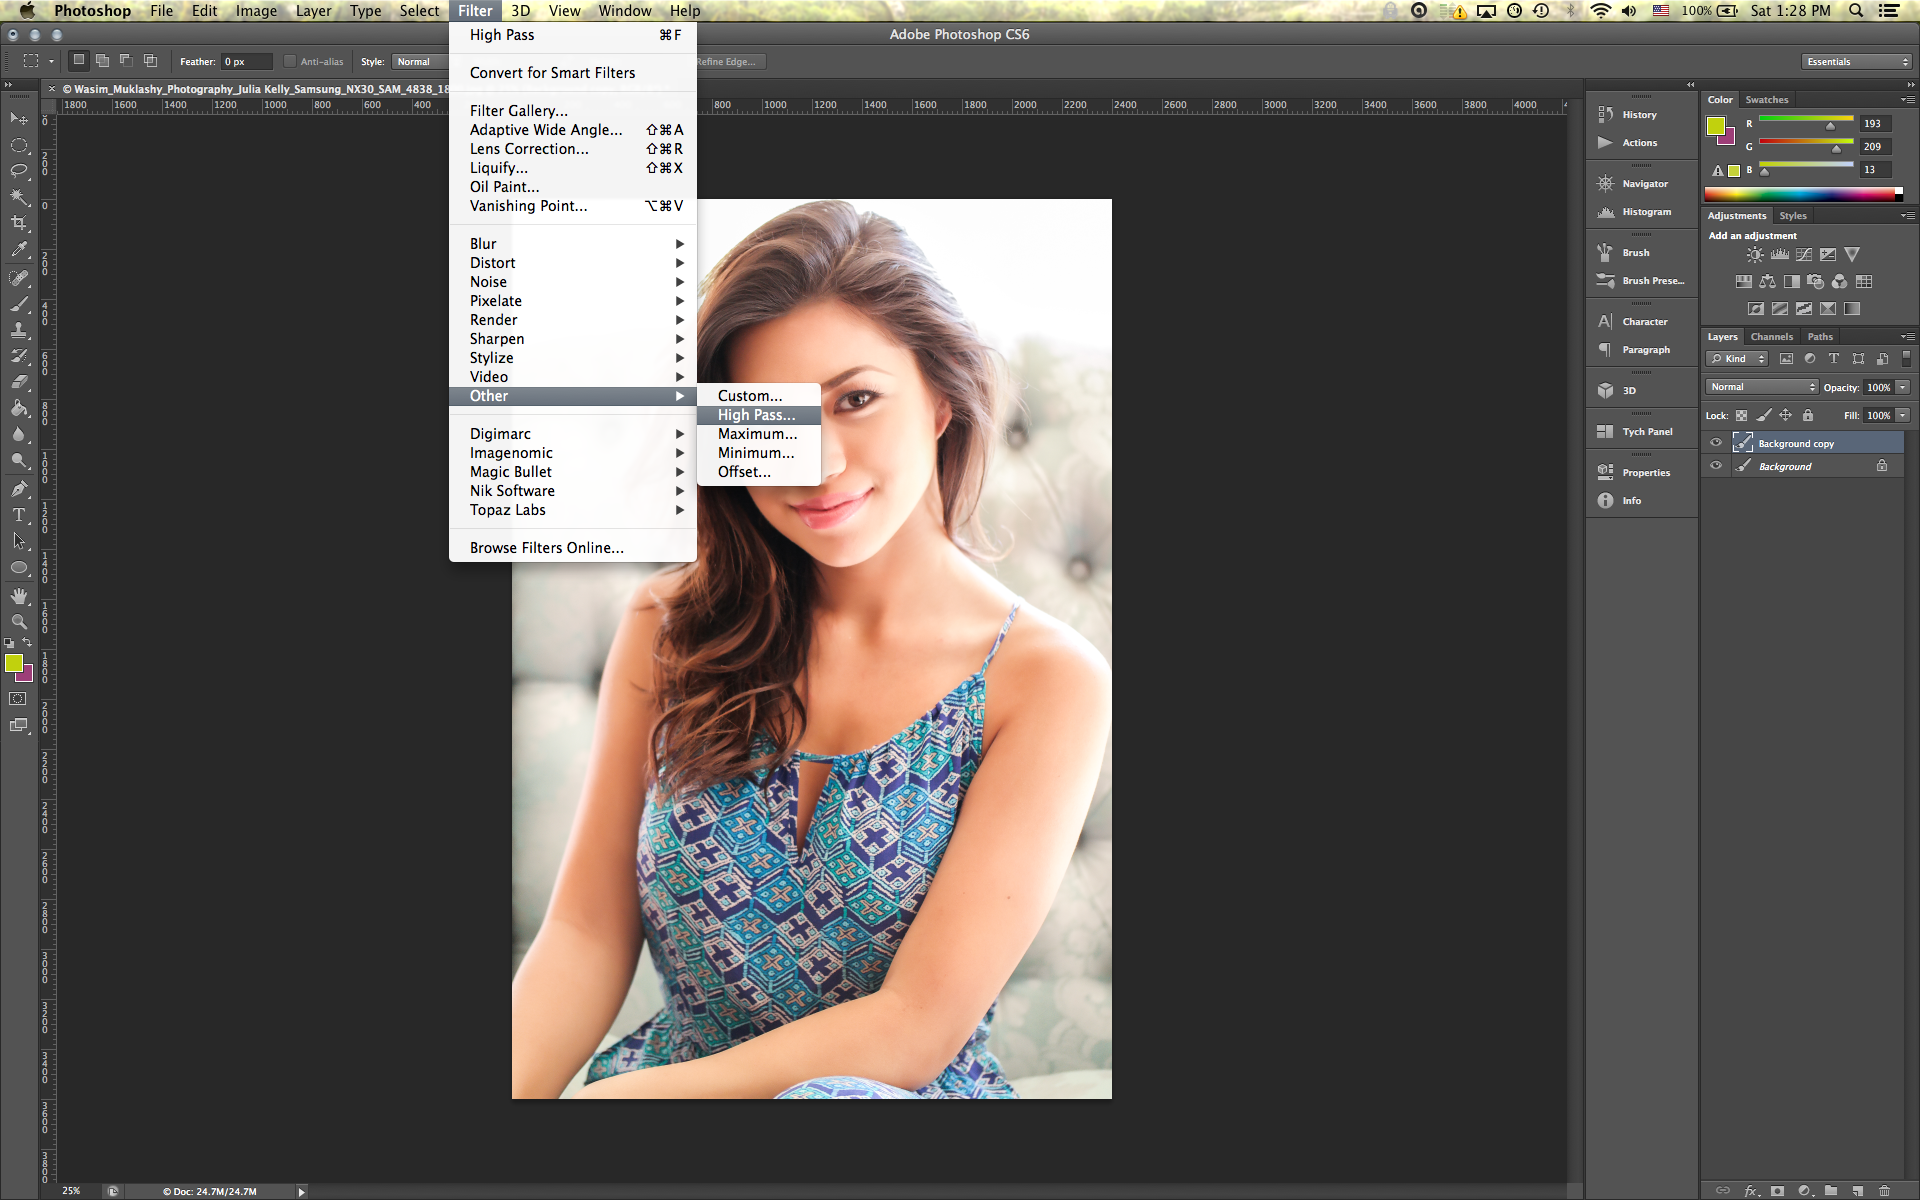
    When most people think sharpening in Photoshop, they understandably default to the ’Sharpen’ or ‘Unsharp Mask’ filters. But since I learned this trick a few years back, I don’t believe I’ve opened a single one of Photoshop’s native sharpen plugins a single time. Instead, I’ve relied on one of the ‘Other’ filters in that ‘Filter’ menu – the ‘High Pass’ filter.
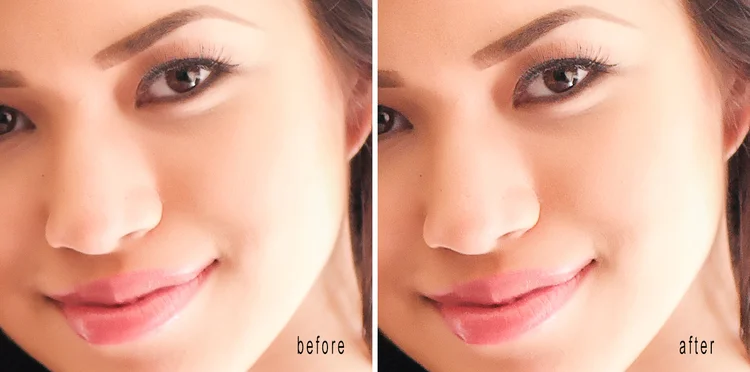
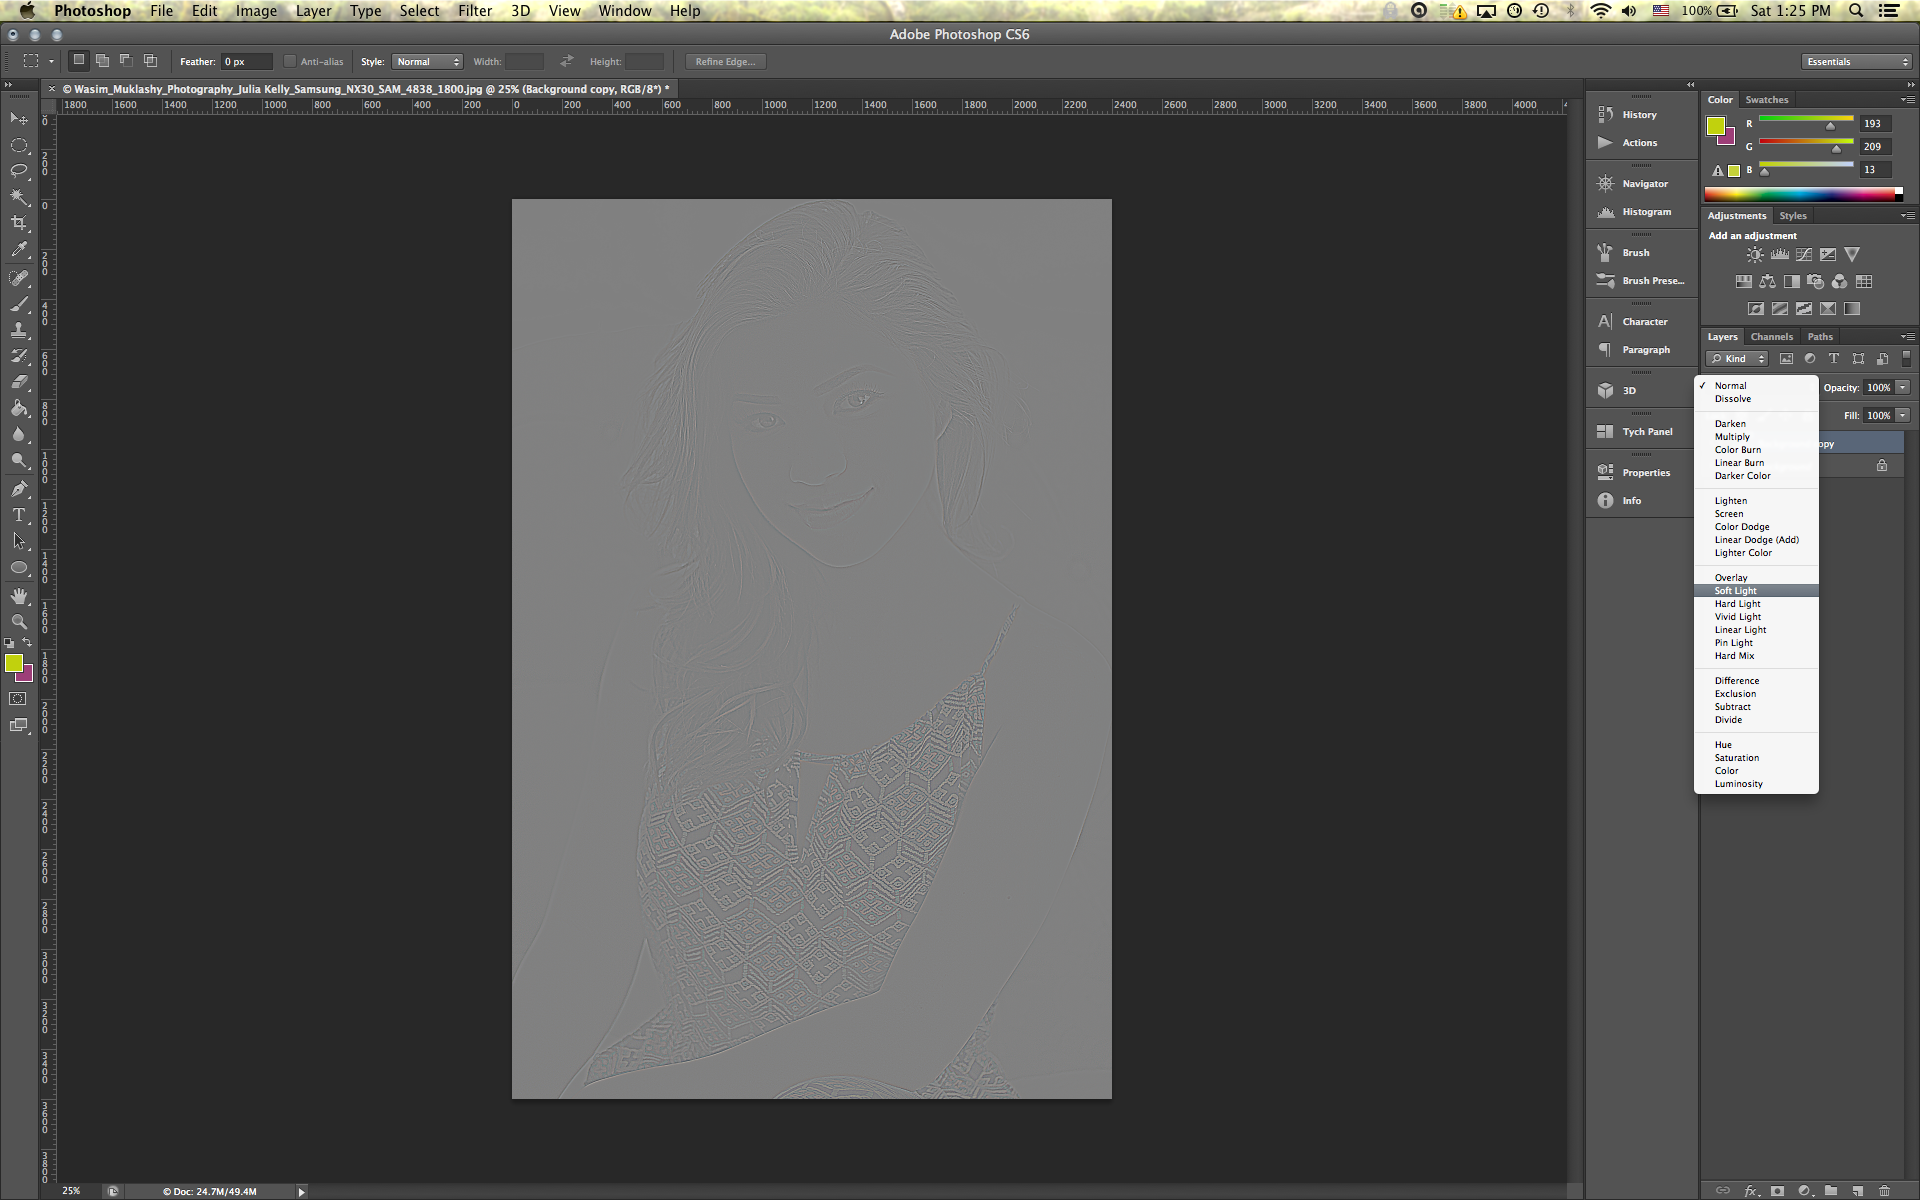
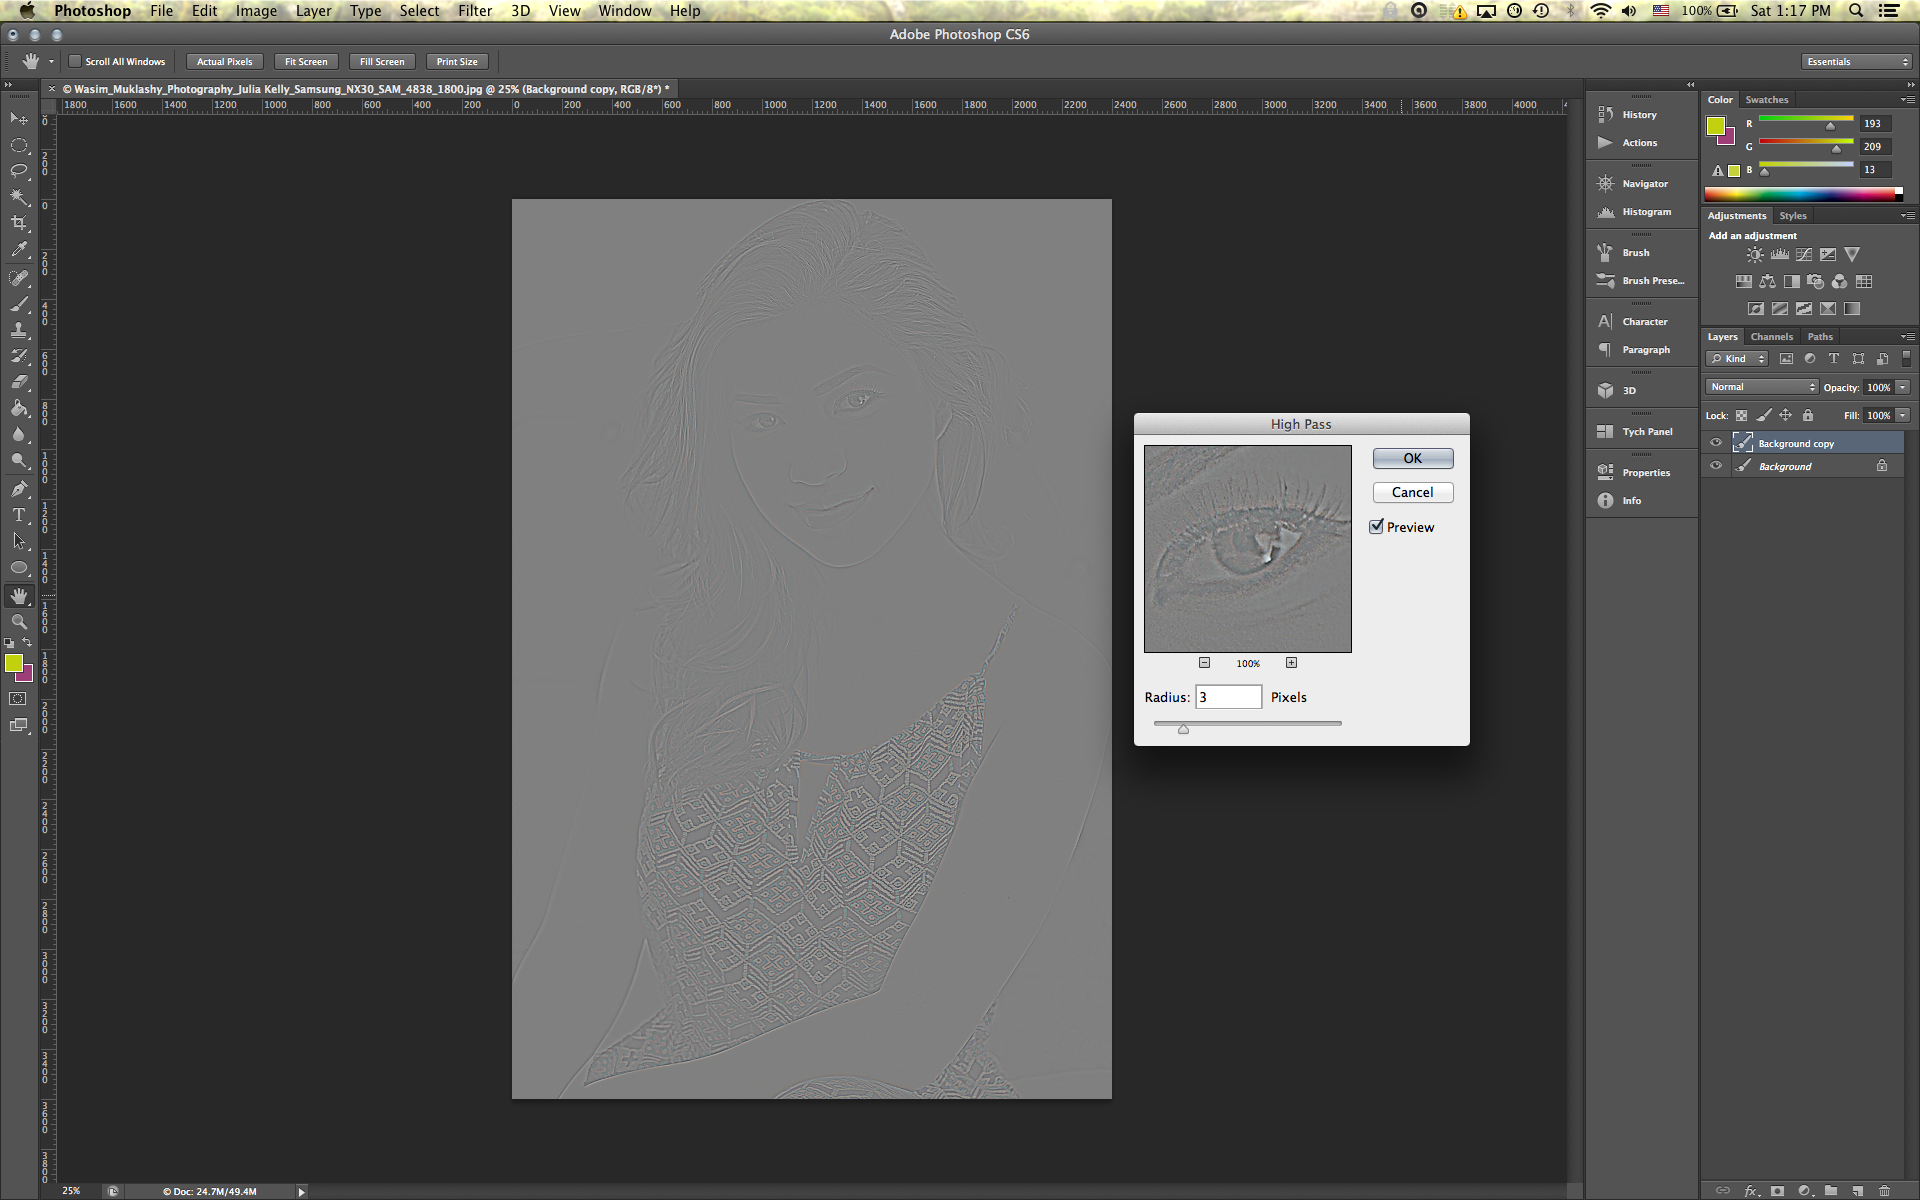
    Essentially, you’ll make a duplicate layer of the image layer. Then navigate to the ‘Filter’ menu, down to ‘Other,’ and choose ‘High Pass.’ What you’ll see might startle you at first, but don’t worry, you’ll learn to love that gray mask that ‘ruined’ your picture in just a minute. Using that dialog box that pops up, I’ll usually enter a radius of between 2-5 pixels, depending on the image. The more sharp edges and lines I have in an image, the higher of that 1-5 scale I’ll go. Anymore above that will usually result in the dreadfully obvious over sharpened image.  If you zoom in closely on the image, you can see exactly what is being sharpened and by how much. You can see the level of sharpening of those pixels through that grey mask on the image. In portraiture, I’m usually between 2-3 pixels at most, mostly to help accent eyelashes and eyeballs.

    Wasim_Muklashy_Photography_High_Pass_Sharpening_1
    Wasim_Muklashy_Photography_High_Pass_Sharpening_1
    Wasim_Muklashy_Photography_High_Pass_Sharpening_2
    Wasim_Muklashy_Photography_High_Pass_Sharpening_2

    Once you decide how much sharpening you’d like, hit ‘Ok.’ Now the top layer will be that High Pass filter. Go to the ‘Blending Mode’ drop down menu above the filters, which is usually set at default to ‘Normal,’ and navigate through those options. I usually stick with ‘Soft Light,’ as it provides the most natural look, especially for portraits and architecture, however, you can play with the various other options, including ‘Vivid Light’ and ‘Hard Light.’ Once you scroll through them, you can see the different way each blending mode affects the high pass filter. The great part here is that you can also control the opacity of that layer, even further fine tuning the sharpening.

    Wasim_Muklashy_Photography_High_Pass_Sharpening_4
    Wasim_Muklashy_Photography_High_Pass_Sharpening_4

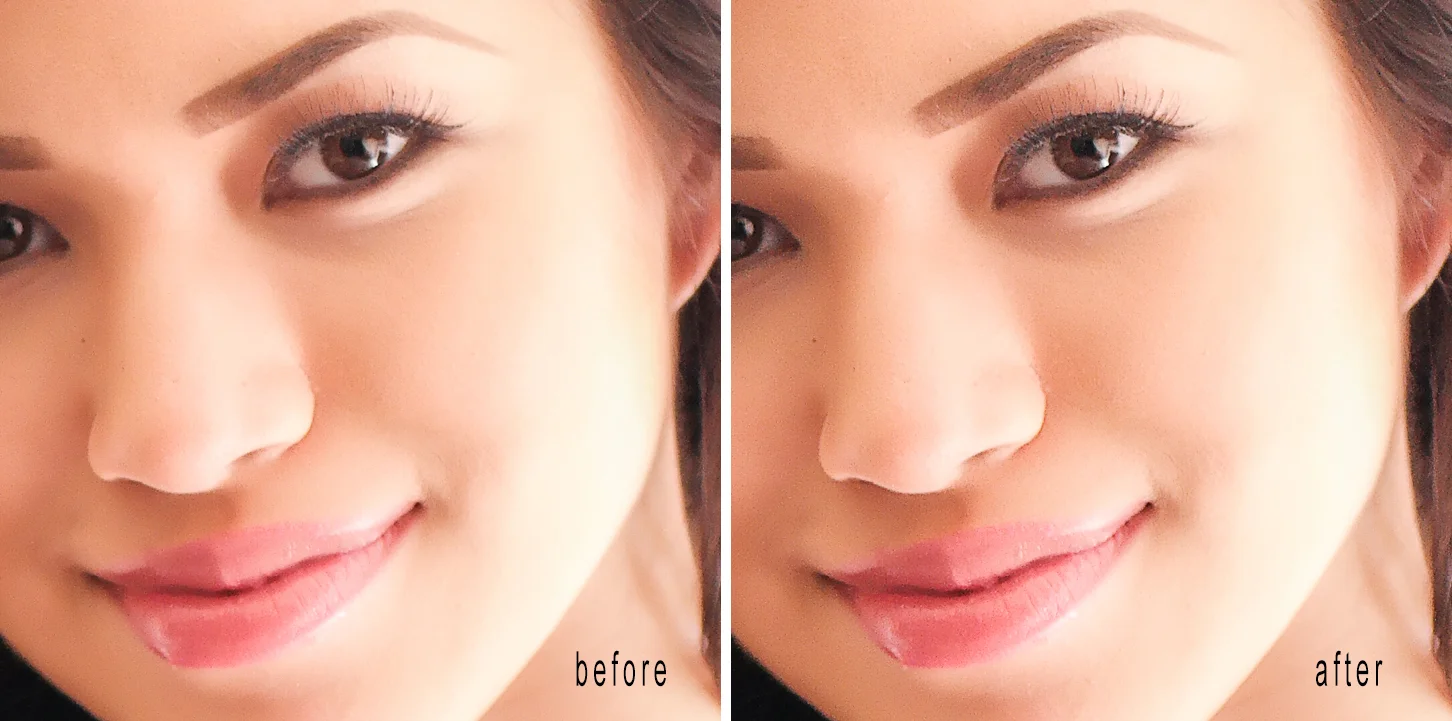
    So that has become my preferred method of sharpening. It just seems to offer the most manual control over the sharpening process and once you get used to it, it’ll start to come as second nature. Here’s the before and after, you can see it best in the eyes:

    Wasim_Muklashy_Photography_High_Pass_Sharpening_Before_After
    Wasim_Muklashy_Photography_High_Pass_Sharpening_Before_After

    The image used here was shot on a Samsung NX30 with a Samsung 60mm/f2.8 lens. The model above is the stunning and popular social media star, Julia Kelly. You can find her on Instagram,Twitter, and Vine.

    For more of my madness:
    Instagram: @wasimofnazareth
    Twitter: @wasimofnazareth
    Google+: www.Google.com/+WasimMuklashy
    Facebook: www.Facebook.com/WasimOfNazareth

  • A Monday Motivational Kick In The Yahoo by Wasim of Nazareth – July 7, 2014
    A Monday Motivational Kick In The Yahoo by Wasim of Nazareth – July 7, 2014
    Wasim Muklashy Photography_Motivational Monday_063014_Water-Under-The-Bridge_1200
    Wasim Muklashy Photography_Motivational Monday_063014_Water-Under-The-Bridge_1200

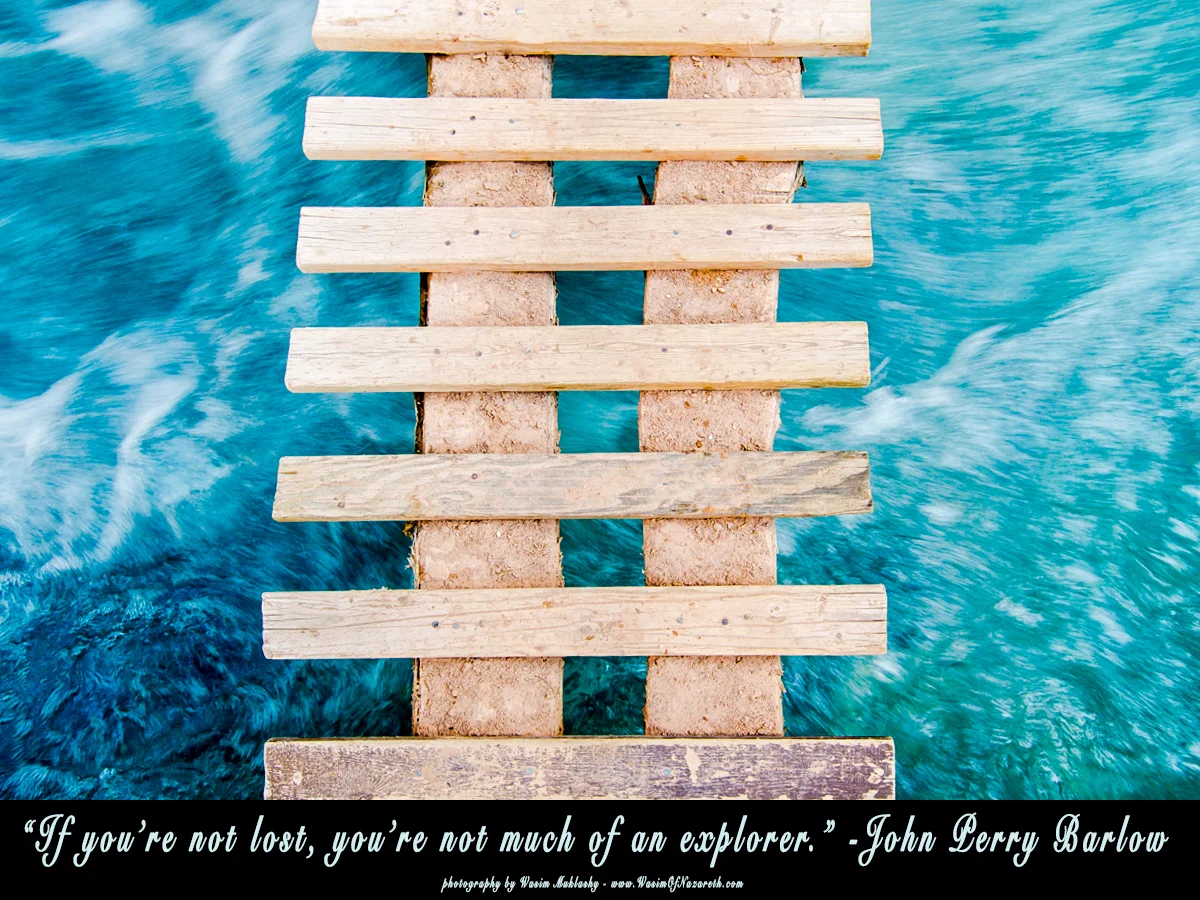
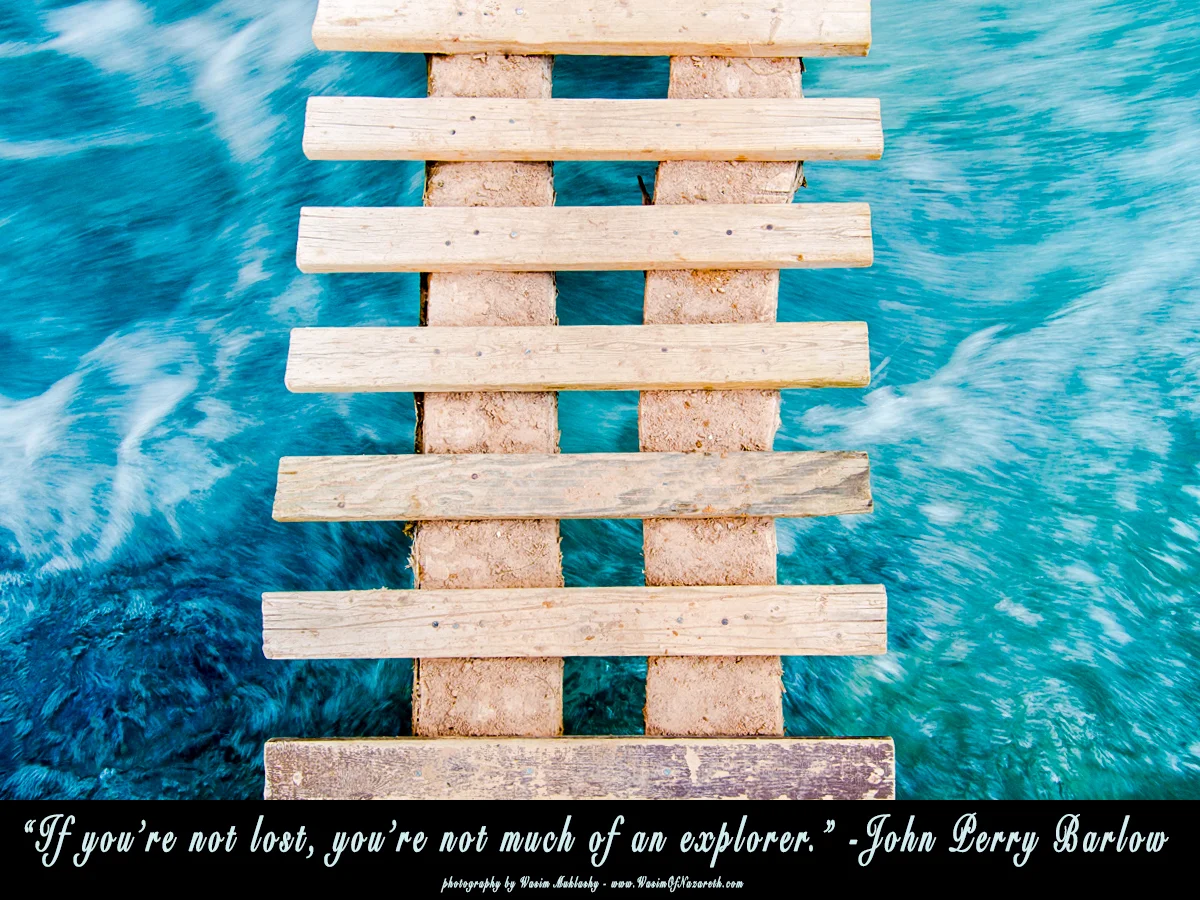
    “If you’re not lost, you’re not much of an explorer” -John Perry Barlow

    Monday’s suck. Yes. It’s never easy to get back into the swing of things after a weekend, especially a long holiday weekend, so I figured I’d try to do a little thing to hopefully ease the transition a bit. While the rest of each week’s posts will focus on tips, tricks, and journeys, every Monday I’ll be posting a motivational post – an image with a quote, mantra, saying, tao – to try to focus on and remember throughout the week. Easily digestable – quick – bite-sized stuffs and things.

    Admittedly I’m selfishly doing this for a personal kick in the arse at the opening of each week, but figured perhaps you all can get something from it as well!

    So,
    From me to you,
    Here’s the first Monday Kick In The Yahoo!