Tag: tips

  • 8 Quick Tips For Candid Pet Photography

    8 Quick Tips For Candid Pet Photography

    Wasim Muklashy Photography_Pet Photography_Dogs_Ocean Walk Pet Sitting

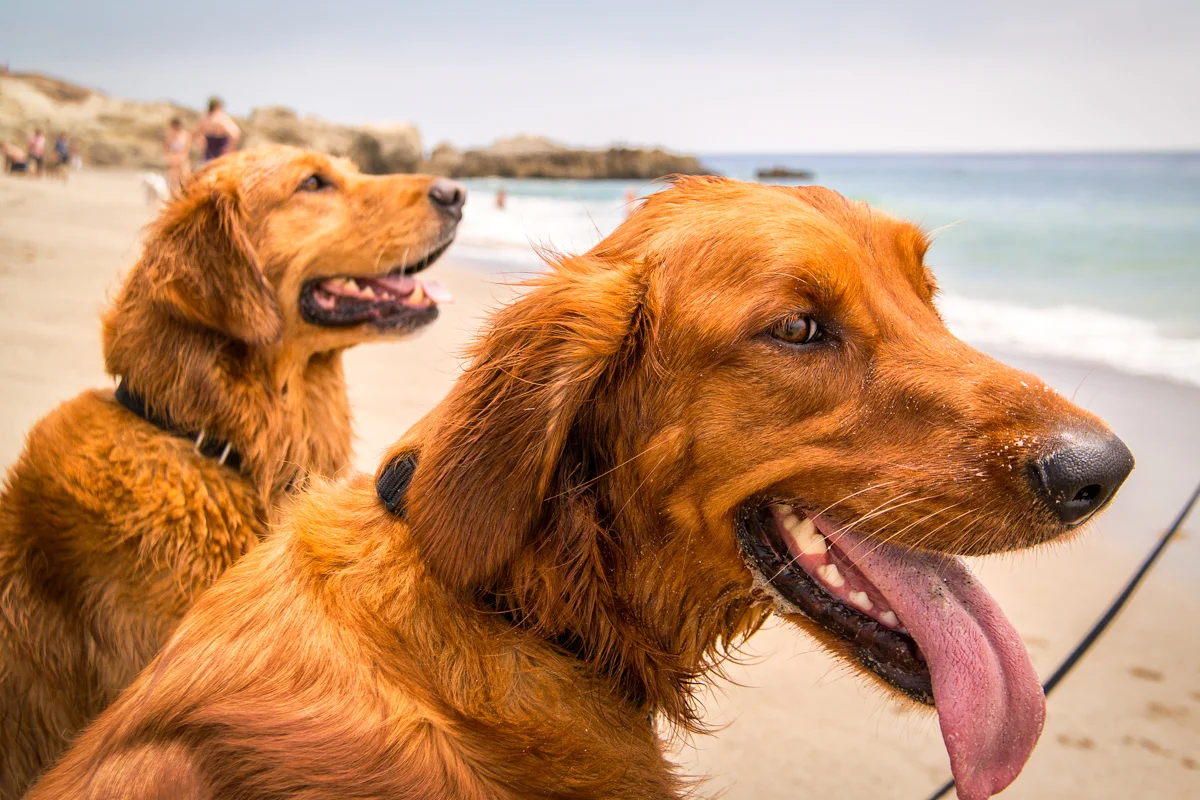
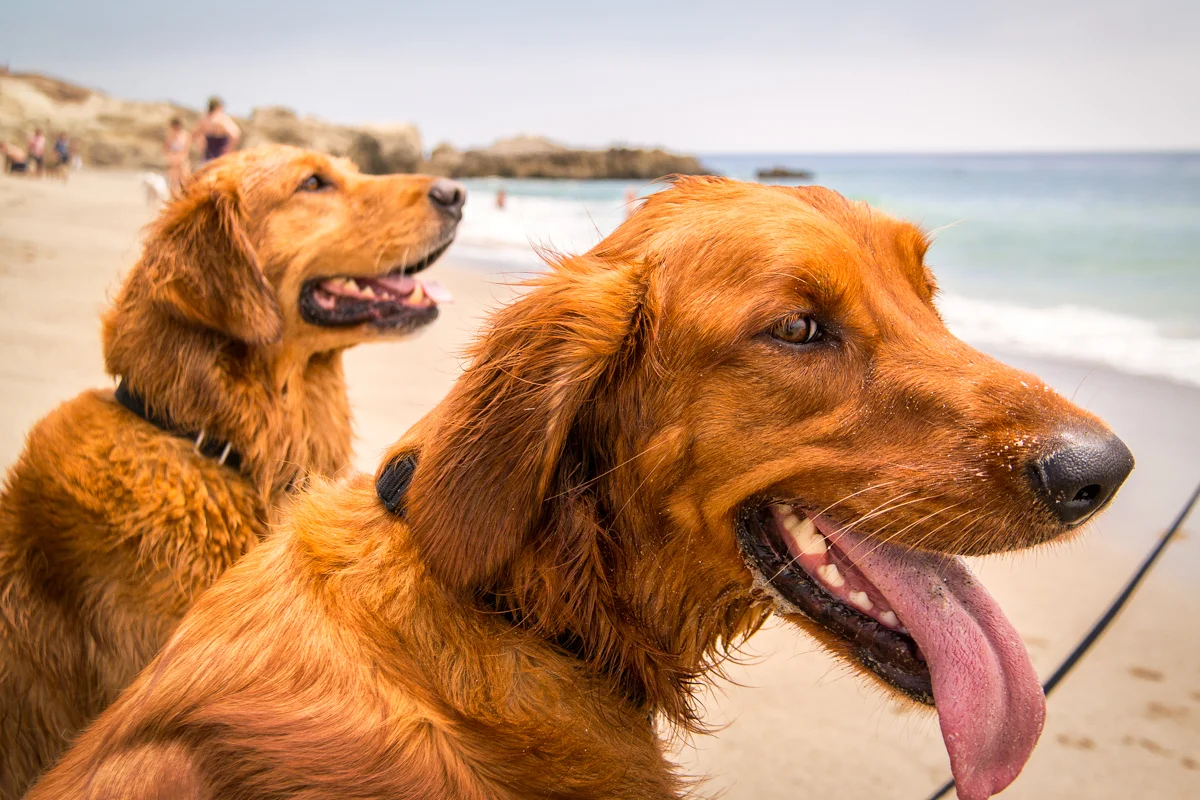
    I was recently asked by a friend of mine who runs Ocean Walk Pet Sitting to shoot a few candid shots of one of his clients dogs so that he can present them as a gift to the client. Since this was, one, for a good friend, and two, another excuse to be outside in the sunshine on the beach with a camera, how could I say no? It’s not the first time I’ve done pet photography as I’ve shot some of his client’s pets in the past, so I knew a bit of what to expect, and I was able to draw on what I had learned the last time and apply them to this session.
    Here are 8 pet photography takeaway tips from those sessions that I wish I knew right away:

    1. Don’t Start Shooting Right Away. Get to know the pet first. Play with them, feed them, give them a treat, play fetch with them, get comfortable with the pet so the pet gets comfortable with you.

    2. Approach The Pet Gently. Don’t startle them. You won’t get the shot. Trust me. Sand in your lens? Yes, you’ll get that. The shot? Nope.

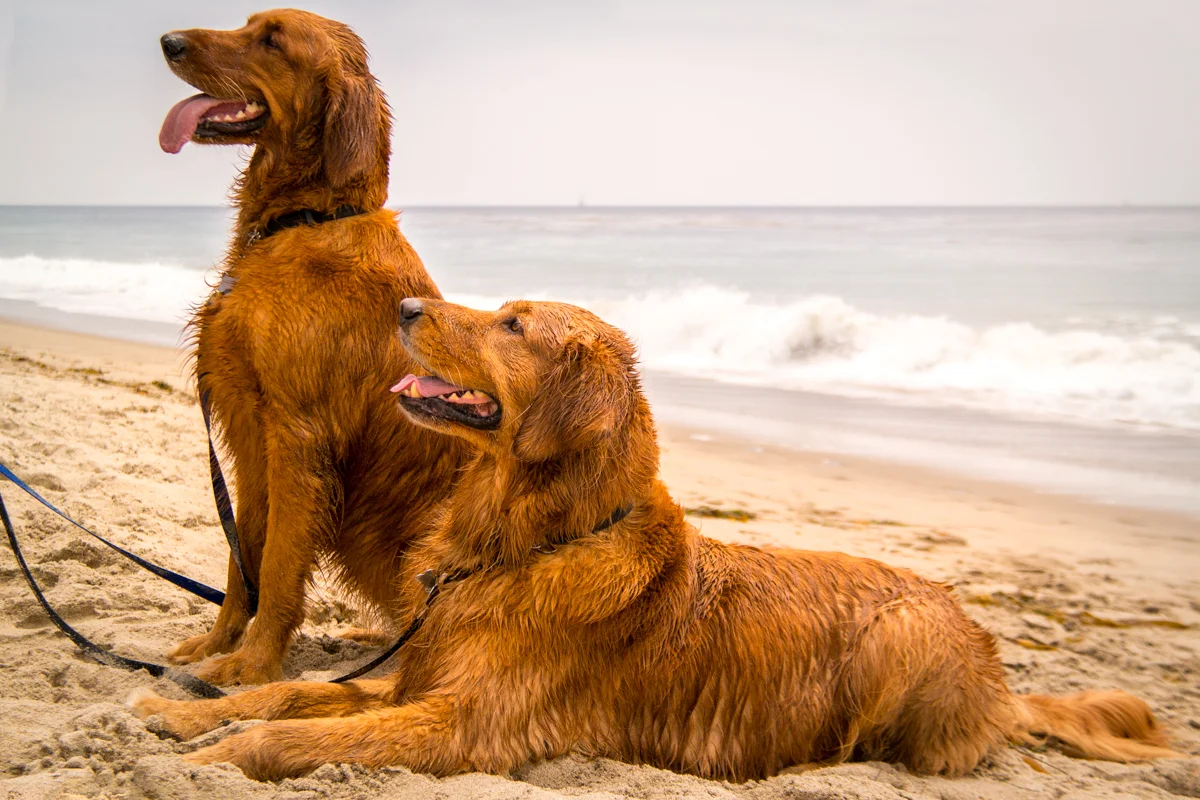
    3. Get Low. Try Low Angles. It’s always fun to lay down and have the camera at ground or grass or sand level and let the curious animal come towards the lens on it’s own. Then start snapping. This way, when something is below the level of the pet, especially dogs, they feel more in control and are more apt to be comfortable with the situation.
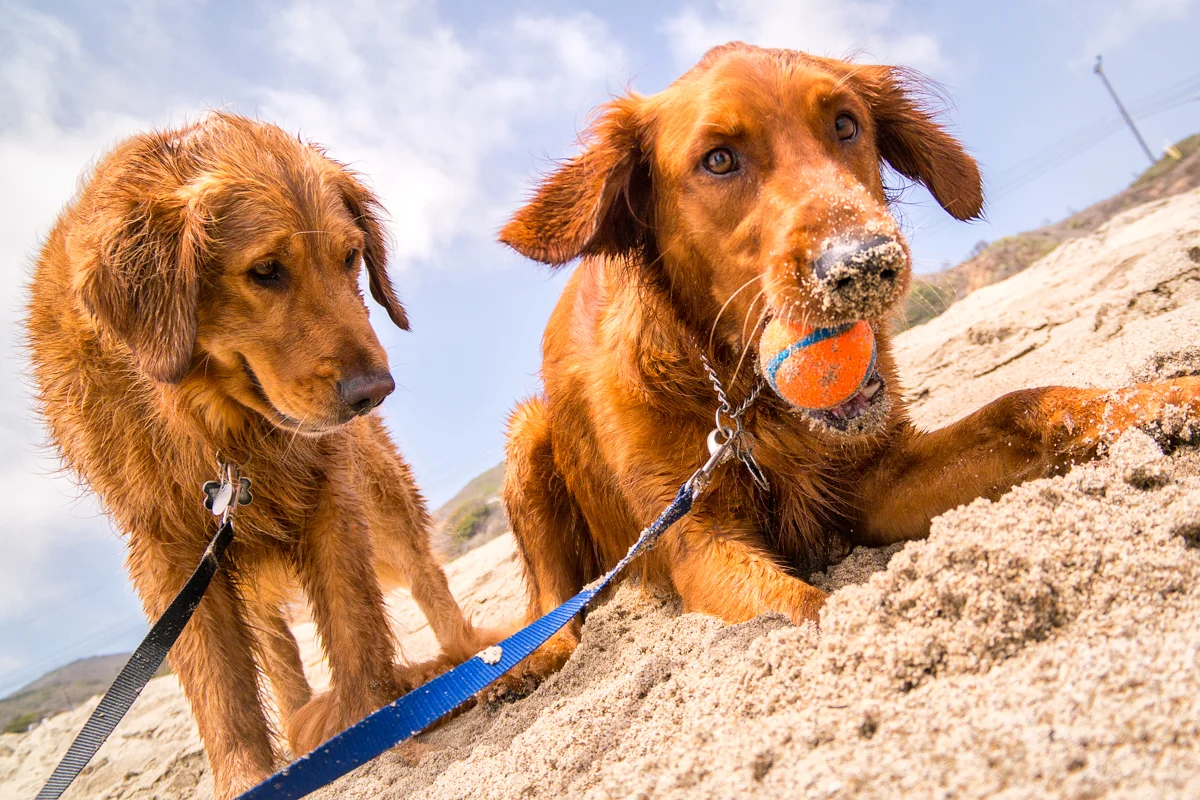
    Wasim Muklashy Photography_Pet Photography_Dogs_Low Angle_Ocean Walk Pet Sitting

    4. Be Patient. You can’t tell a pet how to pose and which way to turn and where to stand and where to look. This can get frustrating when you’re trying to get a shot that you have in your head, but let this play to your creative advantage. It’ll force you to think outside your box and, once you get over it, have fun with it. Unlike humans, most pets don’t really need to be anywhere at any particular time…take advantage of that!!

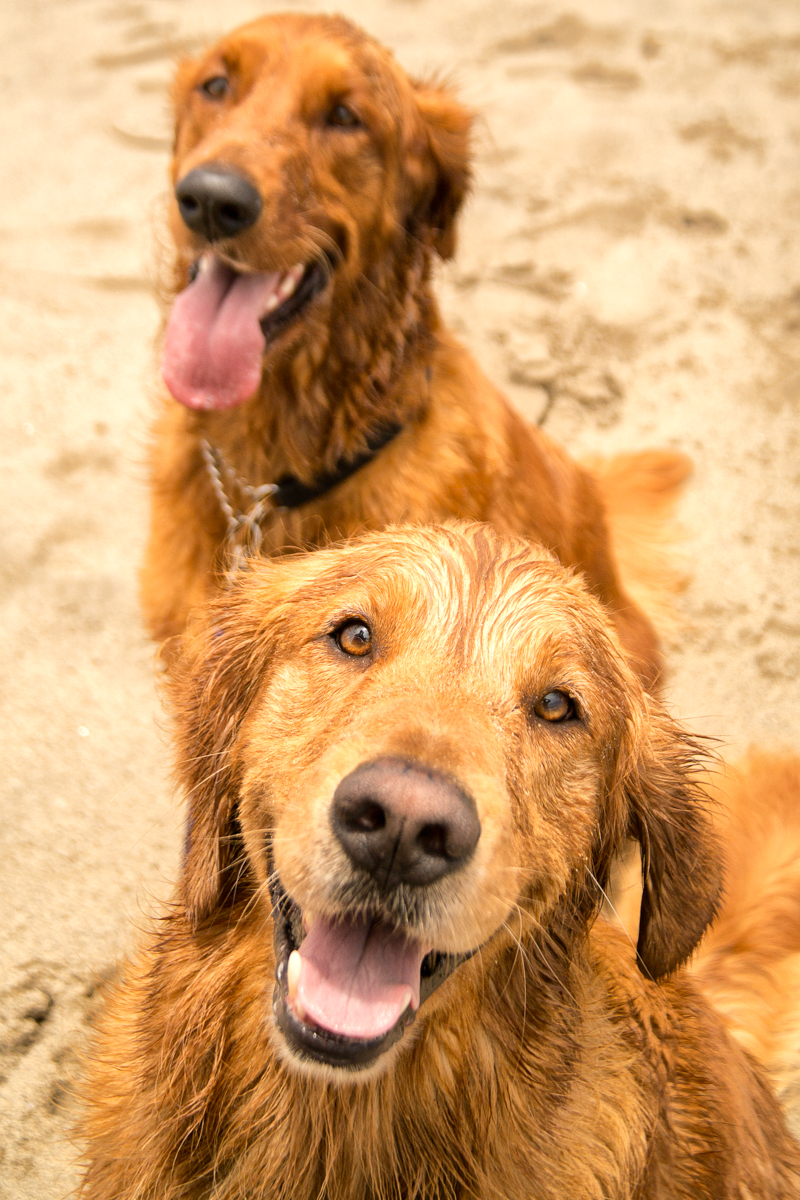
    5. Experiment. Play with focal lengths. You don’t have to get the entire pet in every shot. Don’t be afraid to just get detail shots of the face. Just like with people, the important thing is to make sure the eyes are in focus. A great 18-200mm can be super helpful due to it’s flexibility, but closeup portraits can make for very flattering and adorable pet images. Heck, you might even want to try using a macro lens as a portrait lens if you have that option. They’re very good at preserving incredibly sharp detail.

    Wasim Muklashy Photography_Pet Photography_Cat_Samsung NXMini

    Wasim Muklashy Photography_Pet Photography_Dogs_Ocean Walk Pet Sitting

    6. It’s All In The Eyes. Unless the pet you’re working with is an iguana or a turtle or something that doesn’t move all that much, this wouldn’t be the time to use a wide open aperture with a rail-thin depth of field, especially on a full-frame camera if that’s what you’re using. It won’t be easy to keep a dog or a cat still to get that eyeball in focus! You’ll want a shutter speed that’s quick, for sure, but if need be, increase the ISO rather than drop the aperture. If you’re outdoors or in a place with ample light, f5.6 should be plenty to get an attractive bokeh while maintaining a fast enough shutter speed to catch the wiley buggers!

    7. Take The Lead. If it’s dogs you’re working with, get ahead of the dogs, perhaps 10-15 yards away and face the dogs. Open your aperture to about f5.6 or smaller. Be steady, use the low angle again. If you have it, use a zoom lens so that you can still be about 20 feet from the dogs as they fill up the frame. Set your drive to shoot as many frames per second as your camera can handle. Have the handler begin to walk them towards you. As they start to approach, just as they begin to fill out the frame, hold your finger down on the shutter to snap rapid-fire. The first few might be throwaways, but the sound will usually grab their attention to look right into the lens and they’ll begin to come towards it. And what’s cuter than a schnauzer’s sniffer all up in your glass?

    8. Play Ball. An effective method for dogs if you have someone with you, is to have them hold up a ball or a dog toy so the dog looks up at it in anticipation. Crouch right next to handler on the side of the arm they’re holding up and get super close to them, aiming your camera at the dogs from about hip level. Make sure to have your settings set to employ a fast shutter speed. When ready, cue the handler move the ball to right above your head. You’ll have a few split seconds to snap away at an excited dog who’s appearing to look up into the camera. This method also works great for profile shots when you’re off to the side, perpendicular to the dogs, as the handler holds the ball above his head.

    And with that, I bid you fare-woof! (Yup…I did…)

    All dog images shown here were shot with a Samsung NX30 with a Samsung 18-200mm lens. The cat was shot with a Samsung NXMini.

    For more of my madness:
    Instagram: @wasimofnazareth
    Twitter: @wasimofnazareth
    Google+: www.Google.com/+WasimMuklashy
    Facebook: www.Facebook.com/WasimOfNazareth
    Wasim Muklashy Photography_Dogs_-SAM_5779-Edit

  • A Quick, Easy And Effective Alternative Method Of Sharpening Your Images

    A Quick, Easy And Effective Alternative Method Of Sharpening Your Images

    Julia Kelly_Wasim Muklashy Photography_Samsung NX30

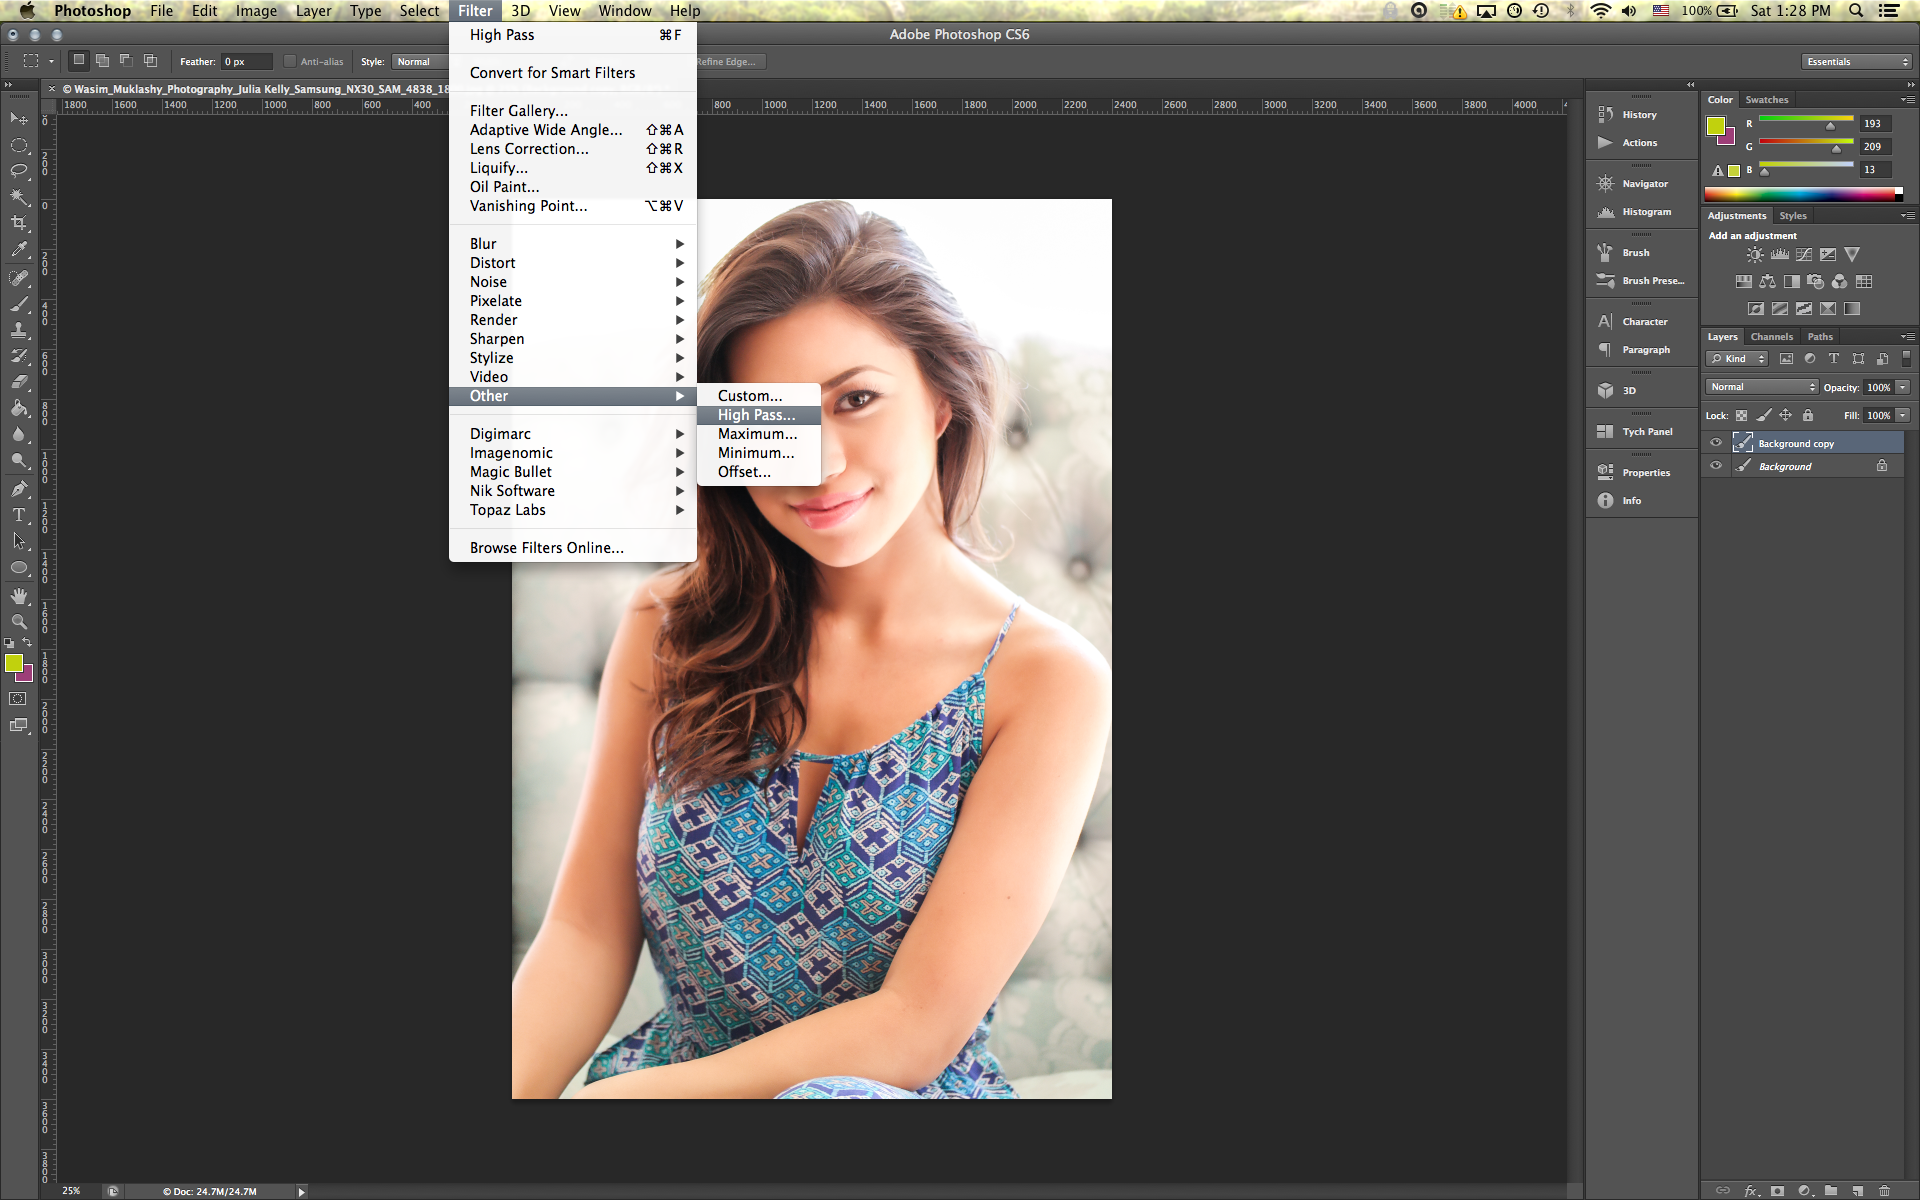
    When most people think sharpening in Photoshop, they understandably default to the ’Sharpen’ or ‘Unsharp Mask’ filters. But since I learned this trick a few years back, I don’t believe I’ve opened a single one of Photoshop’s native sharpen plugins a single time. Instead, I’ve relied on one of the ‘Other’ filters in that ‘Filter’ menu – the ‘High Pass’ filter.
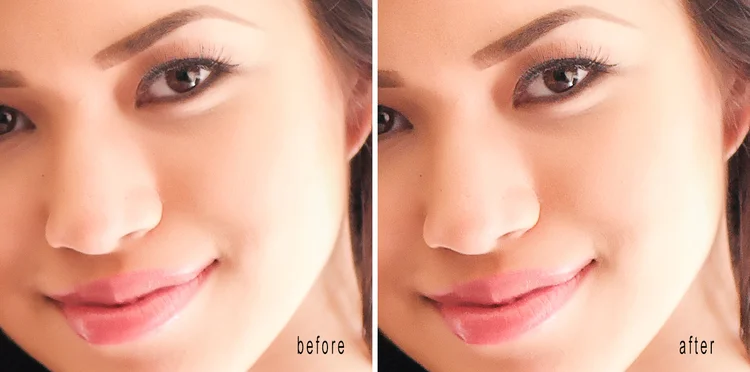
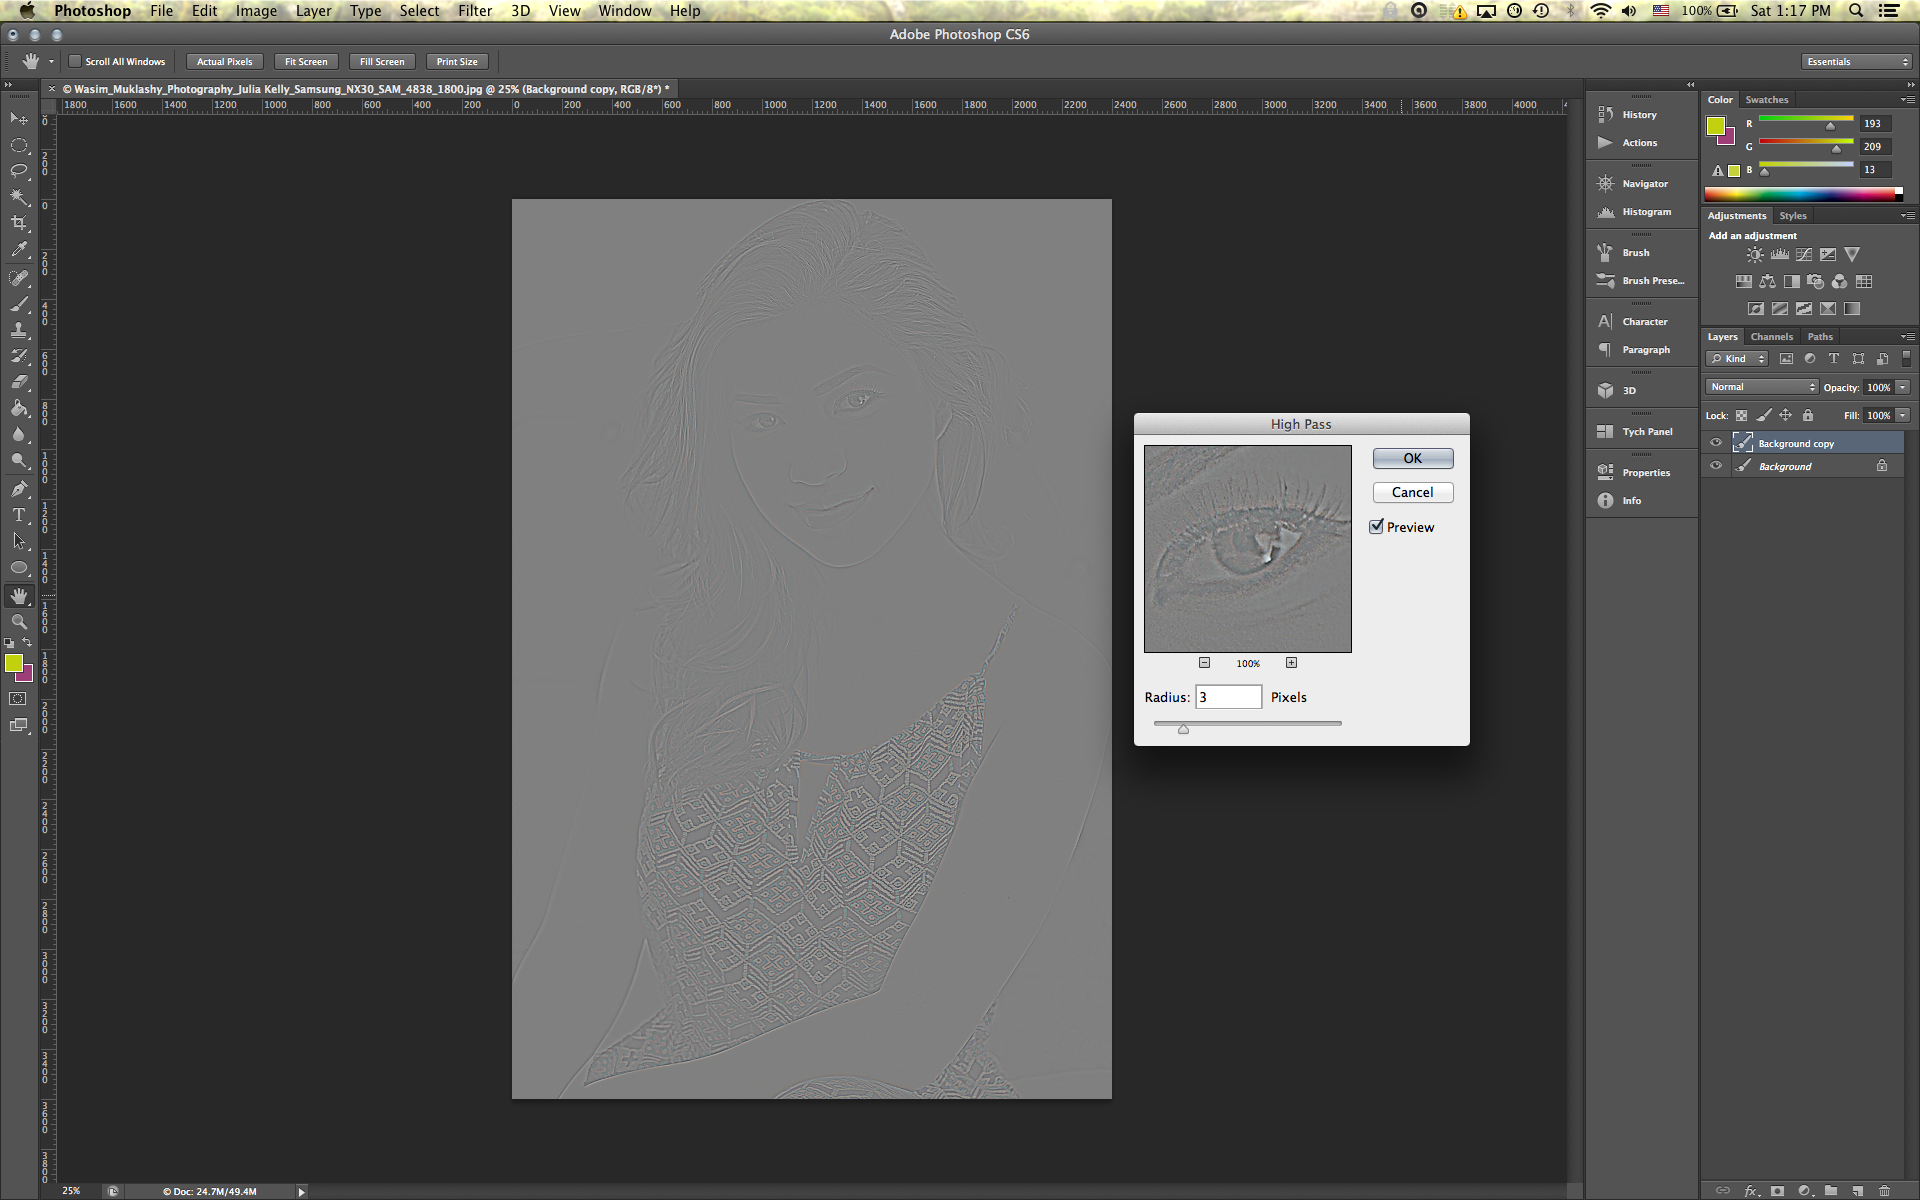
    Essentially, you’ll make a duplicate layer of the image layer. Then navigate to the ‘Filter’ menu, down to ‘Other,’ and choose ‘High Pass.’ What you’ll see might startle you at first, but don’t worry, you’ll learn to love that gray mask that ‘ruined’ your picture in just a minute. Using that dialog box that pops up, I’ll usually enter a radius of between 2-5 pixels, depending on the image. The more sharp edges and lines I have in an image, the higher of that 1-5 scale I’ll go. Anymore above that will usually result in the dreadfully obvious over sharpened image.  If you zoom in closely on the image, you can see exactly what is being sharpened and by how much. You can see the level of sharpening of those pixels through that grey mask on the image. In portraiture, I’m usually between 2-3 pixels at most, mostly to help accent eyelashes and eyeballs.

    Wasim_Muklashy_Photography_High_Pass_Sharpening_1
    Wasim_Muklashy_Photography_High_Pass_Sharpening_1
    Wasim_Muklashy_Photography_High_Pass_Sharpening_2
    Wasim_Muklashy_Photography_High_Pass_Sharpening_2

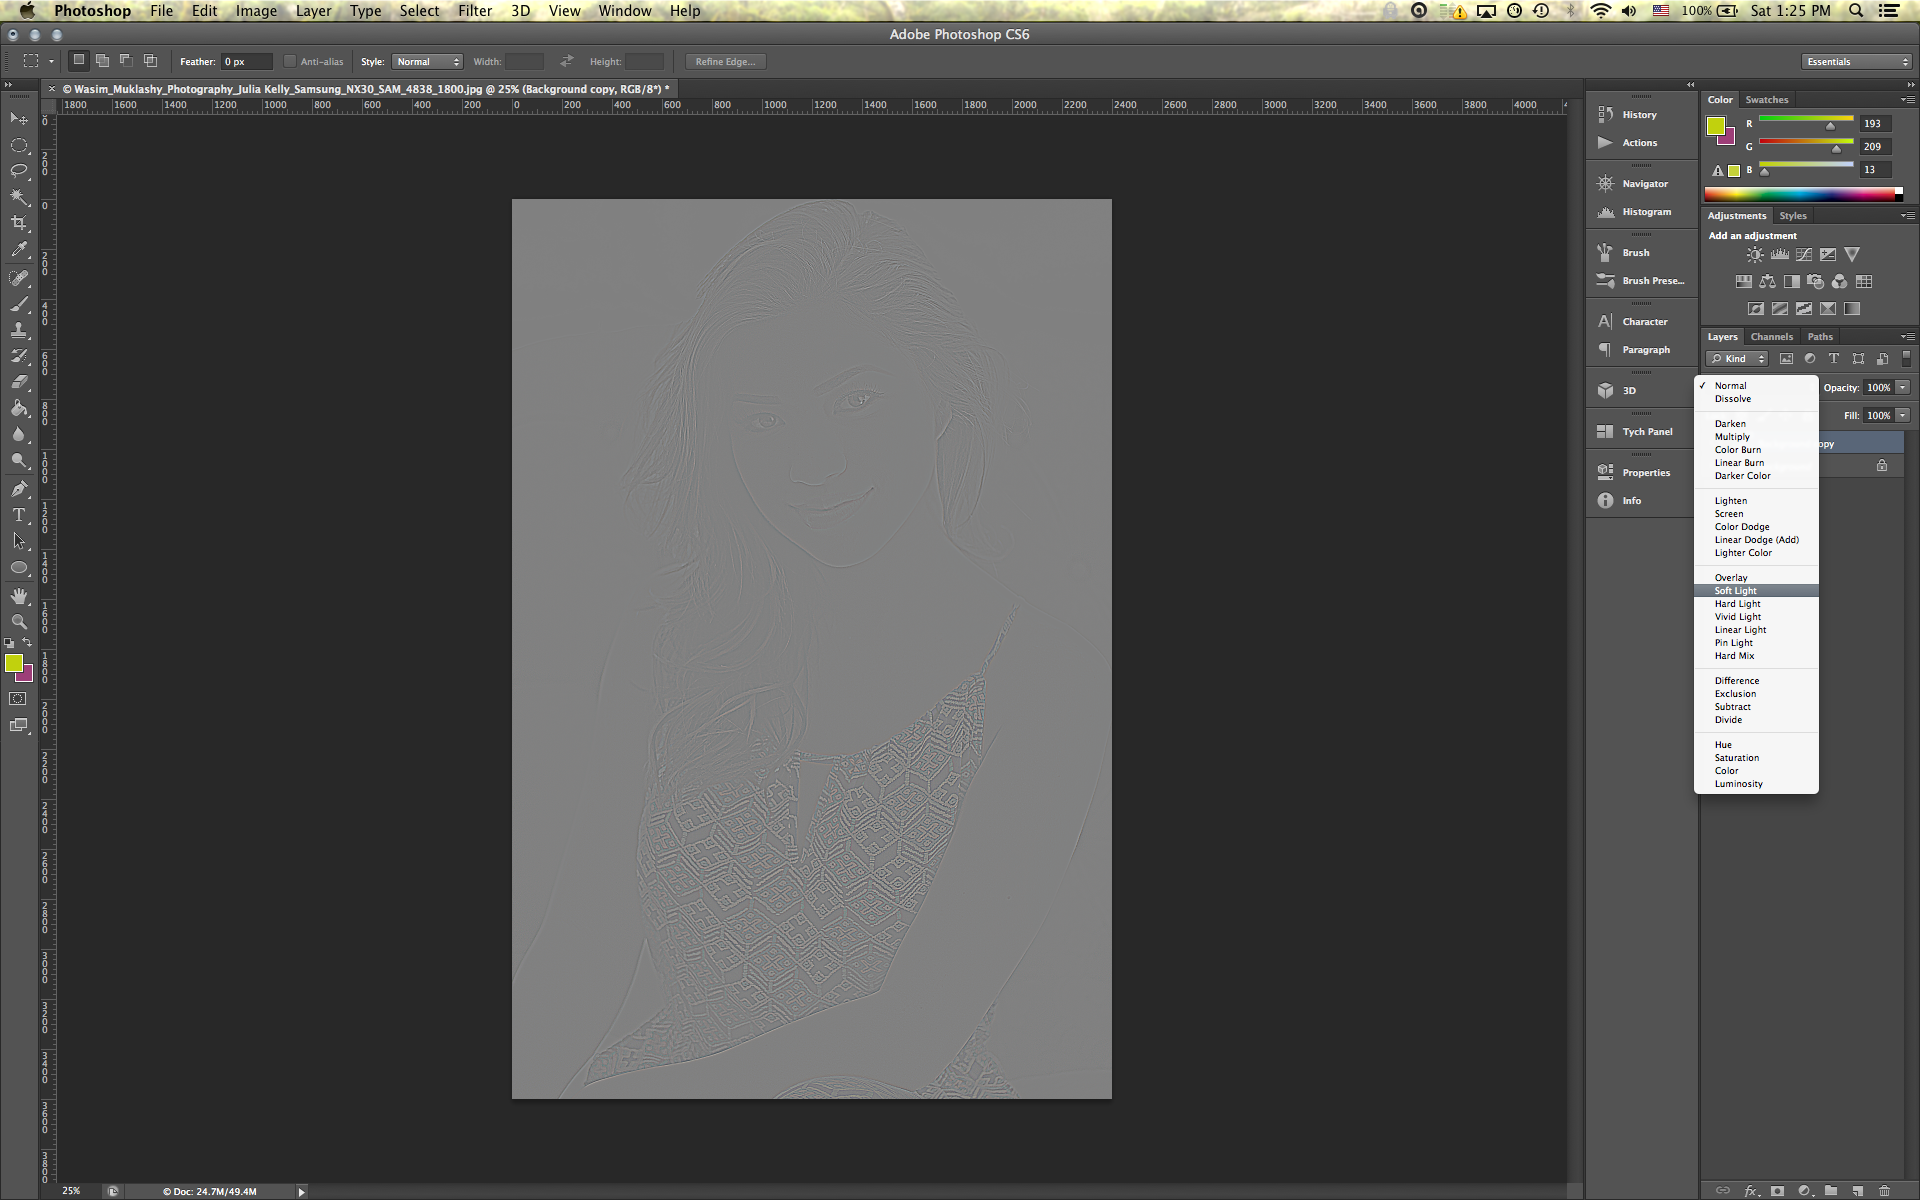
    Once you decide how much sharpening you’d like, hit ‘Ok.’ Now the top layer will be that High Pass filter. Go to the ‘Blending Mode’ drop down menu above the filters, which is usually set at default to ‘Normal,’ and navigate through those options. I usually stick with ‘Soft Light,’ as it provides the most natural look, especially for portraits and architecture, however, you can play with the various other options, including ‘Vivid Light’ and ‘Hard Light.’ Once you scroll through them, you can see the different way each blending mode affects the high pass filter. The great part here is that you can also control the opacity of that layer, even further fine tuning the sharpening.

    Wasim_Muklashy_Photography_High_Pass_Sharpening_4
    Wasim_Muklashy_Photography_High_Pass_Sharpening_4

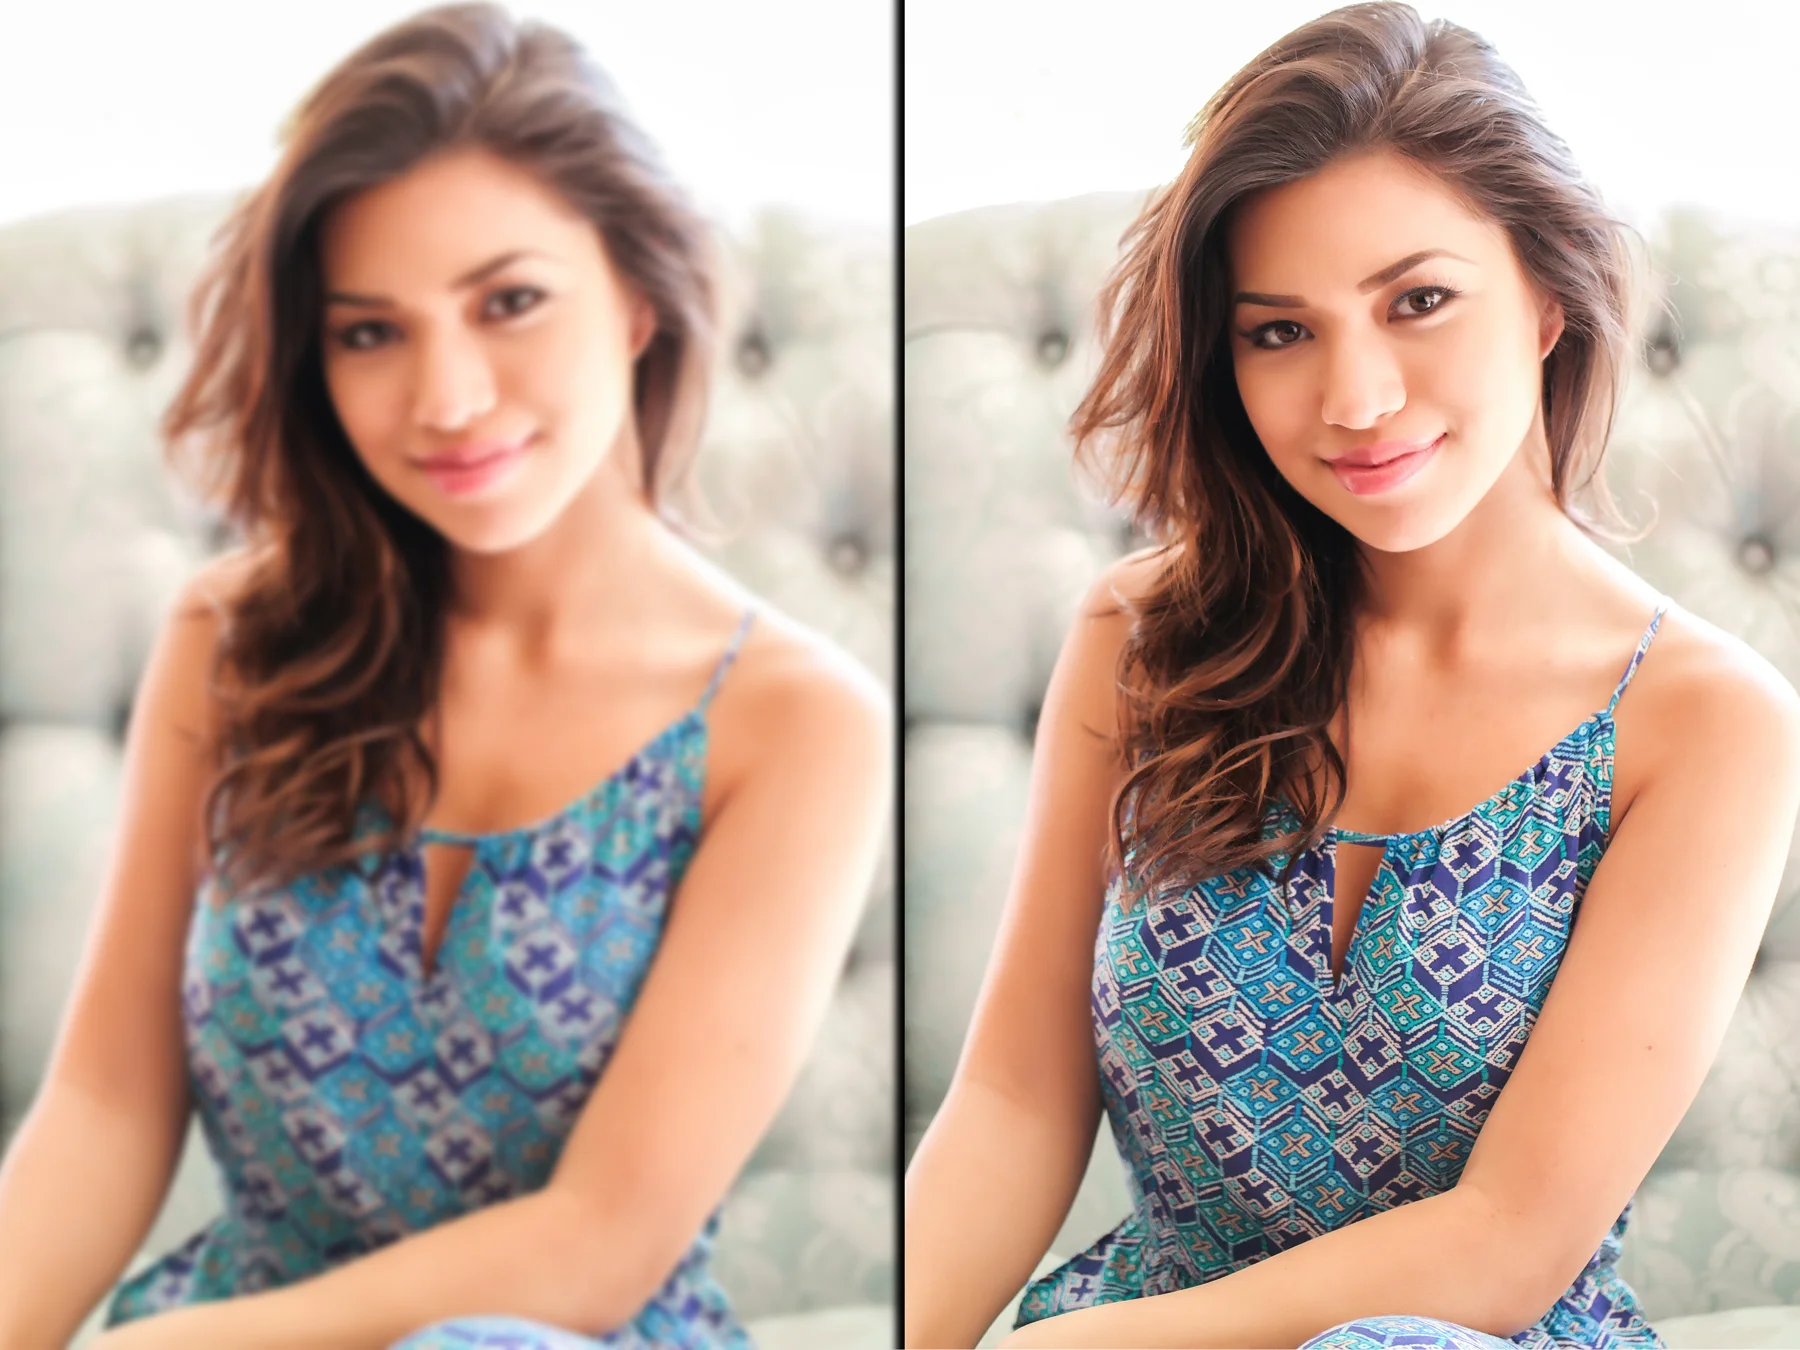
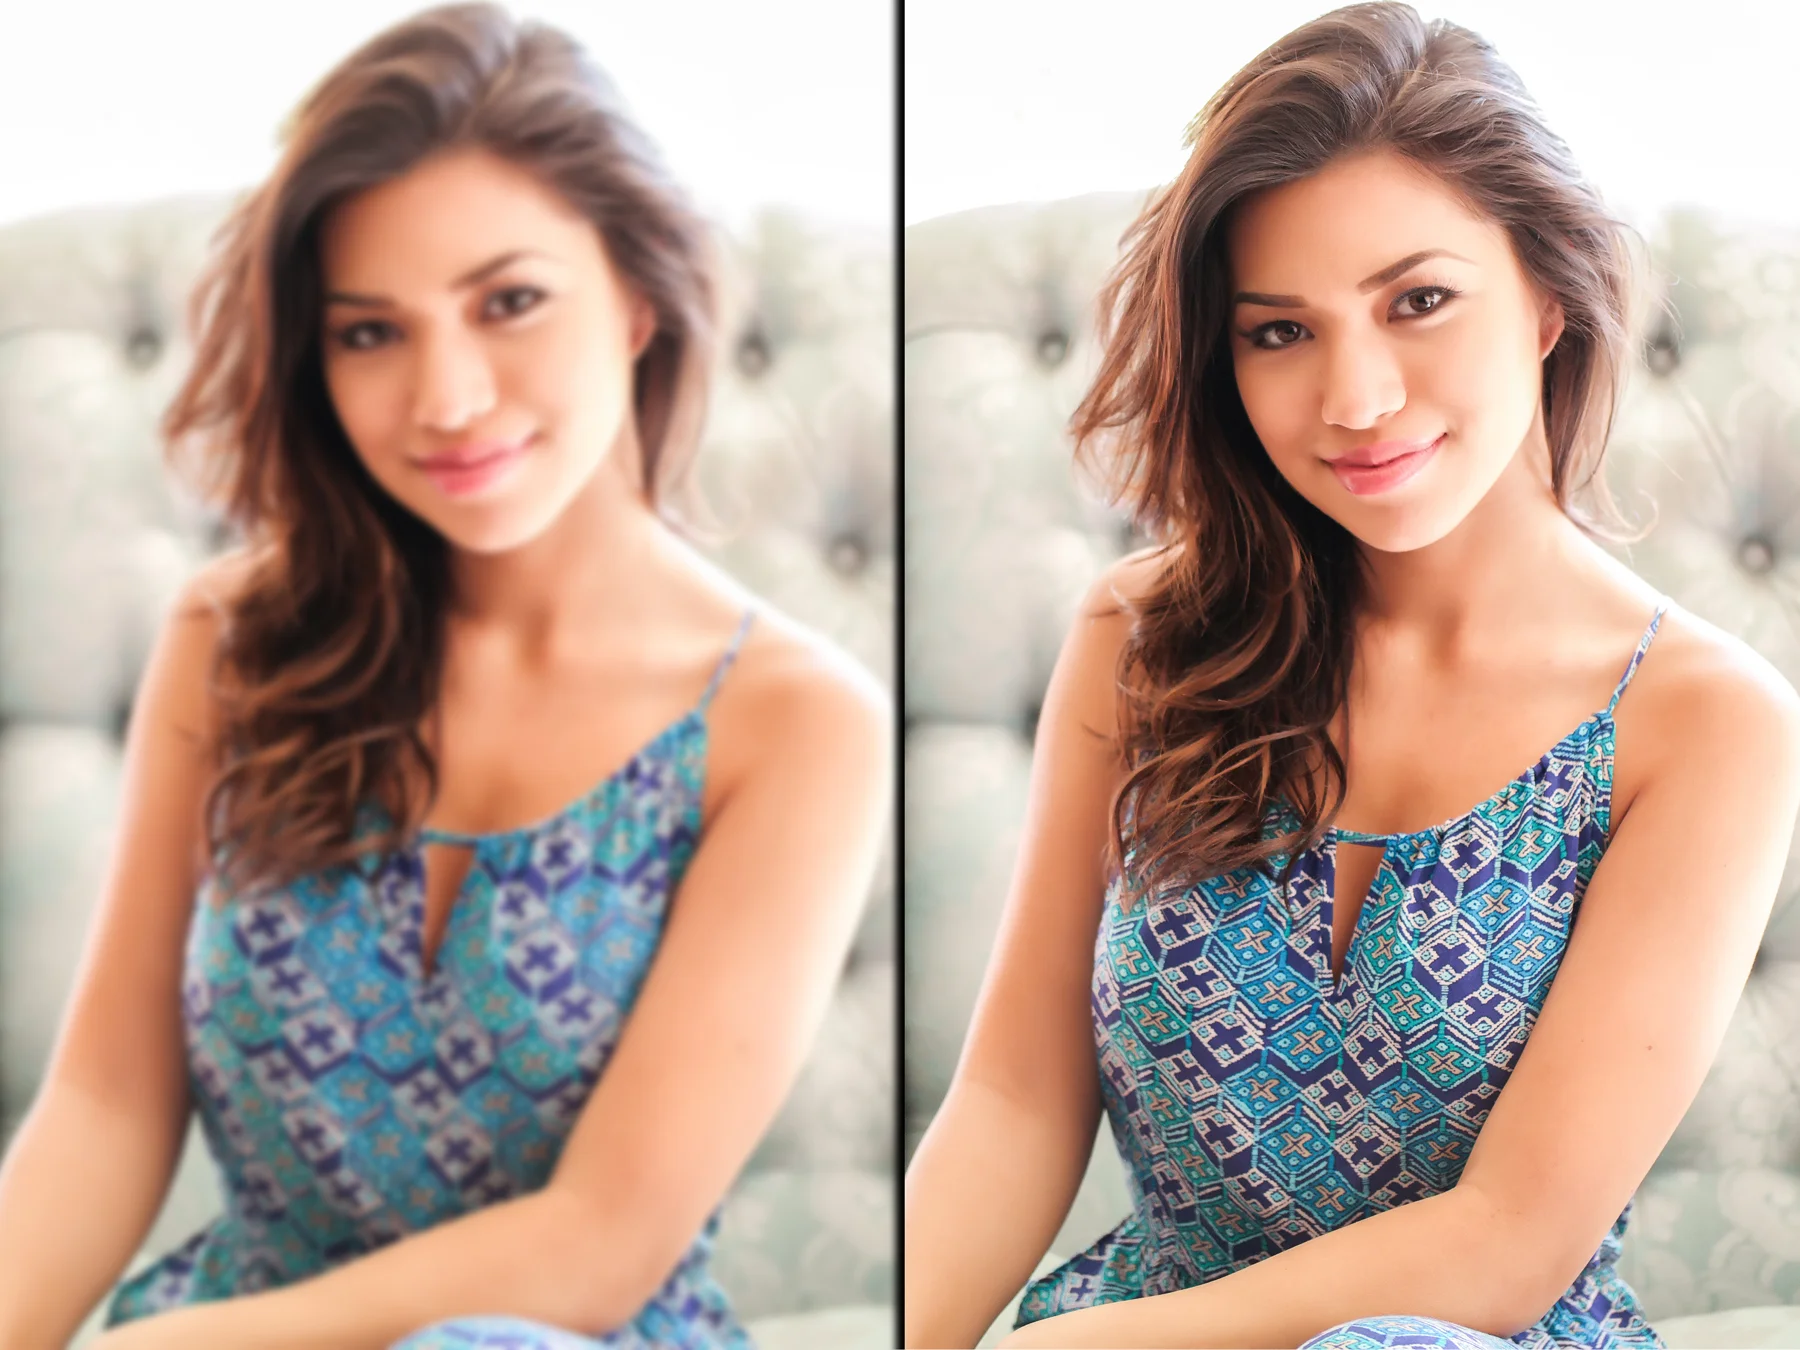
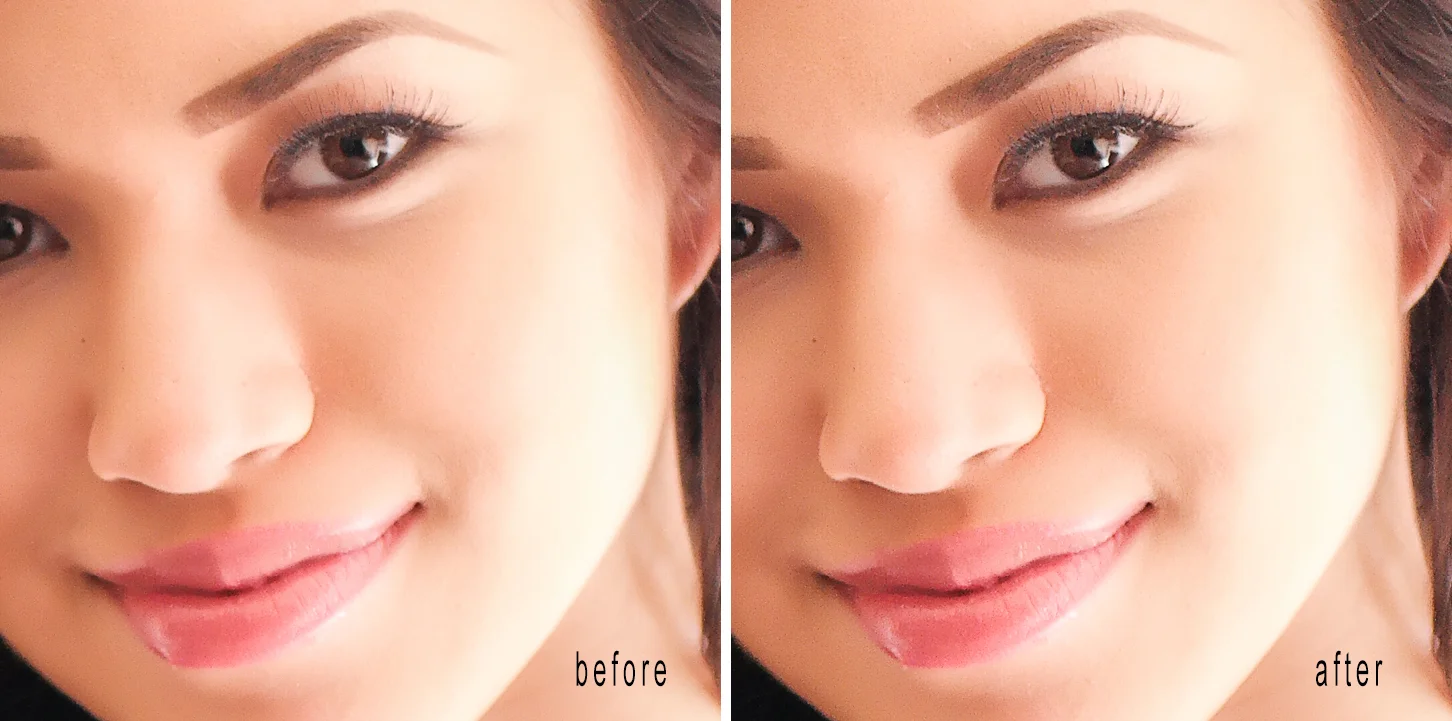
    So that has become my preferred method of sharpening. It just seems to offer the most manual control over the sharpening process and once you get used to it, it’ll start to come as second nature. Here’s the before and after, you can see it best in the eyes:

    Wasim_Muklashy_Photography_High_Pass_Sharpening_Before_After
    Wasim_Muklashy_Photography_High_Pass_Sharpening_Before_After

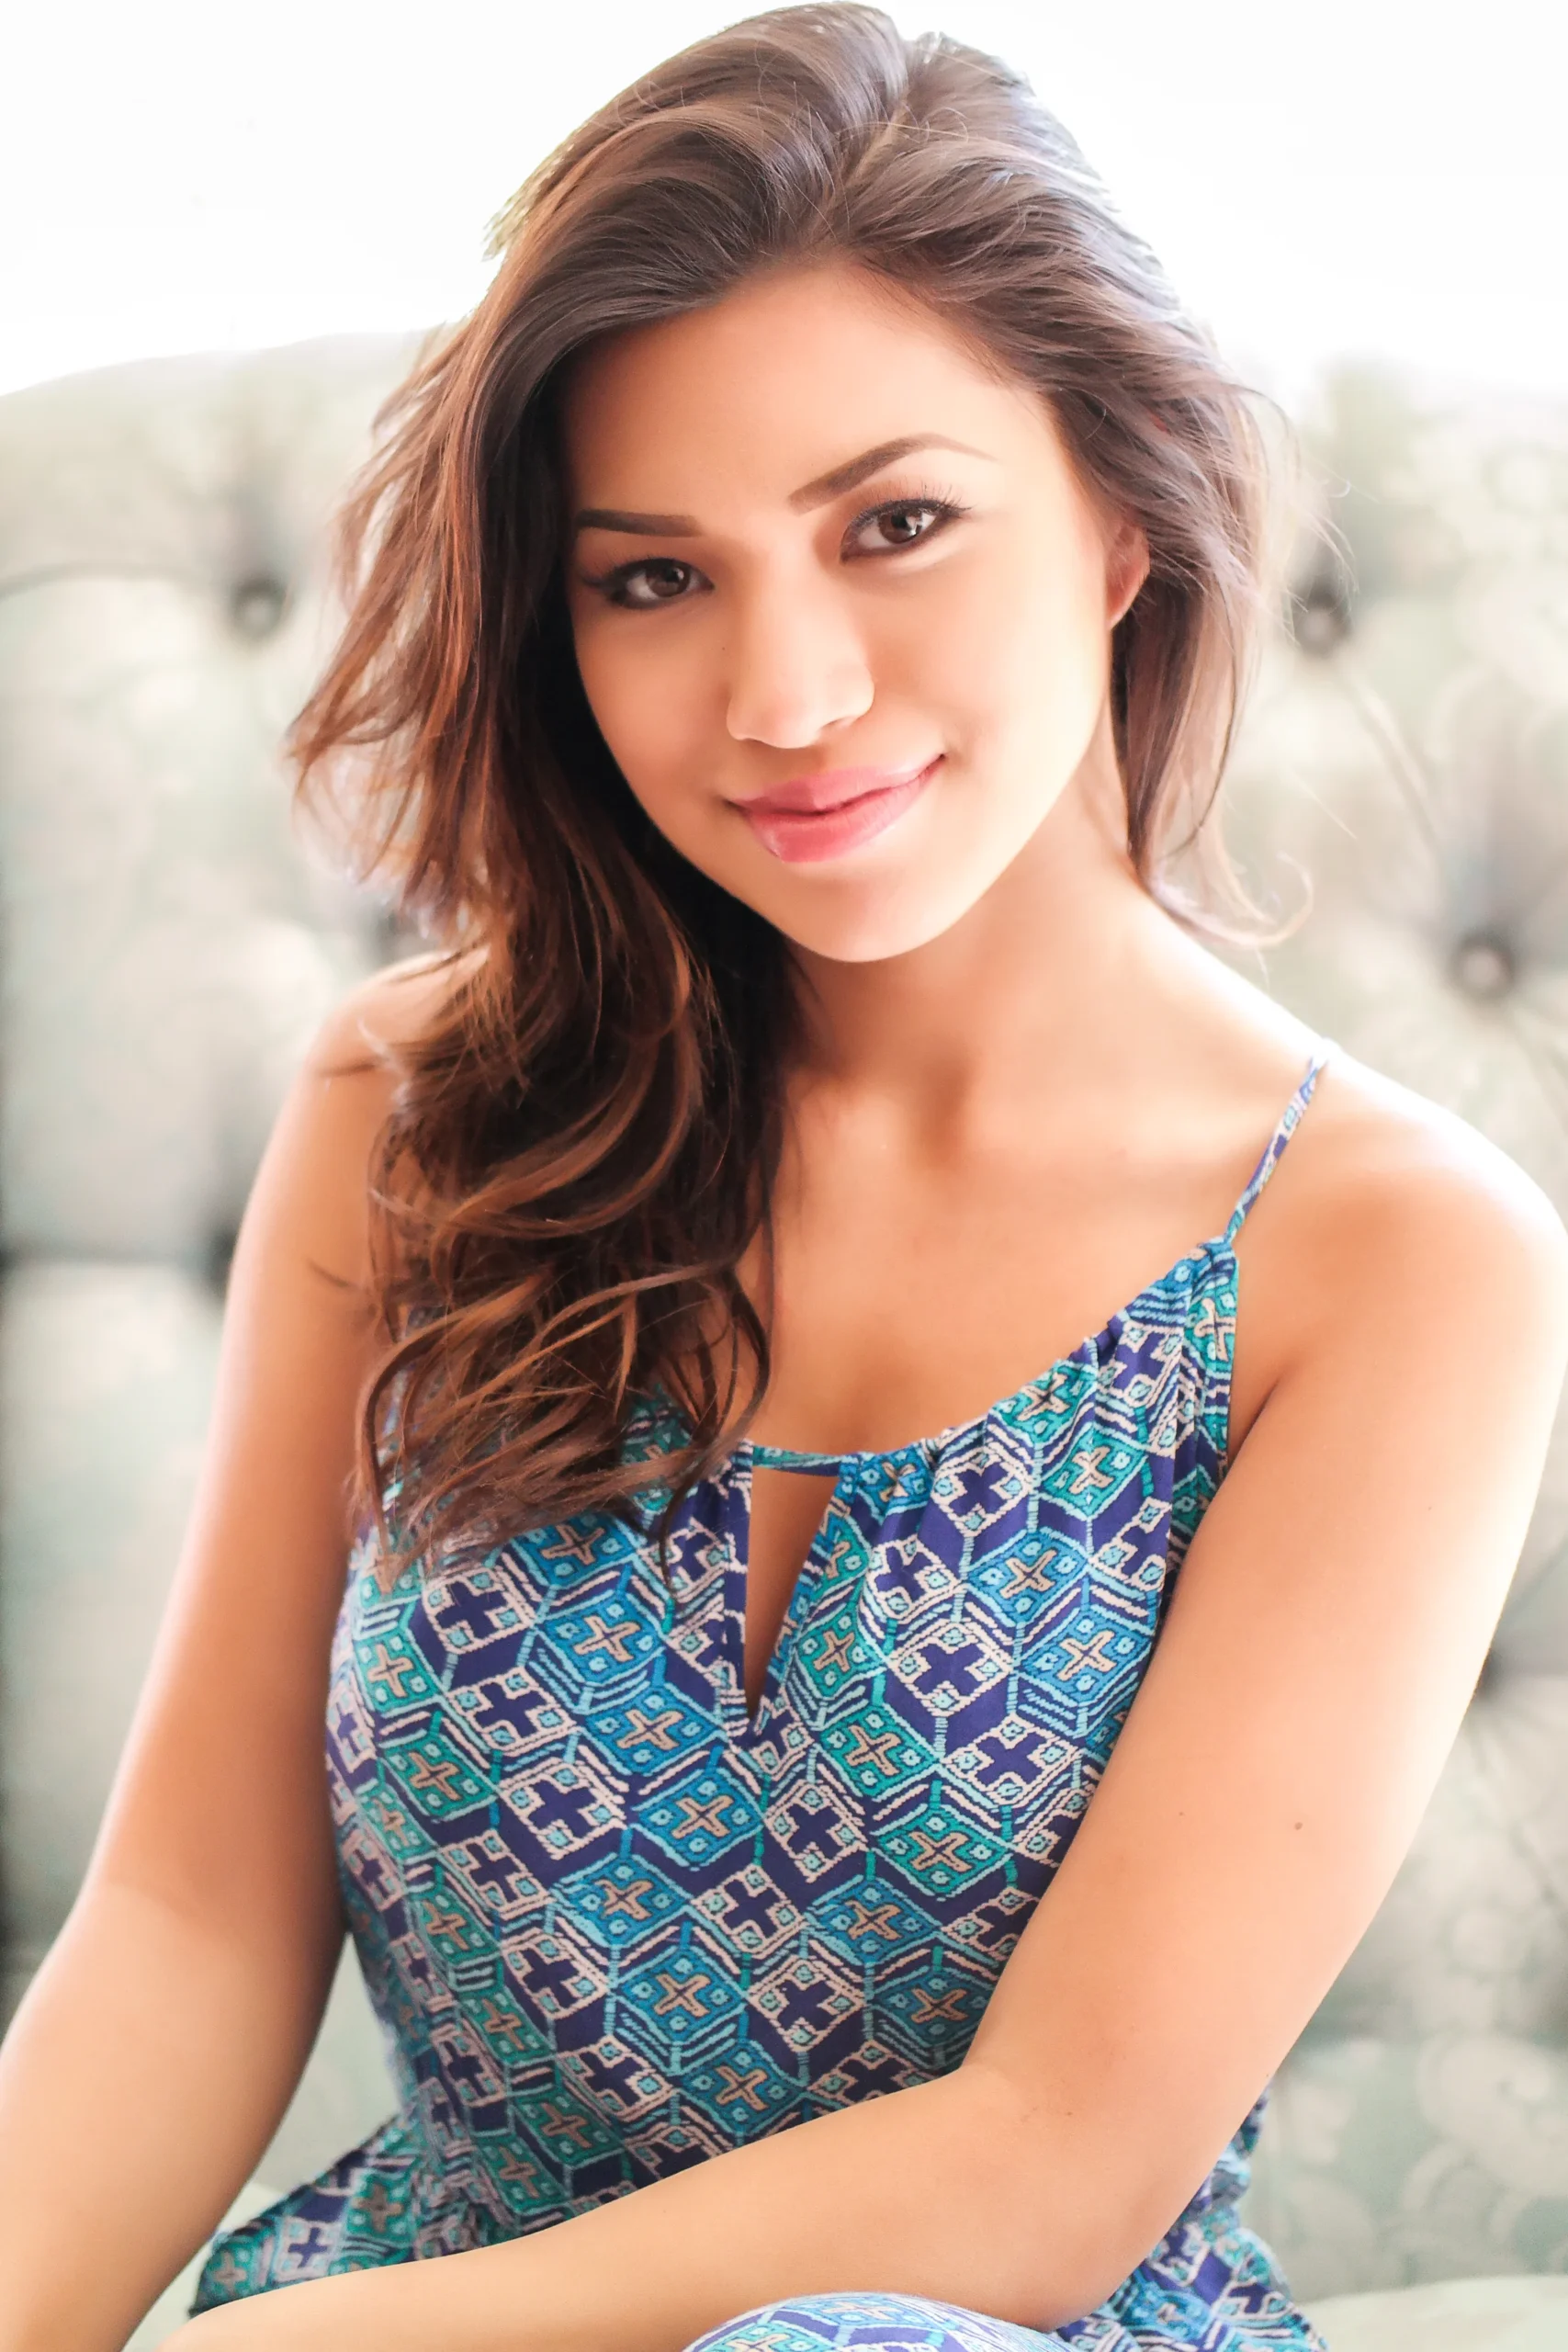
    The image used here was shot on a Samsung NX30 with a Samsung 60mm/f2.8 lens. The model above is the stunning and popular social media star, Julia Kelly. You can find her on Instagram,Twitter, and Vine.

    For more of my madness:
    Instagram: @wasimofnazareth
    Twitter: @wasimofnazareth
    Google+: www.Google.com/+WasimMuklashy
    Facebook: www.Facebook.com/WasimOfNazareth
  • 5 Fun (And Pretty Stupid) Photography Tips For Your 4th Of July Barbecue

    5 Fun (And Pretty Stupid) Photography Tips For Your 4th Of July Barbecue

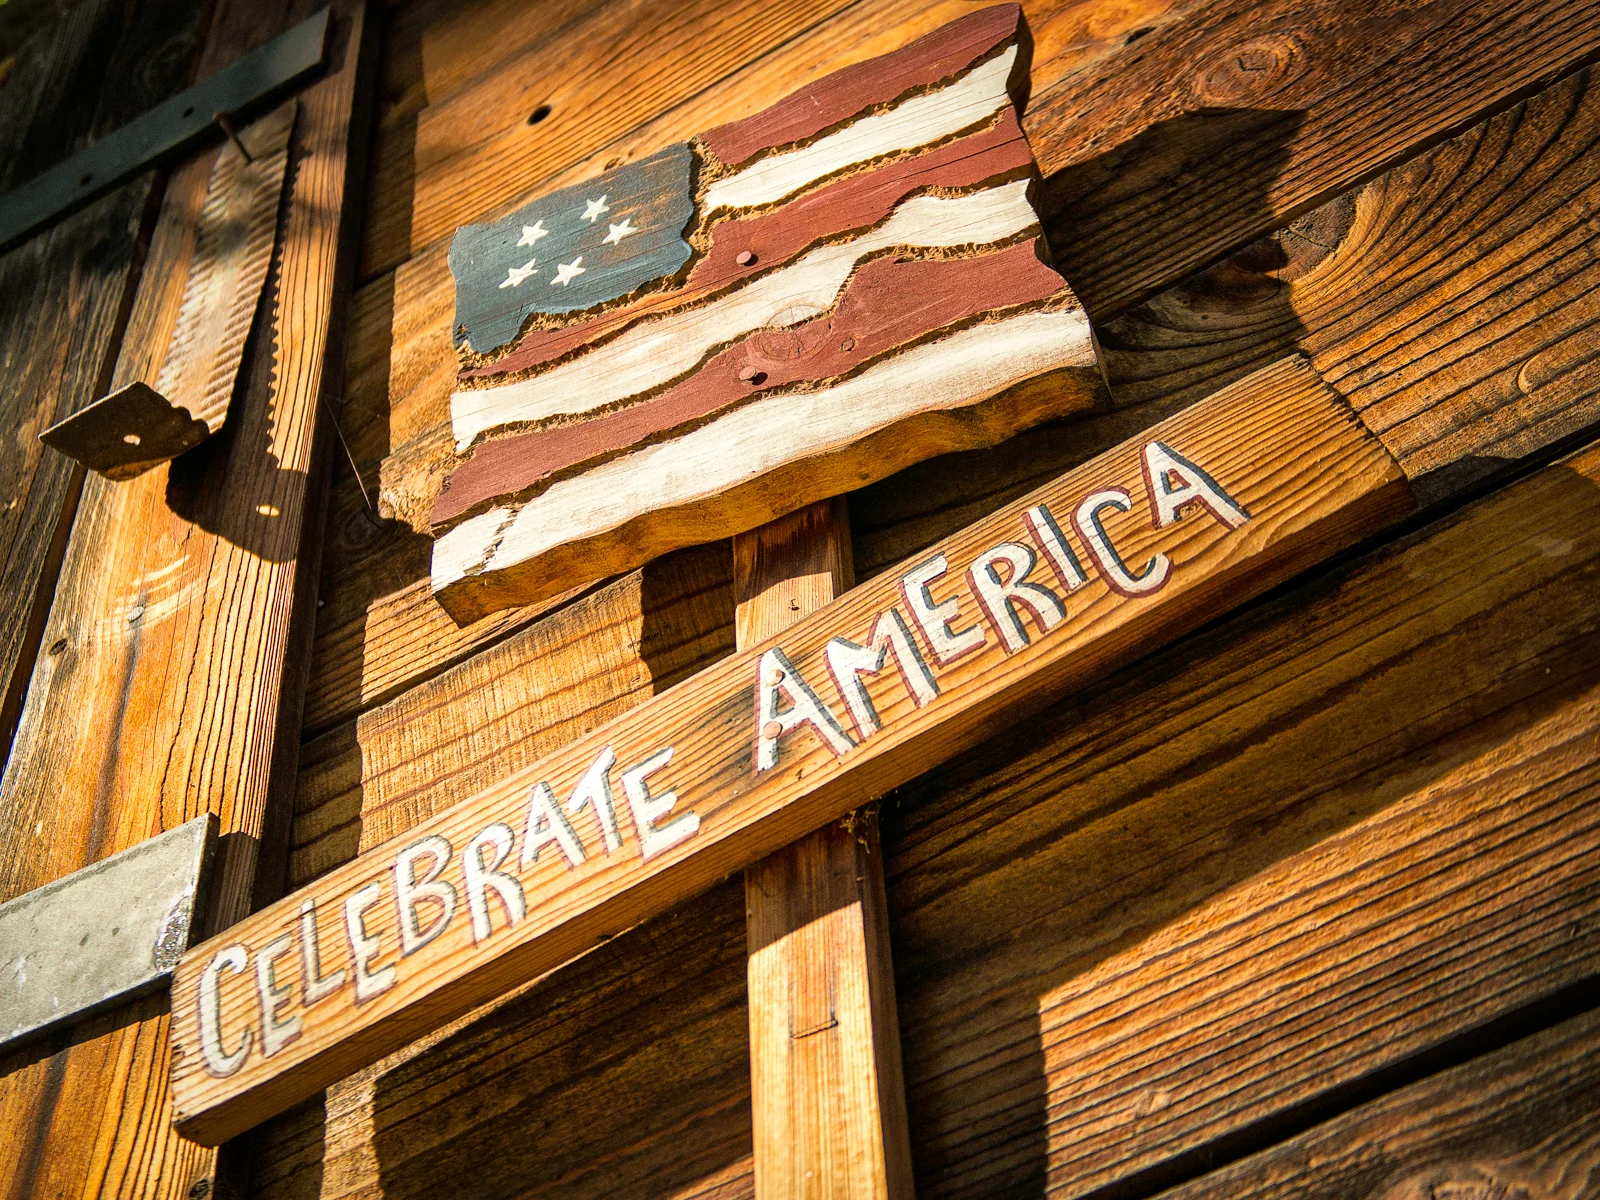
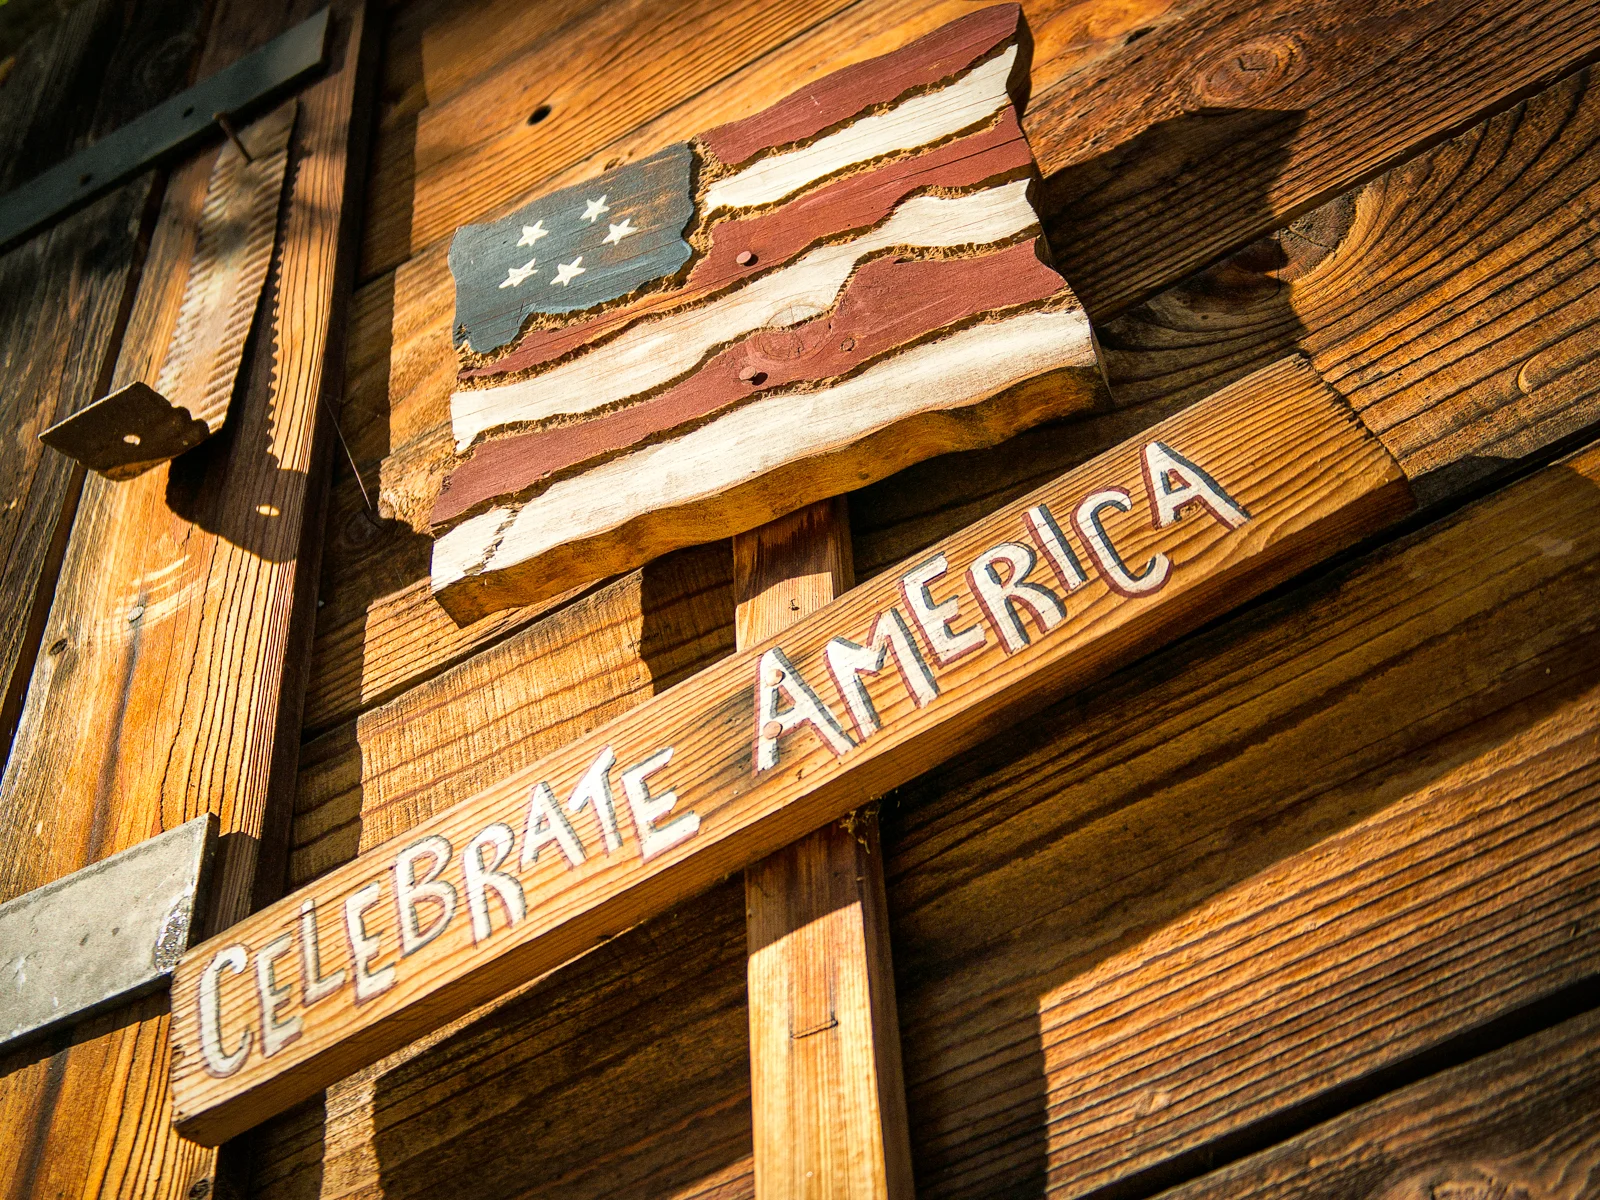
    Wasim Muklashy Photography_4th of July_Celebrate America

    Independence Day is upon us!! A day when we can celebrate the hard-fought achievements of our forefathers by, well, doing what we do best…git your gluttony on (as respectful as possible of course…). Here are 5 quick photography tips for your 4th of July barbecue:

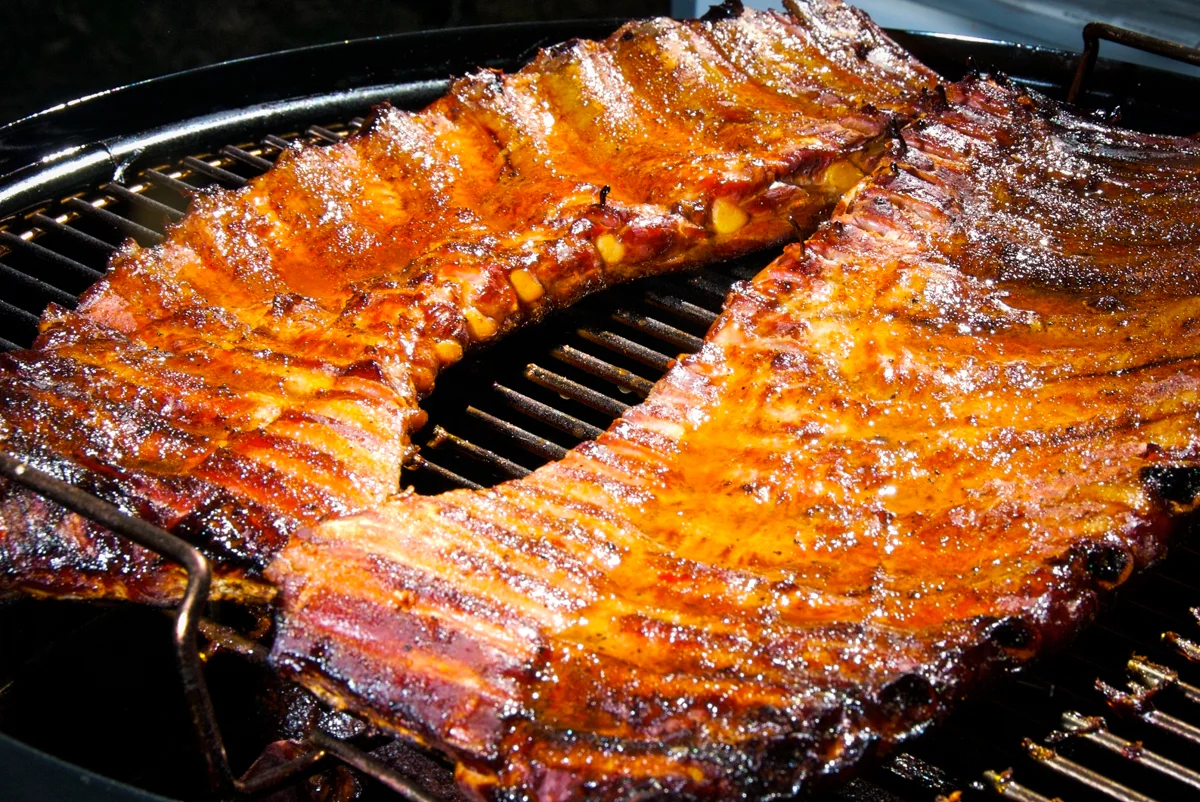
    1. Nothing says 4th Of July better than dripping, oozing, shiny, glistening barbecue sauce…both on the grill and splattering all over people’s faces and clothes as they try to inhale the various sugar sauce doused proteins, starches, veggies, and fibers. Try to use a wide aperture and get in close on the drips, the shine, savor the details of those barbecue-sauce mustaches, especially on the wives and girlfriends. I recommend using Aperture Priority if you’re using a camera with manual controls. That way all you’ll have to focus on is the focus, and the camera will do the rest.

    This image belongs to Flickr user “BBQ Junkie” and is used by permission under the Creative Common License: http://goo.gl/uk4xos. I have added some sharpening, cropped the image, and added a vignette. Original image found at: http://flic.kr/p/34xtb5

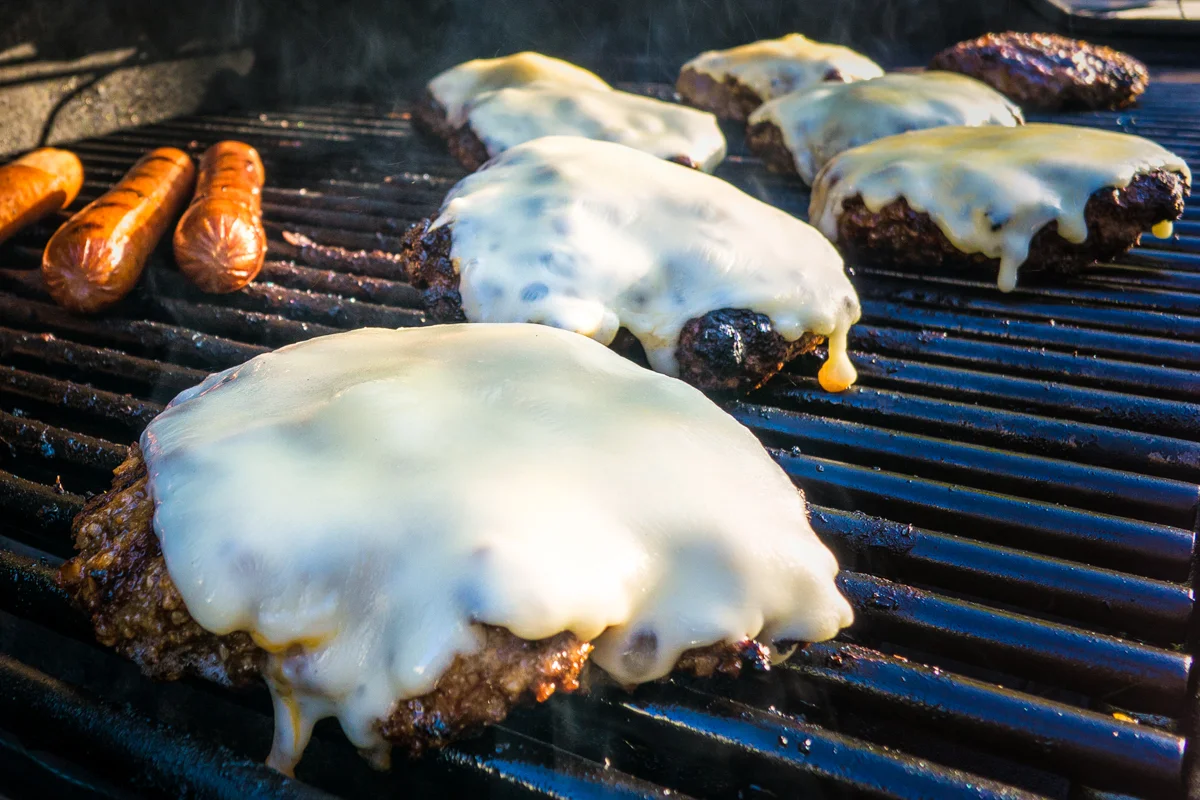
    2. Nothing else says 4th of July barbeque better than dripping, oozing, meat on a grill. The same idea as #1, but come in at an angle, add some energy to the shot. Straight from above, or perfectly perpendicular might be good for Instagram, but if you want to get a solid, professional looking image, use a wide aperture for minimal depth of field, perhaps around the f3.5 – 5.6 range, which is a good balance so the background doesn’t get so blurry you can’t tell what it is. Move in as close as you can without fear of melting your lens (if you have the luxury of a good zoom, a solid 12-18 inches away from the heat source would be best and zoom that sucker in. However, beware, on most zooms, the more you zoom, the smaller your widest aperture will be, which means that the f-stop number will rise and you’ll get more in focus unless you’re lucky or wealthy enough to have a fixed aperture zoom). Focus on a small part of the burger, perhaps right where it meets the grill and the fat is dripping off into the charcoal filled ether, or the corner of the cheese melting off the side of the meat onto the charcoal coated grill, allowing the rest of the scene to melt out of focus behind it. Even after eating 3 of the suckers, that picture will convince even you to inhale a fourth.

    Zach Rosenberg Photography_Cheeseburgers On Grill

    3. The Group Shot! While everyone is holding their burgers and their food, get a group shot. This is when everyone gets silly and their over-the-top enthusiasm kicks in, especially after a few drinks. For the best results, hold the camera like you’re going to take a picture, but hit the video button instead. Don’t tell them that. Wait until they realize it on their own. Then you’ll have over 30 frames per second to choose the most awkward one from to post (and of course tag) on social media. Immediately. Better yet, post the video! It’s not a new idea, but it is a brilliant one. I mean, come on:

    4. The Chef! Never forget them! Keep an eye on the cook(s). Often times, especially as the afternoon gets longer and a few libations have increased the enthusiasm over the grill, lazy eyes and slurred speech and dropped steaks followed by a ‘god made dirt and dirt don’t hurt’ grumble begin to dominate the festivities and make for the most memorable of images, especially since, well, your job is to make sure they remember their most embarrassing moments.

    5. By all means, get brewed up, it is a celebration after all, but by NO means forget your camera anywhere near the barbecue. That celebration will turn into the breeding grounds for a whole new American revolution.

    Ok then…go get your gluttony on! And remember to come back and share the best of the best and worst of the worst with a link in the comments. Needless to say, I’d absolutey LOVE to see them.

    And once you’re good and ready to shoot them fireworks (that’s if you don’t imbibe enough to miss ’em), click here for a few tips for photographing the fireworks courtesy Photofocus.com:

    Happy 4th!!

    For more of my madness:
    Instagram: @wasimofnazareth
    Twitter: @wasimofnazareth
    Google+: www.Google.com/+WasimMuklashy
    Facebook: www.Facebook.com/WasimOfNazareth
  • How To Expose For Interiors And Exteriors In Architecture Or Real Estate Photography – Part 2 – Post Processing

    How To Expose For Interiors And Exteriors In Architecture Or Real Estate Photography – Part 2 – Post Processing

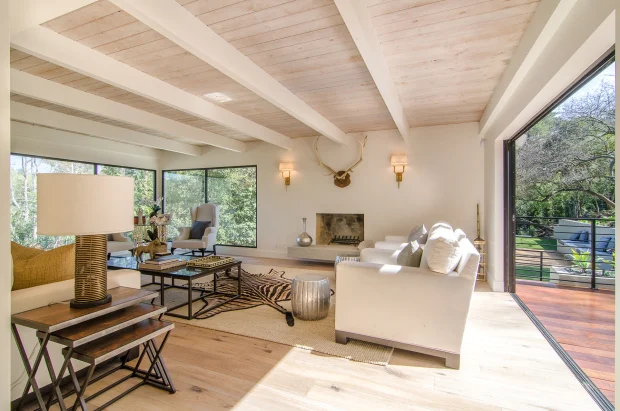
     Wasim Muklashy Photography_Real Estate_ShootingLA_Exposure Sample

    In Part 1, we explained the process of getting the proper exposures on location for architecture and real estate photography. Here in part 2, we explain how to post-process these exposures.

    Now that you have your exposures as described in Part 1, pull them into Adobe Lightroom. Use the first three bracketed exposures, and make any adjustments you see fit, starting with white balance, where ‘Auto’ does a great job these days.

    I’ll then usually pull the highlights down on the overexposed exposure, and sometimes I pull the shadows up in the underexposed frame, but not too much as that can introduce some noise. Be conservative with how much you open your shadows based on your camera and sensor. Now in the fourth exposure, the one in which you used the flash to expose for the outside scene, i’ll usually pull down the highlights just a bit so I can make out the details very well in the outside scene, and then I’ll open up the shadows about 30-50% to reveal a bit of details especially around the edges of the window frame or door frame. Often times if you hit the ‘auto’ tone button in Lightroom’s Develop pane, it’ll take care of a lot of this on its own and you could end up with a solid frame to use.

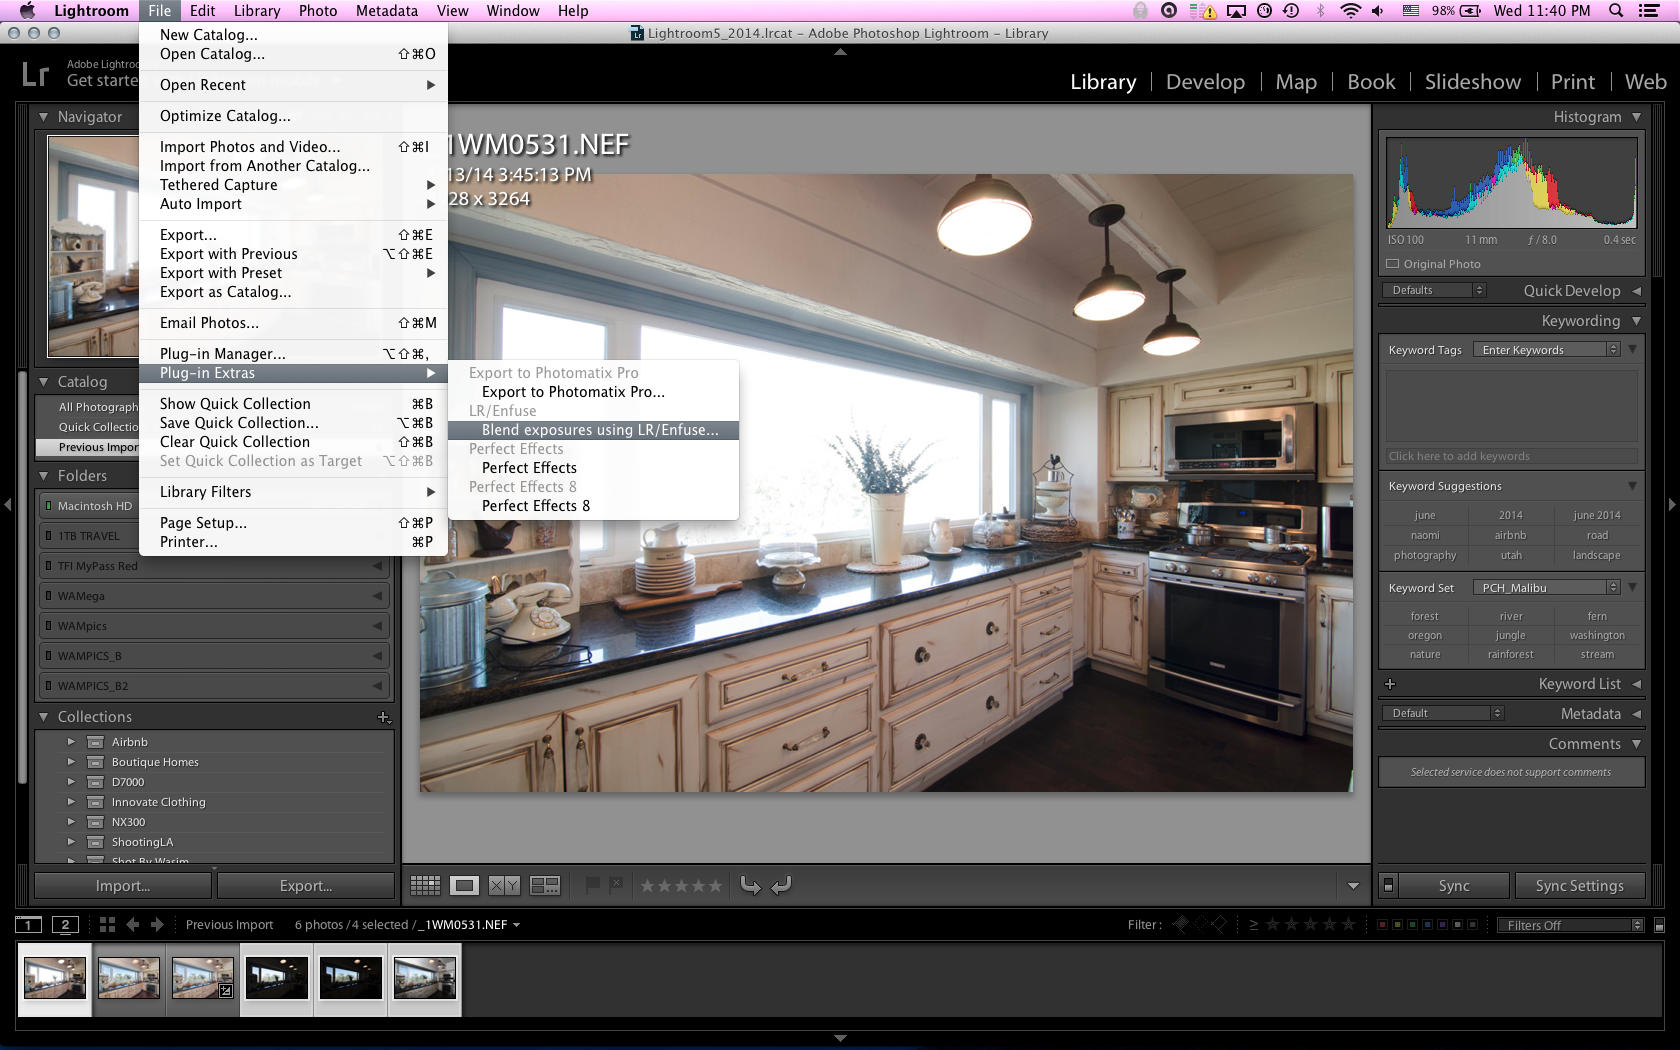
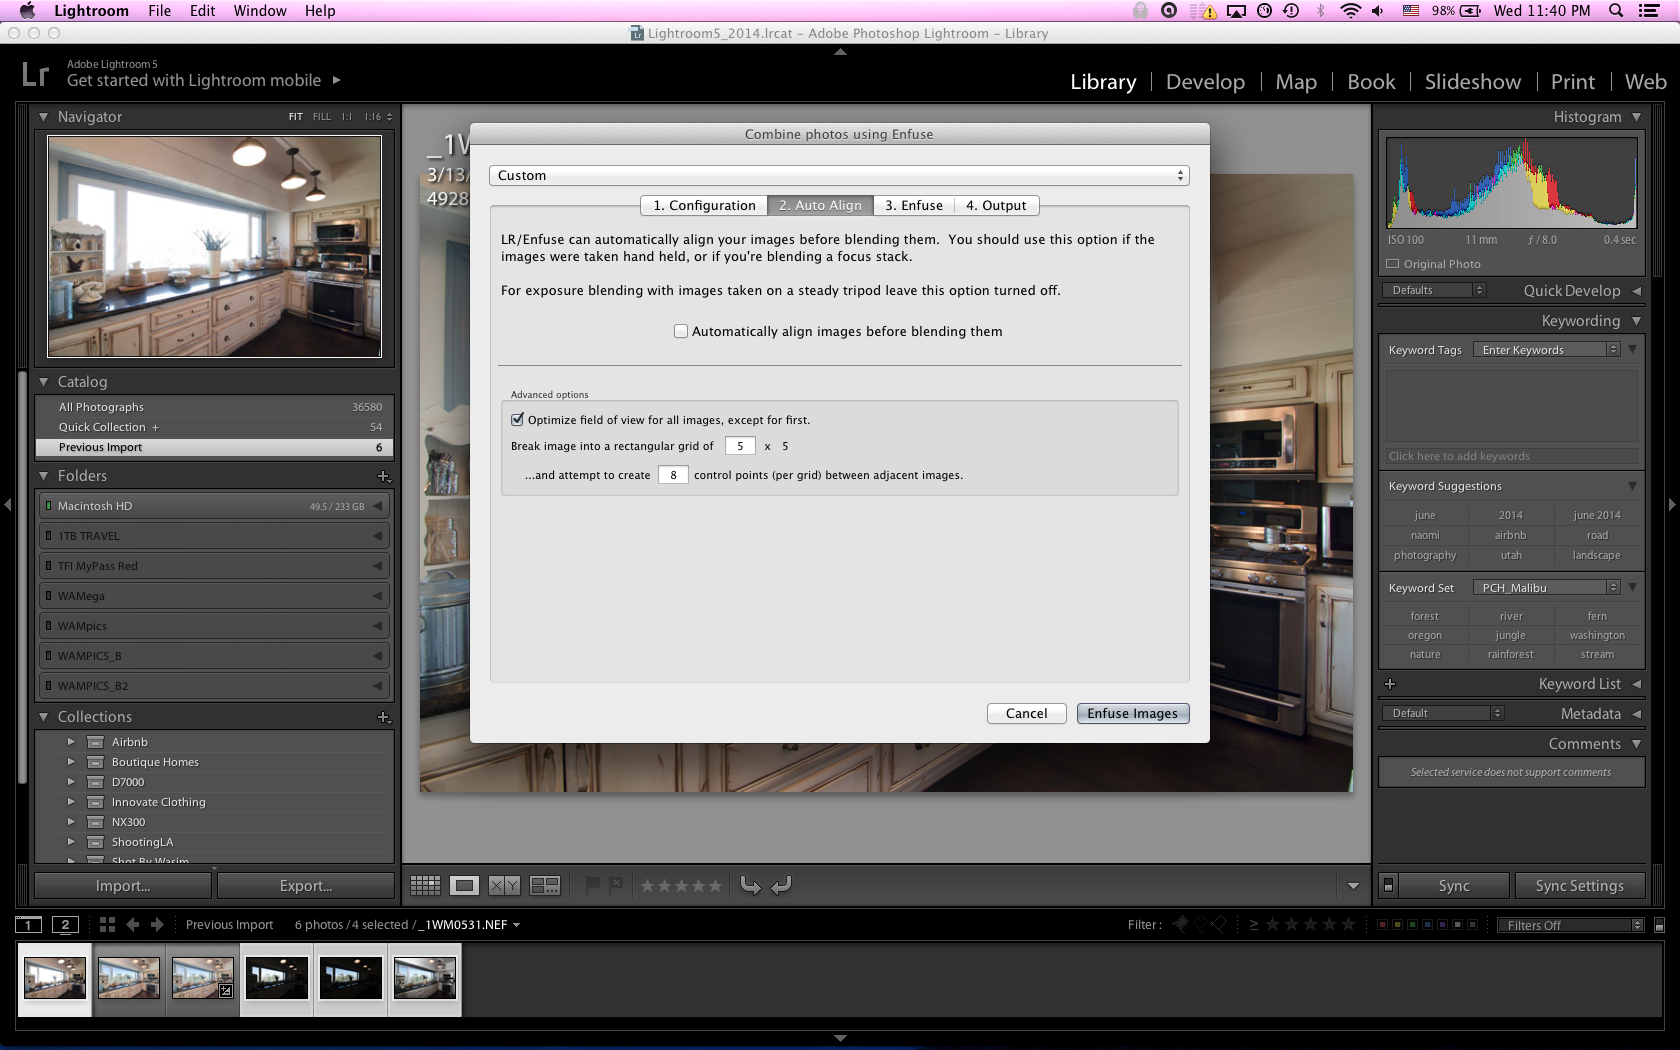
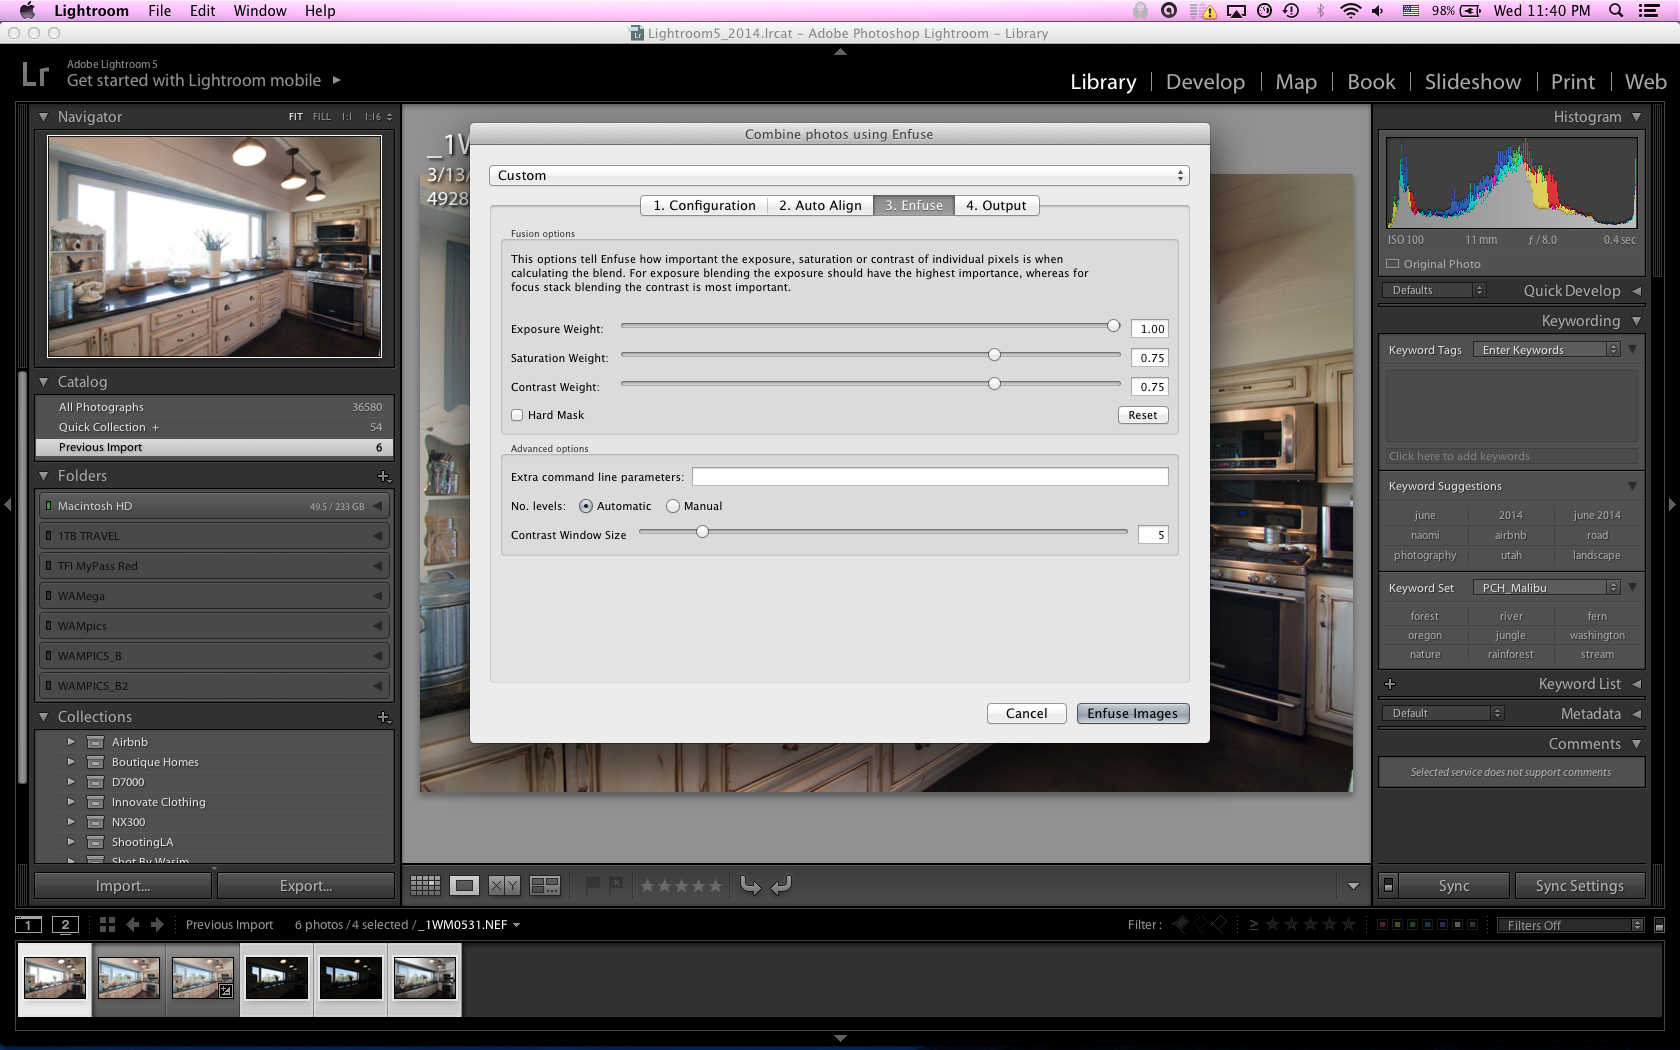
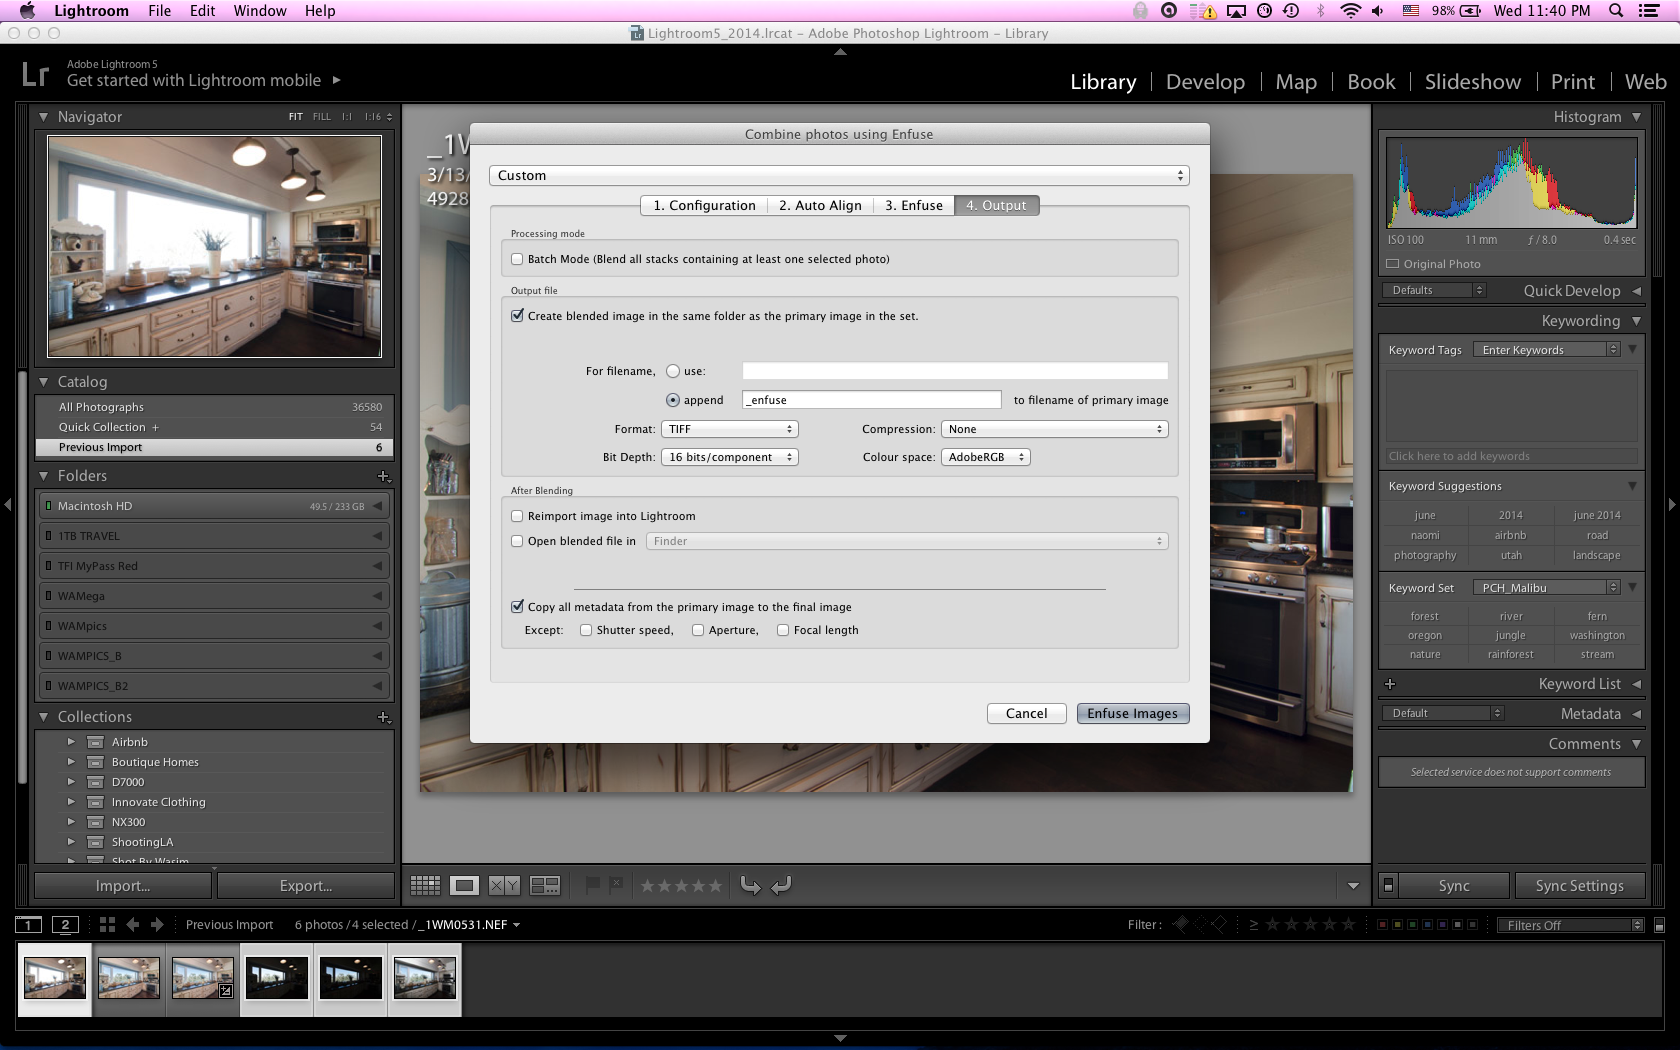
    The next step is to highlight those exposures in Lightroom, and then navigate to ‘File’ menu, to ‘Plug-In Extras’ menu, to ‘Blend exposures using LR/Enfuse’. A dialogue box will pop up. Leave the “1. Configuration” panel the way it is, on the “2. Auto-Align” panel, if you used a tripod, be sure to un-check ‘Automatically align images.’ If you weren’t using a tripod, firstly, shame on you! Secondly, go ahead and click the ‘Automatically align images’ option. 3. The “3. Enfuse” panel is an important one. Using the default settings, the contrast and saturation will not normally work out very well for architecture and real estate photography. I have played with several settings and the ones in this screenshot seem to work best for me. Basically, I set ‘exposure weight’ all the way up to 1, and both ‘saturation weight’ and ‘contrast weight’ are set up to .75. Lastly, in the “4. Output” panel, set where you’d like to file to be saved and other personal settings. I typically save to the same folder as the rest of the images in the current set I’m editing. Makes it easiest to find and know where it exists.

    It’s worth mentioning here that, alternatively to Enfuse, once you’re comfortable and are looking for more control and fully-featured options, feel free to migrate to other HDR programs such as Aurora HDR, Photomatix. However, be aware, they are a bit more advanced and detailed and will take a bit more getting used to.

    Additionally, as of the original date of this writing, Adobe has included an ‘HDR Merge’ feature directly in Lightroom that works extremely well. All you have to do is select the images you’d like to merge, right click, navigate to the ‘Photo Merge’ menu, and then choose ‘HDR.’  Click the ‘Auto Align’ checkbox, you can choose whether or not you’d like the ‘Auto Tone’ checkbox checked (if you check it, you’ll get a good idea of what the balance will look like, but you can get the same effect by choosing ‘auto’ in the develop pane of Lightroom once the exposures are merged), and finally, choose ‘none’ for Deghost Amount. This will result in Lightroom outputting a merged image directly to the same Lightroom project you were working from. 

    If you choose to use Enfuse, here are screenshots of my settings:

     Wasim Muklashy_Real Estate Photography_Enfuse Lightroom_1

     Wasim Muklashy_Real Estate Photography_Enfuse Lightroom_2

     Wasim Muklashy_Real Estate Photography_Enfuse Lightroom_3

     Wasim Muklashy_Real Estate Photography_Enfuse Lightroom_4

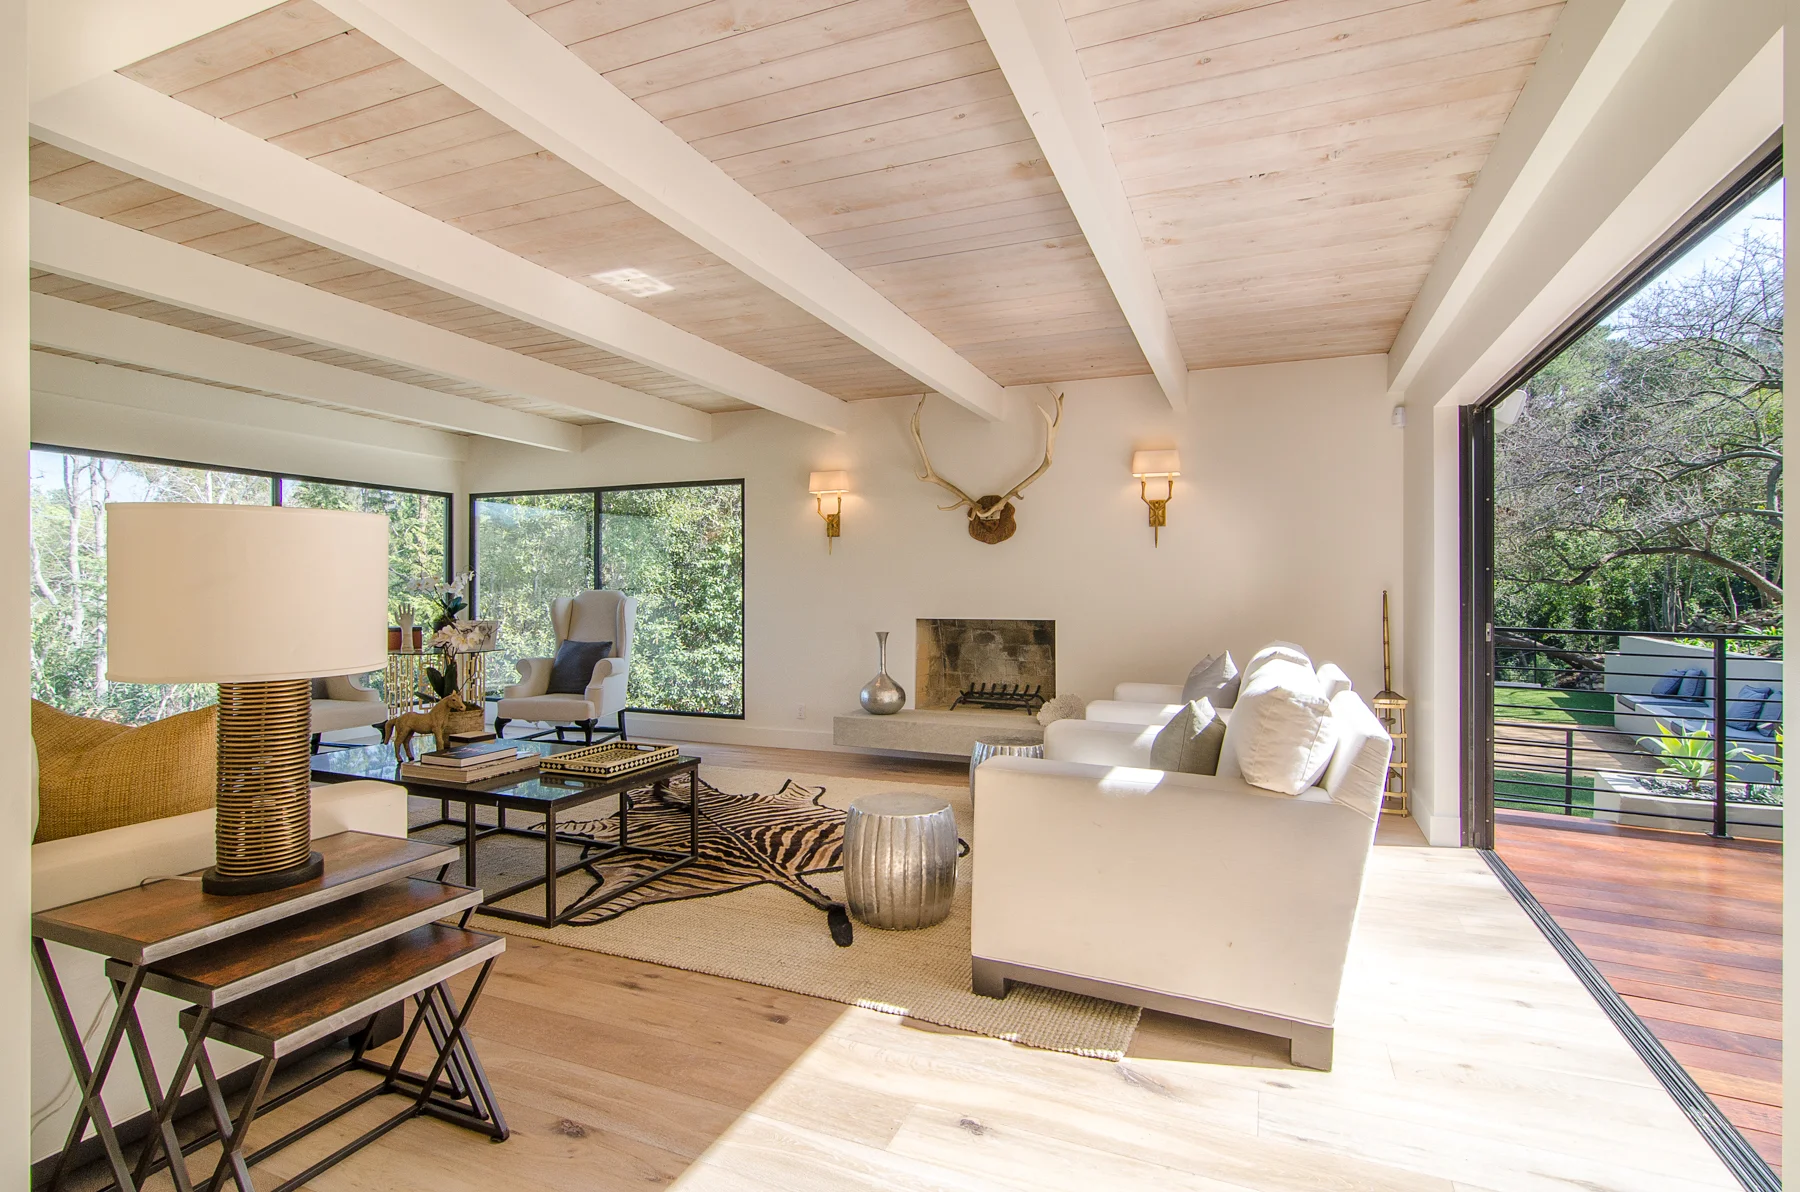
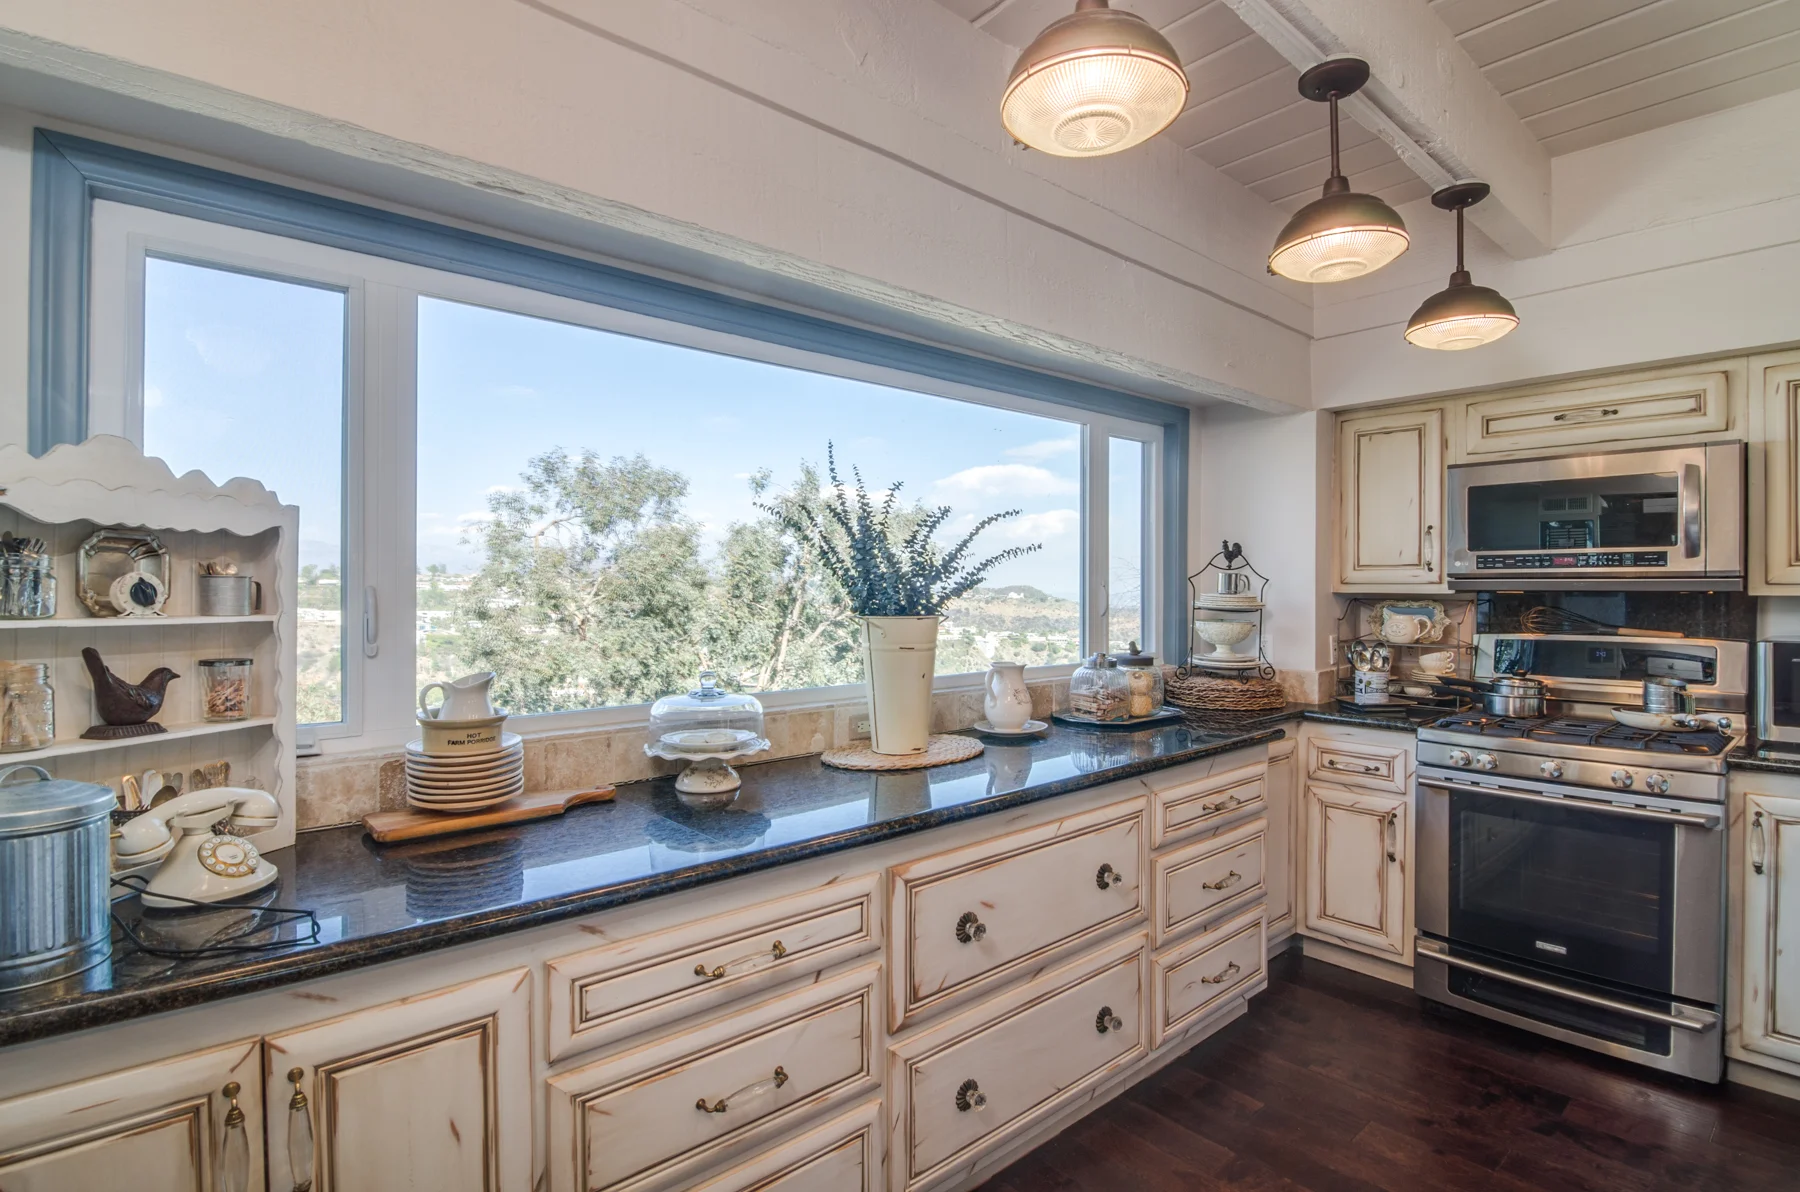
    Now, once you have that file back into Lightroom, if done properly, what you’ll see is an image that has taken all the best exposed parts from the various exposures and fused them into one. This is the file that you can now process fully in Lightroom or Photoshop. I’ll usually adjust white balance, perhaps add some more contrast and clarity. I’ll drop highlights a bit until I feel the exterior scene is well balanced with the interior exposure and then, finally, I’ll add some sharpening. Here’s the results of that:

     Wasim Muklashy_Real Estate Photography_Enfuse Lightroom_Enfused

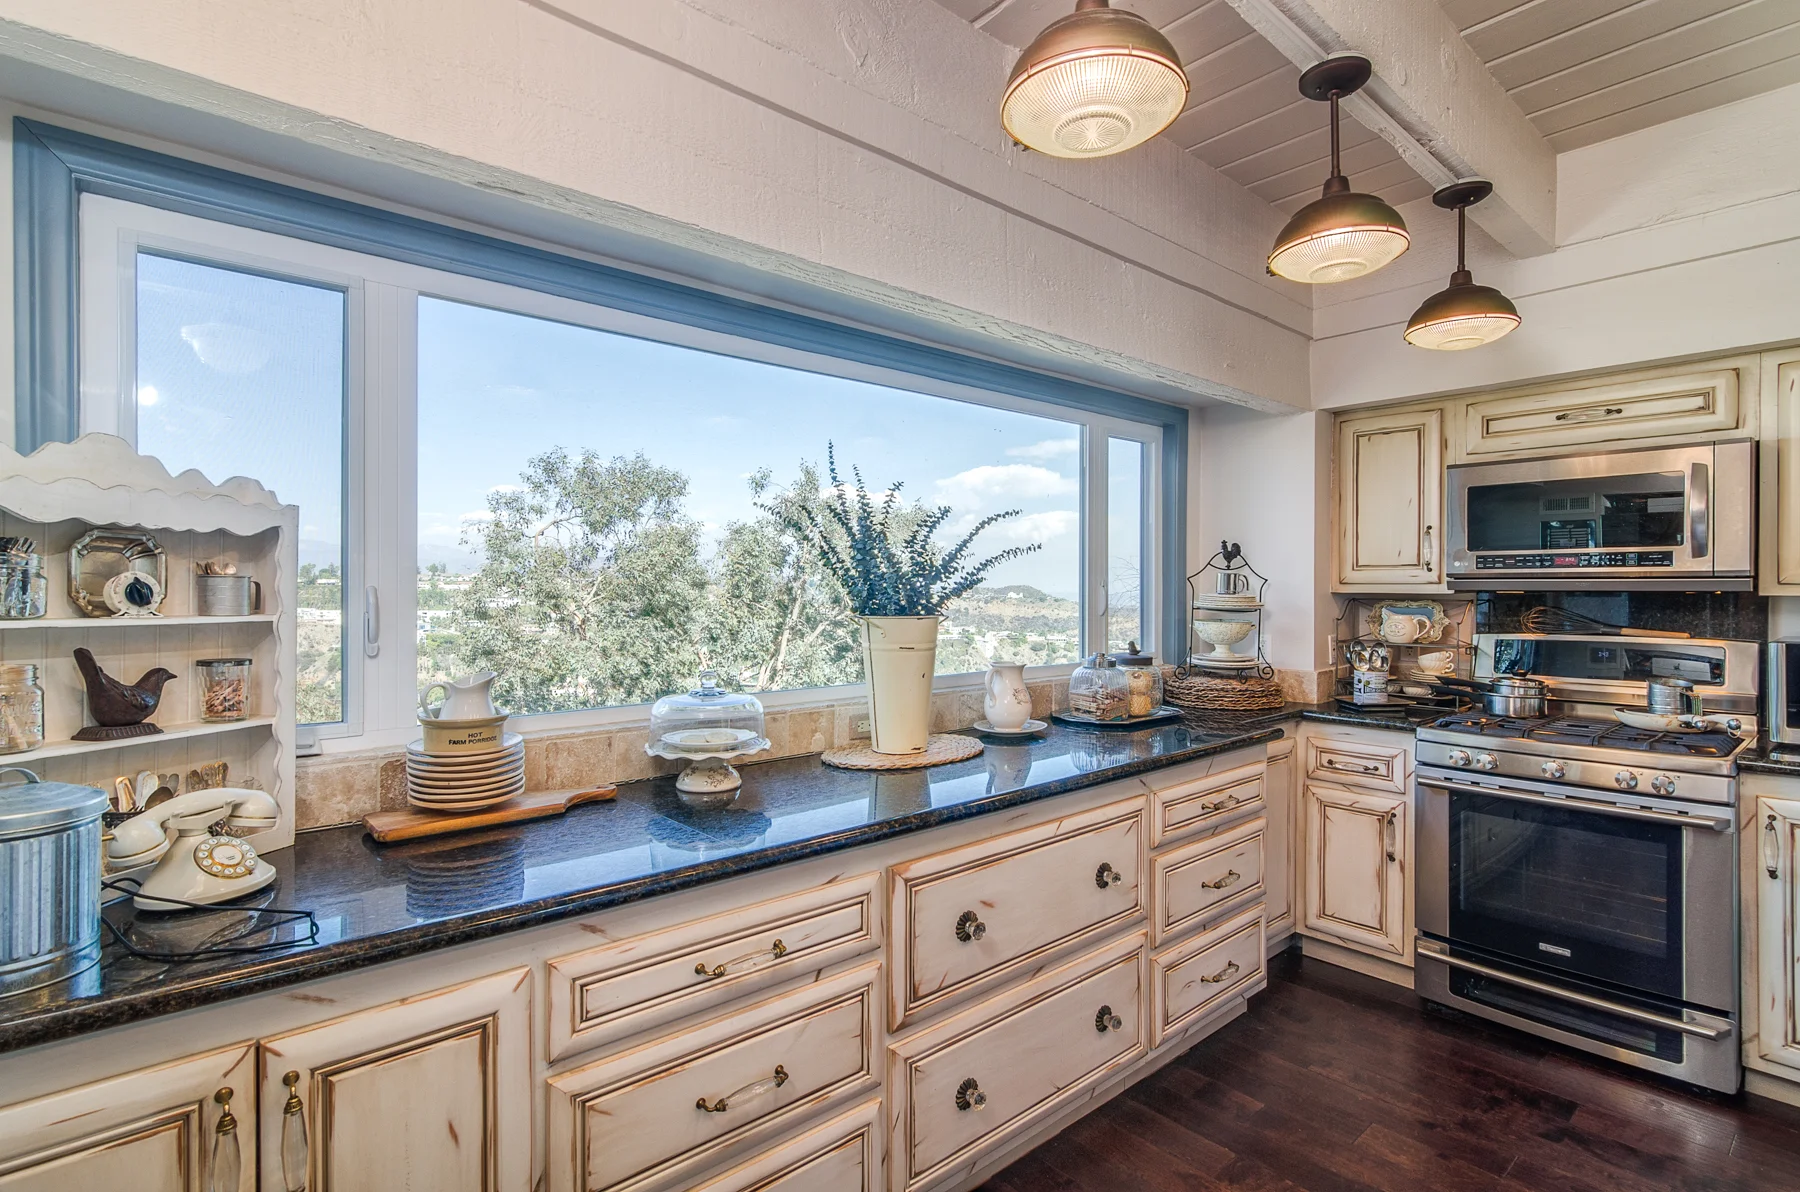
    If you want to go a bit further, there’s a wonderful plugin by DXO Software called Viveza. The beauty of this plugin is that it helps pull out a lot of detail and structure from the image, especially from a 3 exposure tif file, before tip-toeing the line of surreal HDR that you wouldn’t be able to do otherwise. If I want to go even further, I’ll often use the high-pass filter solution to add a tad extra controlled sharpening. That will turn the above enfused image into this:

     Wasim Muklashy_Real Estate Photography_Enfuse Lightroom_Final

    Well, that’s it. I hope this helped you achieve better results with your interior and real estate photography. Once I got this process down, it certainly transformed my approach and results exponentially.

    If you’re interested, here are a few more entries that can also help you when shooting real estate and properties:

    7 Tips for Shooting Real Estate Photography

    How To Minimize Reflections In Interior Photography

    5 Tips For Shooting Commercial Real Estate Photography 

    And if you’re in need of real estate photography services, whether commercial or residential, please feel free to contact me or check out my Property Photography website.

    And if you’re just getting started here’s a great Beginner’s Guide to Architectural Photography provided by Pixpa.

    For more of my madness: Instagram: @wasimofnazareth Twitter: @wasimofnazareth Google+: www.Google.com/+WasimMuklashy Facebook: www.Facebook.com/WasimOfNazareth
  • How To Expose For Interiors And Exteriors In Architecture Or Real Estate Photography – Part 1 – On Location

    How To Expose For Interiors And Exteriors In Architecture Or Real Estate Photography – Part 1 – On Location

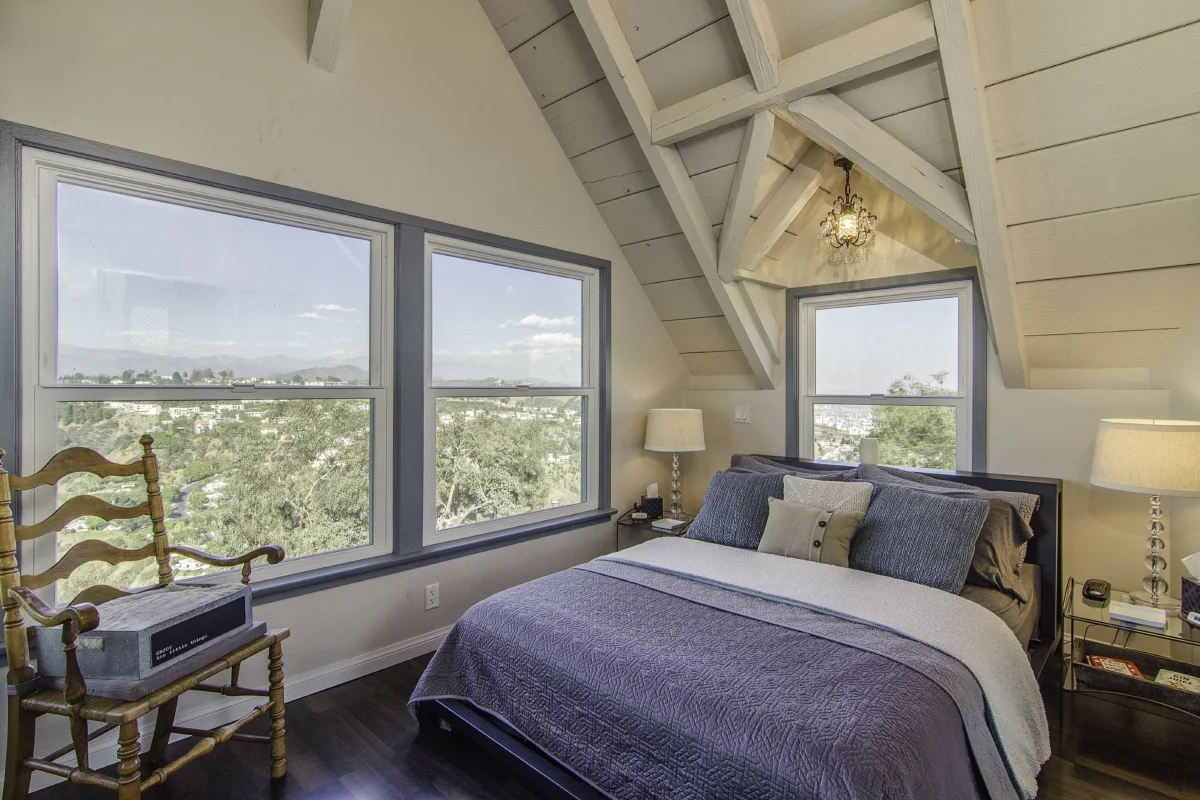
     Wasim Muklashy Real Estate Photography_Hollywood_CA

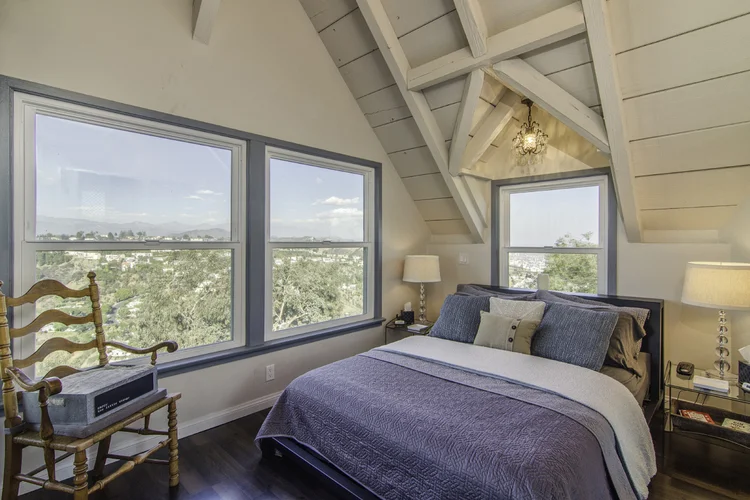
    If you’ve shot architecture or real estate photography, you already know the rub…exposing for interiors as well as exteriors! It’s a finicky art all in itself. Starting when I lived in Los Angeles, sandwiched in my little hippie canyon between Malibu, Pacific Palisades, and the Hollywood Hills, and throughout my time after moving to the Pacific Northwest, I had the opportunity to shoot some very high-end real estate for some very high-end and particular clients, and through that process, I’ve learned some incredibly helpful methods to help pull off results that even surprised me! While it would look incredibly unnatural to have both exposed for perfectly, especially when shooting a scene where big windows are involved on a bright day with a to-die-for view in which blown out windows are just NOT an option, there are a few ways to do it that will please both yourself and the client. Most importantly, they can provide a very accurate and attractive representation of the space.

    HDR is certainly one of those methods, but HDR in its traditional sense more often than not results in very unnatural surreal images. While they can sometimes (and I emphasize ‘sometimes!’) look pretty cool, they’re more often than not neither an accurate representation of what the scene actually looked like, nor do they represent any sort of (sober) reality anywhere on earth (and if they do…please tell me where…I’m moving!).

    My preferred method was taught to me by Michael McNamara of ShootingLA.com, a client I did some occasional work for in Los Angeles and this method has changed the way I approach real estate photography and has made my job a LOT easier. In addition to your camera and obligatory tripod (a MUST), here are the things you’ll need:

    1. A decent off-camera flash (with an optional bounce-card). Does NOT need to be name brand. I use the Yongnuo speed-lights and they’re MORE than capable and a third the price of name-brands. If you really want to get crazy, you can use a Cheetah Light or equivalent, such as the Cowboy Studio or Neewer versions of the same speedlights.

    2. Wireless flash triggers such as the Pocket Wizards or what I use are Yongnuo RF-603 flash triggers. A pair cost me 30 dollars and they do just as good a job.

    3. Adobe Lightroom software

    4. Enfuse Plugin by Photographers Toolbox (donationware) or Photomatix Pro by HDRSoft ($99) or Skylum’s Aurora HDR, especially their updated 2019 version. While I used to use Enfuse, since the original publication of this article, I have begun using Aurora HDR as their tools have become infinitely better. Enfuse is certainly more economical and absolutely gets the job done, but Aurora HDR and Photomatix are much more detailed programs that give you more control over certain parameters that you might want to consider after you get the process down and are looking to advance to the next level. Also, as of the original date of this writing, Adobe has included a very very good HDR Merge feature directly into Lightroom, which is an excellent option as well.

    Now when you’re in the space, find your shot, frame your shot, lock the camera on the tripod, and set it at an aperture you’re happy with for the size of the space to get everything in focus, typically between f7.1 and f11. Also, make sure you shoot in RAW to get the most latitude out of your data. Now, either set your camera to bracket 3 shots as if shooting HDR, or if your camera doesn’t have an automatic bracket feature, you can fire the brackets yourself – one exposure centered at 0, one exposure at a stop underexposed and one exposure a stop overexposed using exposure compensation. I typical expose for the mid-tone in the scene so as to preserve as many details as possible. And if the window is blown out, don’t worry, that’s where the fun part comes into play.

    Image asset

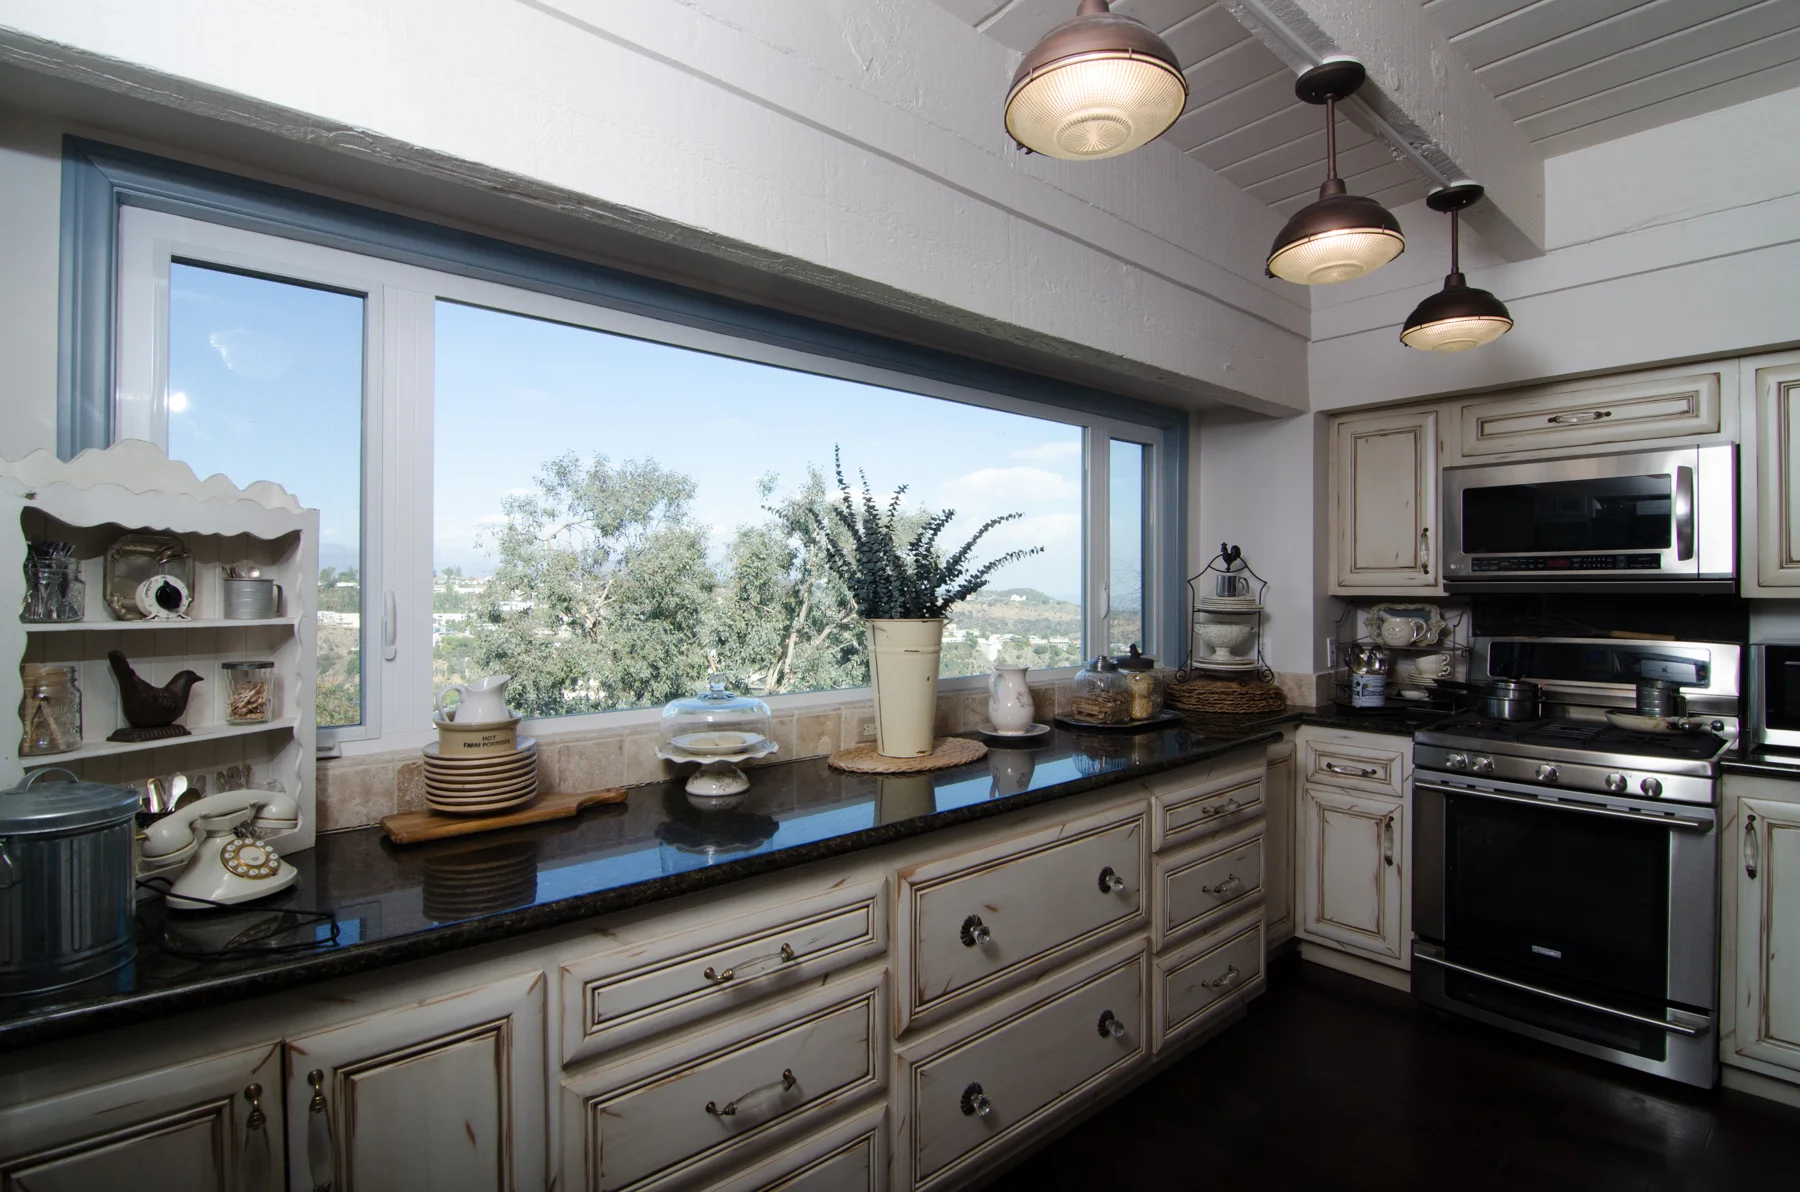
    Once you have your base exposure and the two bracketed exposures, turn off bracketing, and turn on your flash and the wireless flash triggers. Set your exposure centered at 0 and move your focus/exposure point to expose for the brightest part in the scene (typically the window). Increase your ISO to somewhere between 400-600 in order to boost the sensor’s light sensitivity to absorb as much of the flash light as possible. Now fire an exposure using the flash as a bounce flash aimed off the wall either behind the camera or the ceiling above the camera if it’s white or a light color that will bounce the flash. If there is no light surface to bounce the flash, use the bounce card or a white piece of paper. If you did it right, what you should see now that you didn’t see in the brackets is the window frame or door frame detail, as well as the scene outside the window well exposed. If there are shadowed areas in the exposure, don’t worry, you’ve already exposed for those areas in the brackets. All you’re looking for here is a well exposed exterior scene outside the door or window with little to no light leak or fringing on the door or window frames. Sometimes, depending on the scope and size of the window or door and intensity of light, you might have to shoot that exposure at a stop underexposed. What you’re looking for is a result similar to following image:

     Wasim_Muklashy_Photography_Architecture_Flash_Exposure

    For more advanced shooters and once you have this process down, you can even shoot multiple bounce-flashed exposures to expose for different parts of the room or space.

    Next step is to post-process these exposures. I cover that process in How To Expose For Interiors And Exteriors In Architecture Or Real Estate Photography – Part 2 – Post Processing. In the meantime, go fire off a few images using the methods above so you can follow along with the post-processing techniques.

    And if you’re in need of real estate photography services, whether commercial or residential, please feel free to contact me or check out my Property Photography website.

    For more of my madness: Instagram: @wasimofnazareth Twitter: @wasimofnazareth Google+: www.Google.com/+WasimMuklashy Facebook: www.Facebook.com/WasimOfNazareth
  • 6 Travel Photography Lessons Learned On My Recent Trip To The Pacific Northwest

    6 Travel Photography Lessons Learned On My Recent Trip To The Pacific Northwest

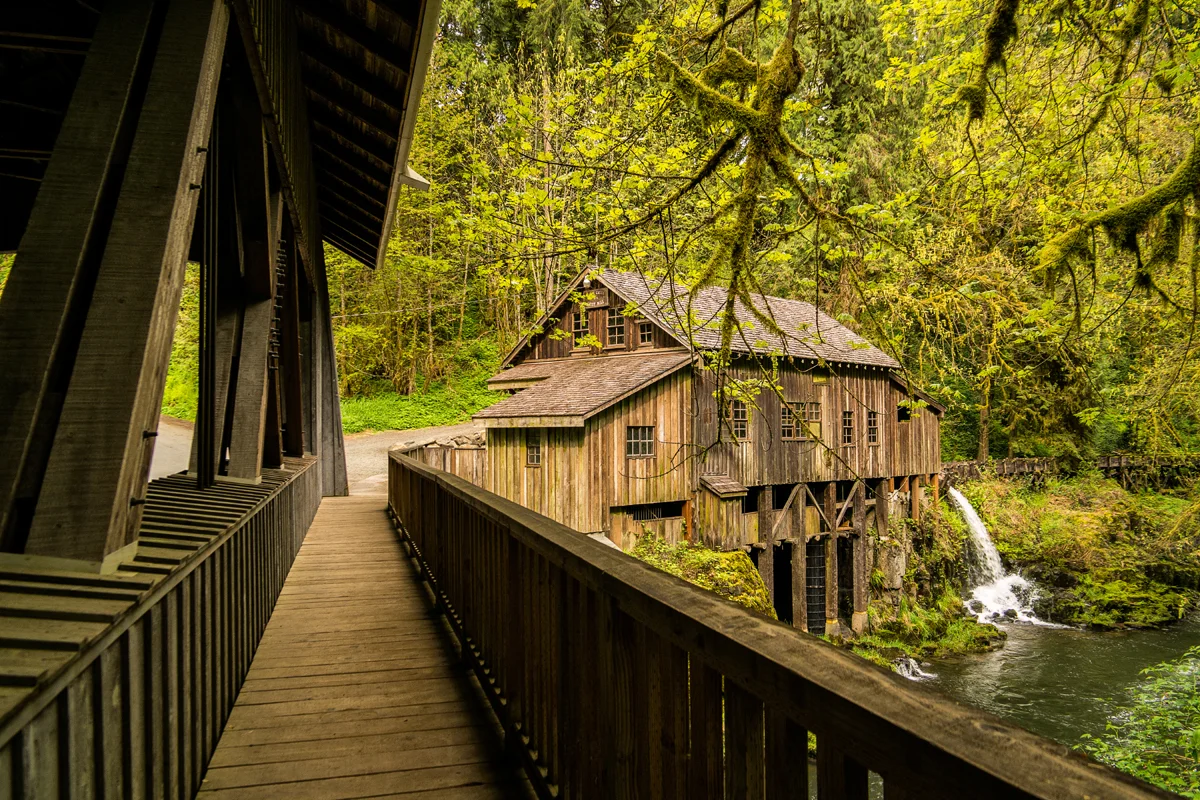
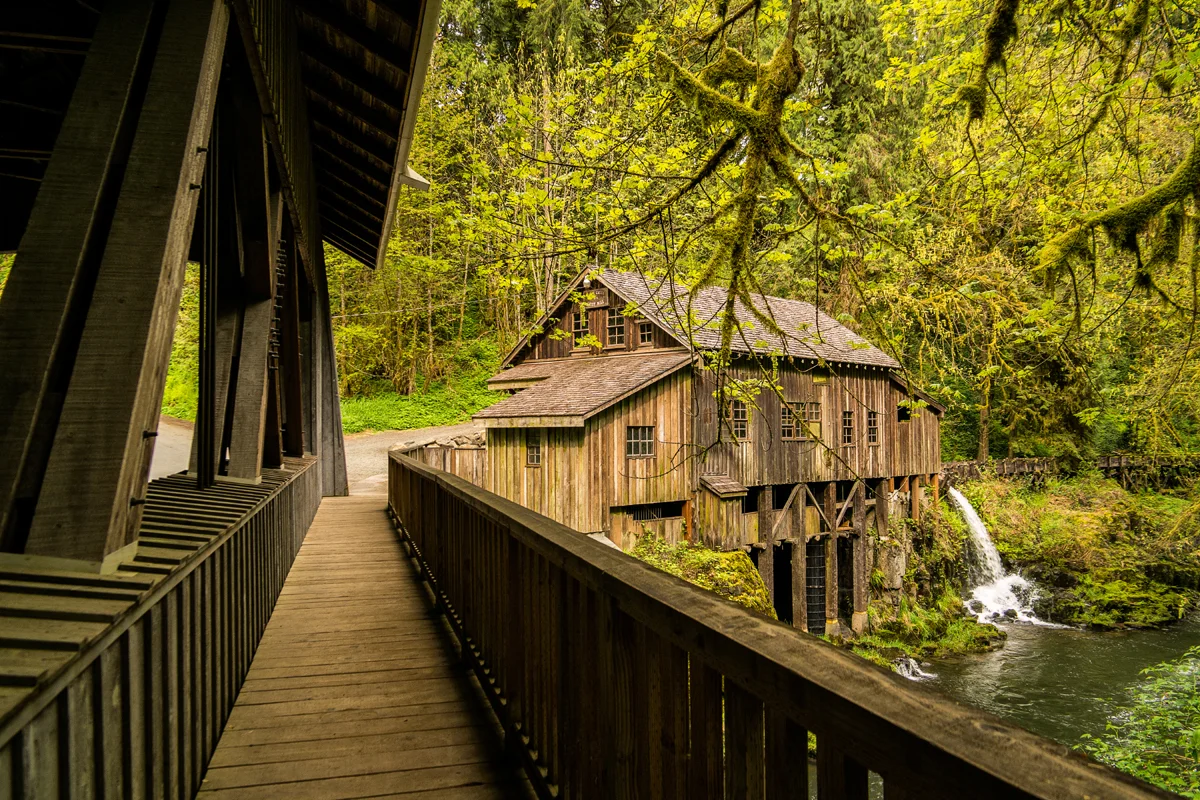
    Wasim Muklashy Travel Photography_Pacific Northwest_Cedar Creek Grist Mill_Washington

    So as many of you know, I embarked on a nature and travel photography trip this past Spring to the Pacific Northwest, and I’ve shared all those pictures here and all my social outlets. This so happened to be my first photo trip in which I left the DSLR behind and employed mirrorless cameras exclusively, namely, the Samsung NX30. While this post will forgo all the reasons behind that (click here if you want to see those posts of that journey), now that the dust has settled and some time has passed, I’ve been able to reflect a bit on the incredible experience, which has proven to be a personal milestone in many ways in my photographic journey. So I figured I’d take this opportunity to share with you a few of the lessons I learned on that trip:

    1. Make A List – It always seems like a good idea to make a list of the shots and images you’d like to come back with. When you’re planning for a trip, especially if it’s somewhere you’ve never been, it would do you good to do a bit of research, whether you Google the location, or visit sites like 500px and Google Plus to search for images from that location. It’ll give you a great idea of what to expect, what to look for, how the weather can alter the look of the images, what you like, what you don’t.

    2. Throw That List Out – The main reason for me making that list was basically to get it out of my system. It’s almost like pre-visualizing a conversation with someone – it’s impossible, and more often than not, it doesn’t go at ALL the way you had it in your head. It’s great to have the ideas and a foundation in your head to work from, but once you’re on location, your eye is going to dart around and see things you never planned for. And this is a good thing. I mean, do you really want to return with the same images you already saw all over those sites? Really?

    3. Work It – Never EVER settle on the first shot or angle. In other words, yes, trust your eye in the sense that something made you stop and look. Something was behind whatever it was that caught your attention. And sure, stop, set up, take the shot. Indulge. But no joke, every time I found myself in front of something that caught my attention for whatever reason, it was NEVER the first shot that I took that ended up being my favorite. I ducked, dodged, leaned in, got on the ground, climbed a tree, switched positions, got behind bushes, wrestled with spider webs, balanced on an unbalanced rock, everything I could to make whatever it was that caught my eye even more attention grabbing. Sometimes you don’t have the luxury of time on your side, but in most cases, if you can find time to snap one shot, you can usually find time to try at least try 2 or 3 different angles or approaches. If you’re with people that get annoyed by your practicing your ‘art,’ surprise them later with a beer at dinner. You’ll see how quickly they get over it.

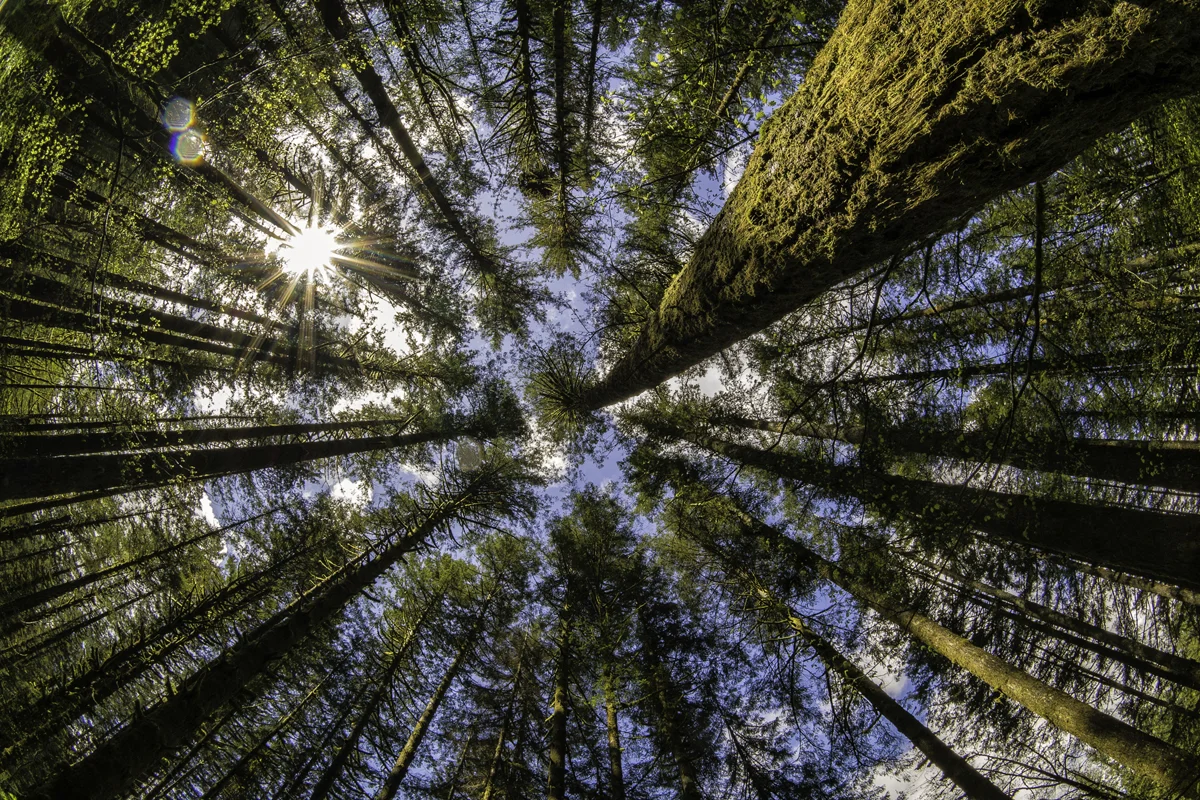
    Wasim Muklashy Travel Photography_Pacific Northwest_Washington_Tree Canopy

    4. Marinate – Let the images come to you. Just because I’m somewhere with a camera does not mean I need to make a picture. As a matter of fact, it was when I just sat back and soaked in my environments that I was truly able to get the best feel for the location we were in. Sure, I’ll usually spend the first few minutes antsier than a flock of fleas, but once that part passes, you almost get into a meditative, relaxed state in which your mind goes out of its way to tell you ‘it’s ok.’ And you can’t help but agree. It is OK. The tree canopy above ended up being one of my favorite images from the entire trip and this wouldn’t have happened if I didn’t take a break, put down my camera, and take a mini-catnap on a picnic bench in the middle of the forest.

    5. Have Fun! – Don’t forget why you’re doing this to begin with – fun. Don’t lose sight of that. You’ll get caught up in it and at times frustration will set in and it’ll feel like the world revolves around that very shot or not getting it right or why can’t I get this? Well, it doesn’t. The world truly doesn’t give a hot nor a cold damn. It’s just you. Only you. No one else but you. After all, no one, other than yourself, even knows that image doesn’t exist yet because, well, it doesn’t! So you’re literally stressing out over nothing. Literally. Stop, breath, meditate on the mantra ‘have fun’ for a few minutes. After all, who the hell wants to work?

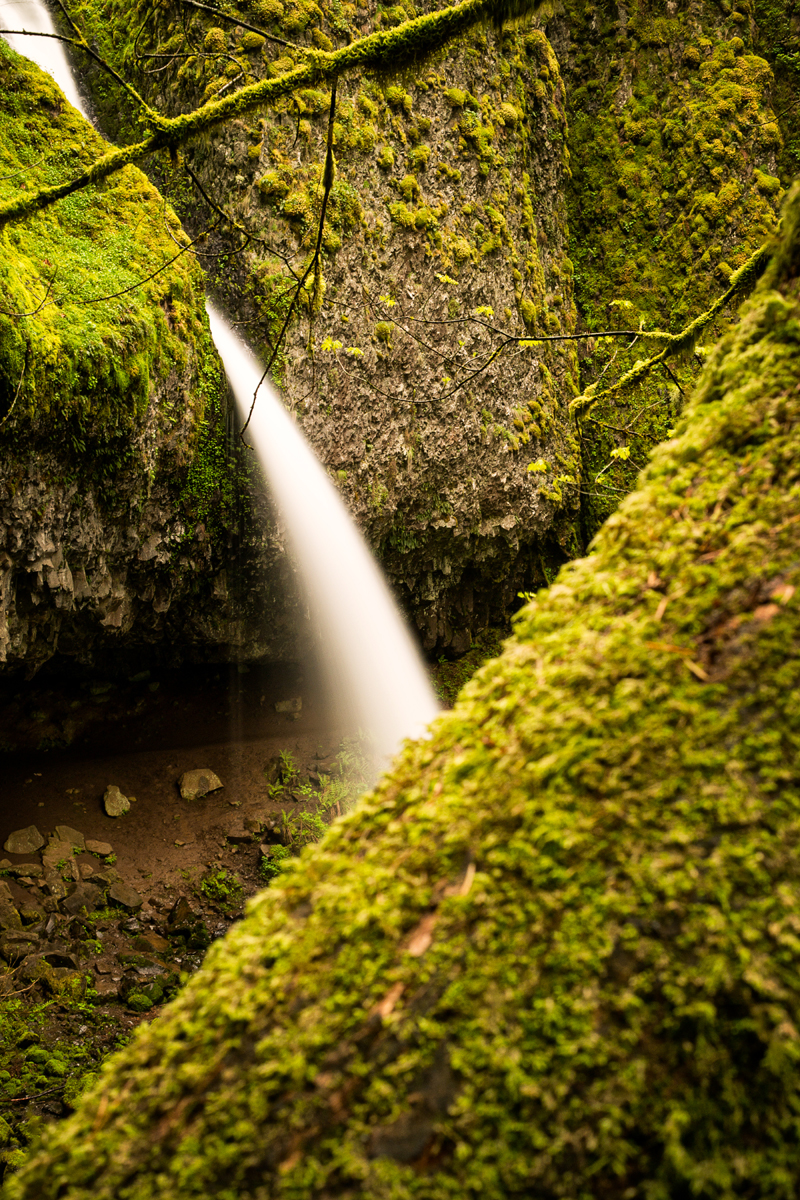
    Wasim Muklashy Travel Photography_Pacific Northwest_Ponytail Falls_Washington

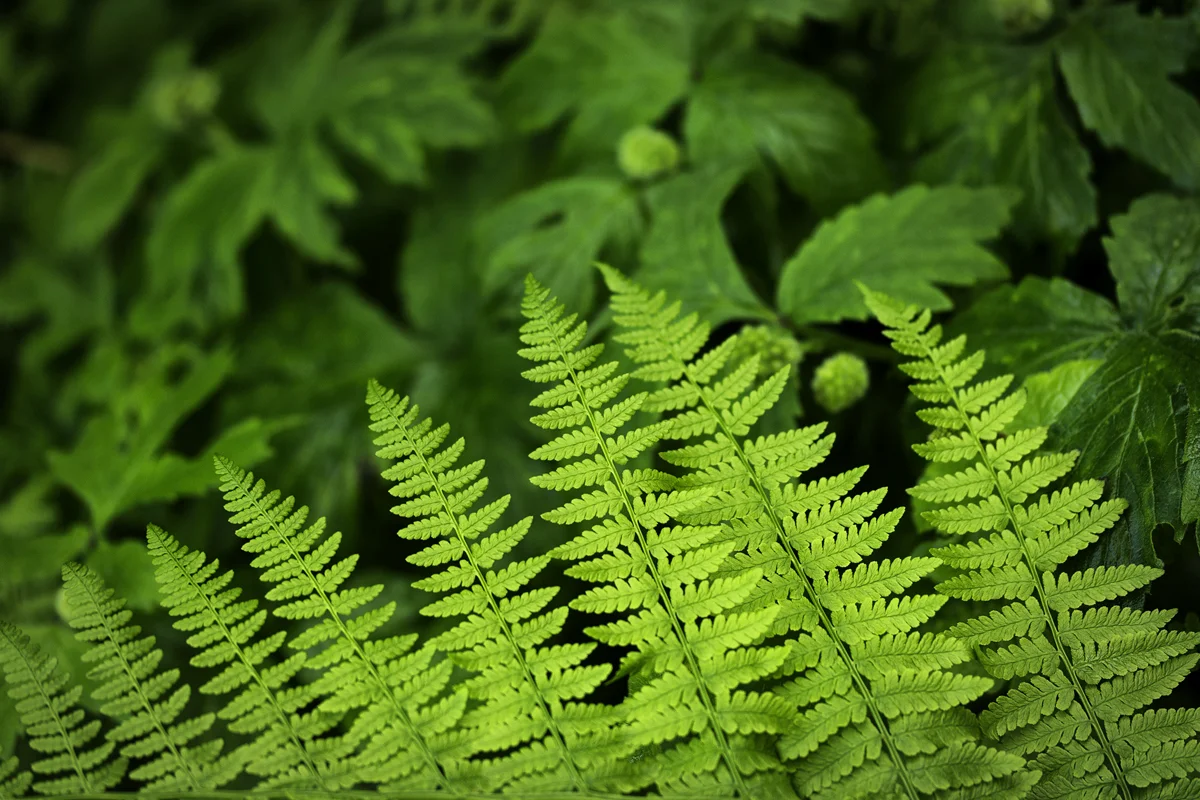
    Wasim Muklashy Travel Photography_Pacific Northwest_Washington_Fern

    6. Details! Don’t forget the details! It’s easy to get overwhelmed by big scenes and subjects, especially if it’s your first time around them. Instinct seems to dictate to try to capture on your sensor as much of that scenes as possible. I want the river with the trees with the mountains with the rock with the acorns with the elk with the other tree and oh…oh…oh…that barn! Oh that barn!! Well, that’s all fine and dandy, and, as expressed in tip #3, shoot it! But don’t settle on that. Now that you got that off your shoulders, get creative. Move in, focus just on the details. If I got that shot as described above, chances are high that once you (or someone else) viewed the image, you wouldn’t know where to rest your eyes. If you just get the elk next to the barn, or the river with the tree, or the hinges on the barn door, the focal points become much clearer, providing a much more pleasant, and imagination-inducing viewing experience. A great example is the fern in the image above. It was surrounded by a picture perfect waterfall and a cave and a cliff and gorgeous moss-covered trees, but once it came down to it, it was the fern that really had my attention, so once I focused solely on that, I was happy with the shot. The rest of it came in a different shot, the one on the right, which, again, focused on the detail of the moss covered tree and the waterfall behind it.

    So I hope you were able to get something out of this. It all might seem like common sense, but once you’re out in the field, especially in unfamiliar locations, every single one of your six senses (yup, six, I’m one of those guys) hits overdrive and all common sense is typically thrown out the window bit by byte. But if you just focus on these six things, Make A List, Throw That List Out, Work It, Relax, Have Fun, and Details, you’re bound to come back with several keepers that you’ll be proud to share.

    Feel free to share your experiences below and what works for you and what doesn’t.

    For more of my madness:
    Instagram: @wasimofnazareth
    Twitter: @wasimofnazareth
    Google+: www.Google.com/+WasimMuklashy
    Facebook: www.Facebook.com/WasimOfNazareth
  • Why I Switched To Back Button Focus And Haven’t Looked Back

    Why I Switched To Back Button Focus And Haven’t Looked Back

    SAMSUNG CSC

    It didn’t make sense at first. Use the AE button on the back of the camera for focusing? How is that supposed to be easier and/or better than the traditional method of pressing the shutter halfway down? I mean, that’s what I know, that’s what I’ve grown to know, that’s what’s normal! Is this an elitist purist thing? Or is this real?
    About a year ago, I decided to truly dig deeper into the idea behind back button focus and, well, like a classic case of neuro-plasticity, over the next 90 days, I had inadvertently rewired my brain to wonder the exact opposite of what I was wondering when I started this little experiment…how did I go this long without it?

    The idea is this: Back button focusing basically frees up the shutter button to be, well, a shutter button. Once you wrap your head around that novel idea, the fun part begins. This is the stage when your brain begins the process of peeling the two functions apart from synonymity, realizing that once you have separate control of focusing and firing the shutter, everything becomes clearer (pun intended…sort of).

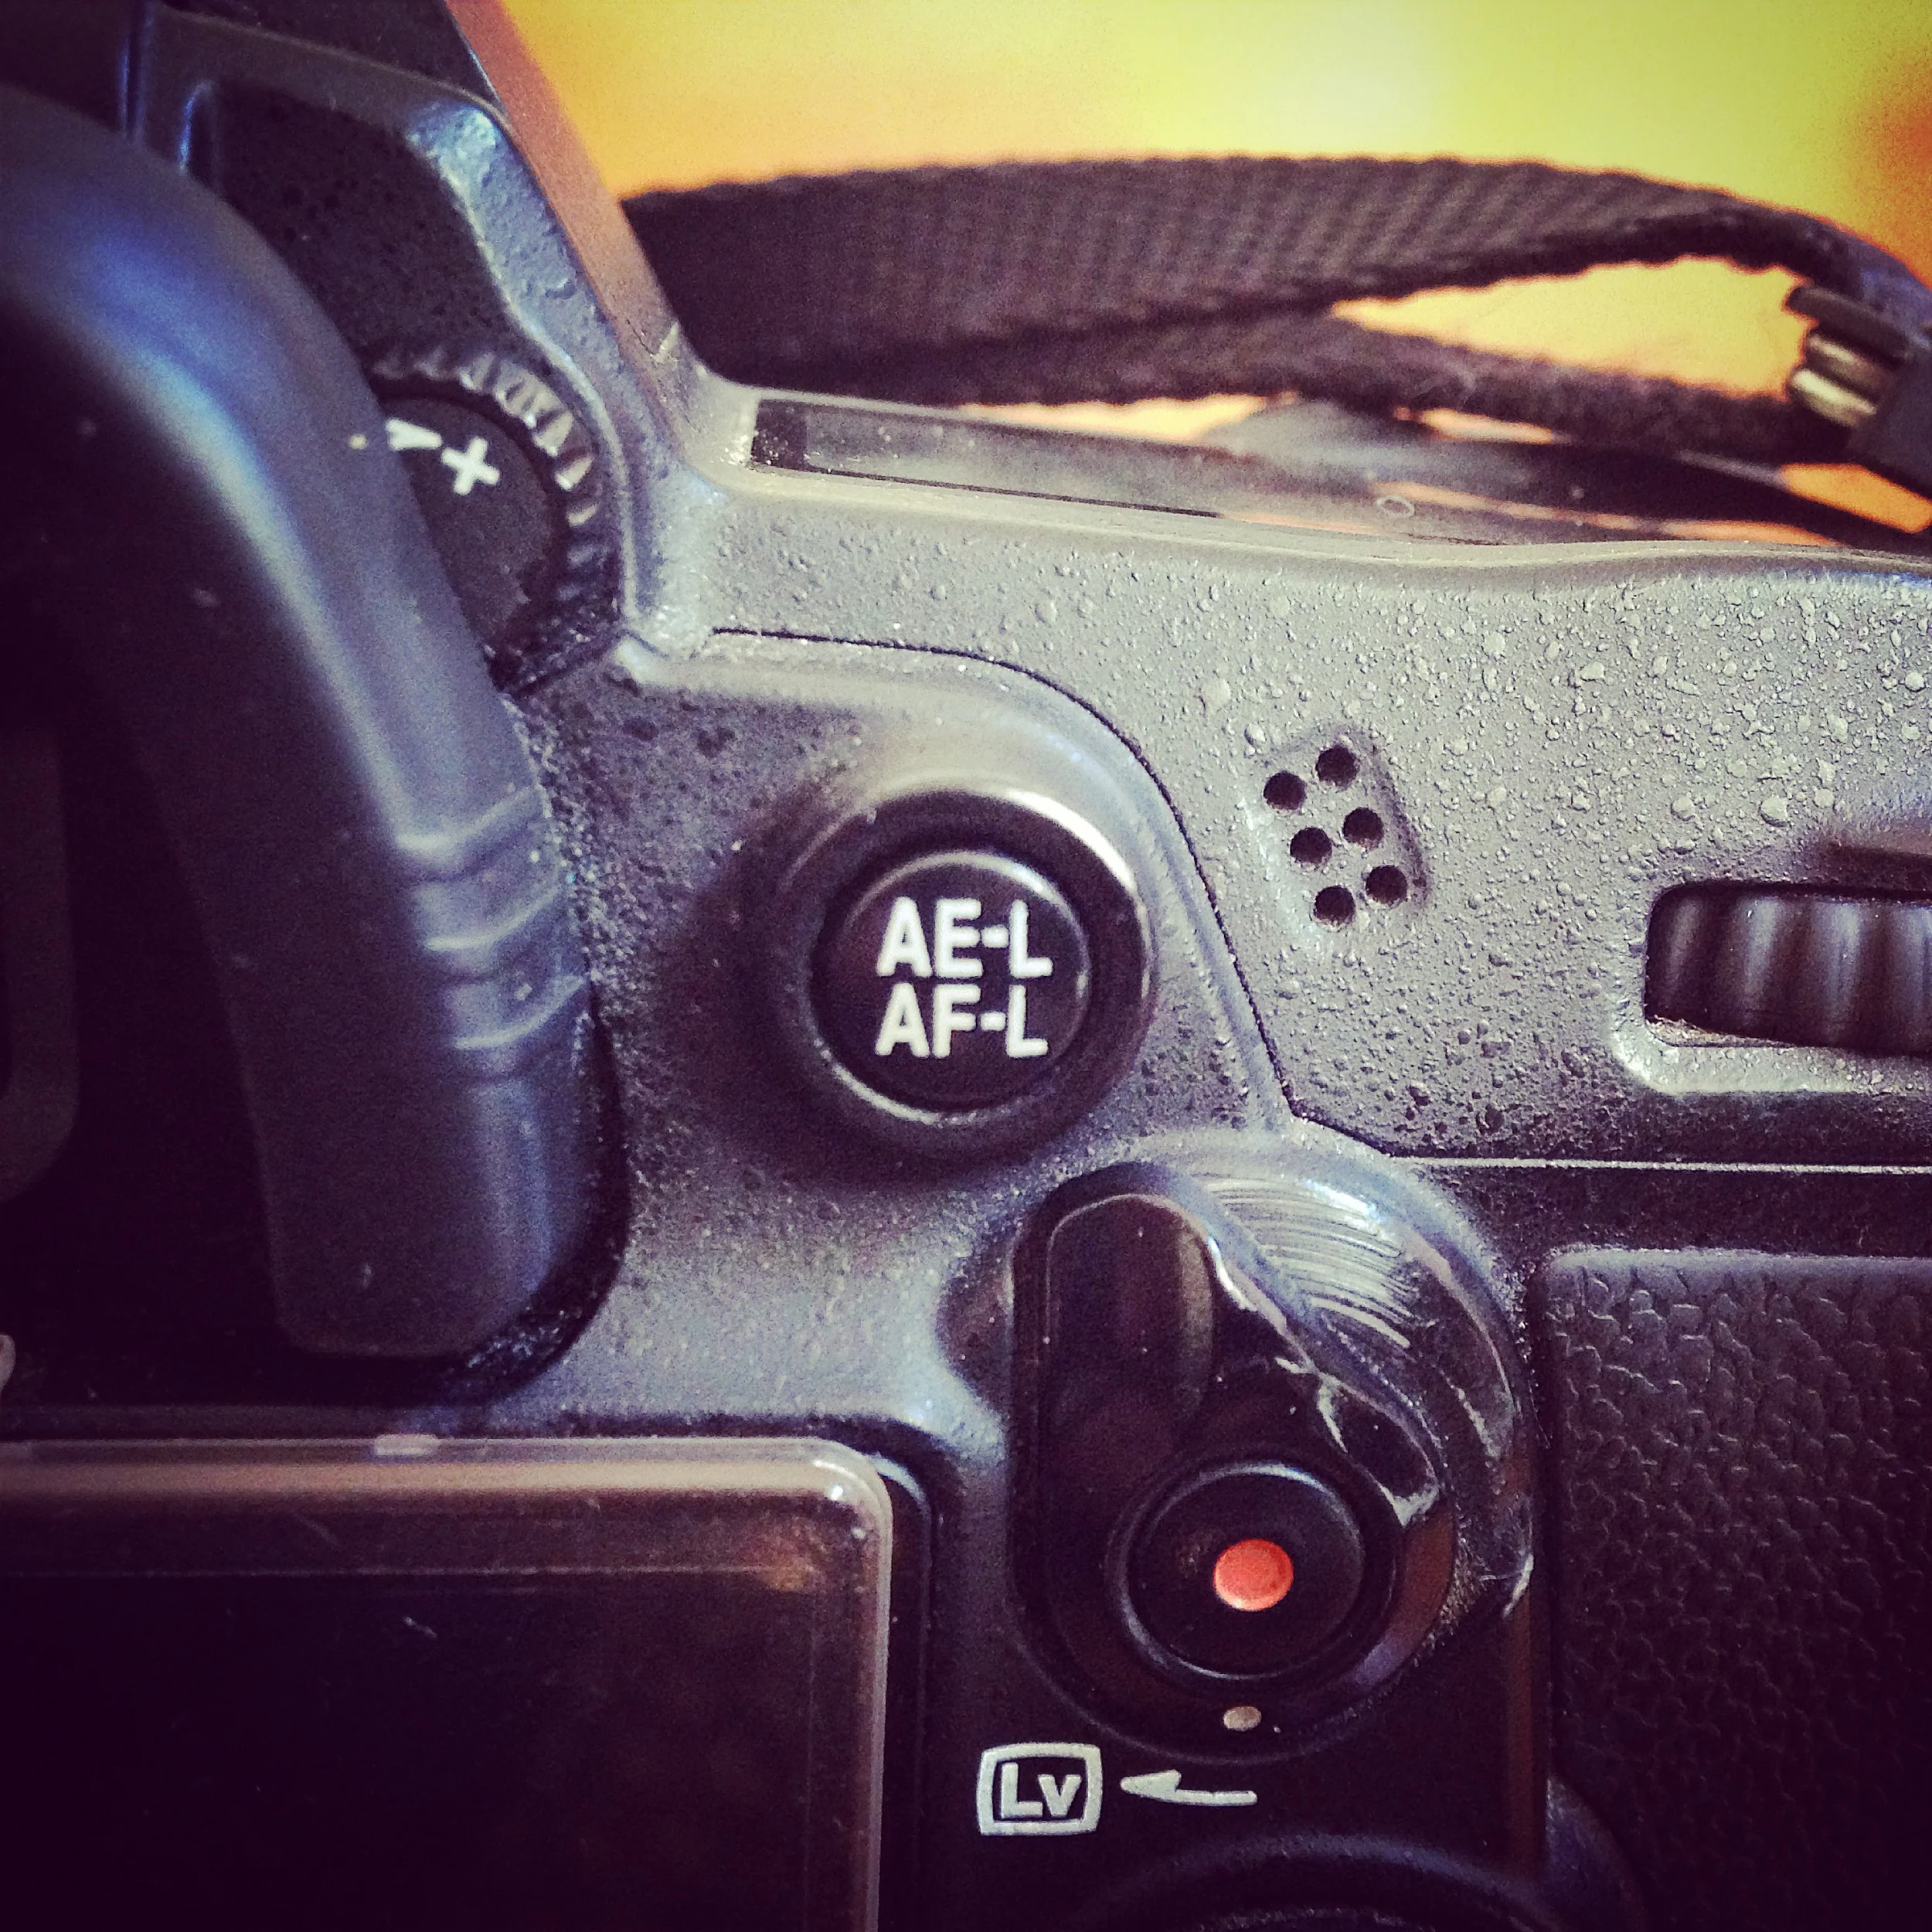
    BackButton_AEL_Nikon D7000

    When you’re using the shutter halfway down method of focusing, each time you move the camera, you have to refocus on your focal point. Unless you’re able to be steady enough to keep that shutter halfway down without clicking the shutter, sometimes for several minutes at a time, this can become a bit tedious as your brain keeps focusing and firing the shutter as a single married entity. But, once you realize they’re a horrible couple and you break them up and see how silly it was that they ever got together to begin with, your brain begins to understand that it should be able to focus on the task of focusing, and then, turn all its energy to the composition of the shot itself.

    In other words, once you focus, as long as you stay in that position, you won’t have to focus again. You can expend all your energies on the composition of the shot with the peace of mind that your shots will be sharp from simply setting that focus once, rather than having to refocus with each shot, each press of the shutter.

    Essentially, the photographic process goes from:

    compose, focus, shoot, re-compose, re-focus, shoot, re-compose again, re-focus again, shoot.

    to, simply:

    focus, compose, shoot, compose, shoot, compose, shoot.

    My brain already hurts less just thinking about it.

    Just imagine the decrease in brain strain when shooting at events and weddings and wildlife knowing that your shots are in focus by just having to focus once instead of with each shot! All because once you release the back button, so long as you remain the same distance away from your subject(s), you can re-compose to your heart’s content confident that focus will remain on that plane of field. The amount of ‘keepers’ is bound to drastically increase!

    Additionally, this works really well on moving objects such as sports or wildlife. For example, let’s say a car was coming towards you, you can focus on the part of the car you want, hold down the back button for focusing, keep it held down and aimed at your chosen focal point, and that point will continually stay in focus. You can then independently fire the shutter while your finger is still holding down the focus button so all of your attention is aimed at the focal point and nothing else, ensuring with better accuracy that you’ll get the sharp focal point you want. Conversely, with traditional shutter-halfway-down focusing, once you press down on that shutter, any movement in those milliseconds between auto-focus disengaging and the shutter firing, especially when working with fast moving subjects, and you’ll have less of a chance of getting a sharp shot. Once you use it and get used to it, there is no turning back.

    Anyhow, most DSLRs and newer mirrorless cameras offer the option – it would be in your settings menus. In most Canon DSLRs, look for the “Metering Start / Meter + AF Start” option in the “Shutter/AE Lock Button” menu. In most Nikon DSLRs, first navigate to the “Custom Settings Menu,” choose “Controls,” then “Assign AE-L/AF-L Button”, then “AF-On.” Now, in the “Custom Settings Menu,” choose “Autofocus,” then in both “AF-C priority Selection” and “AF-S Priority Selection,” choose “Release” so that the shutter will still fire even if if it thinks you didn’t focus because the shutter button wasn’t pressed halfway.

    If you have a different kind of camera, Just Google your camera make and model with ‘back button focus’ and you should be off and running.

    For more of my madness:
    Instagram: @wasimofnazareth
    Twitter: @wasimofnazareth
    Google+: www.Google.com/+WasimMuklashy
    Facebook: www.Facebook.com/WasimOfNazareth
  • How To Photograph Sunsets, Silhouettes And Starbursts For Your Summer Snaps!

    How To Photograph Sunsets, Silhouettes And Starbursts For Your Summer Snaps!

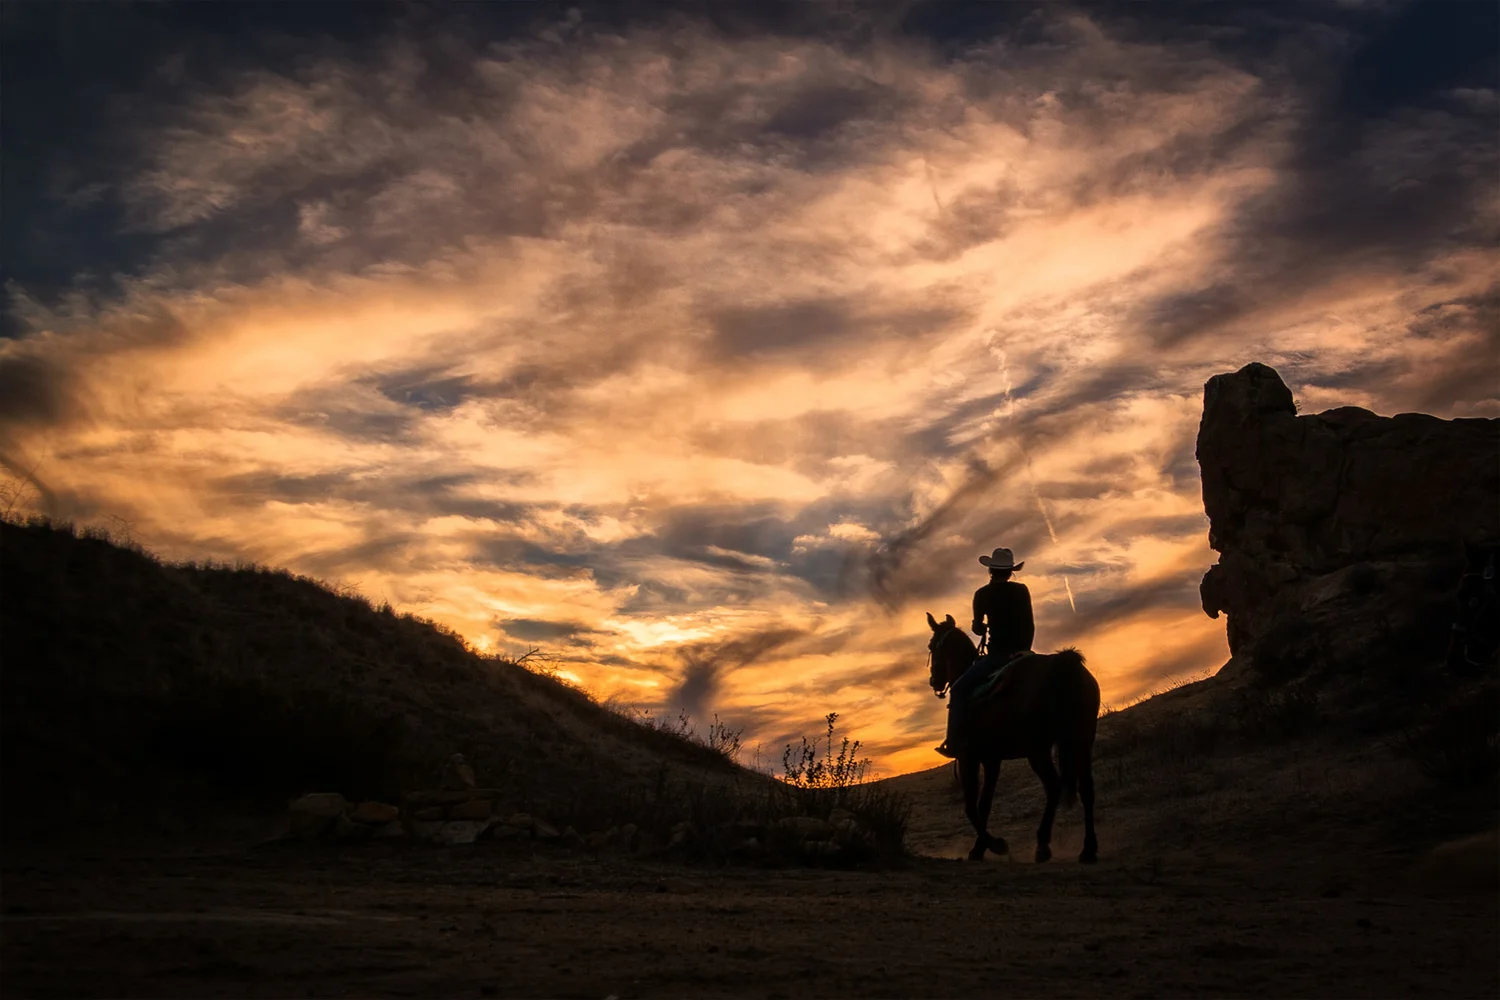
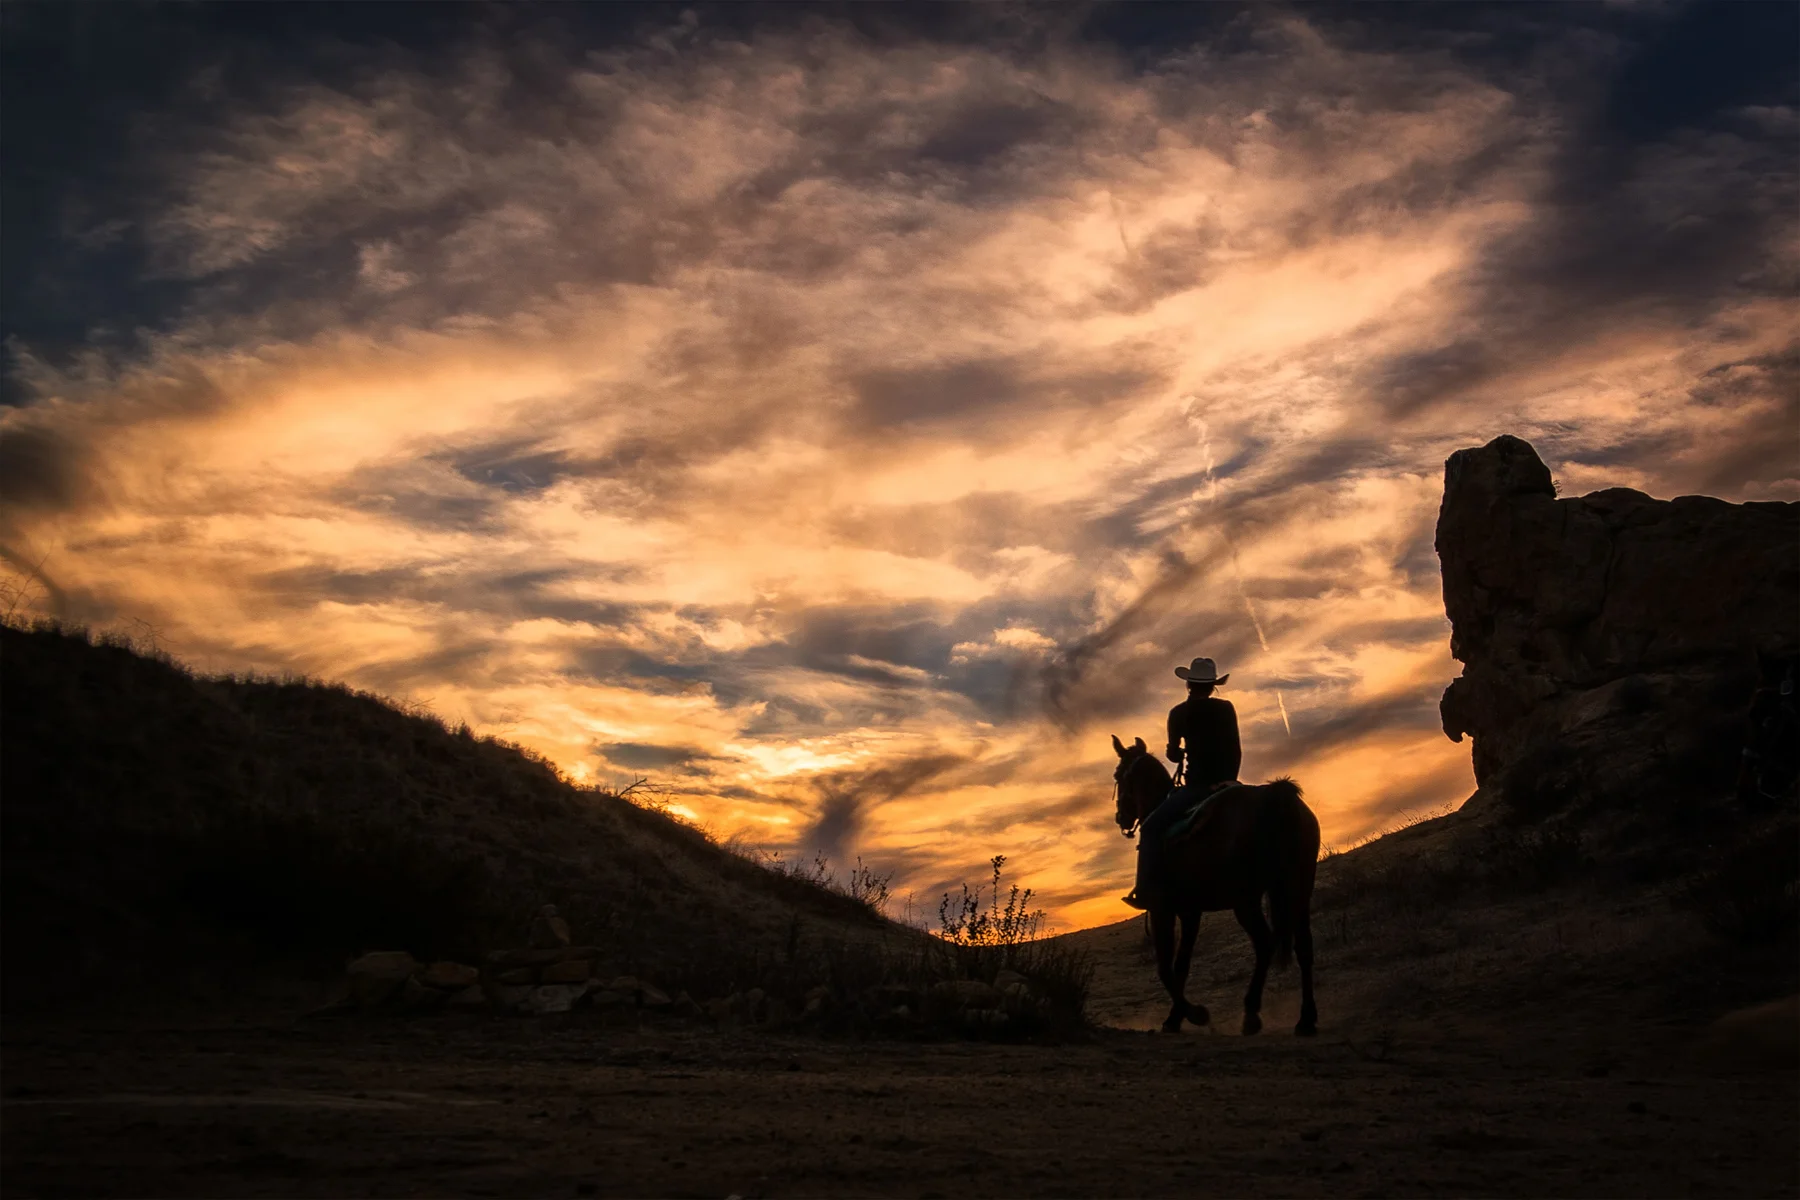
    Wasim_Muklashy_Cowboy_Topanga_Sunset_Photography_Silhouette

    Being in Southern California, we get a lot of wonderful light during the final hours of most days, so naturally, a lot of my photography happens during that time. Consequently, I find myself in position to photograph sunsets a lot, many of which can prove to be quite spectacular, and one of my favorite effects is to catch sun stars (also called starbursts) and silhouettes during this time. I’ve been asked more than a few times what my methods for sunset photography are, so figured I’d share a few tips to help you catch those perfect sun shots during your summer adventures. Click past the break here to see the tips.

    How To Photograph Sunsets, Silhouettes And Starbursts For Your Summer Snaps!

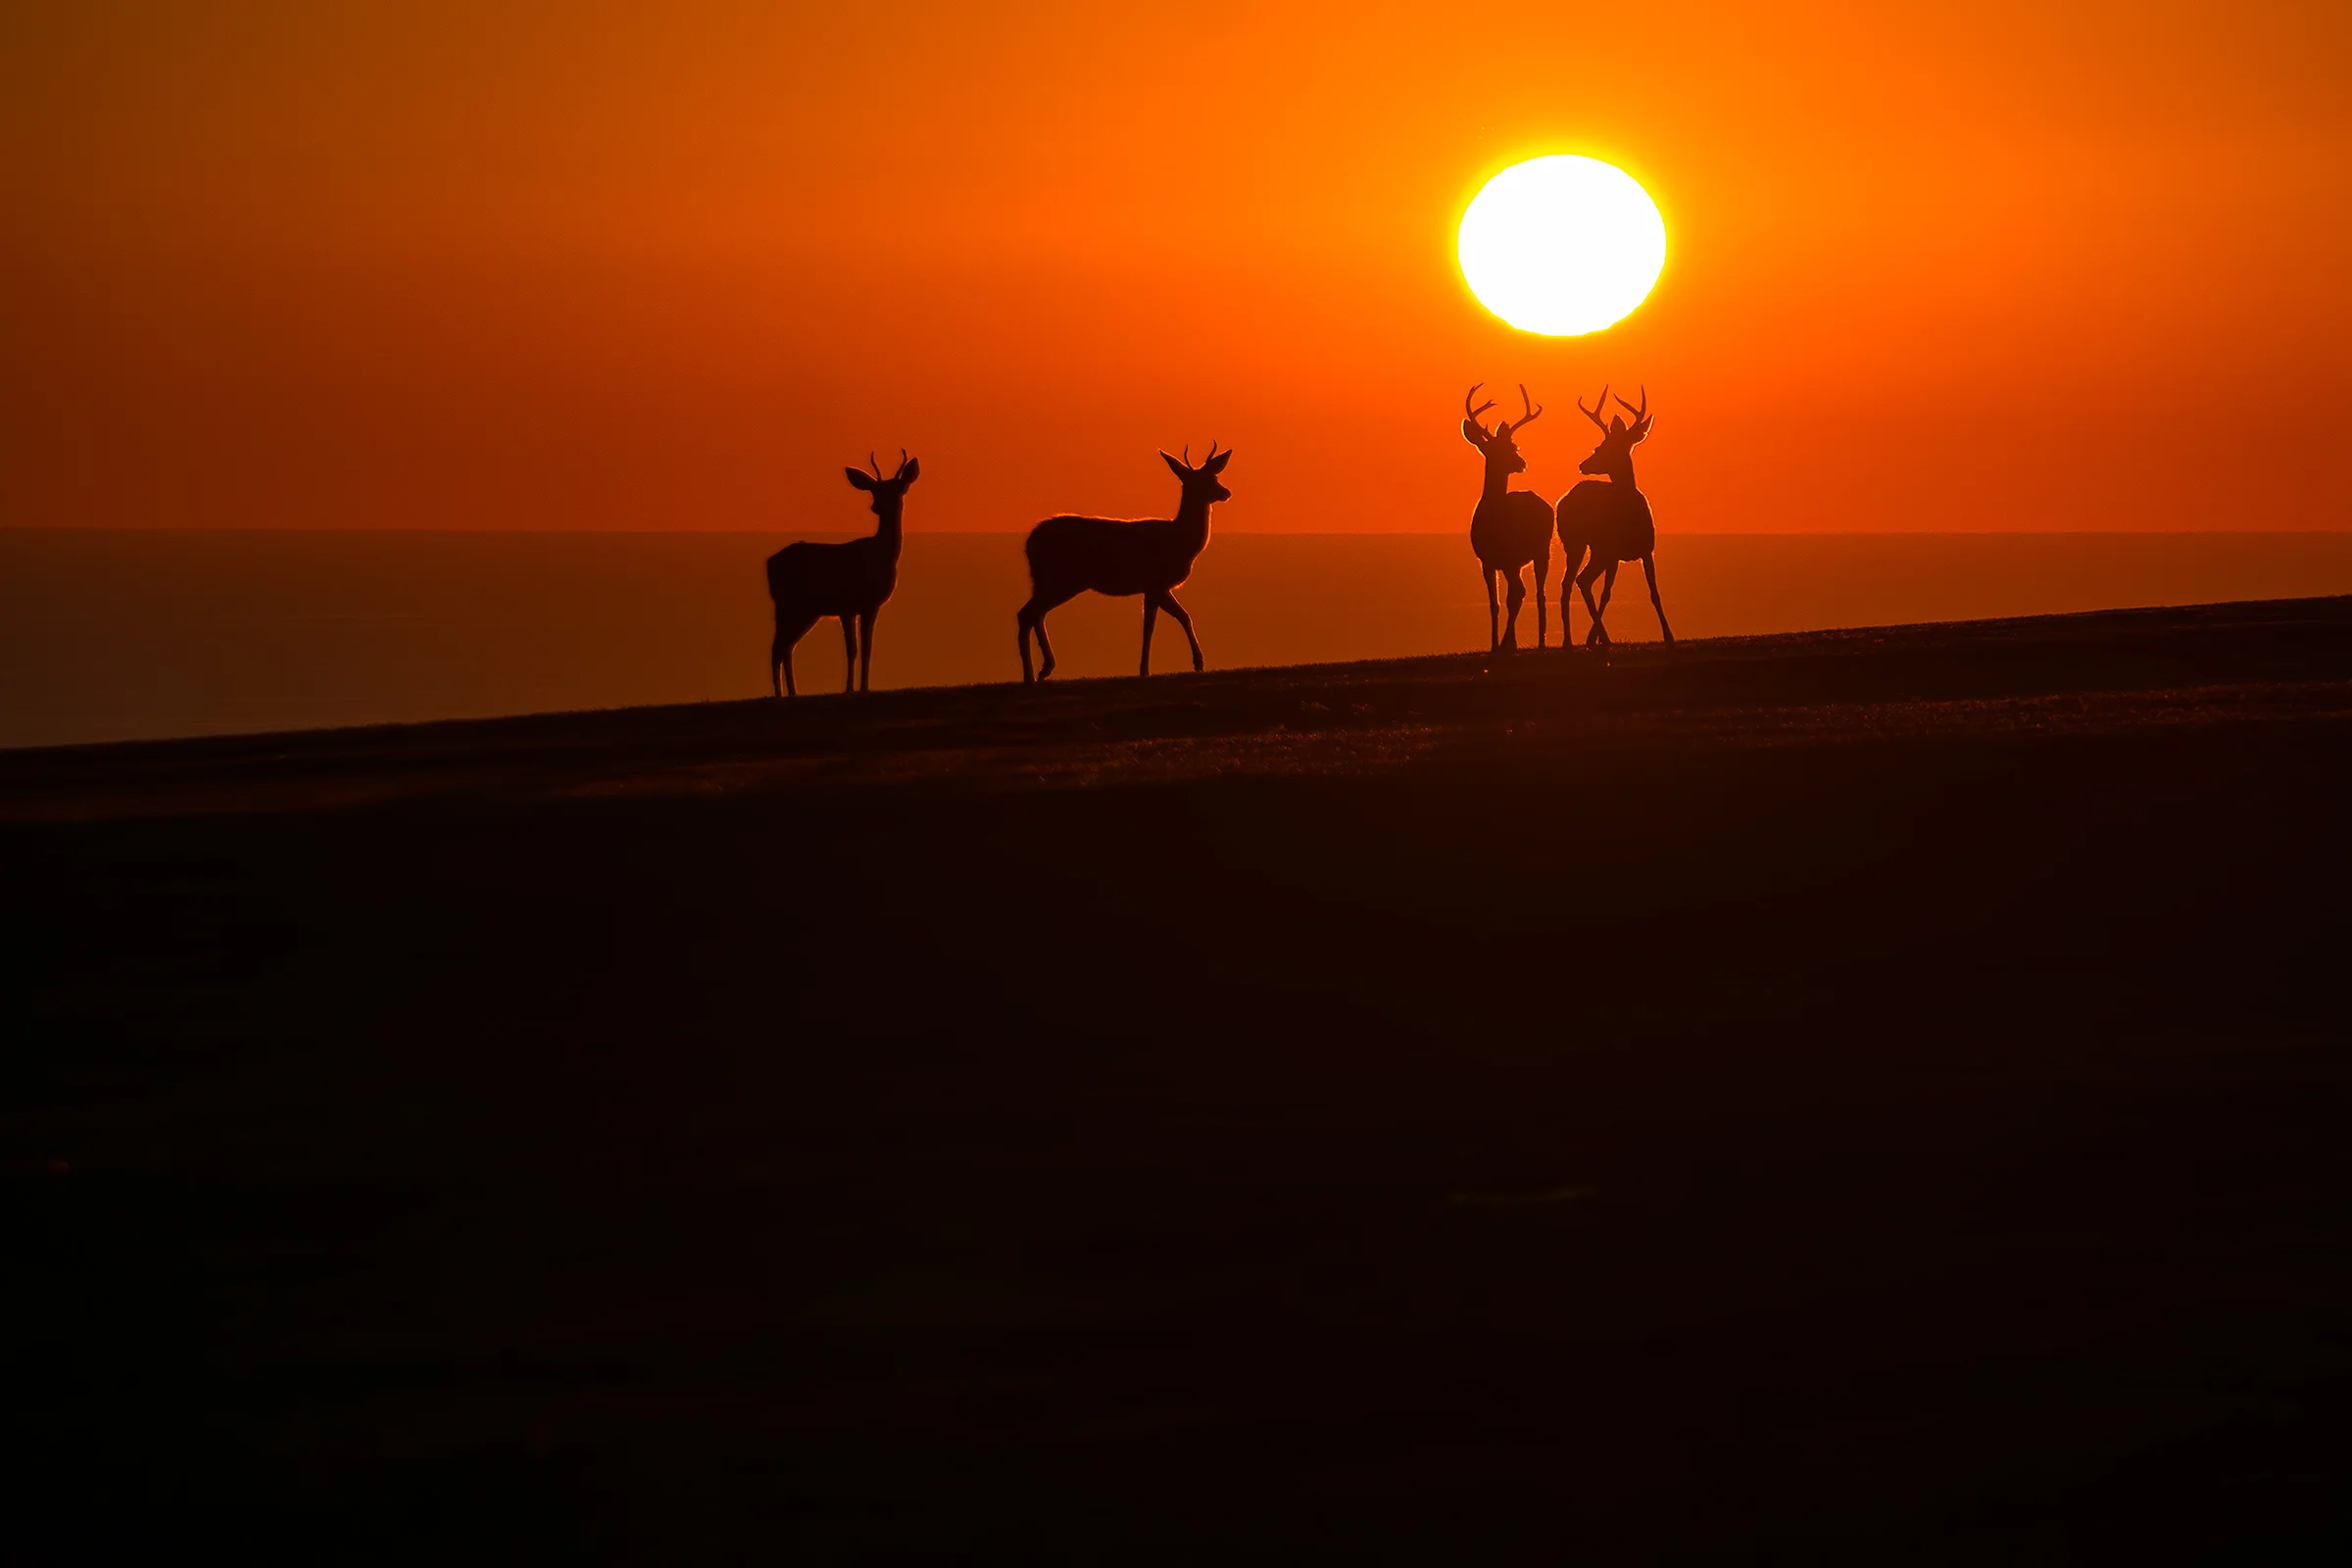
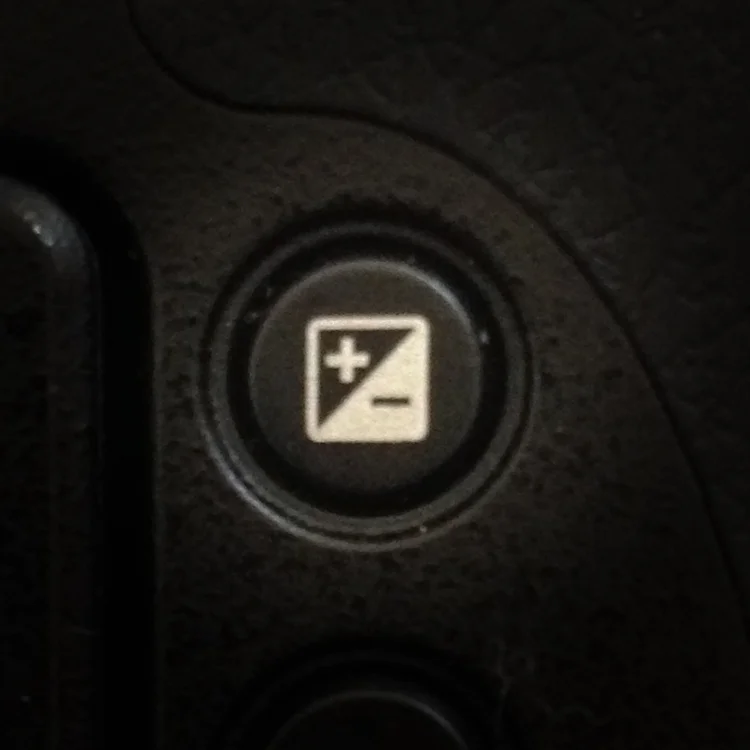
    1. Silhouettes – If it’s a silhouette that you’re trying to capture, such as the deer along the ridge in the image above, or the palm trees in the foreground of that sunset sky in the image in this link, then I usually shoot in Aperture Priority mode and meter for the brightest spot on the scene, usually the sky just around the sun. I’ll then use exposure compensation, the little button that with the +/- symbol that normally looks something like the one below here, to underexpose the image by about a stop, sometimes even two full stops, and if I’m feeling particularly crazy, sometimes up to 3 full stops, depending on how bright the light happens to be that day or time of day.

     Exposure Compensation Button
    Exposure Compensation Button

    I do this so that the bright light isn’t obscenely overexposed to the point you lose all detail. Finally, if necessary, I”ll bring up some of the details in post in Lightroom using the shadow and highlights sliders to taste. Remember…this is art.

    Wasim_Muklashy_WA_NX30_Sunflare_Starburst_Photograph_Sunsets

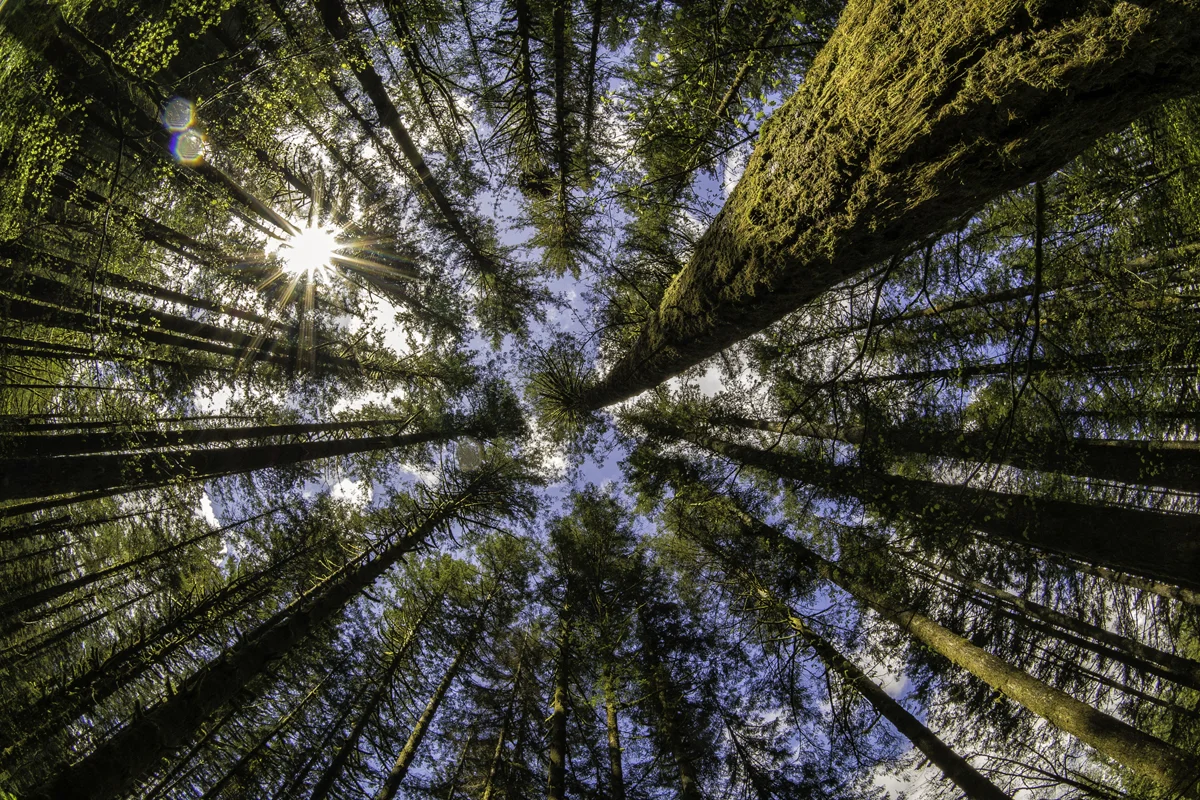
    2. Starbursts – If I’m looking to get the starburst effect such as in the image of the tree canopy above or the Topanga Canyon sunset in the image in this link, it’s best to stop up to f16 or even smaller, usually best at about f18 or f22. Then I’ll frame the shot so the sun is partially obstructed by a tree/hillside/ridgeline/building/leaf/something. Shooting at that small aperture is what will give you that starburst you see in some of them. The effect is a result of what is called light diffraction. In essence, this is when light waves bend around something in their way, causing the waves to spread out. In this case, the ’something in their way’ are the diaphragm blades in the lens. The number of blades inside your particular lens will dictate how many points you get in your starbursts. Typically, the higher end lens will give you more points and a cleaner starburst, but these days, pretty much any lens will give you more than satisfactory results.

    Wasim_Muklashy_051814_Malibu_CA_NX30_SAM_4249_Edit_2400C

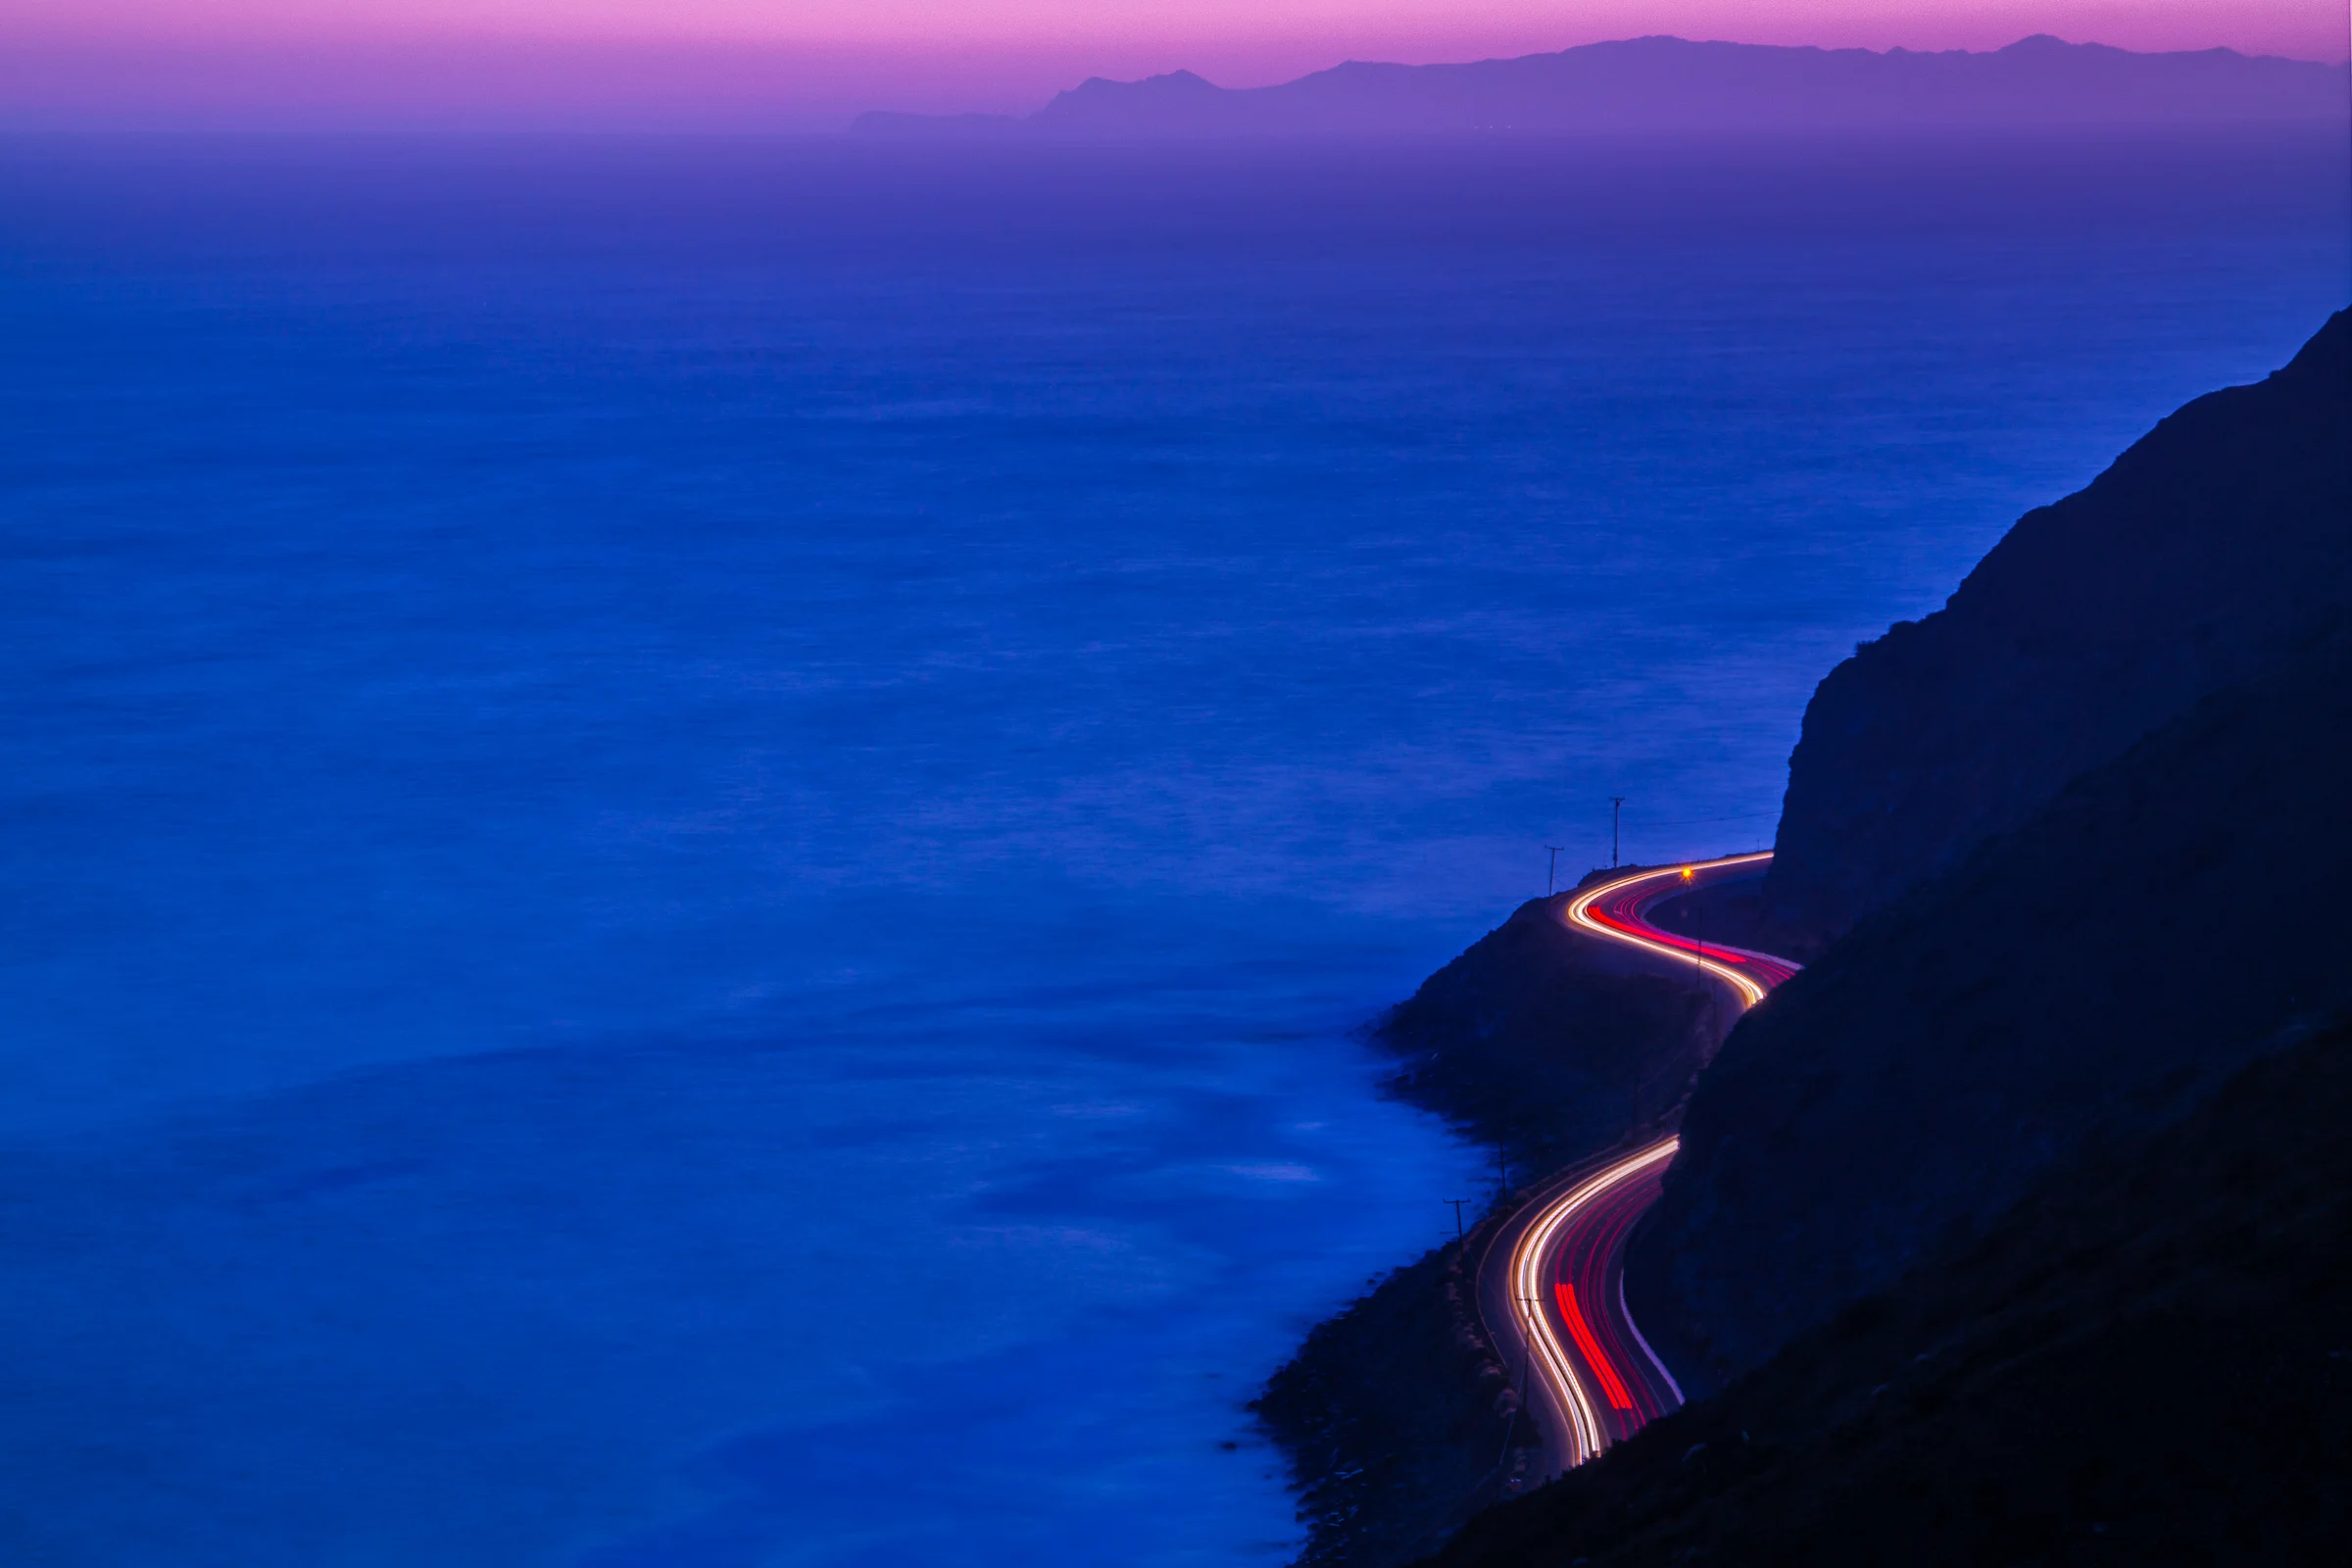
    3. Dusk/Twilight – If the sun isn’t directly in the shot, but you’re looking to capture the dusk/twilight light like the one of the Pacific Coast Highway you see above, then I typically expose for the sky if I’m looking to silhouette or darken the mountains/landscape. Conversely, I might decide to expose for the mountains to get some detail in there, and then use exposure compensation to stop down about a stop or so in order to not blow out the sky too much, still preserve some visible detail in the mountains, and still be able to capture those surreal colors that happen in those 15-20 minutes of perfect twilight after the sun sets behind the horizon. I’ll often also set the white balance to ‘cloudy’ even if it’s not cloudy as it helps warm up the scene and saturates the colors a bit. A few minimal tweaks of the shadow, highlights, and sometimes the contrast and vibrance sliders in Lightroom, and you’ve got yourself some awfully purty colors!

    One final tip is to make sure your lens is clean, especially when shooting images where the sun is a major component such as lens flare or starburst shots. Otherwise, you WILL get very visible unwanted dust specks and artifacts in your images.

    Well, I hope those tips help you during your summer adventures. Let me know if they help you capture some fun shots. I’d love to see them!

    By the way, all the shots you see above were shot on either the Samsung NX300 or the Samsung NX30, both of which are mirrorless cameras and provided to me as part of the Samsung Imagelogger program. Both of which I absolutely highly recommend and have turned into my primary cameras. If you decide to purchase through Amazon, try the links above! They’ll take you directly to the cameras I used and they’ll show me a bit of love for sending you that way…

    For more of my madness: Instagram: @wasimofnazareth Twitter: @wasimofnazareth Google+: www.Google.com/+WasimMuklashy Facebook: www.Facebook.com/WasimOfNazareth
  • One Step At A Time – Forging Ahead In My Photographic Journey

    One Step At A Time – Forging Ahead In My Photographic Journey

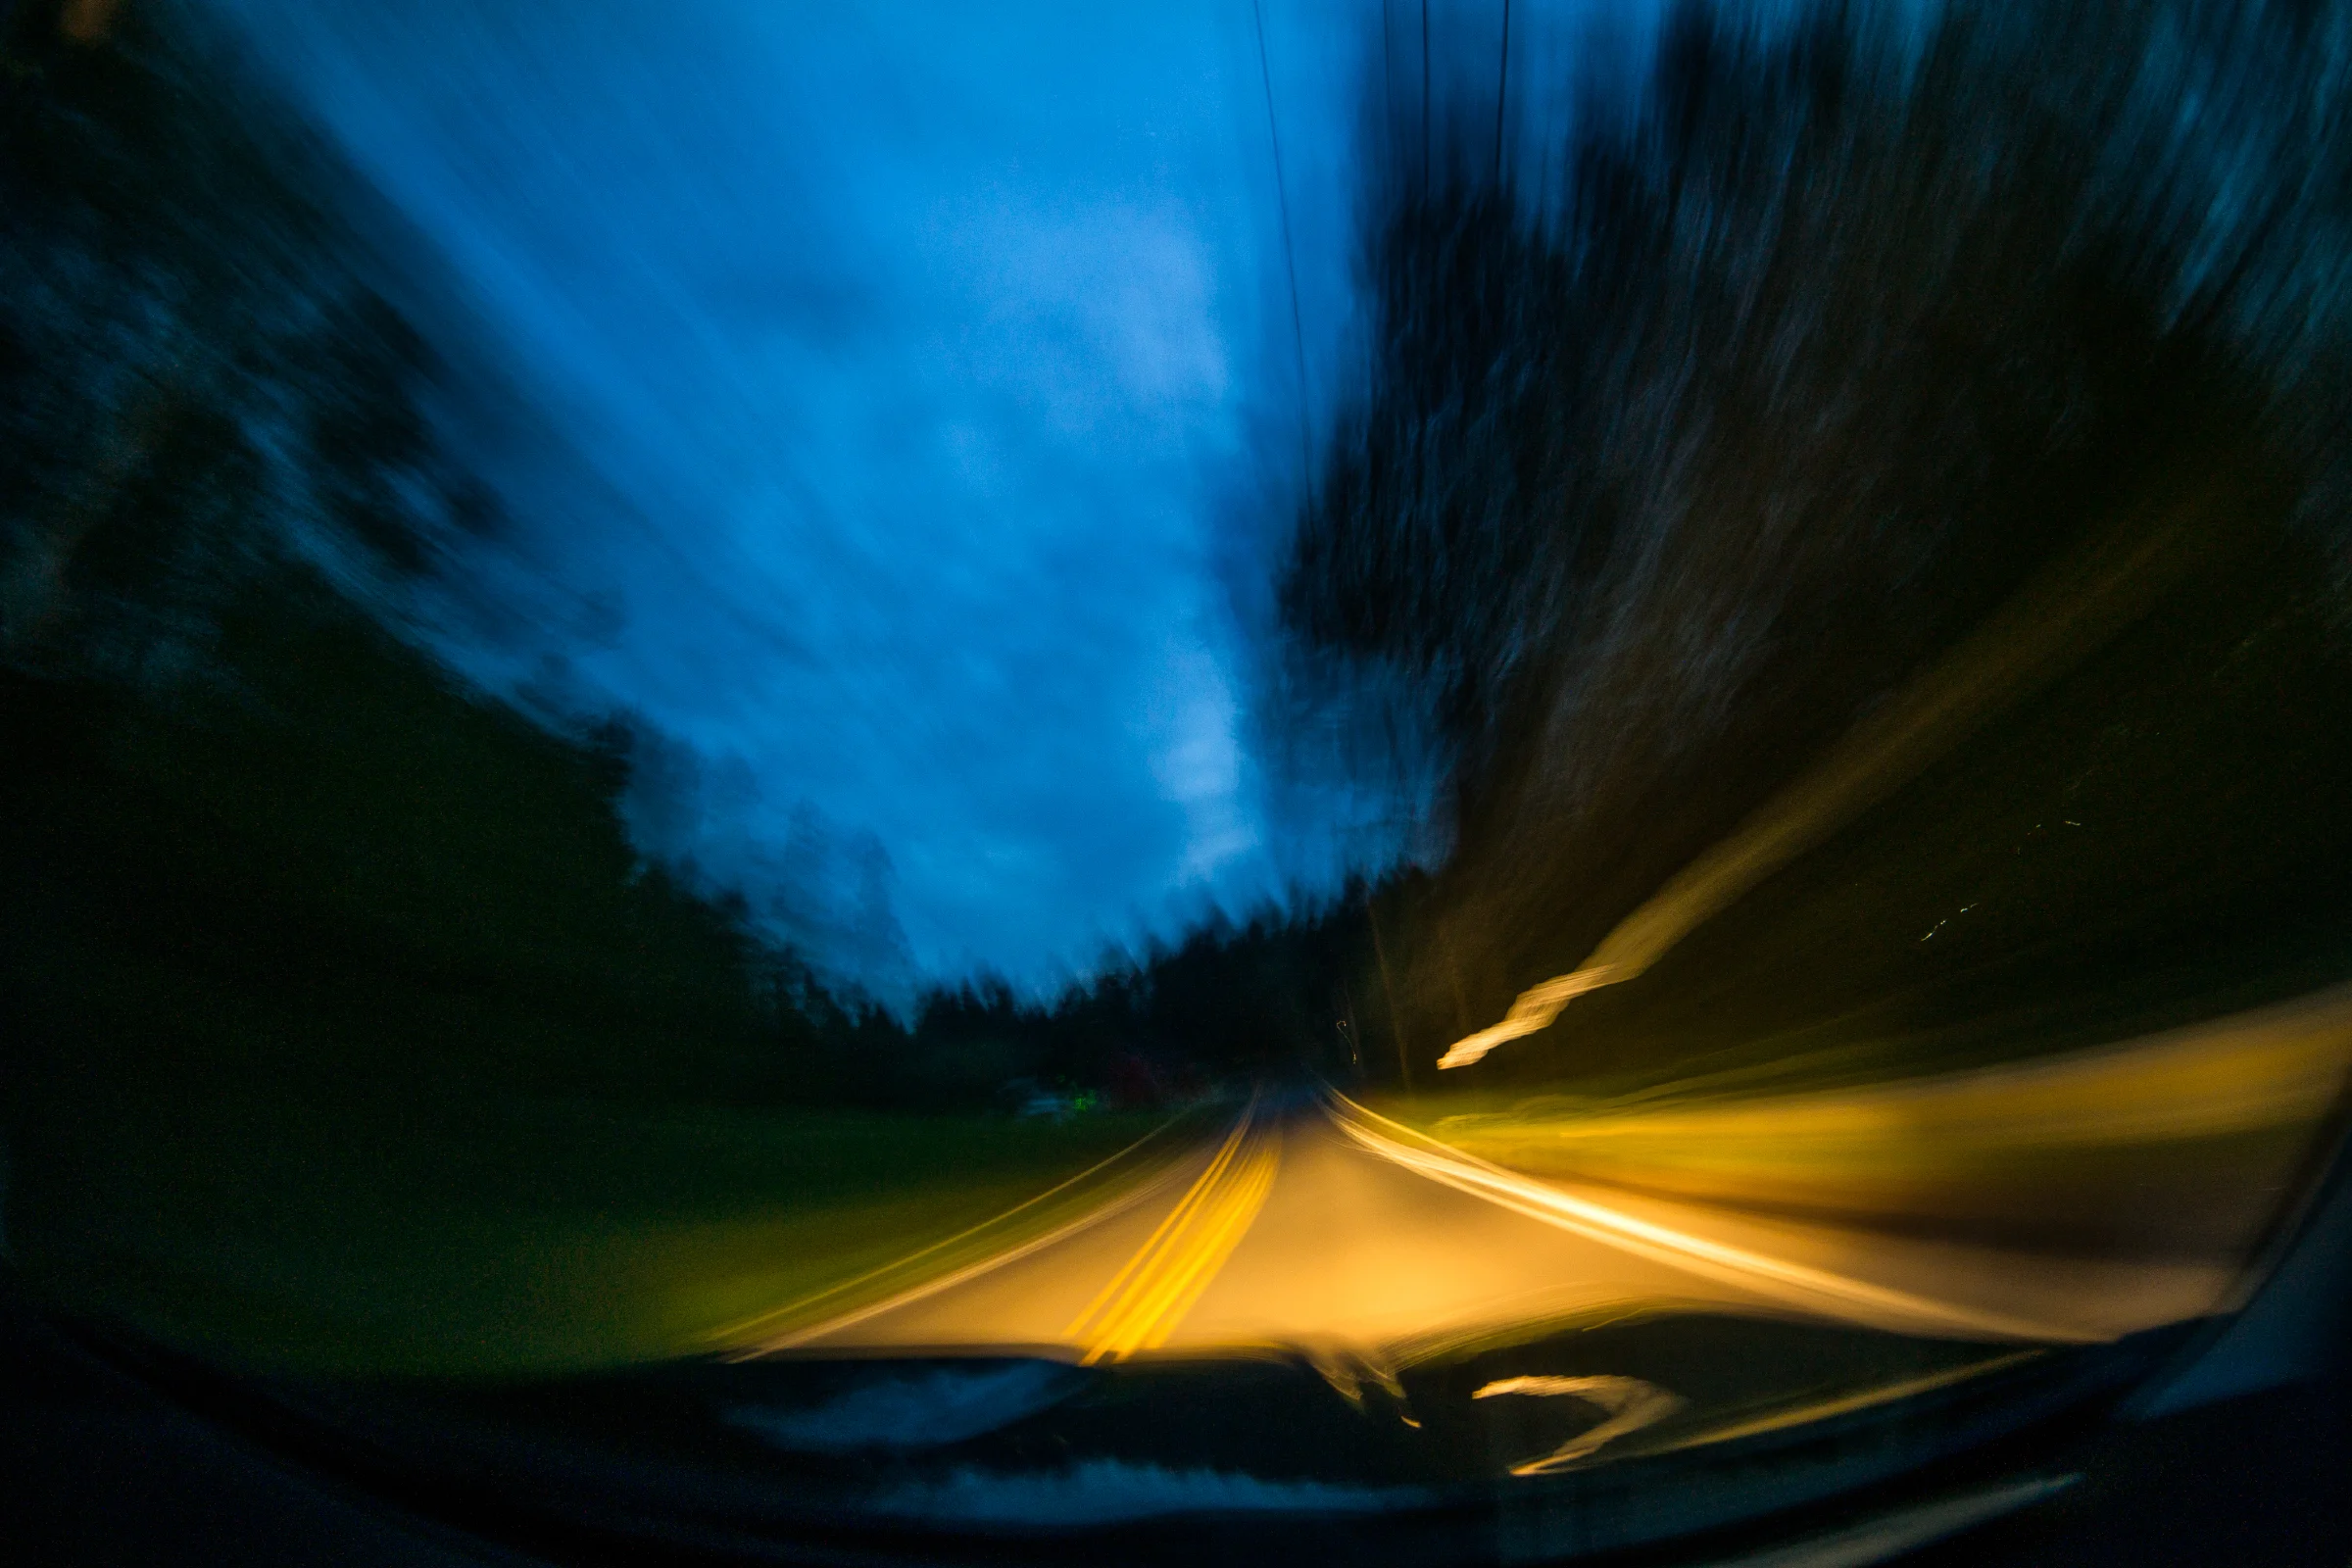
    Wasim_Muklashy_Photography_Trails_SAM_2466_2400sfw

    So if you’ve logged on lately, you might have noticed, but I wanted to wait until everything was ported over from one to the other before introducing my new website. I’ve been working hard the past several weeks getting this sucker in shape and I think it’s ready! You’ll notice that the homepage no longer begins with my portfolio, but rather with the blogroll, so that way you’ll see the latest, and freshest content whenever you log on. Additionally, I’ve created two categories for the blog posts. One, ‘Journeys,’ will continue to focus on my personal photographic journeys and adventures that you’ve grown used to, the other, ‘Lessons’ will focus on tips and tricks and lessons learned through my photographic (hopefully) growth.
    I’ve been getting quite a few questions about photography, so figured this would be a good time to start answering some of them and perhaps providing a bit of insight into my process. However, please take everything with a grain of salt. I am not an expert on anything and would never claim to be. I’m just a photographer and aspiring artist with a passion to keep learning his craft, and hopefully, as I learn, I’ll have some information to share that might be of value to some of you out there. With that being said, if you have any photography related questions, please feel free to send them to me through the contact form or the comments below and I’ll do my best to answer them or find someone who has an answer for you!

    Additionally, I’ve revamped the portfolio a bit. Added a few new images to the ‘Places’ section and added ‘Periphery,’ where I’ll be regularly posting some of my favorite images from out and about that might not fit into the other categories. They’ll be a mix of images from all my sources – from professional gigs all the way to my Instagram feed – and there’s no rhyme or reason to how they’re displayed. Whenever you refresh, it’ll look different. This is the section that will be filled with random photography psychotica! Sometimes it’s how I see the world, sometimes it’s how I’d like to see it. The filters, fun, nonsensical, moody and abstract aspects of what goes on up in this noggin’ need a home too!

    Thank you again so much to everyone that has followed along so far. All your words of encouragement and comments and laughs and votes of confidence are behind the forces that are keeping me going on this camera(s)-laden journey. This has saved my sanity and given me a place to focus my energy on through a rough patch in my life, especially over the past several years, so please know that I’m so insanely humbled that you’ve joined me thus far. I hope that you enjoy the next part of this adventure at least a fraction of how much I’ll enjoy presenting it to you.

    Also, please keep me in the loop on what’s going on in your worlds as well. I’m genuinely interested in growing together however we can. After all, isn’t sharing what art is all about?

    To find me in other places, click the links below! I’ll find you back…

    Google+

    Instagram

    Facebook

    Twitter

    Ok then – Let’s do this thing!