Tag: photoshop

  • How To Perform A Quick Minor Composite In Photoshop

    How To Perform A Quick Minor Composite In Photoshop

    Wasim Muklashy Photography_Tuolume Meadows_Yosemite National Park_California_Samsung NX30

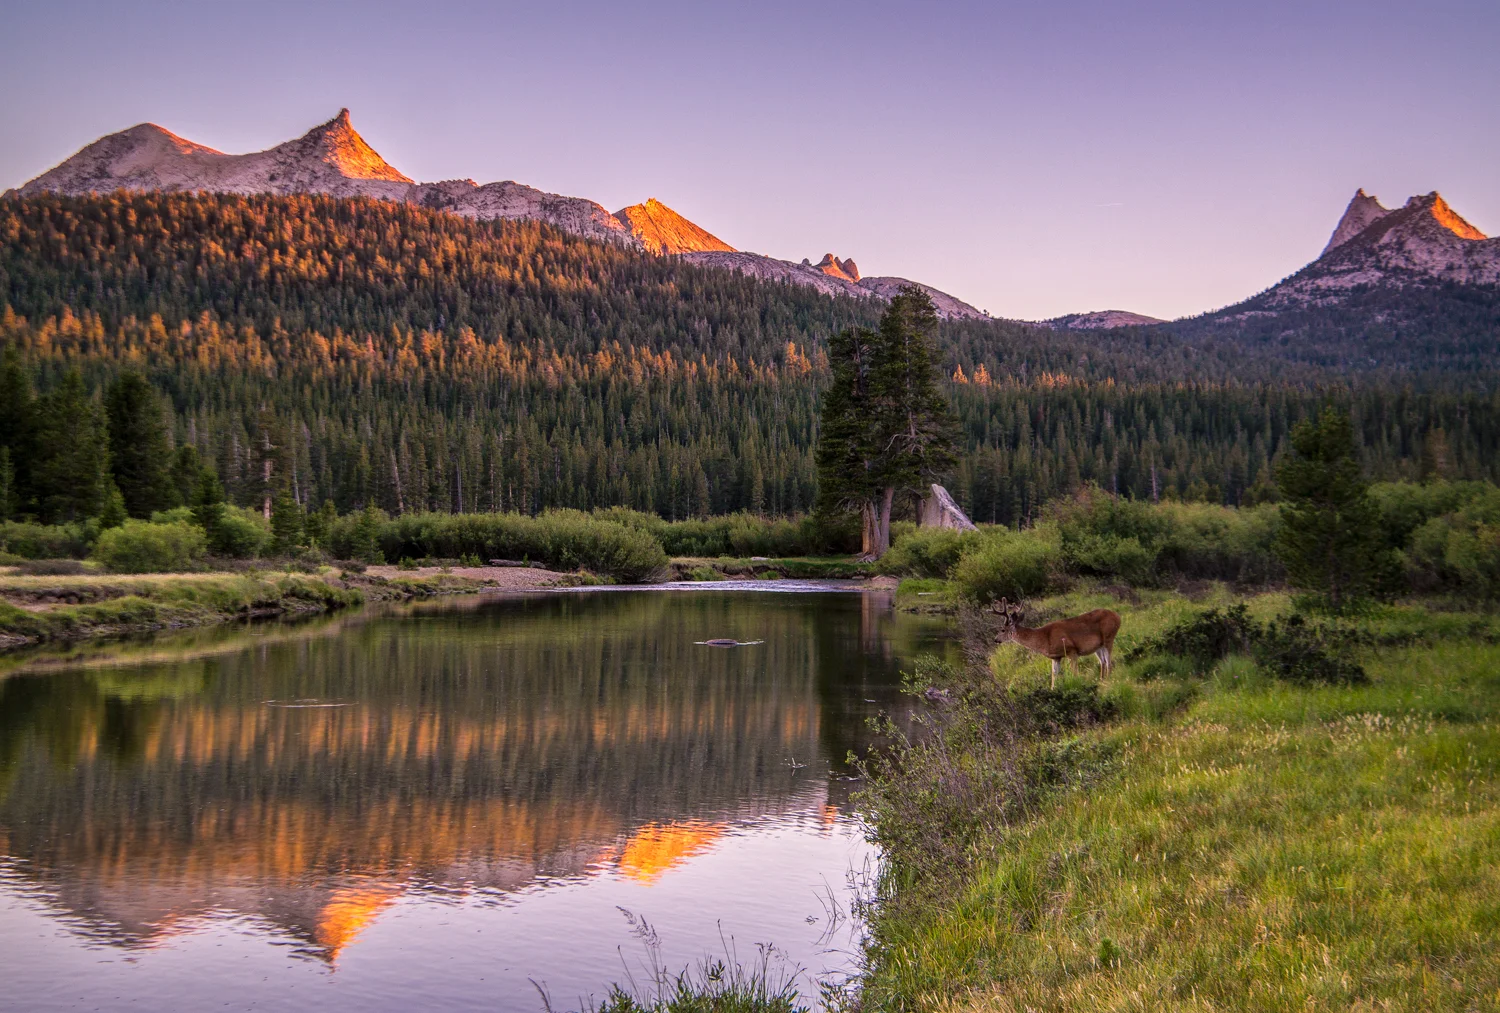
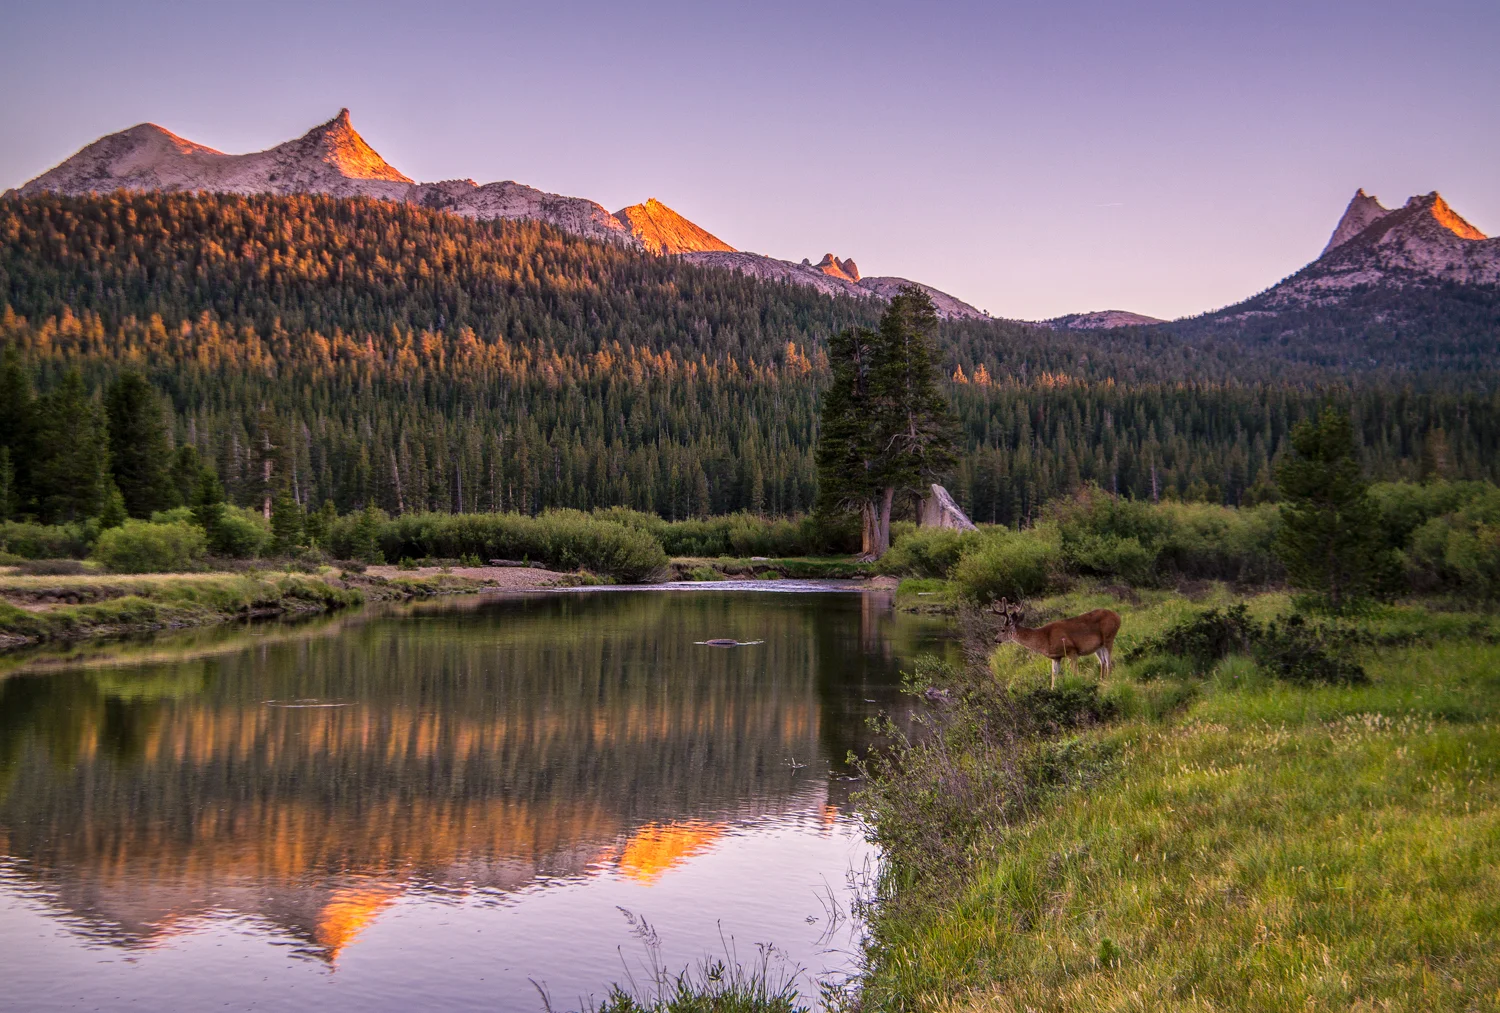
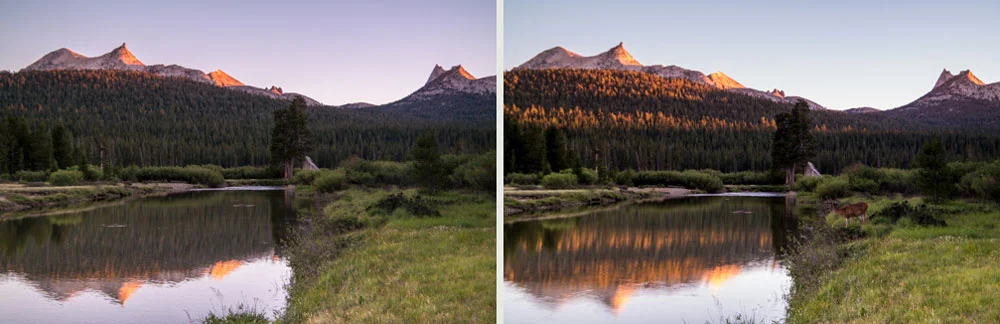
    As I was standing in Yosemite’s Tuolumne Meadows a few weeks ago, awaiting the sunset, I was on a sandbar off to the north side of the Tuolumne River east of bridge leading towards Soda Springs. As I stood there framing the shot, I got the elements I liked, and the light was just about to be perfect. The focus of this one was the light dancing upon the top of Cathedral Peak and Unicorn Peak and the trees on the ridgline below it. As the light started to bounce off those treetops and the peaks, I began to snap a few frames. I was delighted.

    About 2 minutes in, a lone deer decided to wander up and pose directly in the bare patch of grass in the foreground of my image. I damn near lost my mind. It looked at me, I looked at it. It turned away and just stood there. There was no doubt in my mind this was all about vanity, and it wanted its portrait taken. Who was I to argue? I immediately adjusted the exposure and

    Snap.

    Got the bugger.

    As soon as the shutter fired, he looked back at the water, up at the mountains, and walked away. It was like a gift from the Yosemite gods.

    After the deer left, I was still noticing the light on the top of the ridge line, so went back to my original plan, sans deer, and fired a few more frames.
    Wasim-Muklashy-Photography_Tuolumne-Meadows_Yosemite_National-Park_Deer-Composite-Tutorial_Comp

    When I got to the computer to check out the images, I noticed elements from each frame that I loved. In the one with the deer, I loved the light bouncing off the tops of the trees and, well, of course, the star of the show, the deer him/herself. But what I liked in the images I took after were the sharpness of the ridge-line that was lacking in the frame with the deer because I was focused on that element of the composition. Problem is, this frame didn’t have that second row of light on the trees, and well, it didn’t have the deer. This is were I thought to myself, it’s about time. Time to get my feet wet with composites. And this seemed like a relatively easy enough situation to do it. I was going to take that deer and the lights on the treetops from the 2 minutes earlier, and put him in the frame with the sharp mountain tops.

    My first attempt was to try to use the selection tool. Nope. Then I tried the magic wand. Definitely nope! Then I took the two layers, put the deer-less one on top, and tried using the eraser where the deer was. Absolutely nope!!

    At this point, I knew I was going to have to break down and figure out how to use a layer mask, but I had never really done it before. I first checked out a few tutorials on YouTube before I ended up consulting with my brother, who, as an animator and illustrator, has had some considerable experience in Photoshop. He walked me through it, and it seemed to work out perfectly. Here’s a brief video describing the method that I used to get the resulting image you see at the top of this post:

    The image was shot on a Samsung NX30 and a Samsung 18-200mm lens.

    And for more of my madness:
    Instagram: @wasimofnazareth
    Twitter: @wasimofnazareth
    Google+: www.Google.com/+WasimMuklashy
    Facebook: www.Facebook.com/WasimOfNazareth
  • How And Why I Finally Made The Switch To The Adobe Creative Cloud

    How And Why I Finally Made The Switch To The Adobe Creative Cloud

    Wasim Muklashy Photography_Wasim of Nazareth_Adobe Creative Cloud_Lightroom Mobile

    So I fought it for a year. And I fought it hard. I didn’t want to rent it. I wanted to rightfully own it. The way I have for years. The way we all have for years. Why should I have to ‘rent’ the software I need for my work? Why can’t I buy it anymore? It made no sense. And it didn’t seem right. And it didn’t seem fair. So there was only one thing left to do. Rent the software.
    Yeah, that’s right, I did it. I made the switch to the Adobe Creative Cloud. And here’s why it finally just had to happen.

    A big part of my decision was Adobe’s recent commitment to photographers to keep the price at 9.99/month for the two tools that photographers need most, Photoshop and Lightroom. Which, once you crunch the numbers, one you sit down, and really crunch the numbers, you realize that at 120 dollars a year, it would still take about 5 years to cover roughly what a full version of Photoshop used to cost for purchase. Considering the fact that a new version normally came out every 2-3 years, in essence, and in the long run, you’re actually saving money.

    On top of that, getting the updates for free on the fly is quite the welcomed gotcha! Well, sort of. While you lose some of the big-box anticipation of all these new features at once, which was always a fun reveal and sense of discovery, the way it is now actually allows you time to adapt and use and test and play without being overwhelmed by new features all at once. By easing you into the usage of these new features, you are able to actually focus on them rather than try to fish through an onslaught of madness, only to forget half of them existed 2 weeks later. Basically, I’ve begun to get even more use out of each new set of features that has been released since subscribing to the Creative Cloud 2 months ago.

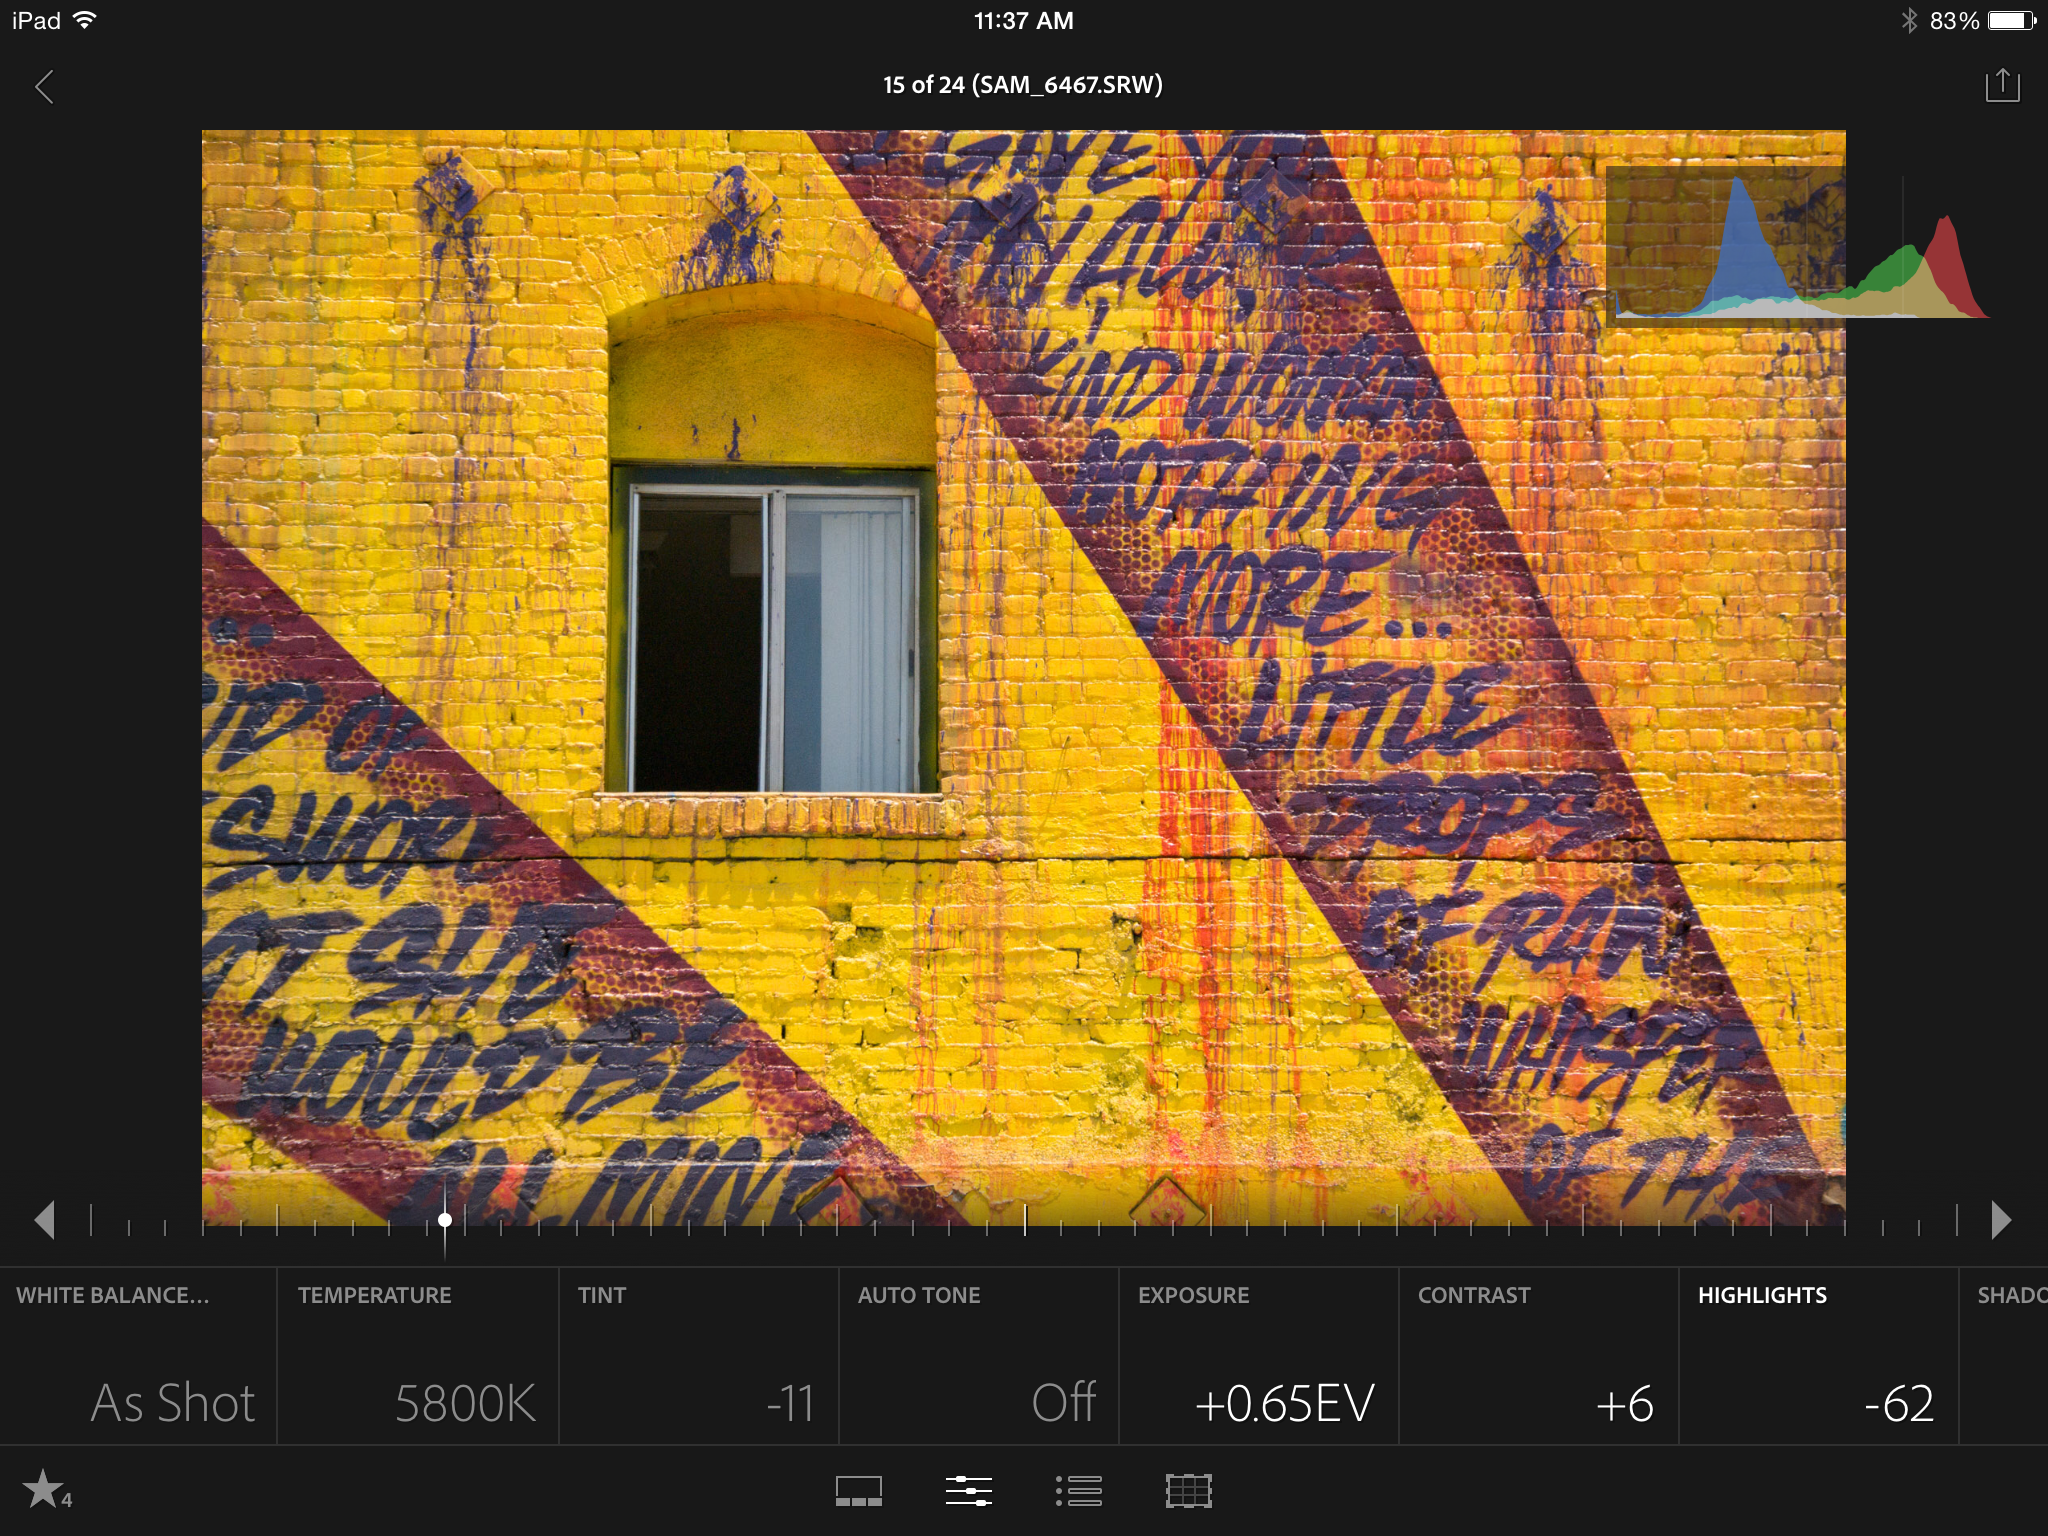
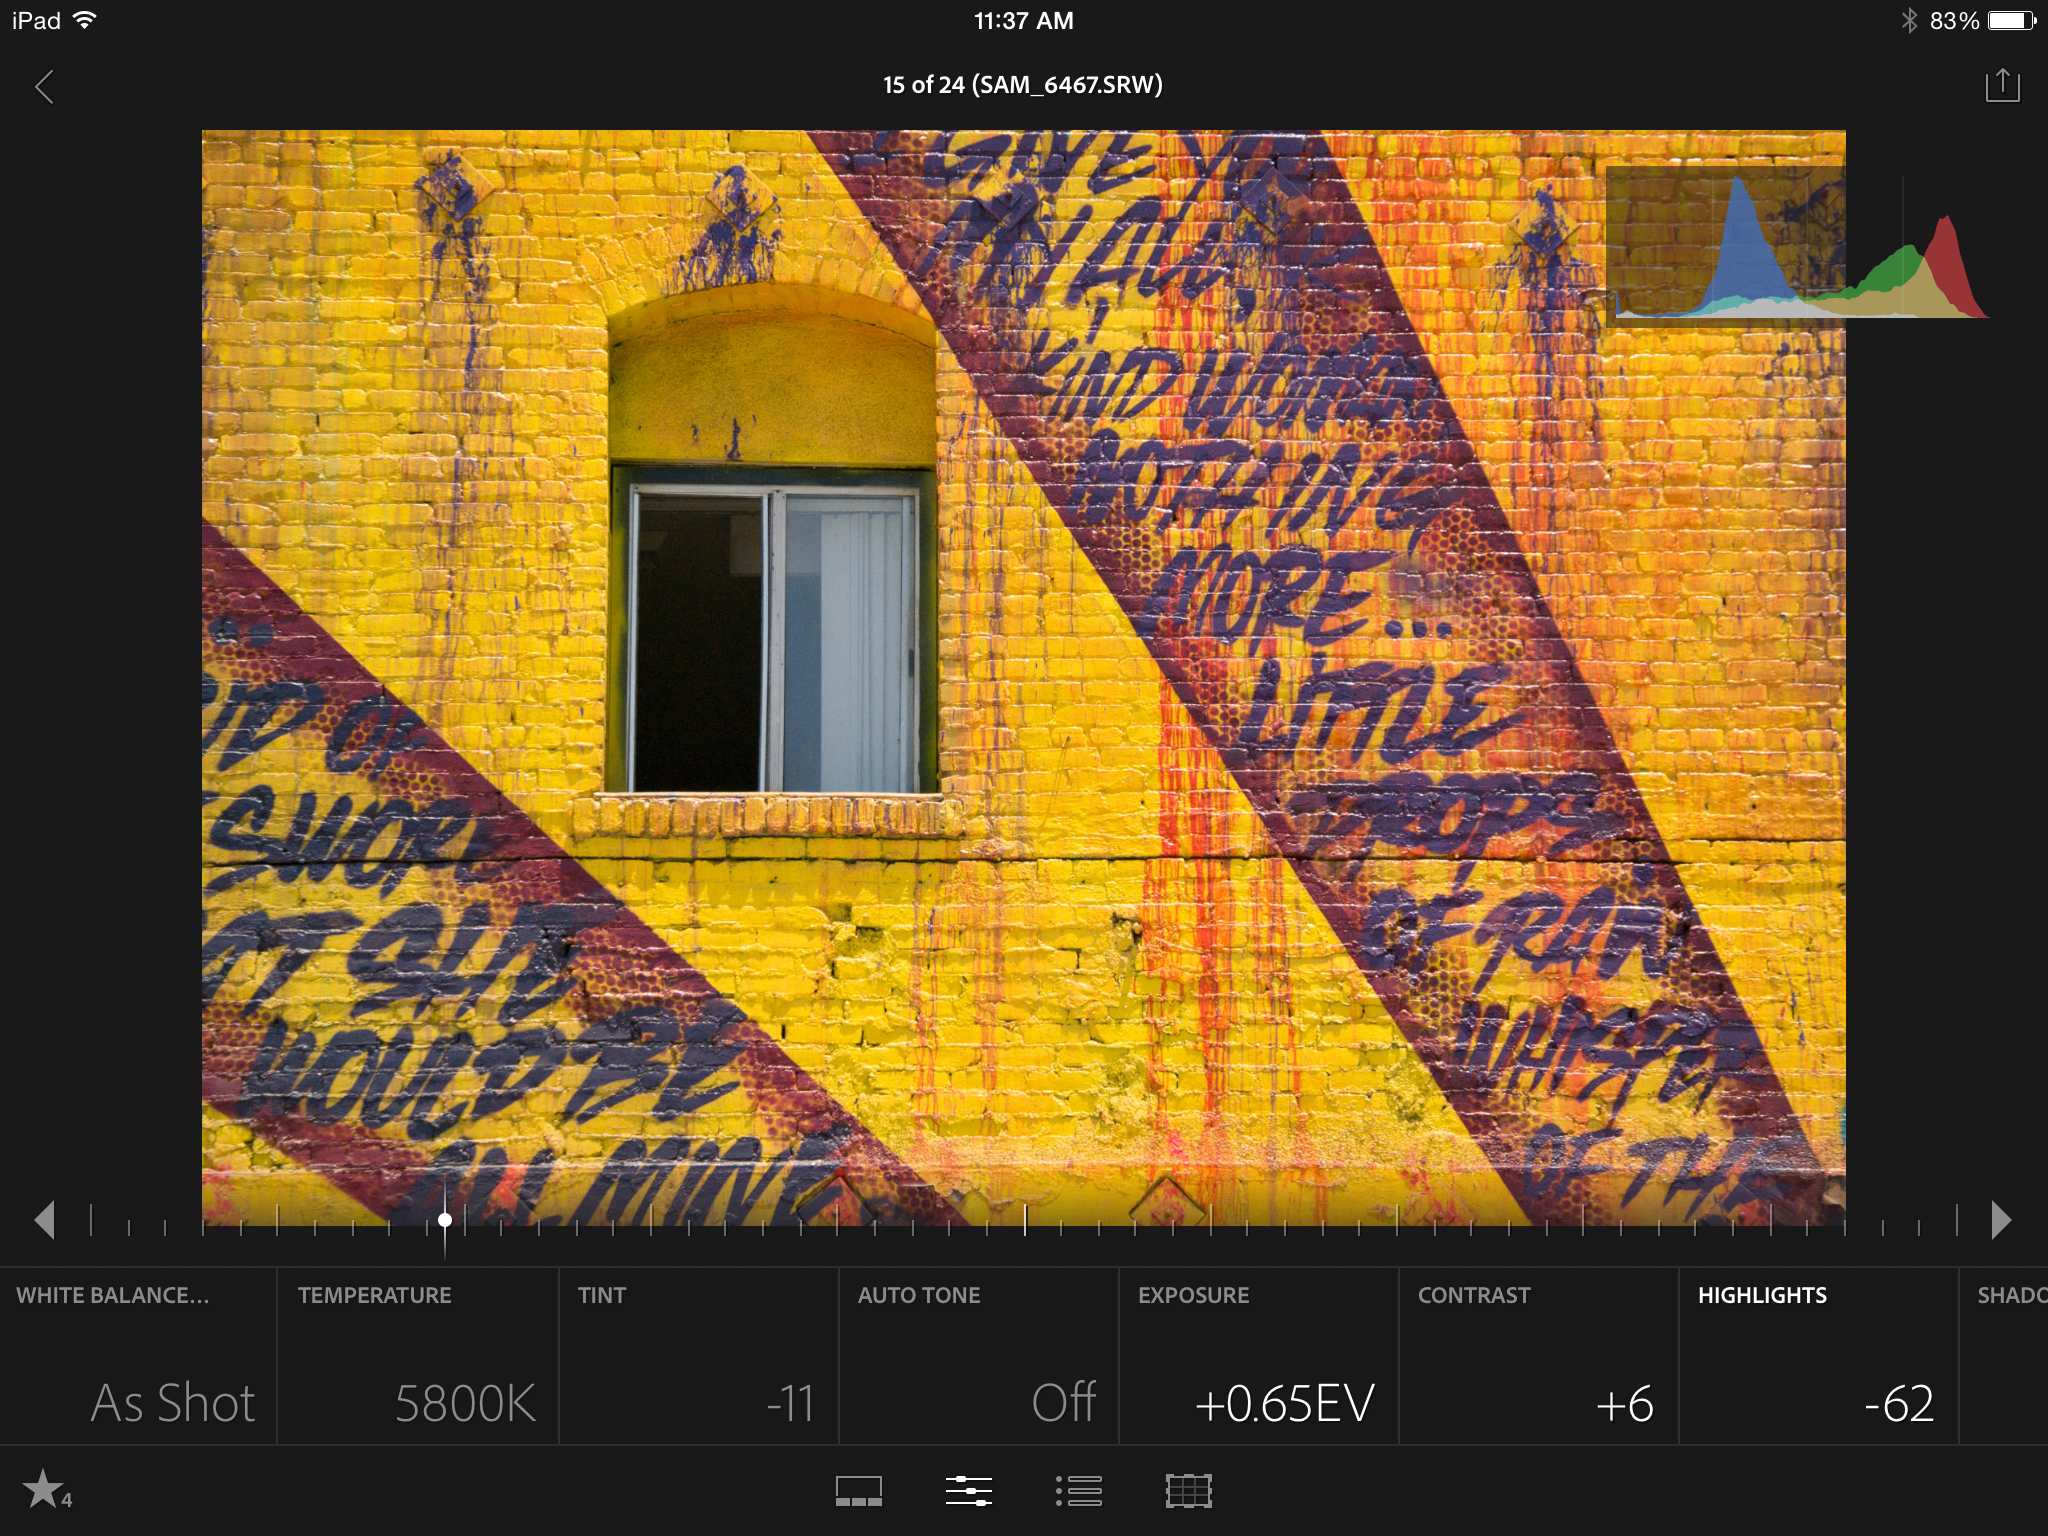
    So I’m 2 months in, and once I got over the whole ’subscription’ thing, the process has actually made my workflow easier, and that’s due in large part to the feature set that they offer in the Creative Cloud, most notably, the syncing with the new Lightroom mobile. This workflow, Lightroom mobile, on an iPad mini? It’s simply divine. Instead of laying on the couch feeling lazy and proscrastinaty, now I’m actually getting work done. I’m able to star, flag, and pre-edit my images, and when I do finally decide to act like a ’true professional’ and get up off the couch, and walk to the computer, or head into to the office or studio the next day, what a treat to see that all the edits have automatically synced with Lightroom on the desktop…I mean…c’mon! That alone might be worth the 10 bucks a month.

    So yes, needless to say, so far, I’m happy I made the switch. Adapt or die right? I’ve still got some gotcha in me hot damnit!

    Anyhow, click here to get in on the action!

    For more of my madness:
    Instagram: @wasimofnazareth
    Twitter: @wasimofnazareth
    Google+: www.Google.com/+WasimMuklashy
    Facebook: www.Facebook.com/WasimOfNazareth
  • A Quick, Easy And Effective Alternative Method Of Sharpening Your Images

    A Quick, Easy And Effective Alternative Method Of Sharpening Your Images

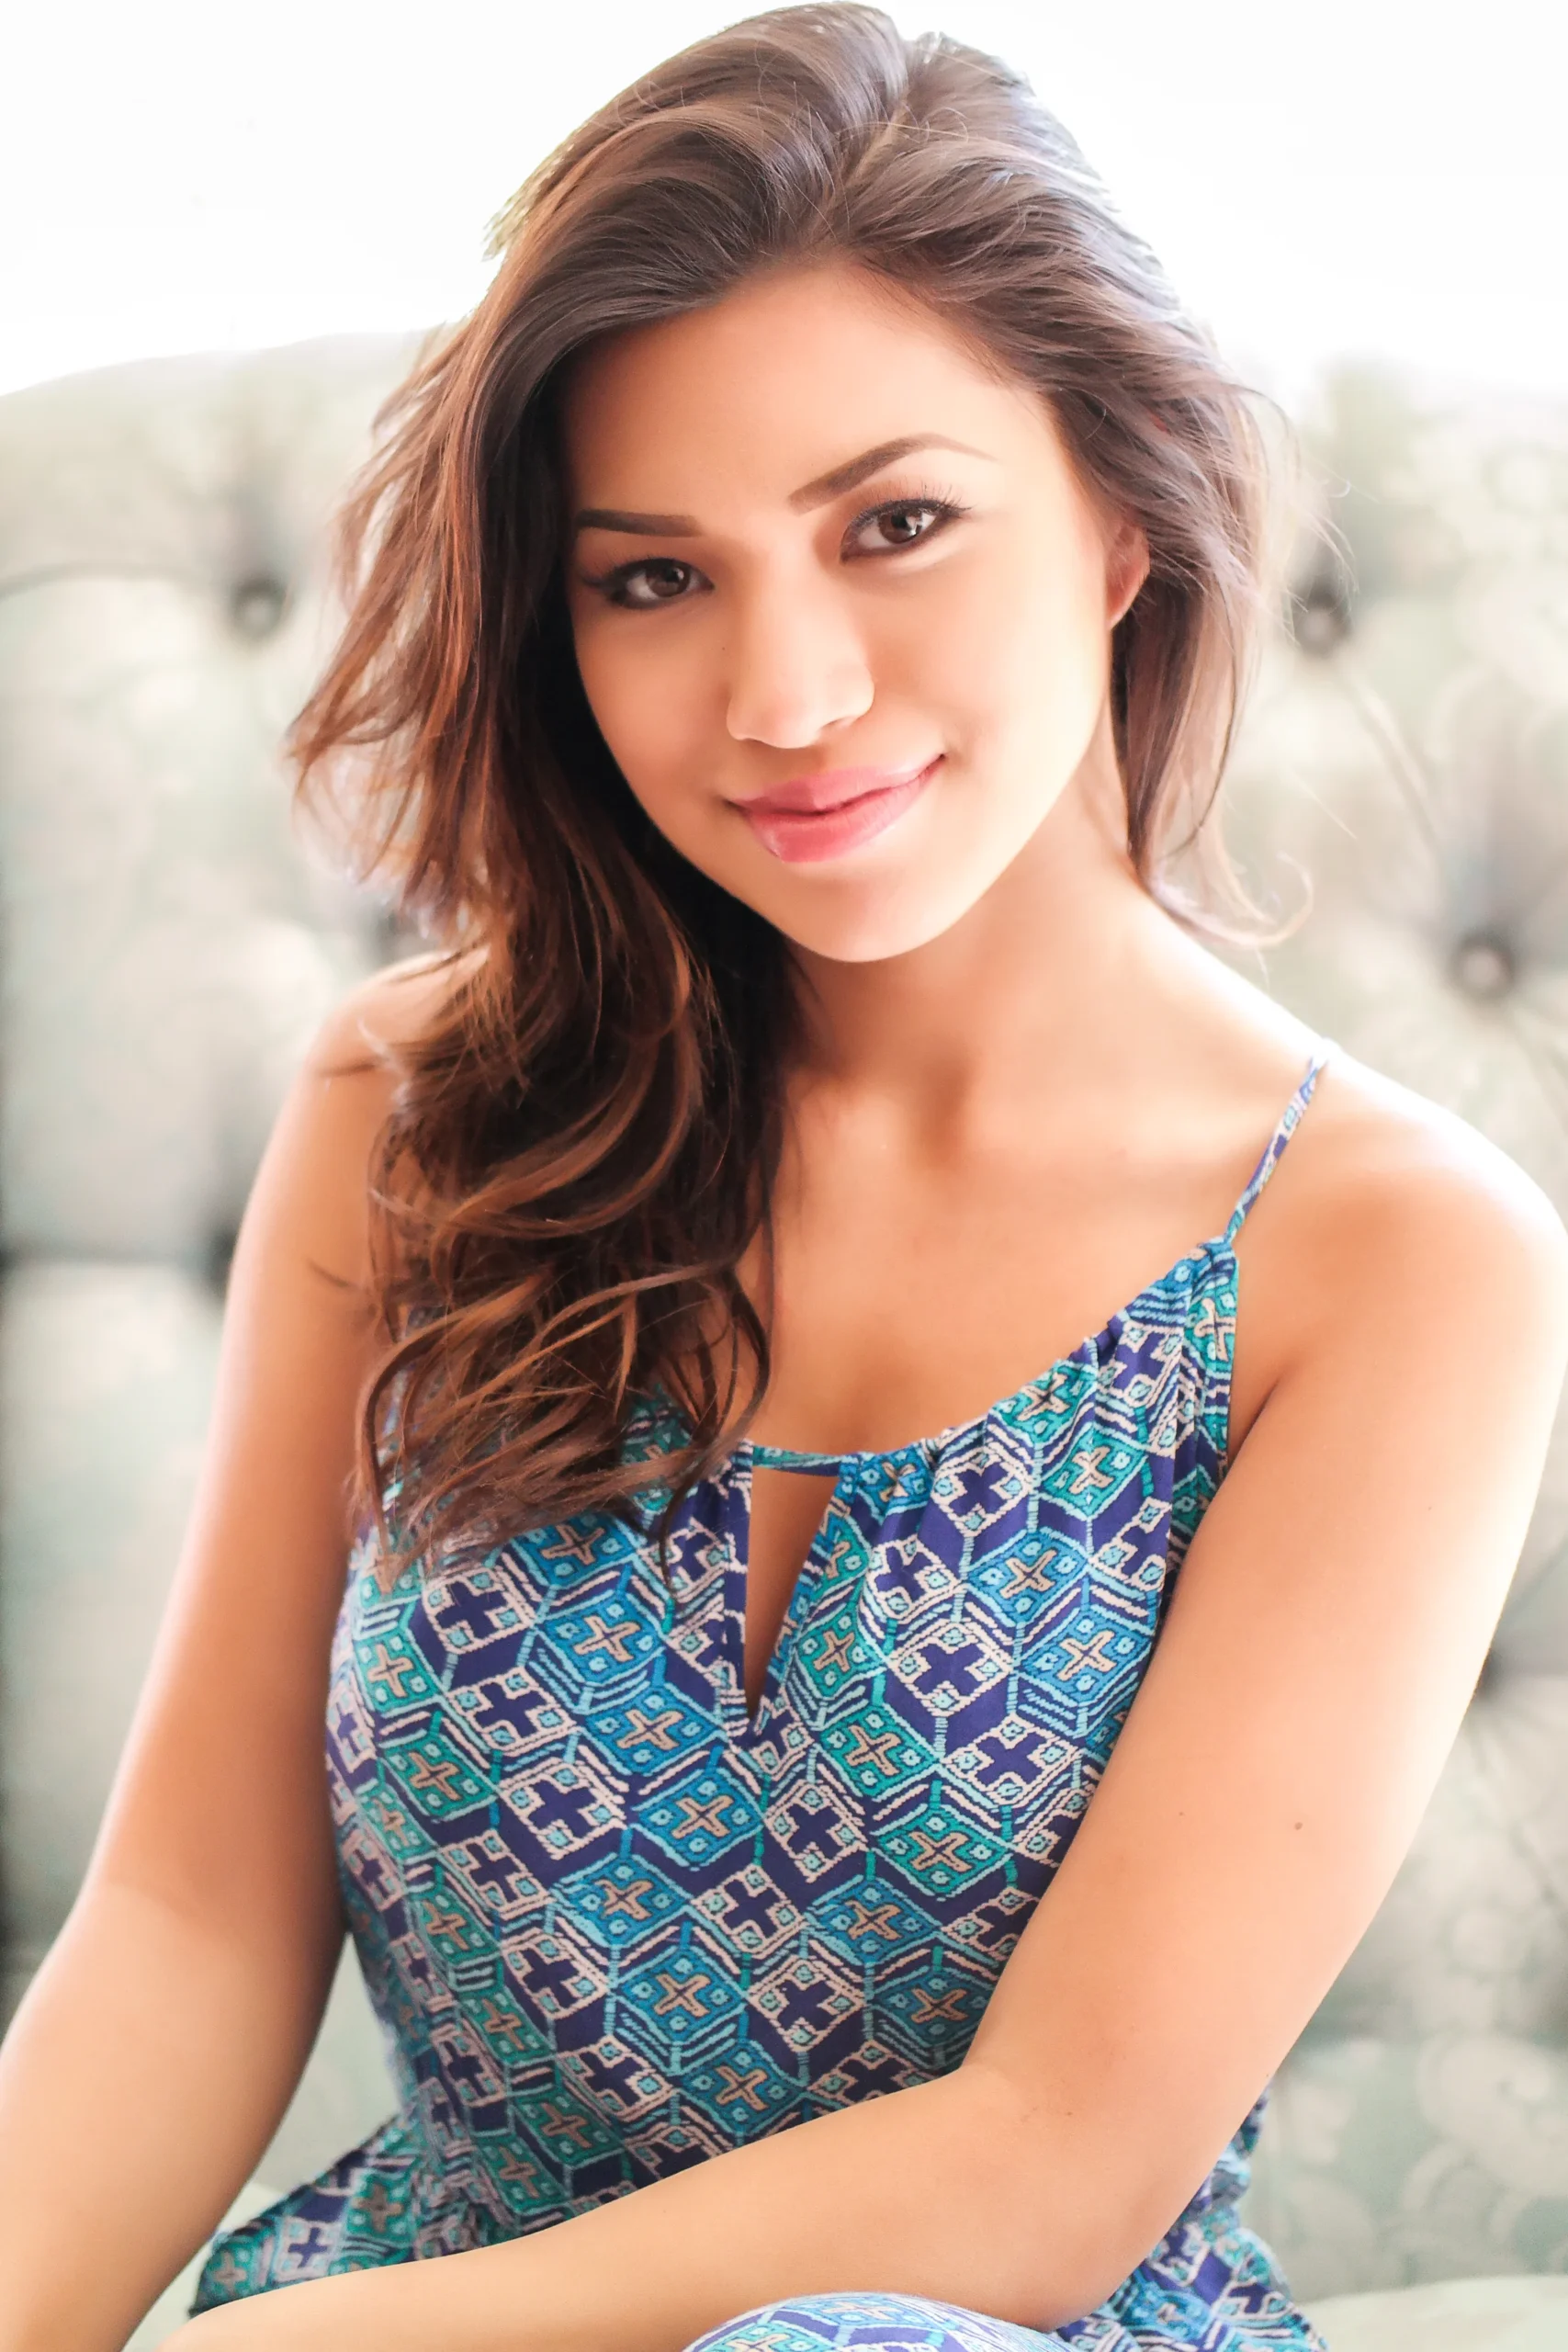
    Julia Kelly_Wasim Muklashy Photography_Samsung NX30

    When most people think sharpening in Photoshop, they understandably default to the ’Sharpen’ or ‘Unsharp Mask’ filters. But since I learned this trick a few years back, I don’t believe I’ve opened a single one of Photoshop’s native sharpen plugins a single time. Instead, I’ve relied on one of the ‘Other’ filters in that ‘Filter’ menu – the ‘High Pass’ filter.
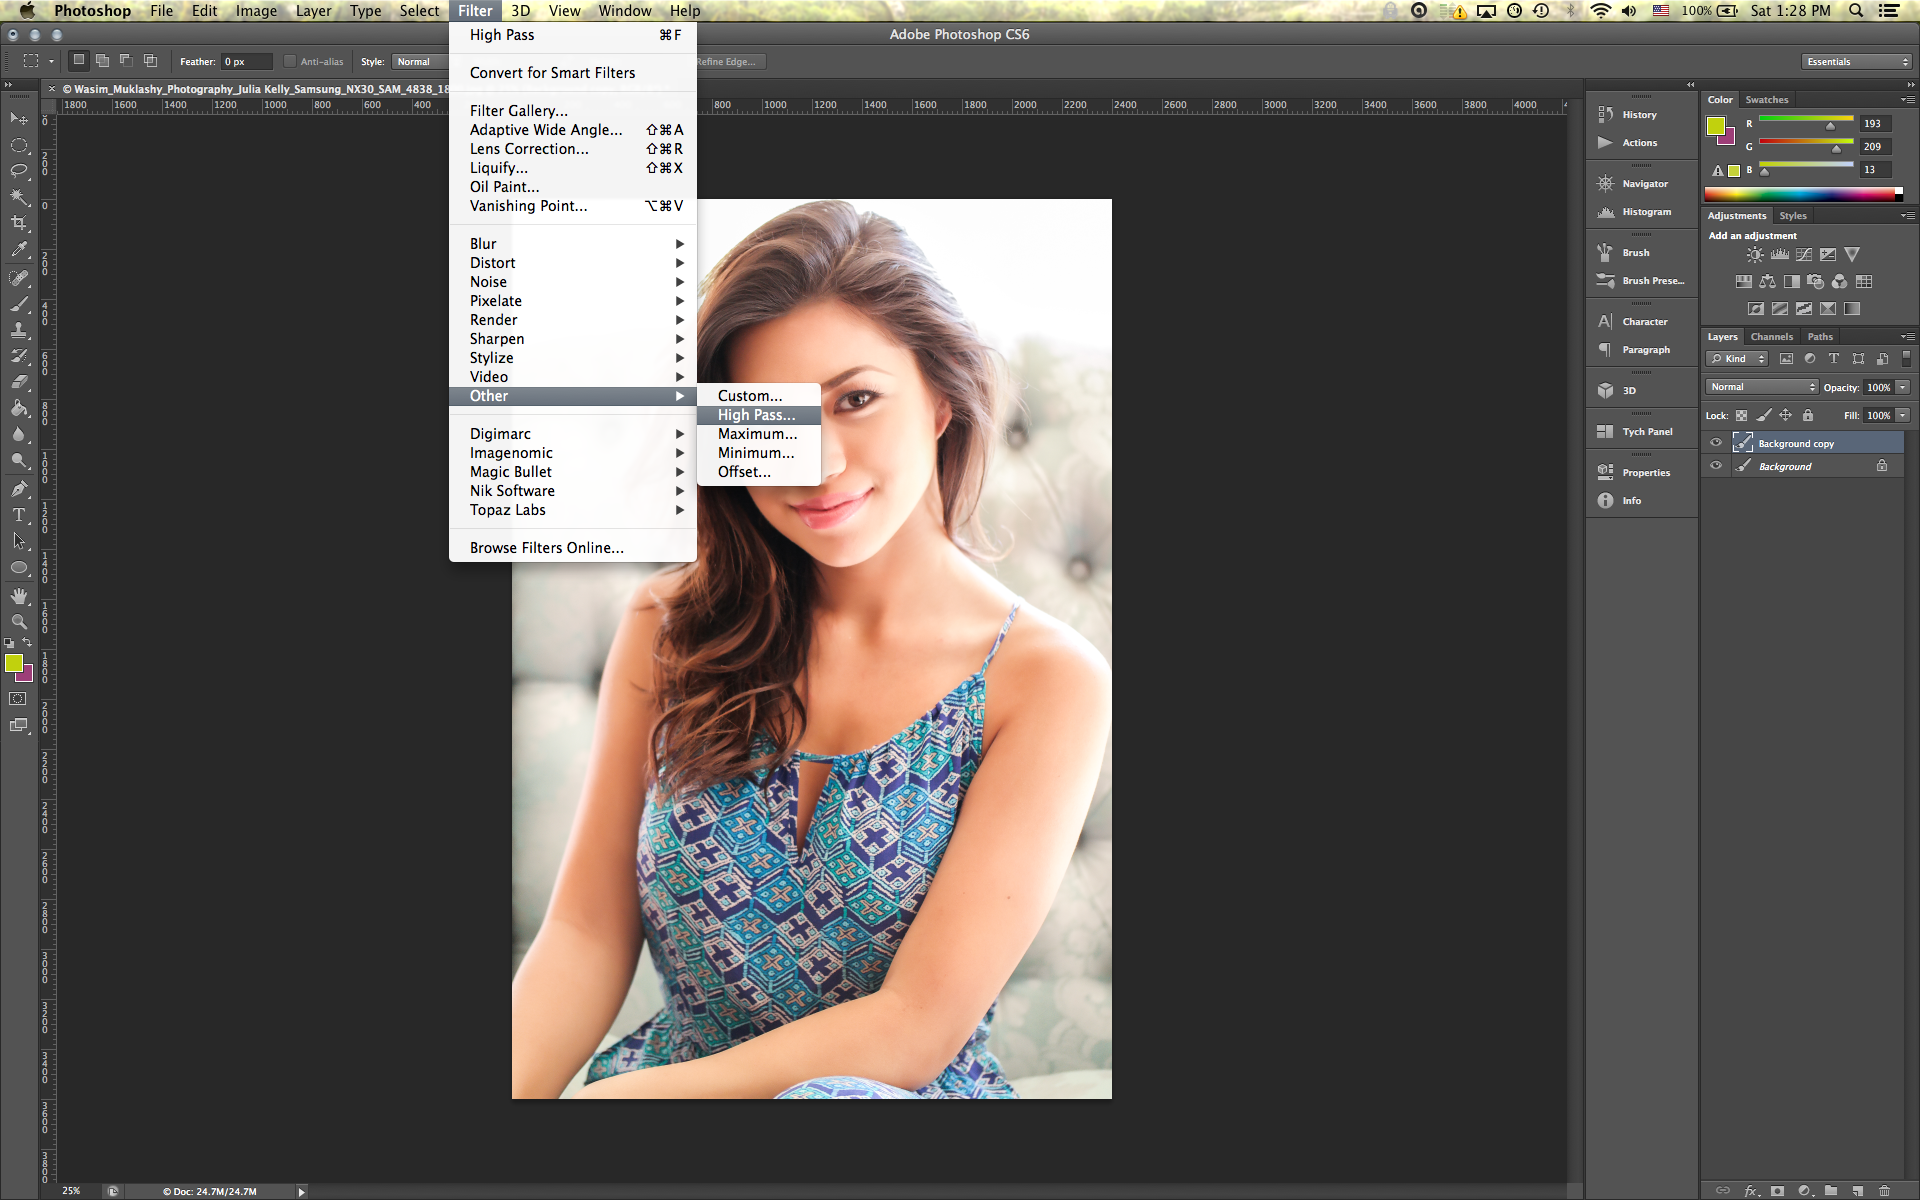
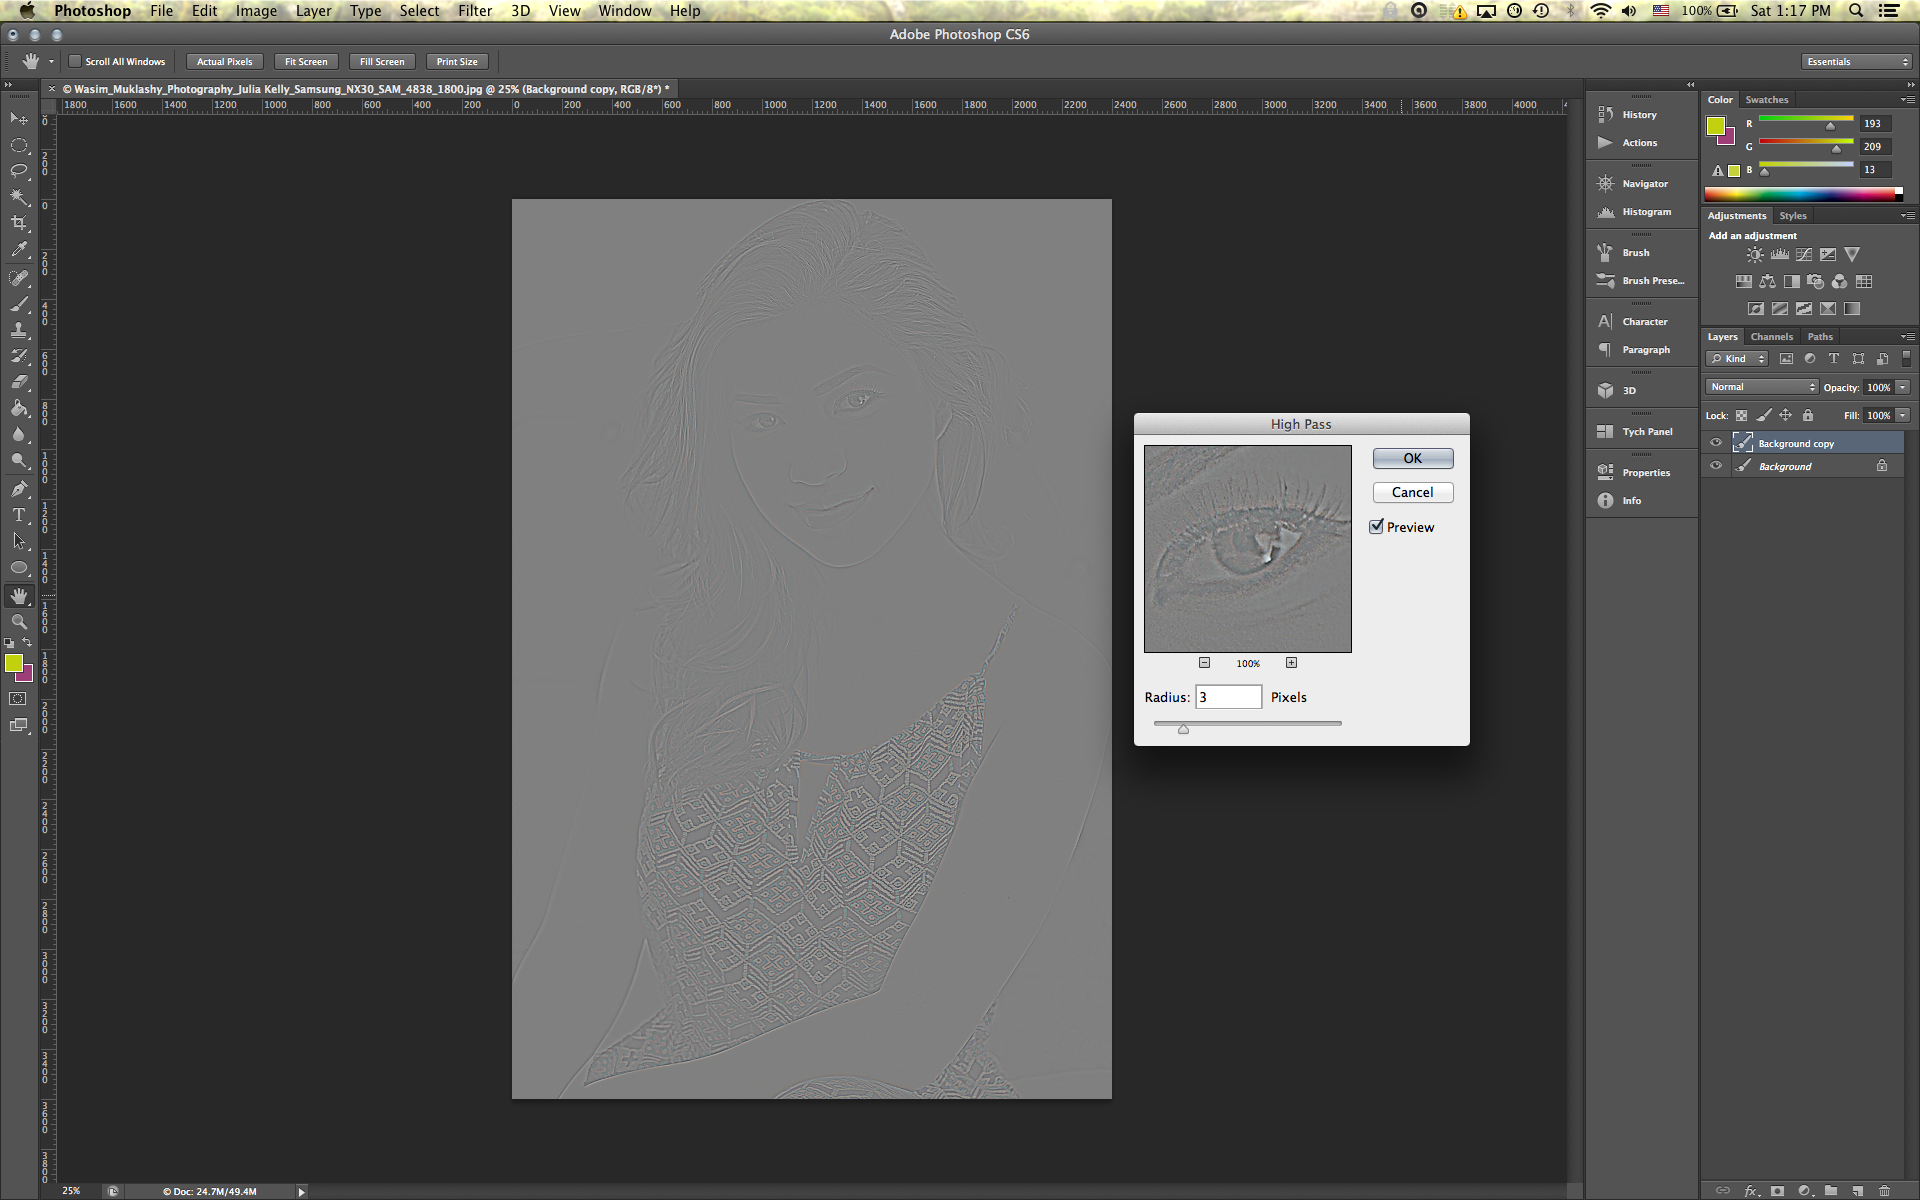
    Essentially, you’ll make a duplicate layer of the image layer. Then navigate to the ‘Filter’ menu, down to ‘Other,’ and choose ‘High Pass.’ What you’ll see might startle you at first, but don’t worry, you’ll learn to love that gray mask that ‘ruined’ your picture in just a minute. Using that dialog box that pops up, I’ll usually enter a radius of between 2-5 pixels, depending on the image. The more sharp edges and lines I have in an image, the higher of that 1-5 scale I’ll go. Anymore above that will usually result in the dreadfully obvious over sharpened image.  If you zoom in closely on the image, you can see exactly what is being sharpened and by how much. You can see the level of sharpening of those pixels through that grey mask on the image. In portraiture, I’m usually between 2-3 pixels at most, mostly to help accent eyelashes and eyeballs.

    Wasim_Muklashy_Photography_High_Pass_Sharpening_1
    Wasim_Muklashy_Photography_High_Pass_Sharpening_1
    Wasim_Muklashy_Photography_High_Pass_Sharpening_2
    Wasim_Muklashy_Photography_High_Pass_Sharpening_2

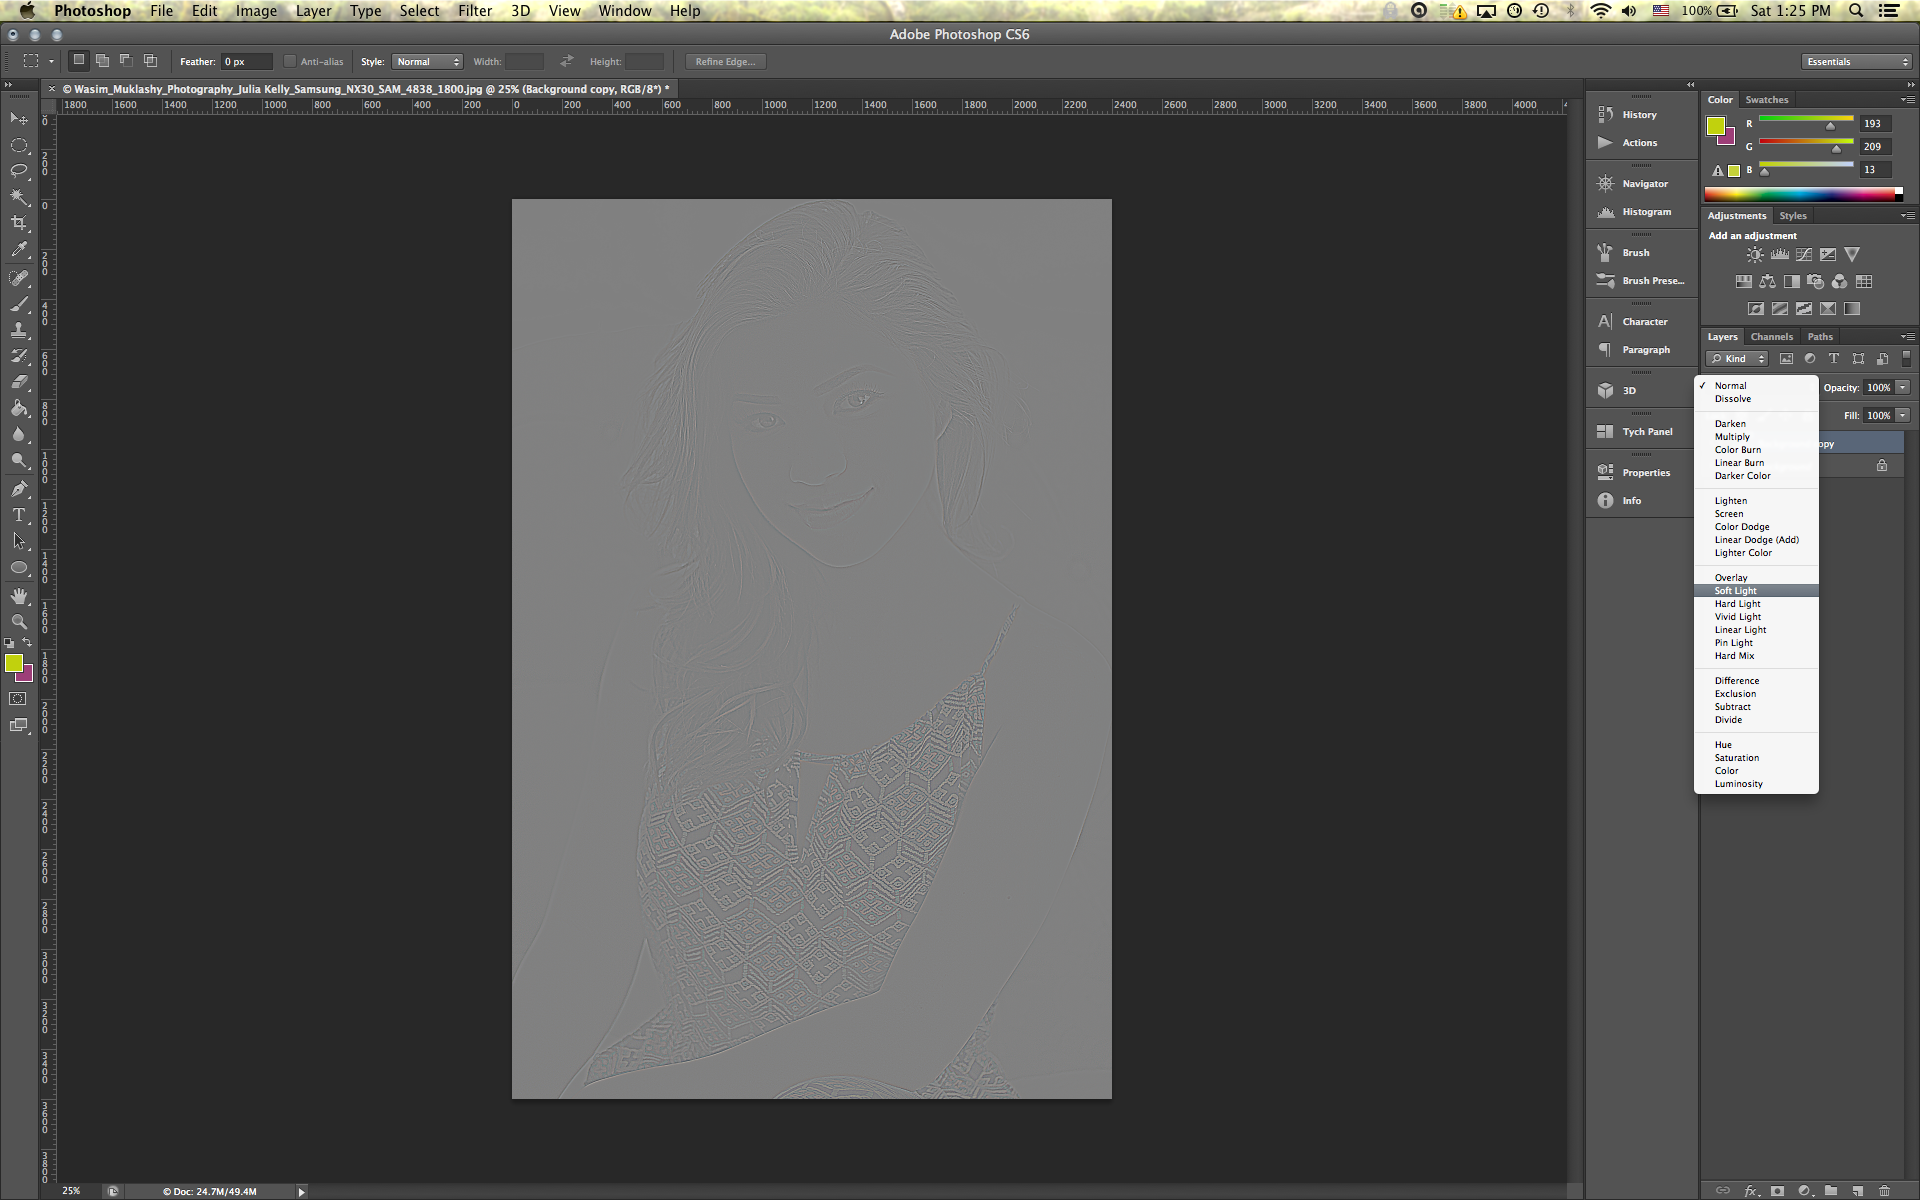
    Once you decide how much sharpening you’d like, hit ‘Ok.’ Now the top layer will be that High Pass filter. Go to the ‘Blending Mode’ drop down menu above the filters, which is usually set at default to ‘Normal,’ and navigate through those options. I usually stick with ‘Soft Light,’ as it provides the most natural look, especially for portraits and architecture, however, you can play with the various other options, including ‘Vivid Light’ and ‘Hard Light.’ Once you scroll through them, you can see the different way each blending mode affects the high pass filter. The great part here is that you can also control the opacity of that layer, even further fine tuning the sharpening.

    Wasim_Muklashy_Photography_High_Pass_Sharpening_4
    Wasim_Muklashy_Photography_High_Pass_Sharpening_4

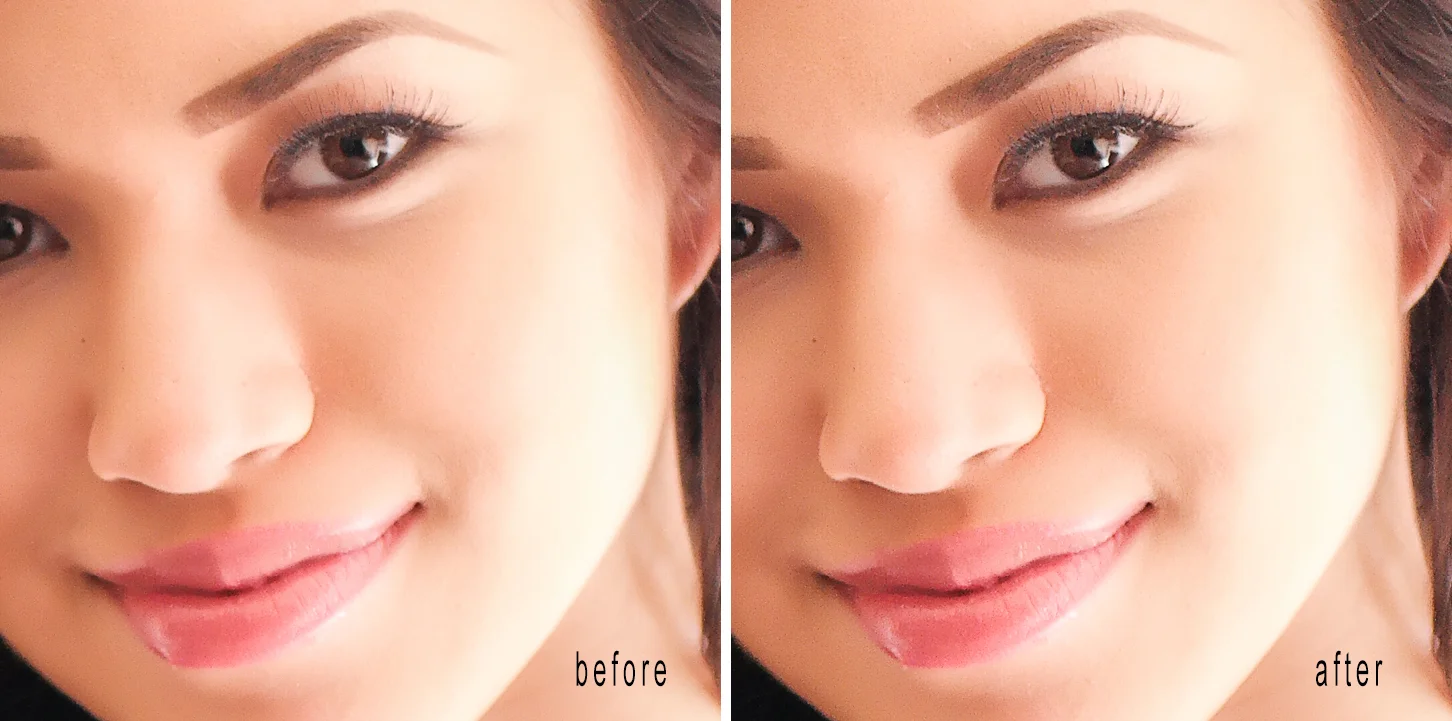
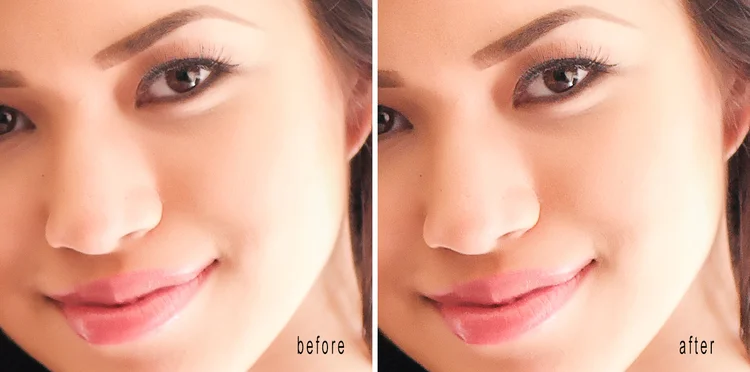
    So that has become my preferred method of sharpening. It just seems to offer the most manual control over the sharpening process and once you get used to it, it’ll start to come as second nature. Here’s the before and after, you can see it best in the eyes:

    Wasim_Muklashy_Photography_High_Pass_Sharpening_Before_After
    Wasim_Muklashy_Photography_High_Pass_Sharpening_Before_After

    The image used here was shot on a Samsung NX30 with a Samsung 60mm/f2.8 lens. The model above is the stunning and popular social media star, Julia Kelly. You can find her on Instagram,Twitter, and Vine.

    For more of my madness:
    Instagram: @wasimofnazareth
    Twitter: @wasimofnazareth
    Google+: www.Google.com/+WasimMuklashy
    Facebook: www.Facebook.com/WasimOfNazareth
  • Late Night Fun With Photo Filters…and Scotch.

    Late Night Fun With Photo Filters…and Scotch.

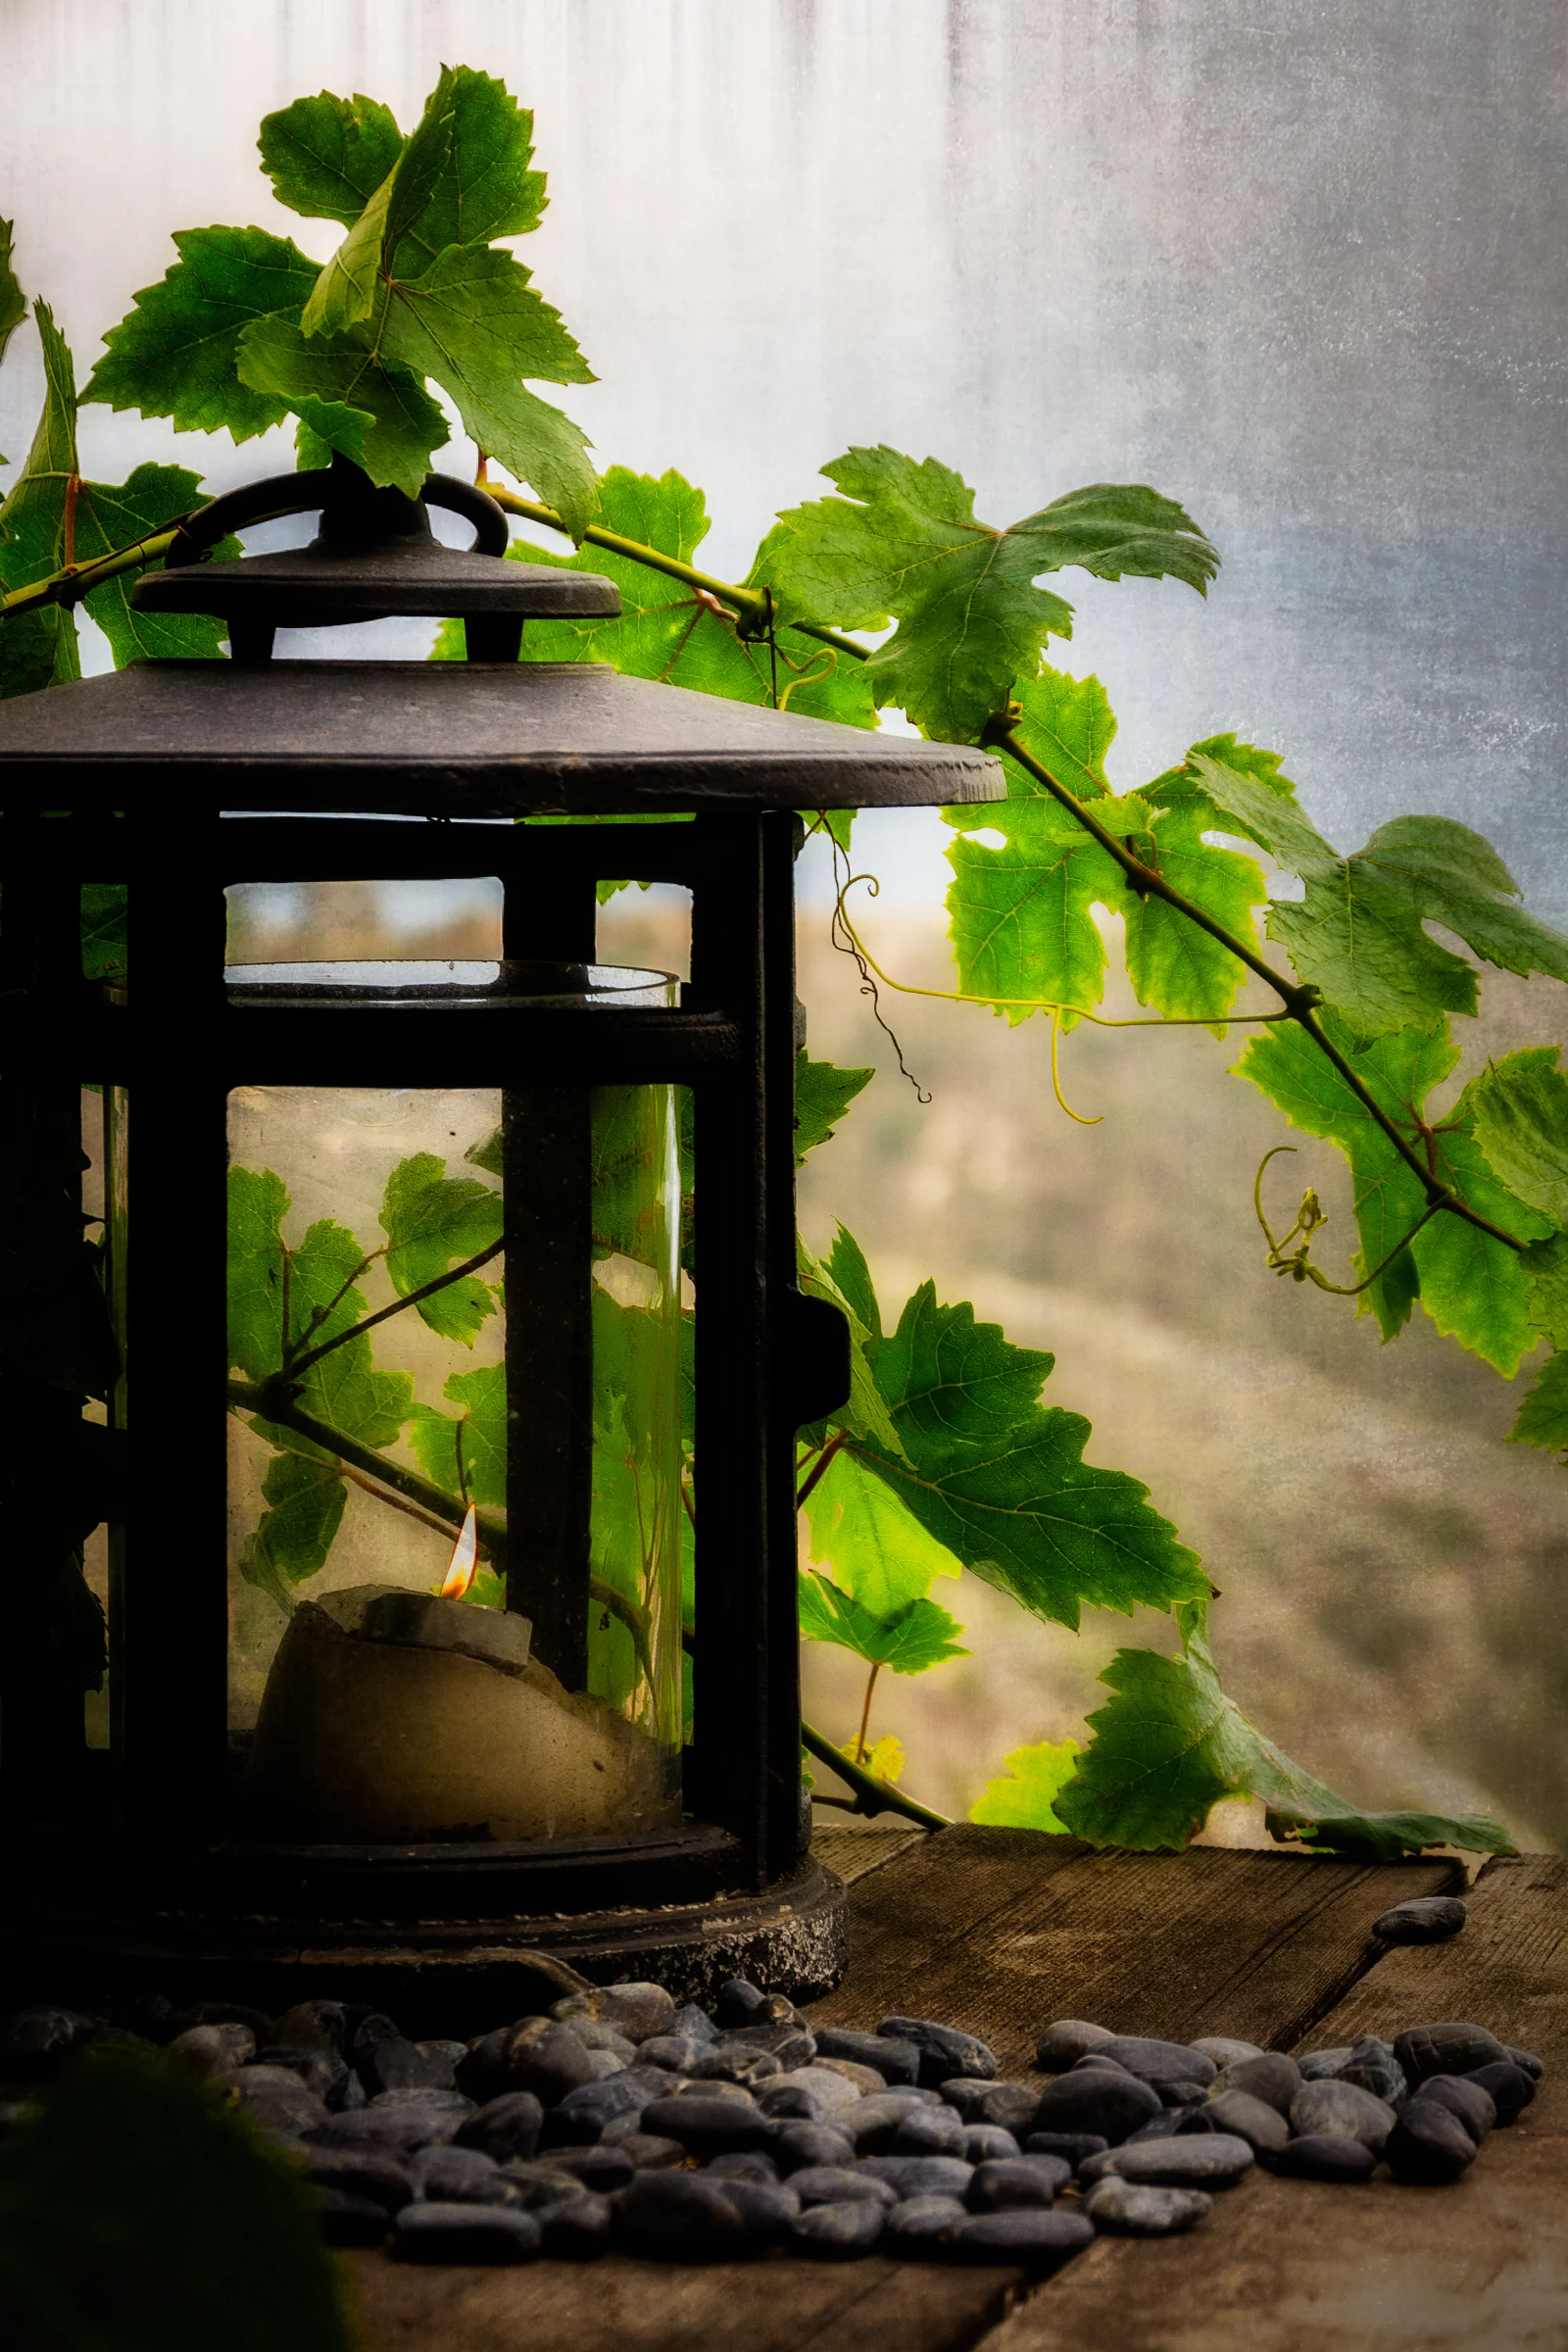
    1wm5837 funwitheffects 2400sfwSo had a house I had to shoot this week for Airbnb. It was actually the second of two units on a property I shot before, but I hadn’t seen the second unit as it was occupied that first time. Anyway, not important…so after I was done shooting the interior, I figured, no one was here, I was going to take advantage of the moment and just kind of chill for a minute. When you’re standing on a deck with nothing in front of you but a gorgeous canyon that opens up to the Pacific Ocean (see image at bottom of this post), it’s hard not to force yourself to take a break and soak it in. So as I sat down and took a few gulps of my warm ice tea that had been sitting the car since I showed up, I saw this ridiculously quaint and charming little candle holder with a pile of little rocks alongside it, being draped PERFECTLY by a grapevine. And when I mean, perfectly, it’s as if it was staged. For some reason, my imagination took me to the Mediterranean coast, perhaps Spain, maybe Italy, I don’t know, but my wanderlust got the best of me and I started snapping a few shots of it as if I was actually on that coast. (more…)