Tag: photography tips

  • 5 Tips For Shooting Commercial Real Estate Photography

    5 Tips For Shooting Commercial Real Estate Photography

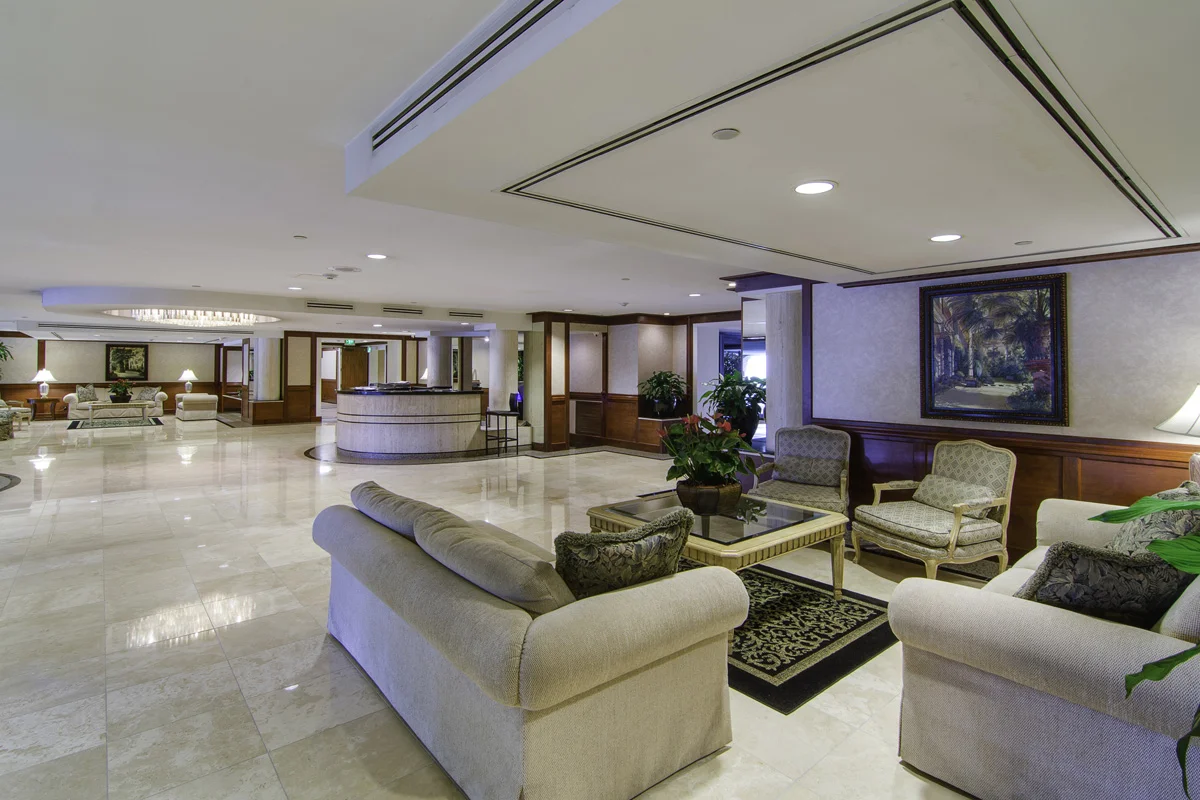
    Wasim-Muklashy-Real-Estate-Photography_San-Diego-Los-Angeles-Ventura_Pro-Property-Photos_011

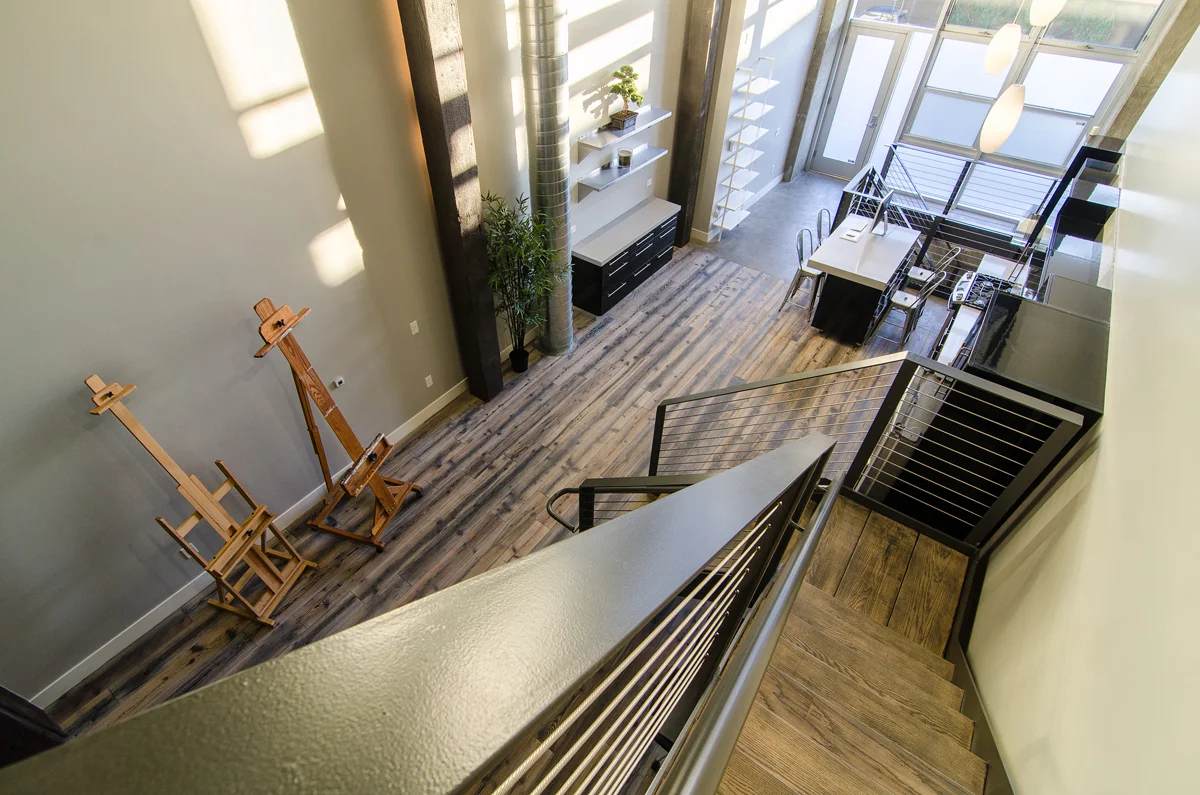
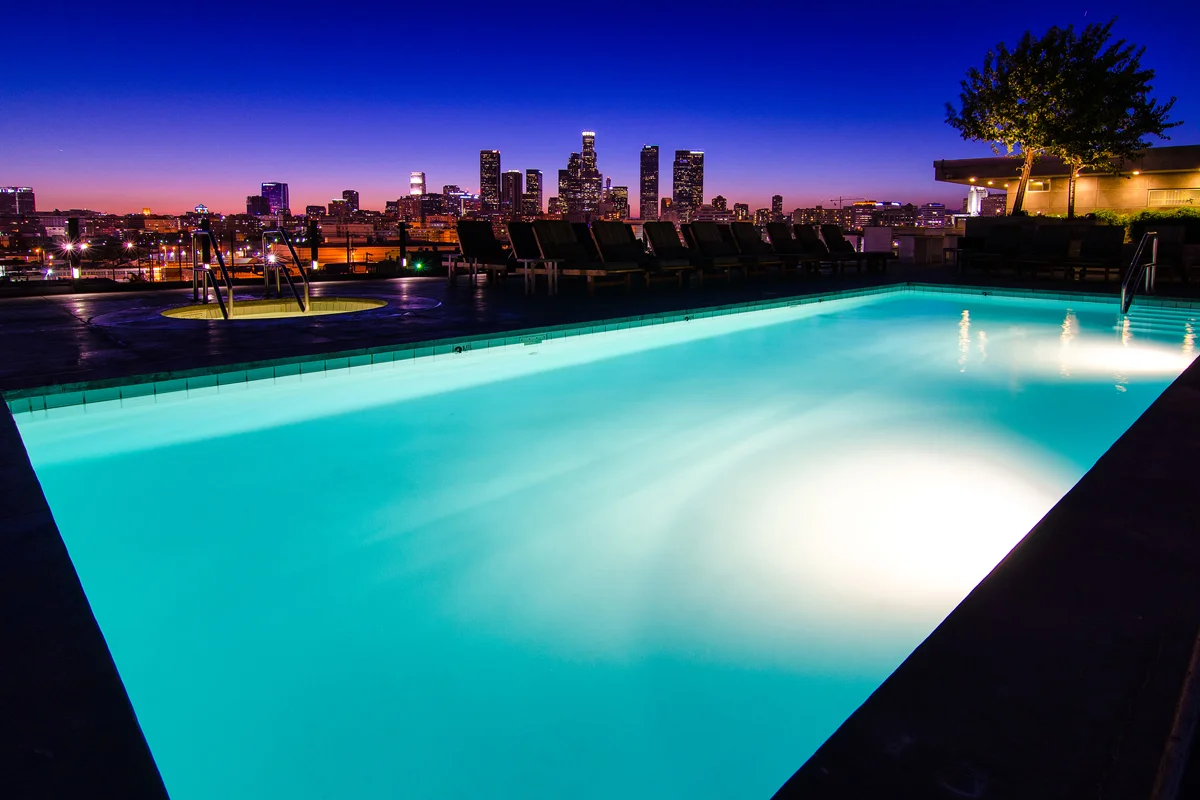
    While there are definite similarities in regards to methods and approach when photographing any sort of real estate, there are also important differences to keep in mind, especially when photographing commercial real estate and properties. In the residential real estate realm, they tend to use the images for a few weeks or maybe months until the space is sold, but in commercial real estate, these images are used to sell the business for perhaps years and years, and they might live on a website for just as long, offering the potential client or customer a visual representation of the space.

    While that’s a huge responsibility for the photographer to capture that in a way that the business owner is proud of, that doesn’t necessarily mean it needs to be any more difficult. Like anything else, if you spend adequate time getting a feel for the space and the business and do your homework, you’ll naturally start to gravitate towards the best ways to represent them in photographs that’ll make both you and the business owner proud. Here are a few tips for commercial real estate photography that I’ve learned on a few recent commercial shoots:

    1. Scout – Make sure to scout the space at least a few days prior to shooting, or if you’re unable to make it yourself due to location (there should be no other excuse really), have someone take simple shots from different corners into the space so you get a sense of the space and get an orientation of the space, which direction are the windows facing, when will the sun be where, are there obstructions to natural light, are there reflective surfaces (if so, check out my post How To Minimize Reflections In Interior Photography). If you can make it to scout the location yourself, which is preferable, shoot a few shots from different angles. Typically the corners of the room, even just on your phone, that you can take with you and marinate on for a few days. This time will give you a chance to formulate a mental shot list and idea of how to and what you’ll need to execute a successful shoot without the day-of stresses of getting all the shots you need and figuring it all out on the fly. This will also give you some time to play with ideas with the client, helping to build a rapport and a trust between you.
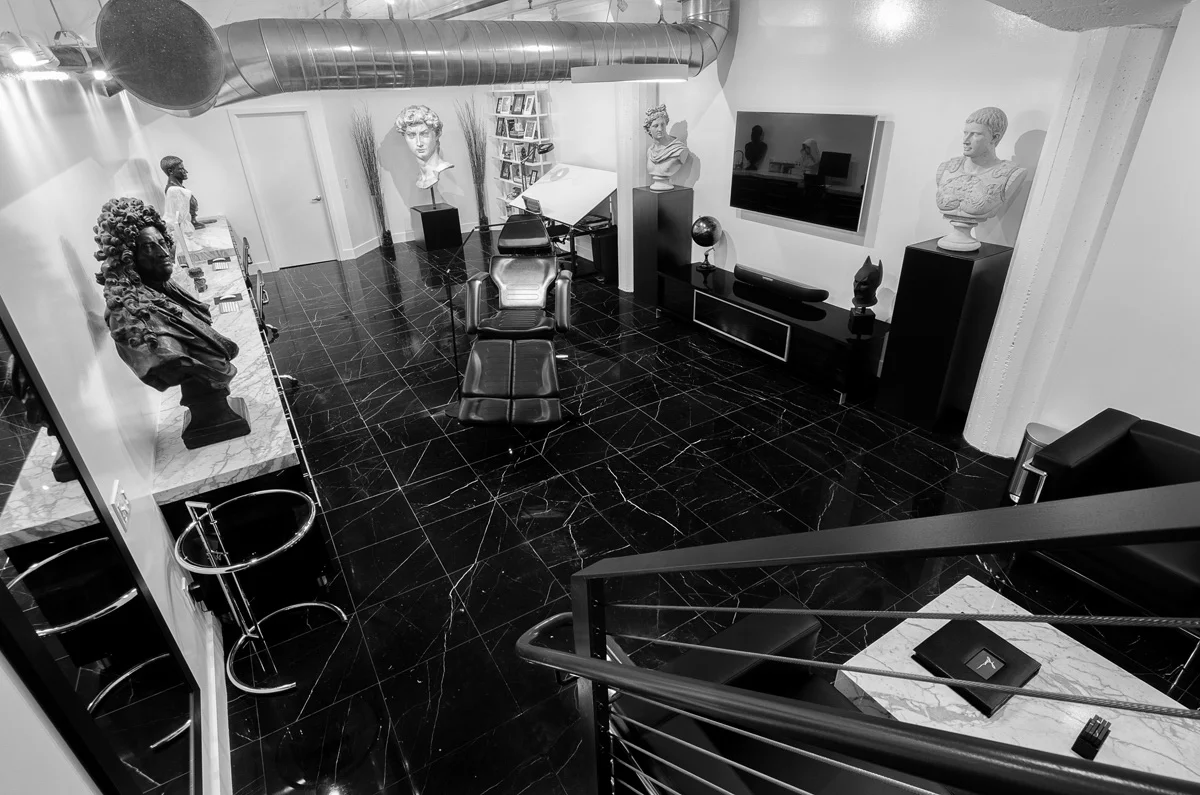
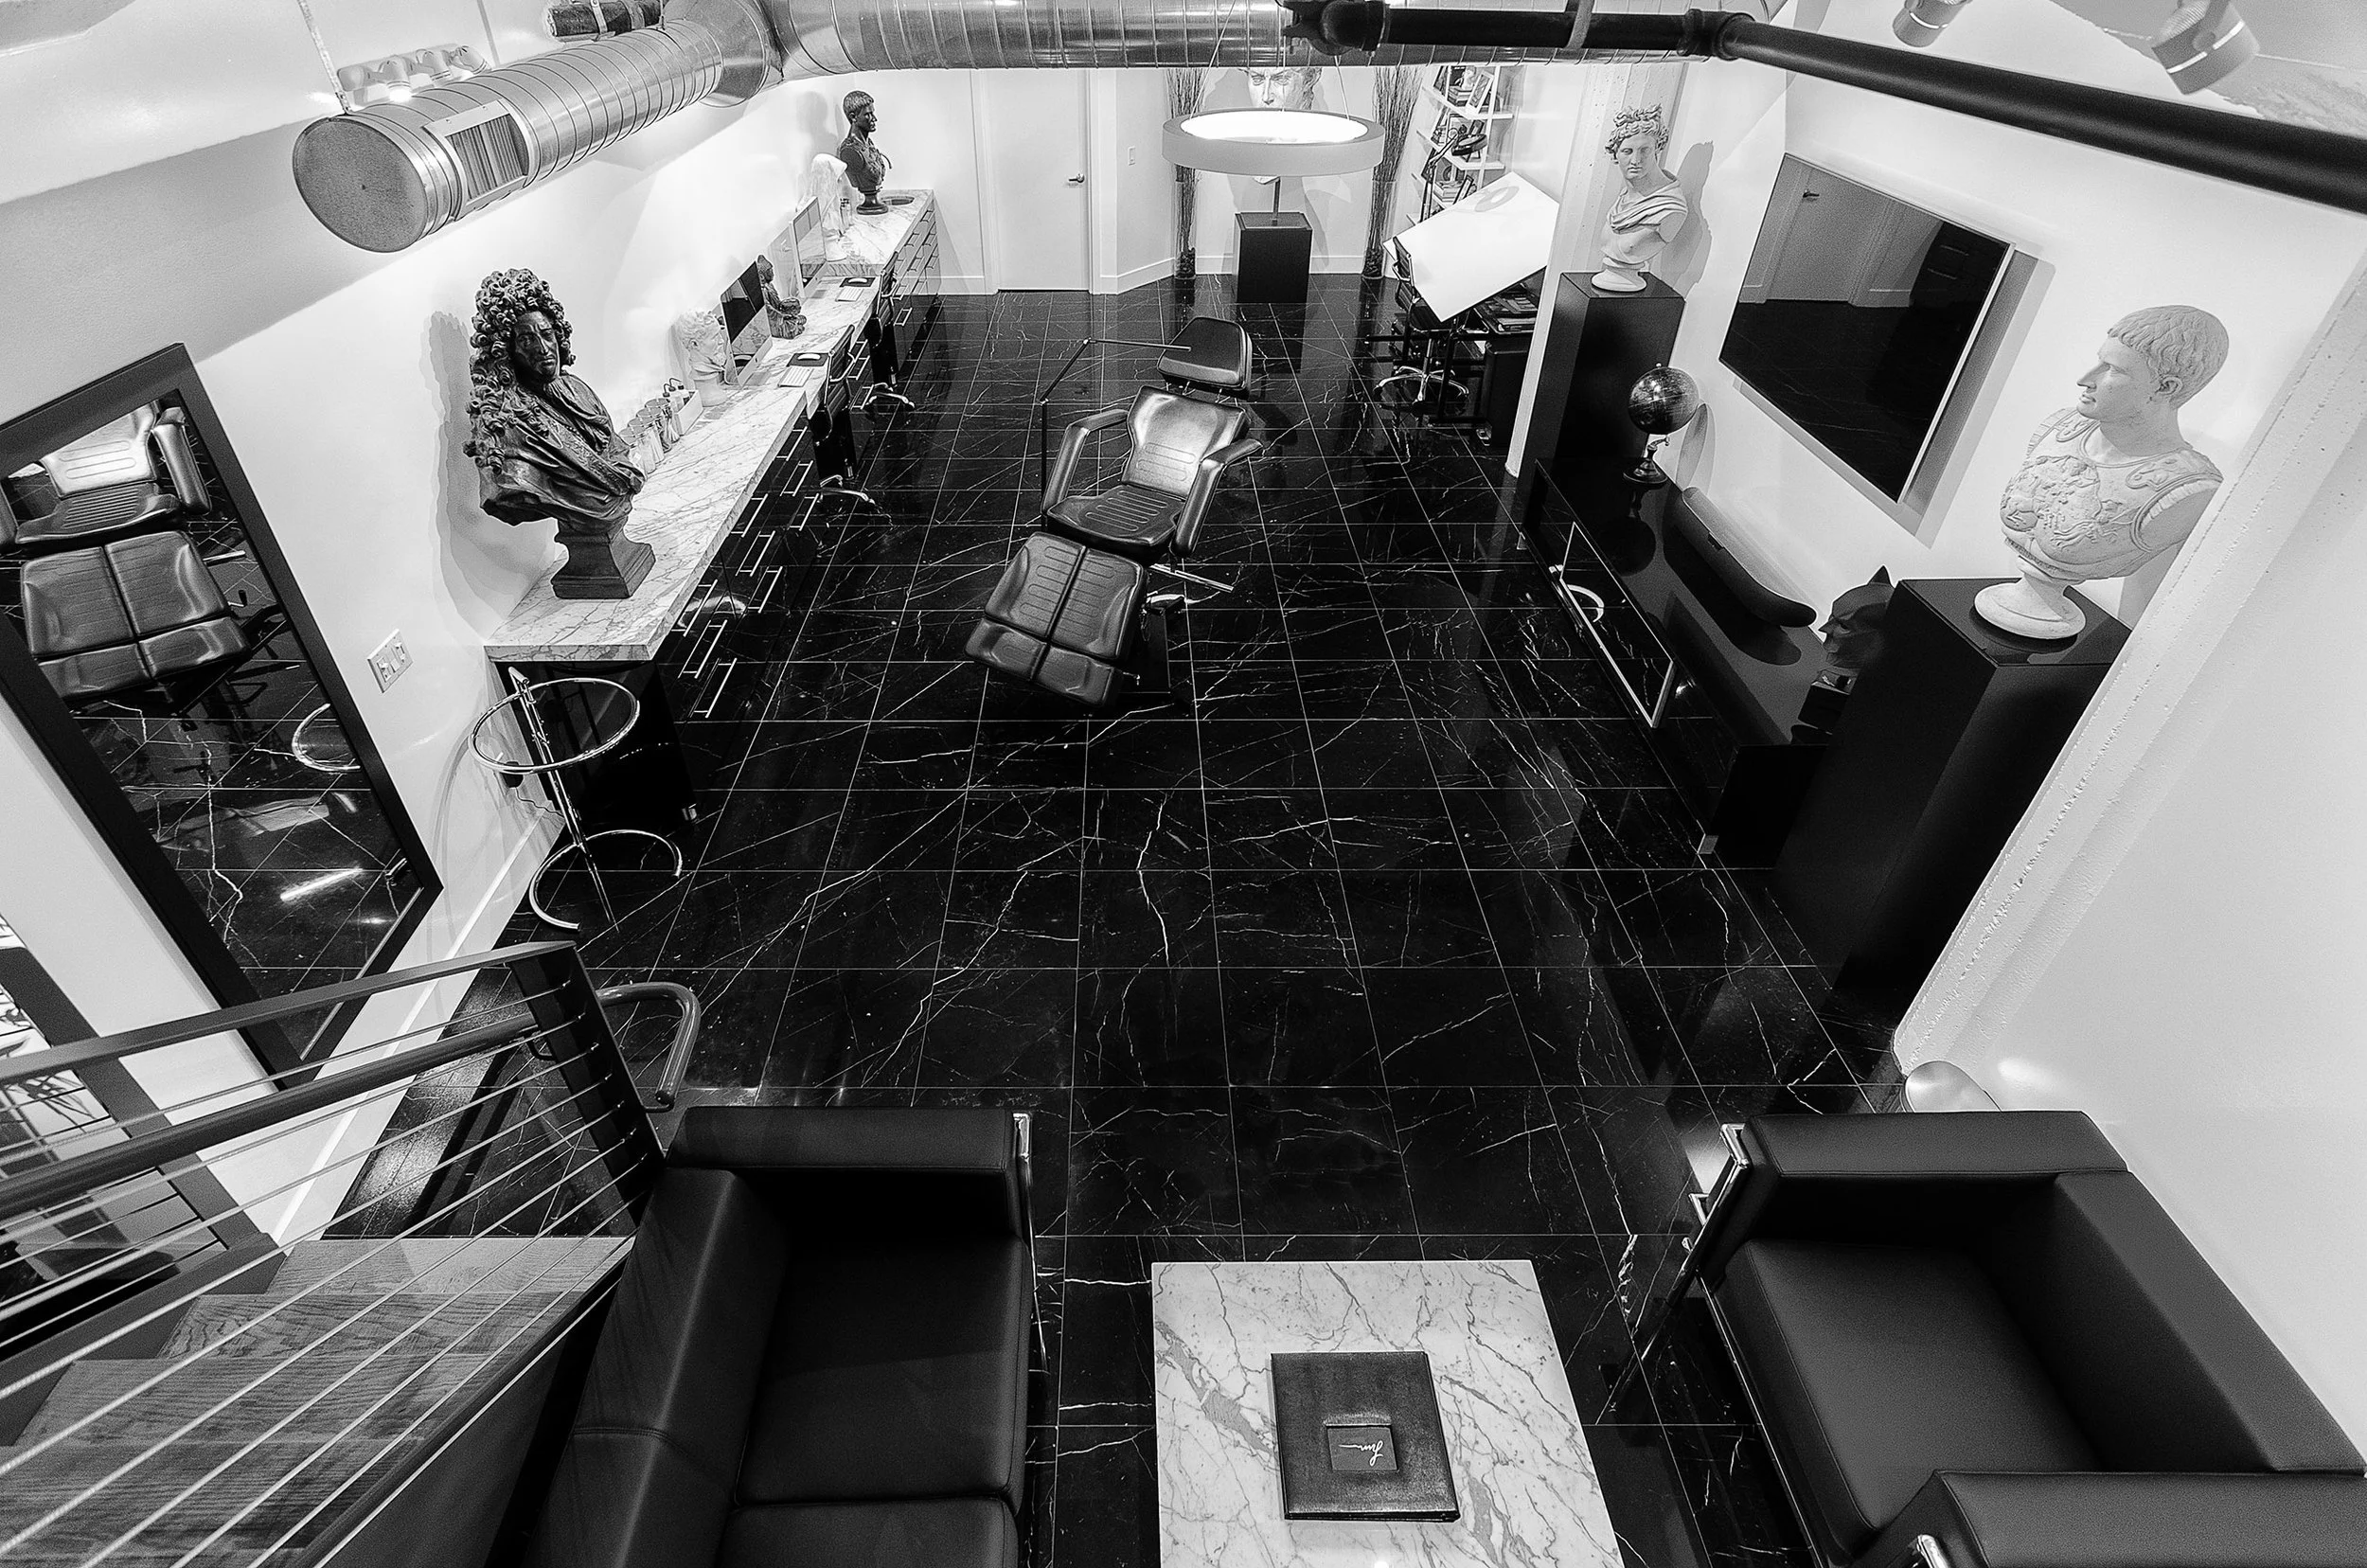
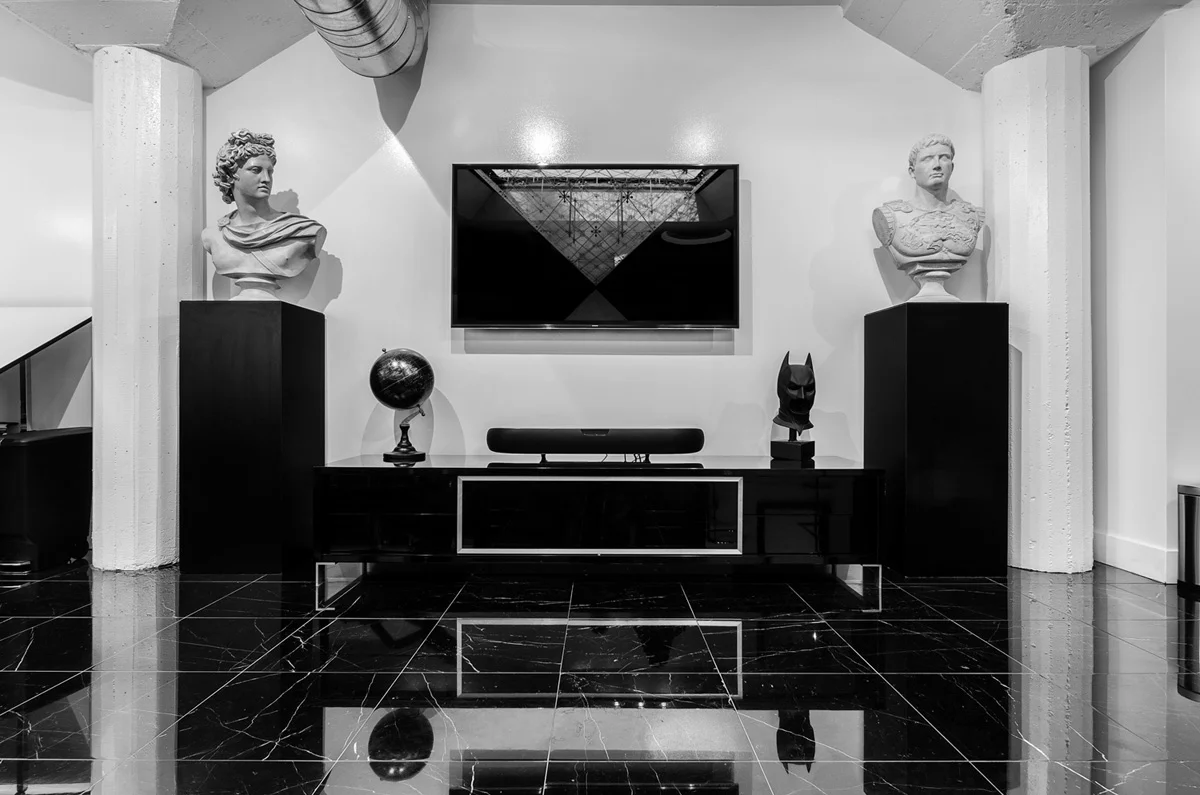
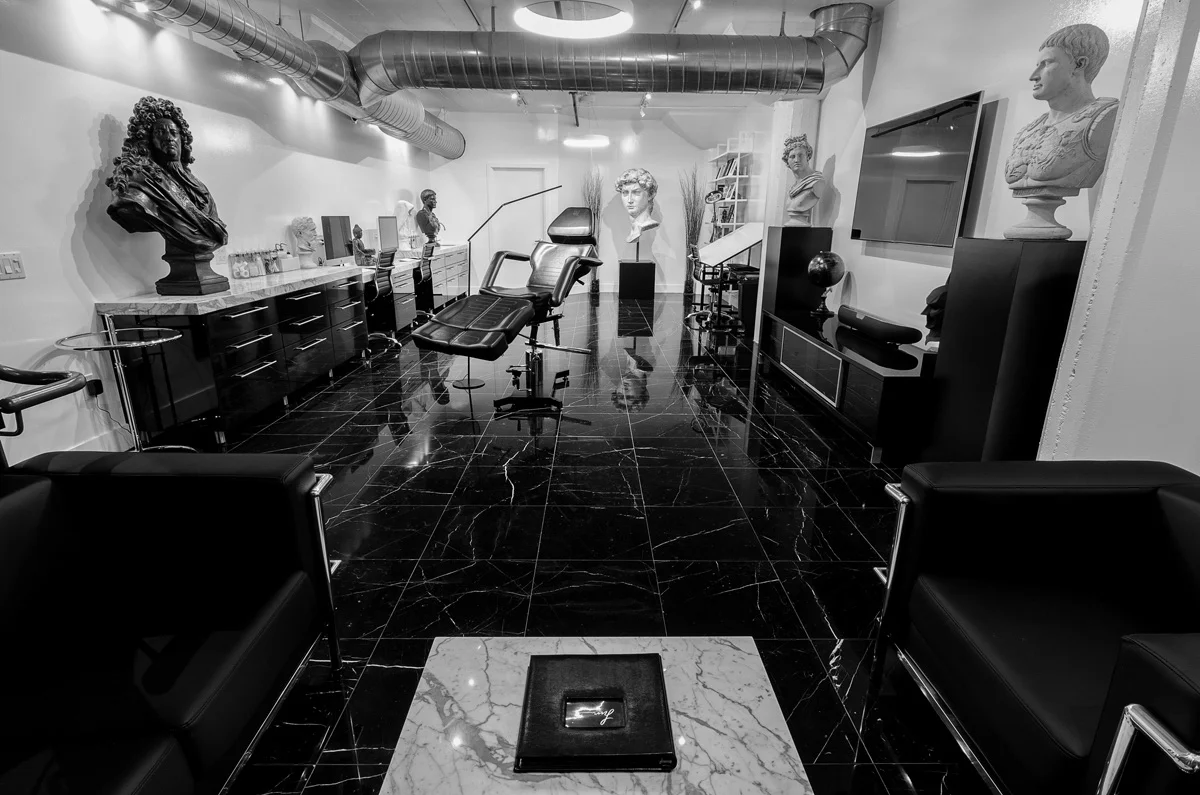
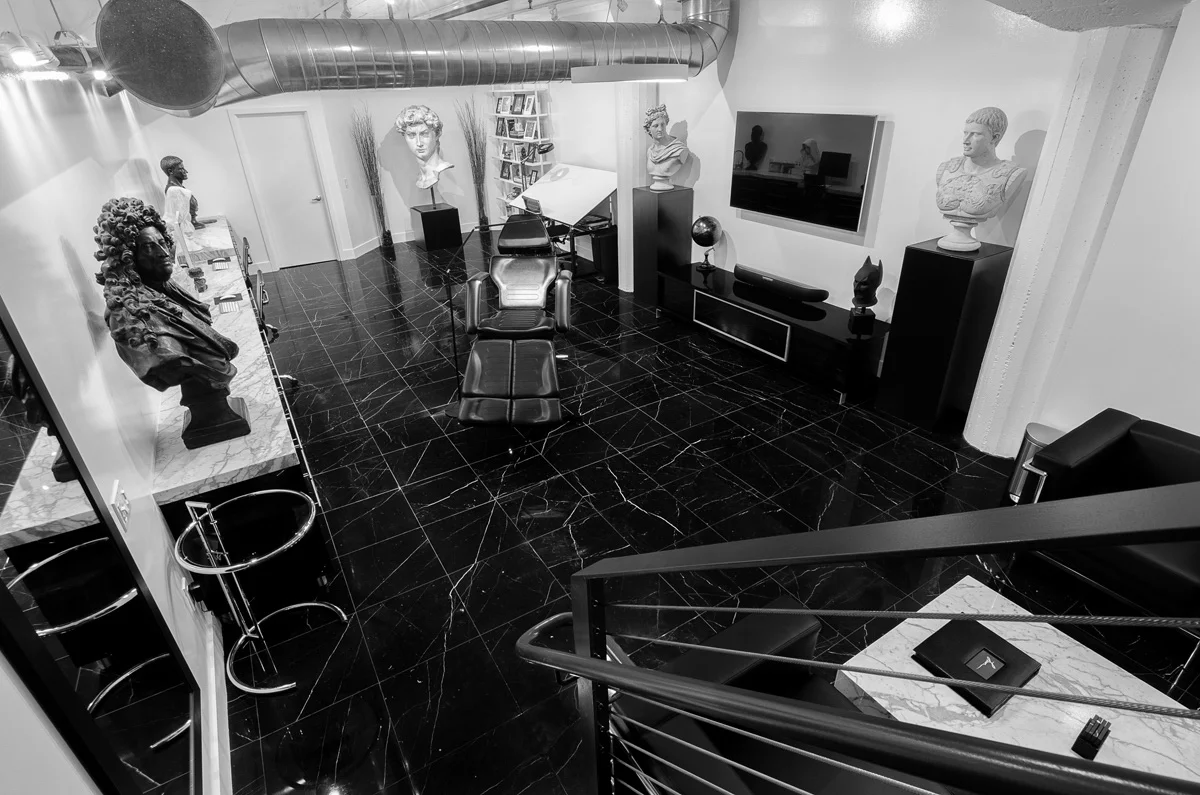
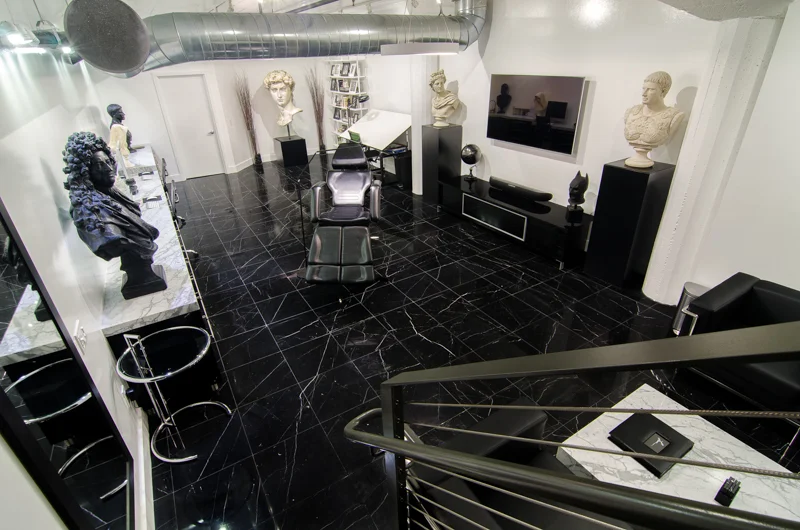
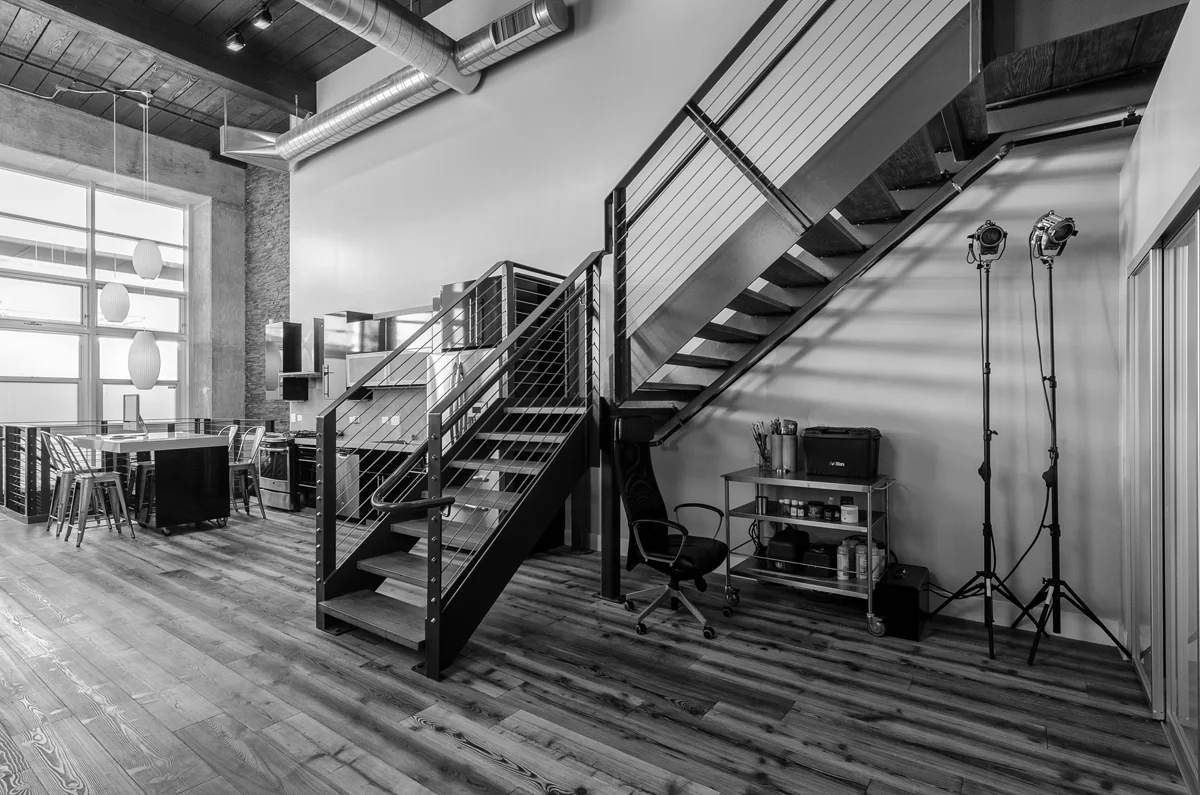
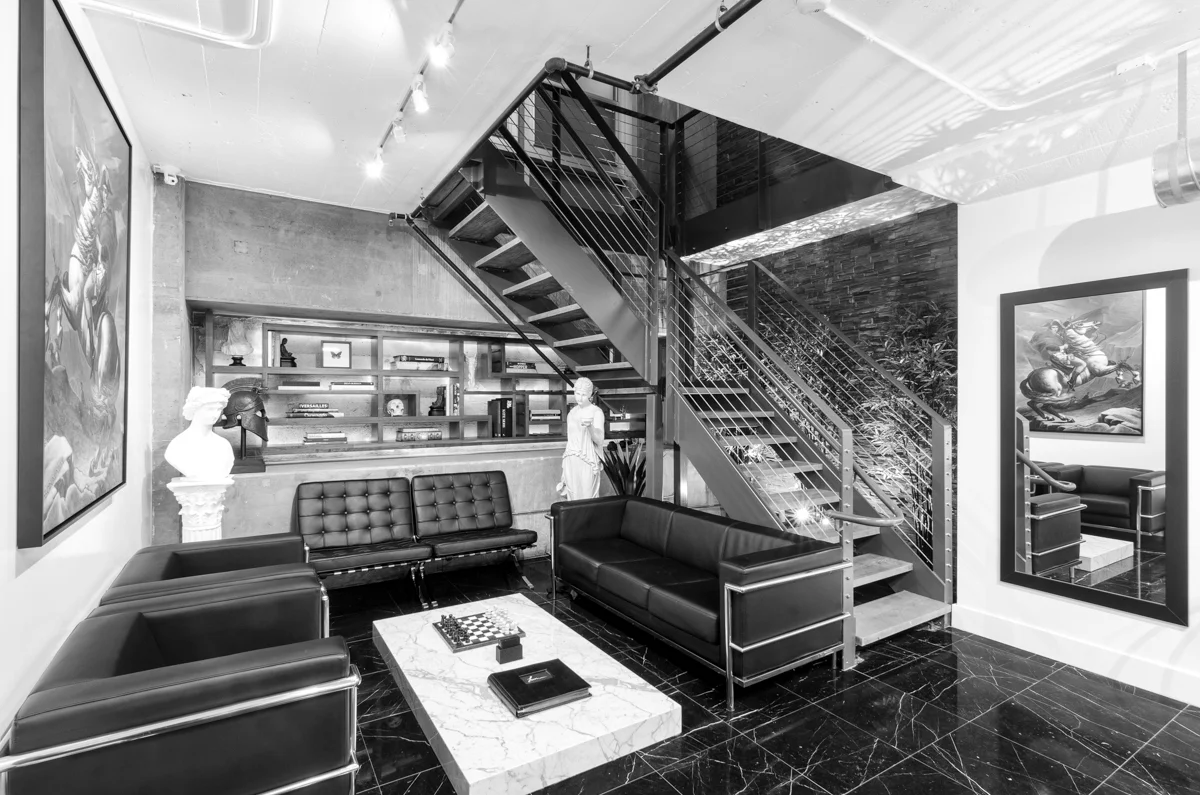
    Tattoo Artist Jun Cha's Monarc Studio.

    2. Communicate – Make sure to talk to the client at length about what they feel are the strengths of the space and what they like and what they’d like to convey. Ask as many questions as you can. This will help break into the emotional connection to the space and it will give you a good idea of what space to be in as you map out how to approach it. Unlike real estate, where the agent is not particularly intimately connected to the property, most times, when working commercial real estate spaces, you’re working with the owner or manager of the business, and, for the most part, they are extremely emotionally tied to their space – they know the quirks, the strengths, the weaknesses. Play off of that. If you listen closely enough, they’ll tell you EXACTLY what shots to get that will ensure their satisfaction with your work. And of course you’ll come up with several of your own ideas, and throw those in there. Sometimes it’s neat to see their reaction to a shot, a view, an angle that they themselves perhaps have never paid attention to.

    3. Team Up – Encourage them to provide ideas and input as you move thru the space on shoot day. It will help make them feel like a pivotal part of the project, hopefully setting them up to be as emotionally attached to those images as they were when speaking about them in tip 2.

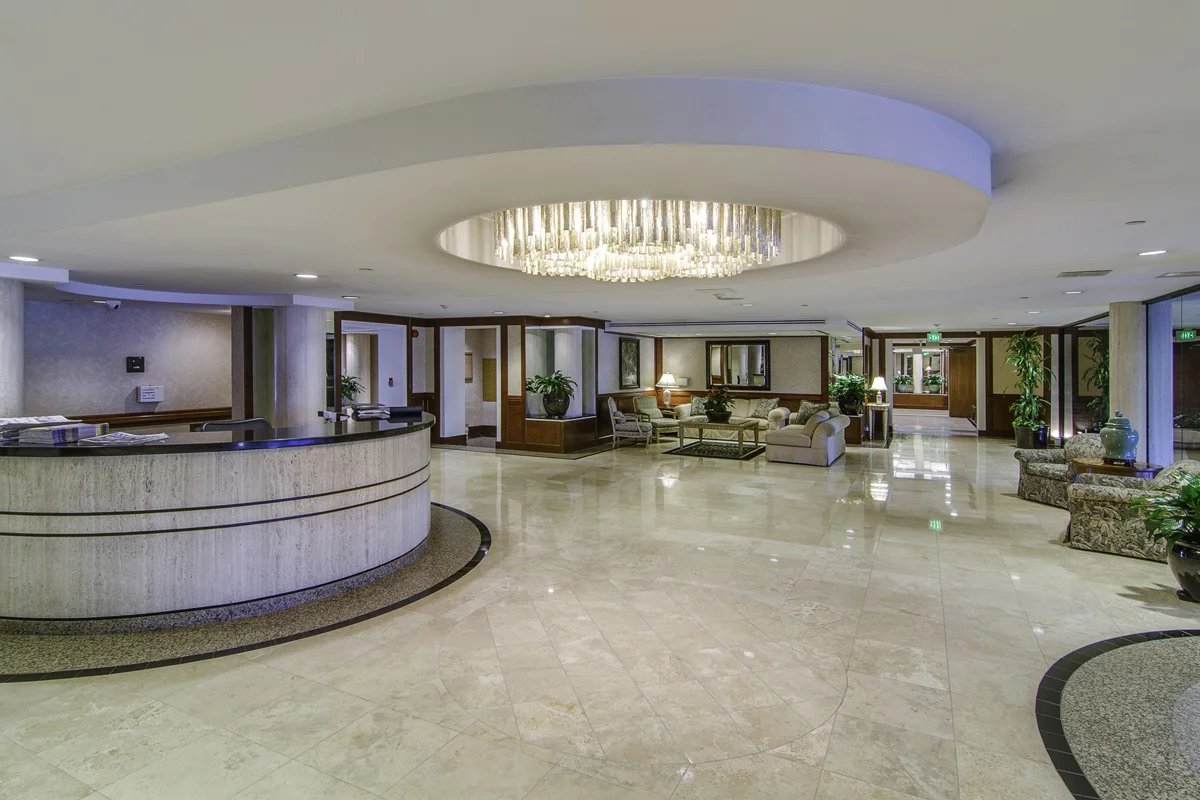
    Wasim-Muklashy-Real-Estate-Photography_San-Diego-Los-Angeles-Ventura_Pro-Property-Photos_114

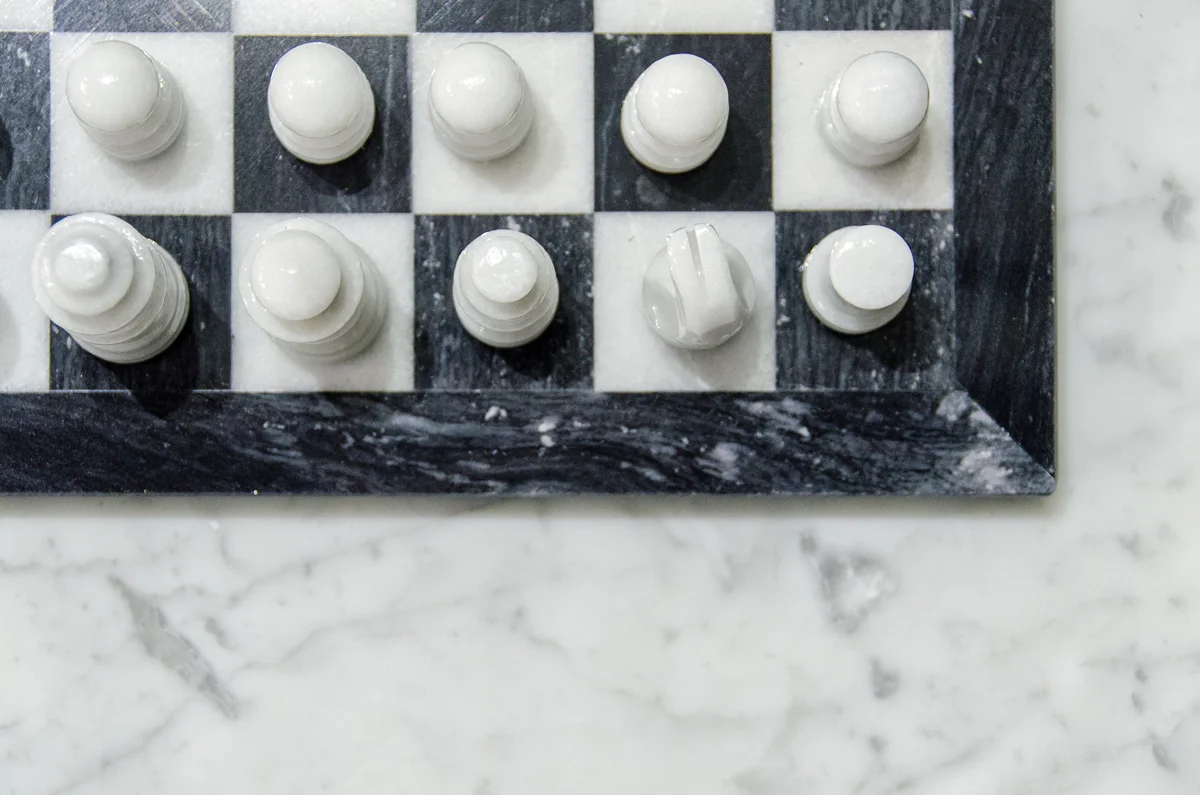
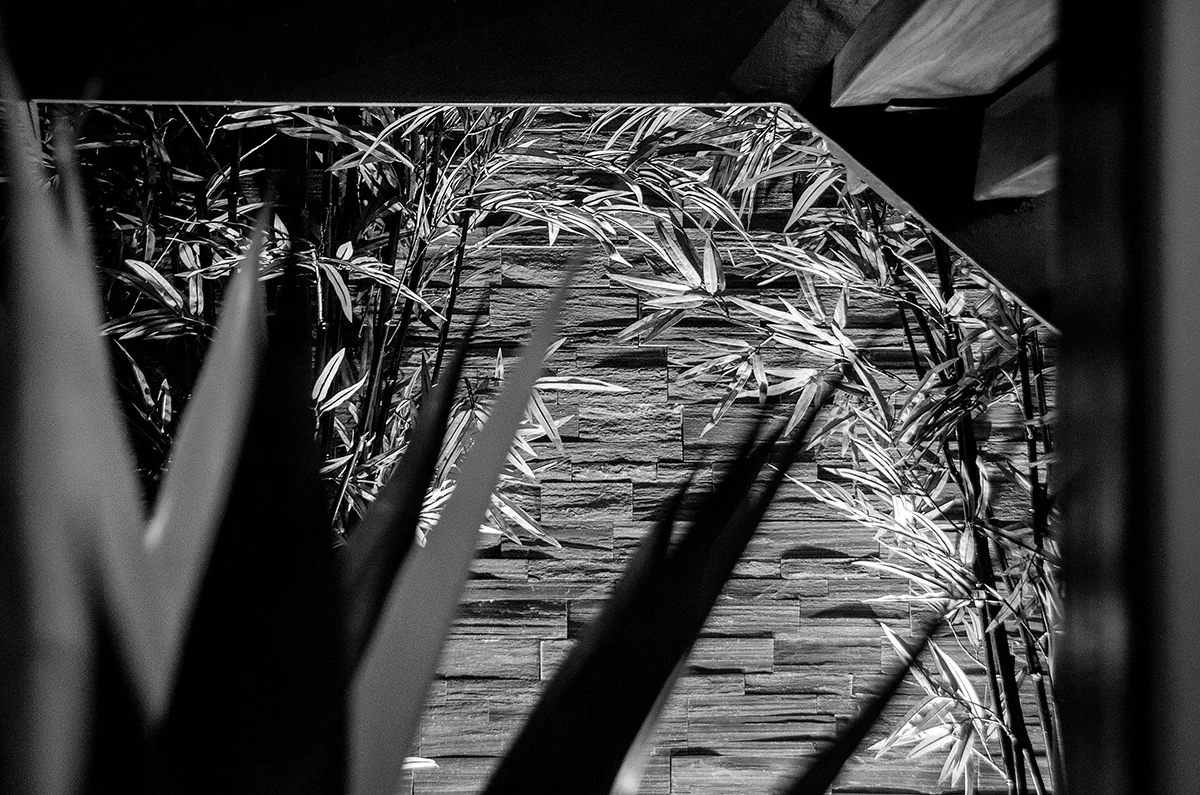
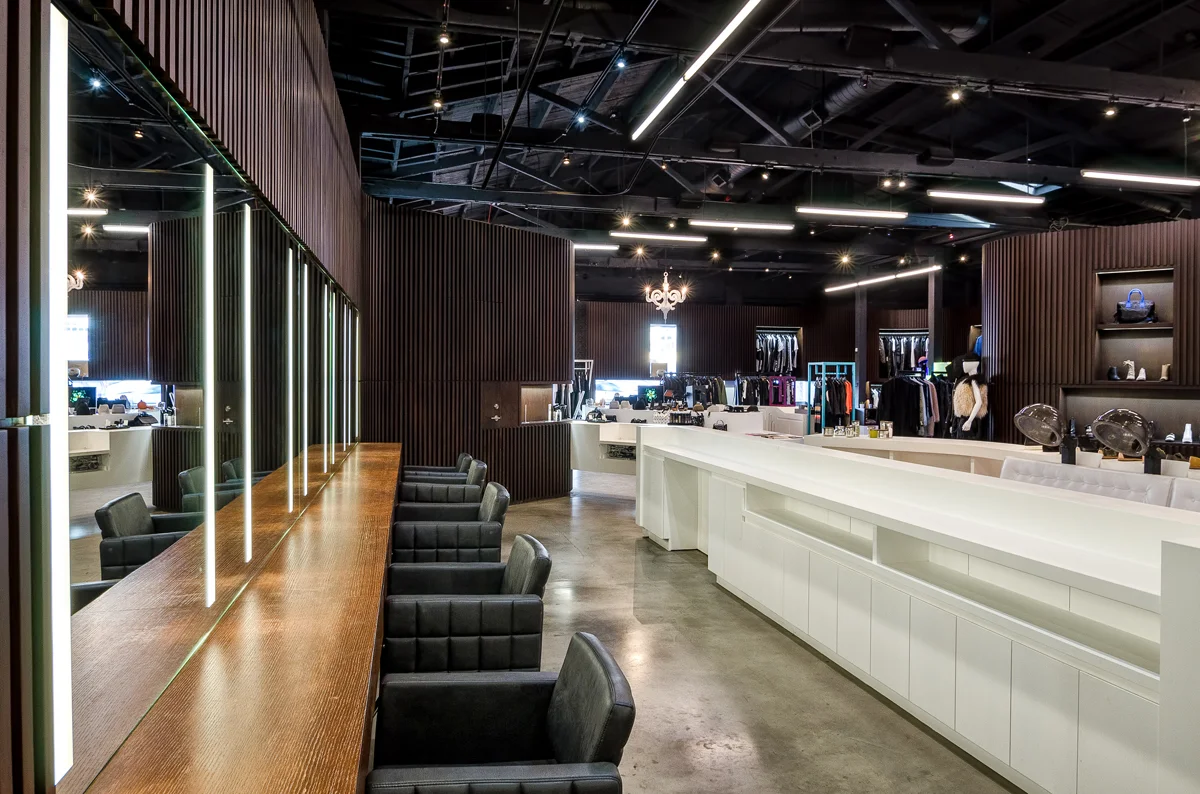
    4. Mix It Up – As was also talked about in my post 7 Tips For Real Estate Photography, mix it up. Yes, wide shots and crazy angles for the sense of space, but don’t discount the extreme value of vignettes and tighter shots, within the 35-50mm range for a more intimate feel. These shots aren’t as intimidating, and instead instill a sense of feel, aura, and connectedness with the space. A person’s vision can’t relate to a wide angle shot, but they can definitely relate to a detail or a vignette or a section of the space that gives you an idea of the character of the space.
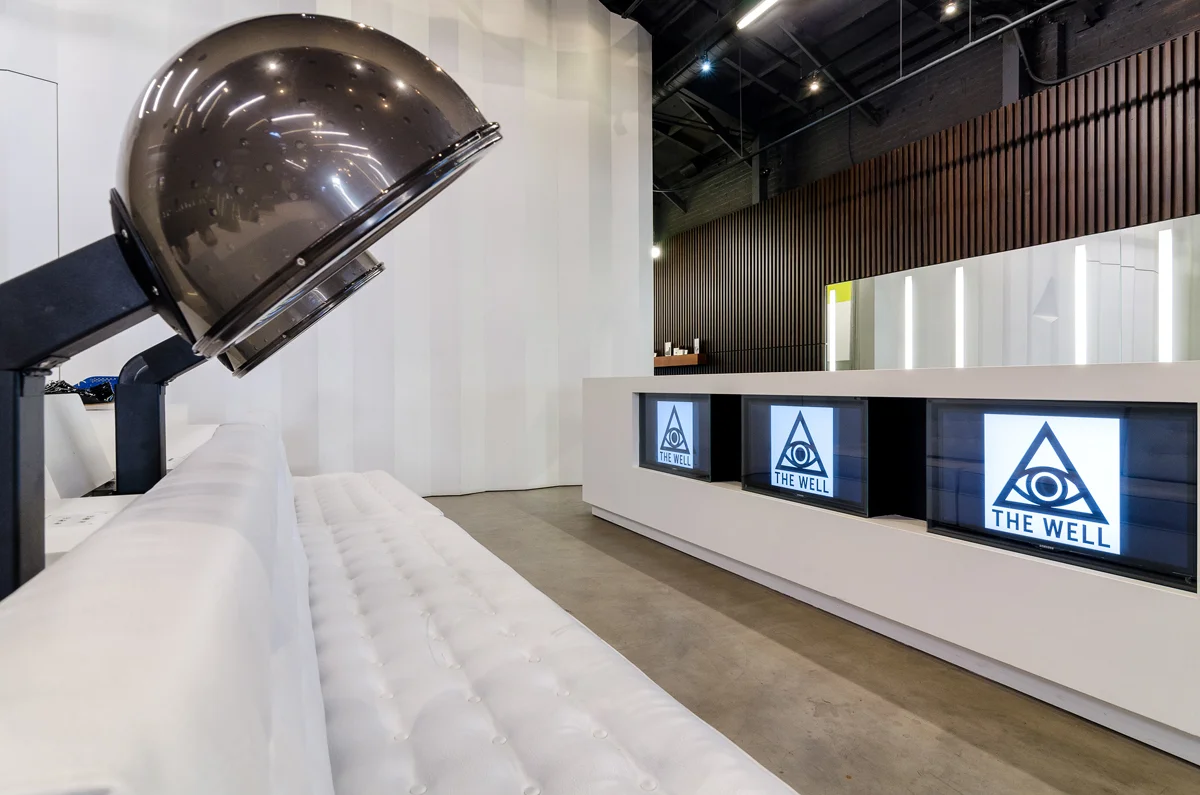
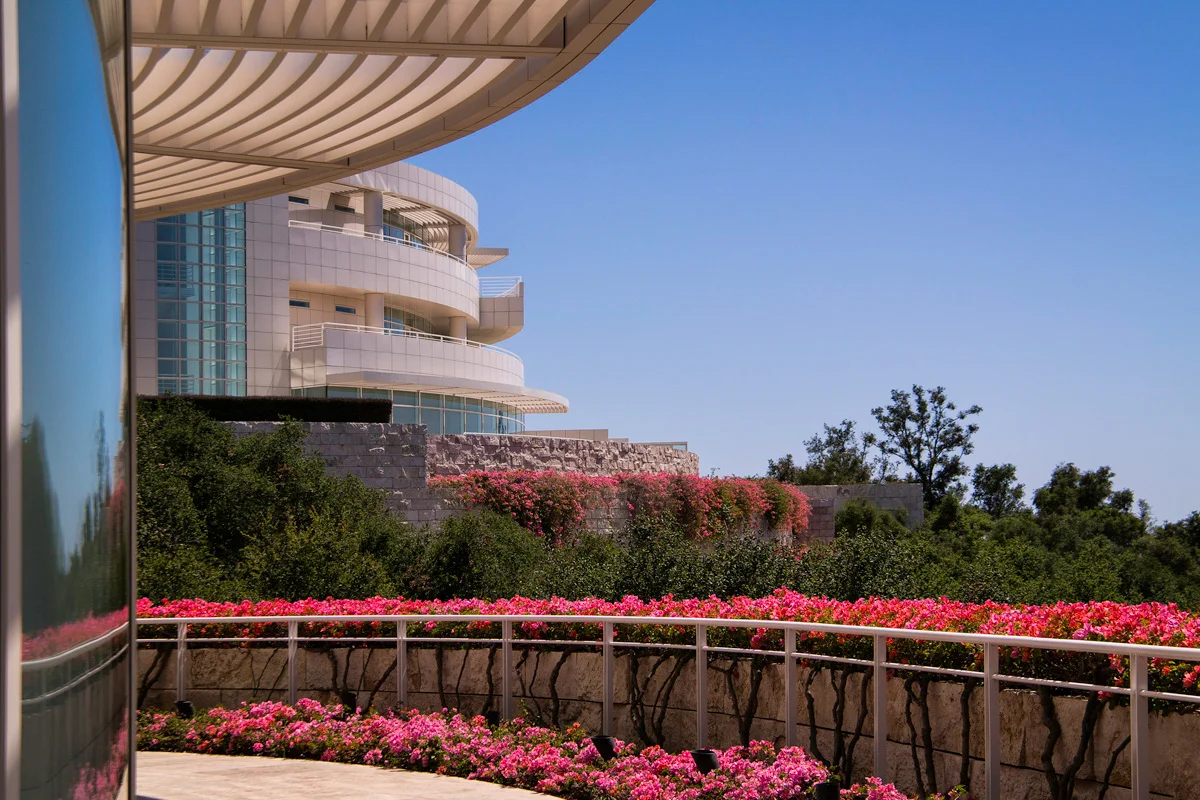
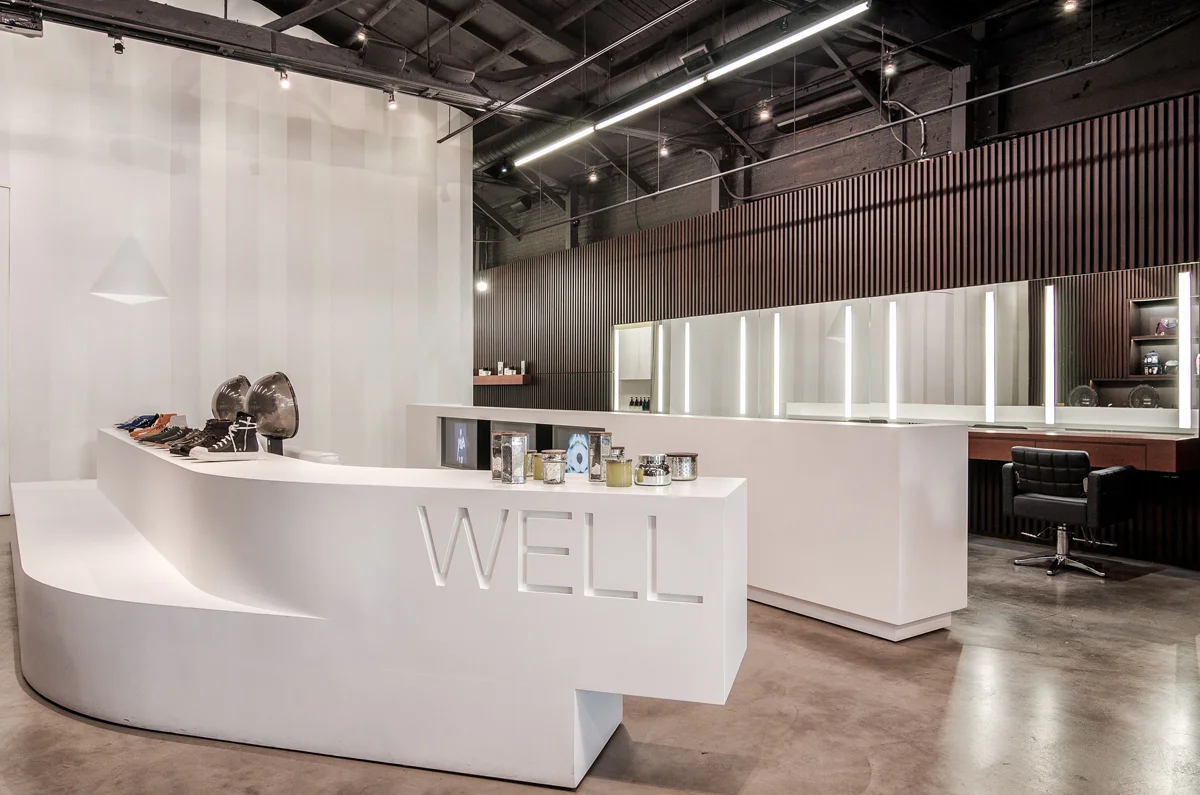
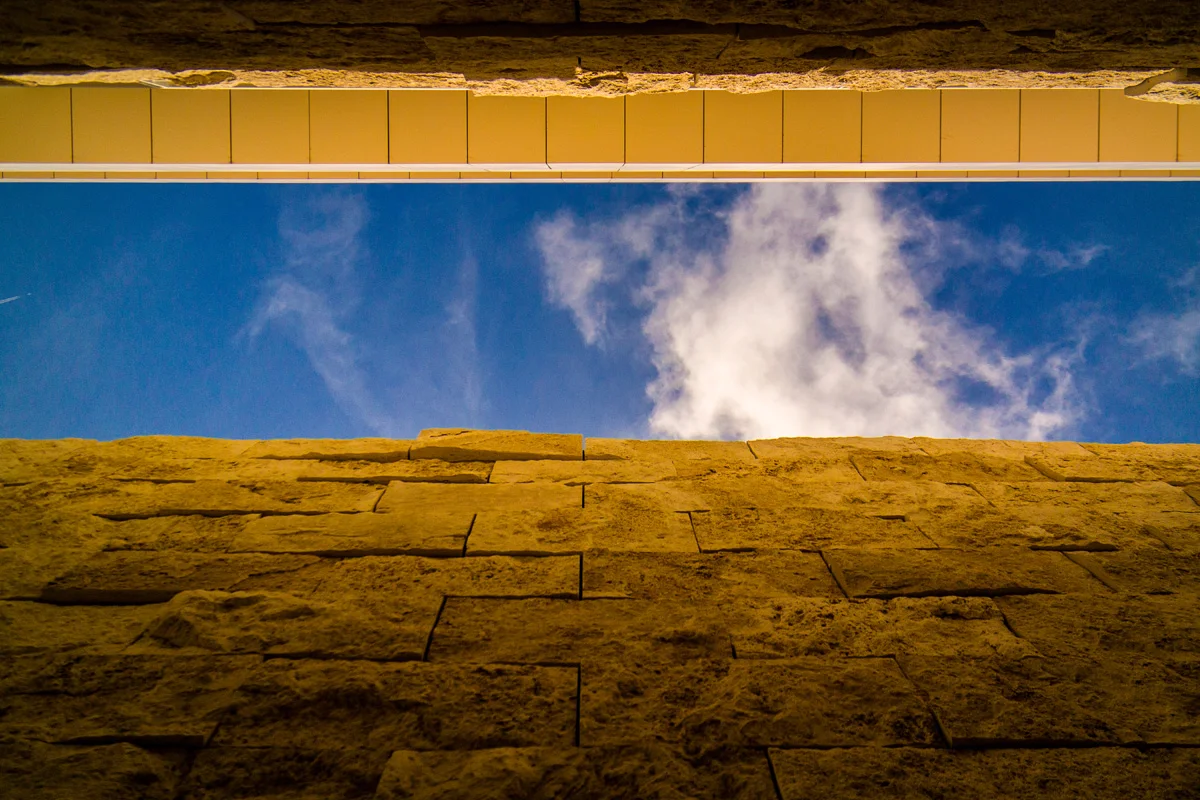
    Wasim Muklashy Real Estate Photography_The Well_Los Angeles_California_03

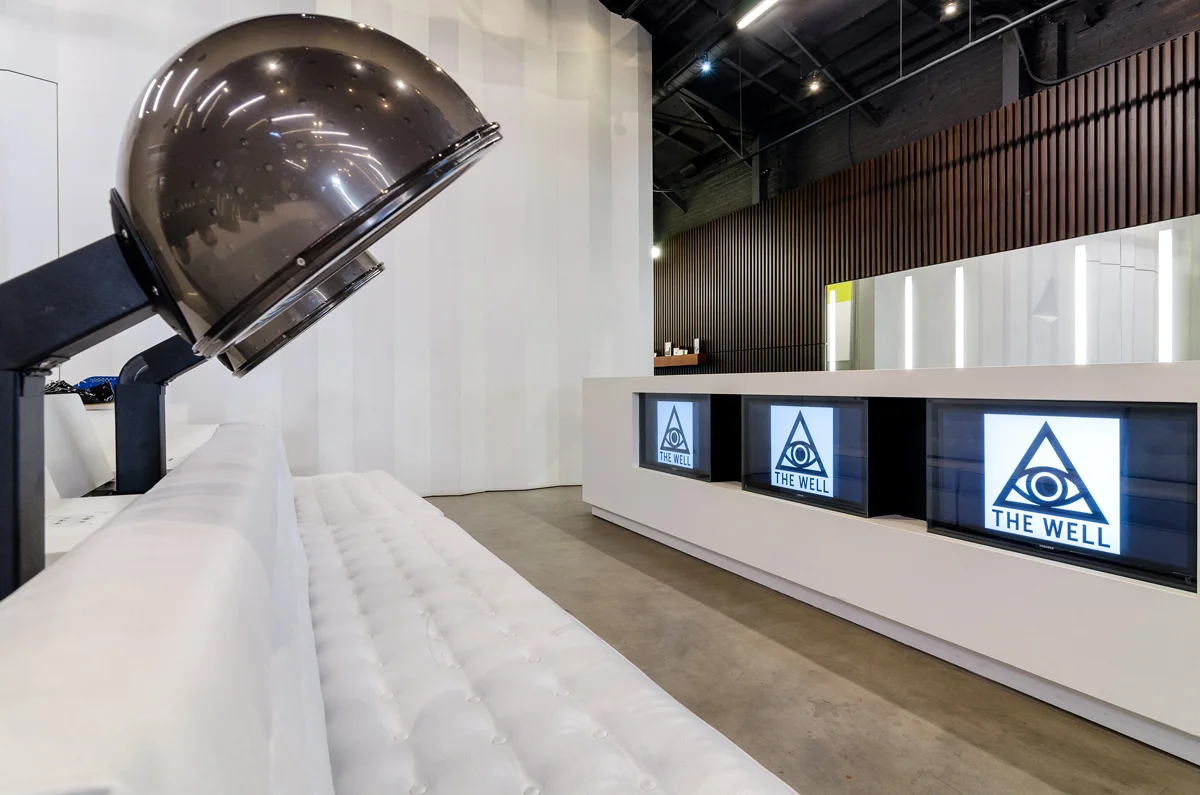
    5. Logos & Branding. If the space has any sort of branding or logos, try to find a way to incorporate those into the images. Whether they be on screens or table mats or windows or pens, try to find at least a few shots where those logos are included. Not only can these sorts of shots help with branding, but they can also be used for other purposes by the business such as social media posts, headers, or physical postcards or prints for marketing materials. Business owners work hard to build their businesses and consequently, they’re very proud of the fruits of their labor. Branding shots are a great pat on the back that they are sure to appreciate.

    So there it is. Don’t stress out about it, don’t fret, take it as a challenge, know that you’ll learn something, and, most importantly, have fun with it. If someone else was confident enough in your skills to hire you, then you’ve got those skills. Be confident. Go kill it!

    Also, here are a few more entries that can also help you when shooting real estate and properties:

    7 Tips for Shooting Real Estate Photography

    How To Expose For Interiors And Exteriors In Architecture Or Real Estate Photography – Part 1 – On Location

    How To Expose For Interiors And Exteriors In Architecture Or Real Estate Photography – Part 2 – Post Processing

    How To Minimize Reflections In Interior Photography

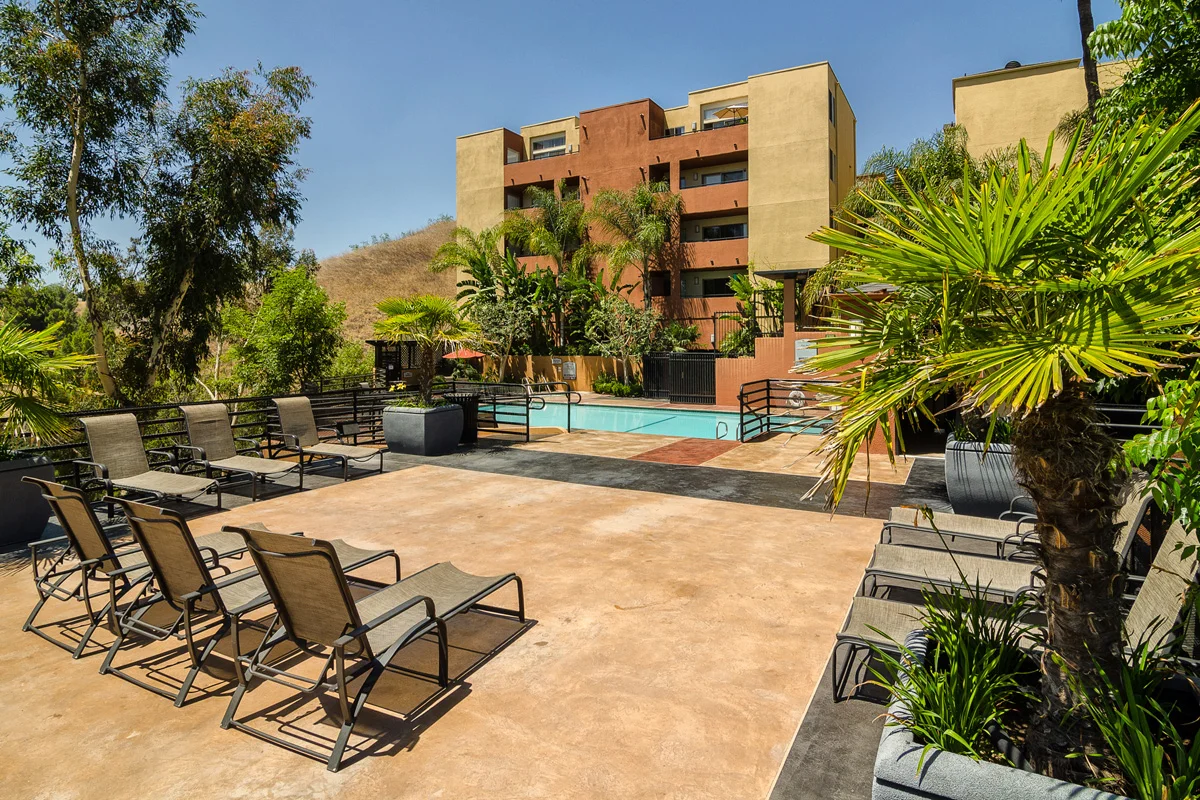
    Below is a gallery that has some of the images from my recent shoots at Jun Cha’s Monarc StudiosThe Well Salon & Event Space, and a local condominium complex.

    And if you’re in need of real estate photography services, whether commercial or residential, please feel free to contact me or check out my Property Photography website.

    And as always, for more of my madness, take your pick: Instagram: @wasimofnazareth Ello: @wasimofnazareth Google+: www.Google.com/+WasimMuklashy
  • 5 Black & White Photography Tips I Learned While Taking The Black & White Photography Challenge

    5 Black & White Photography Tips I Learned While Taking The Black & White Photography Challenge

    Wasim Muklashy Photography_Realtime Lapse_Samsung NX3000_Malibu_California

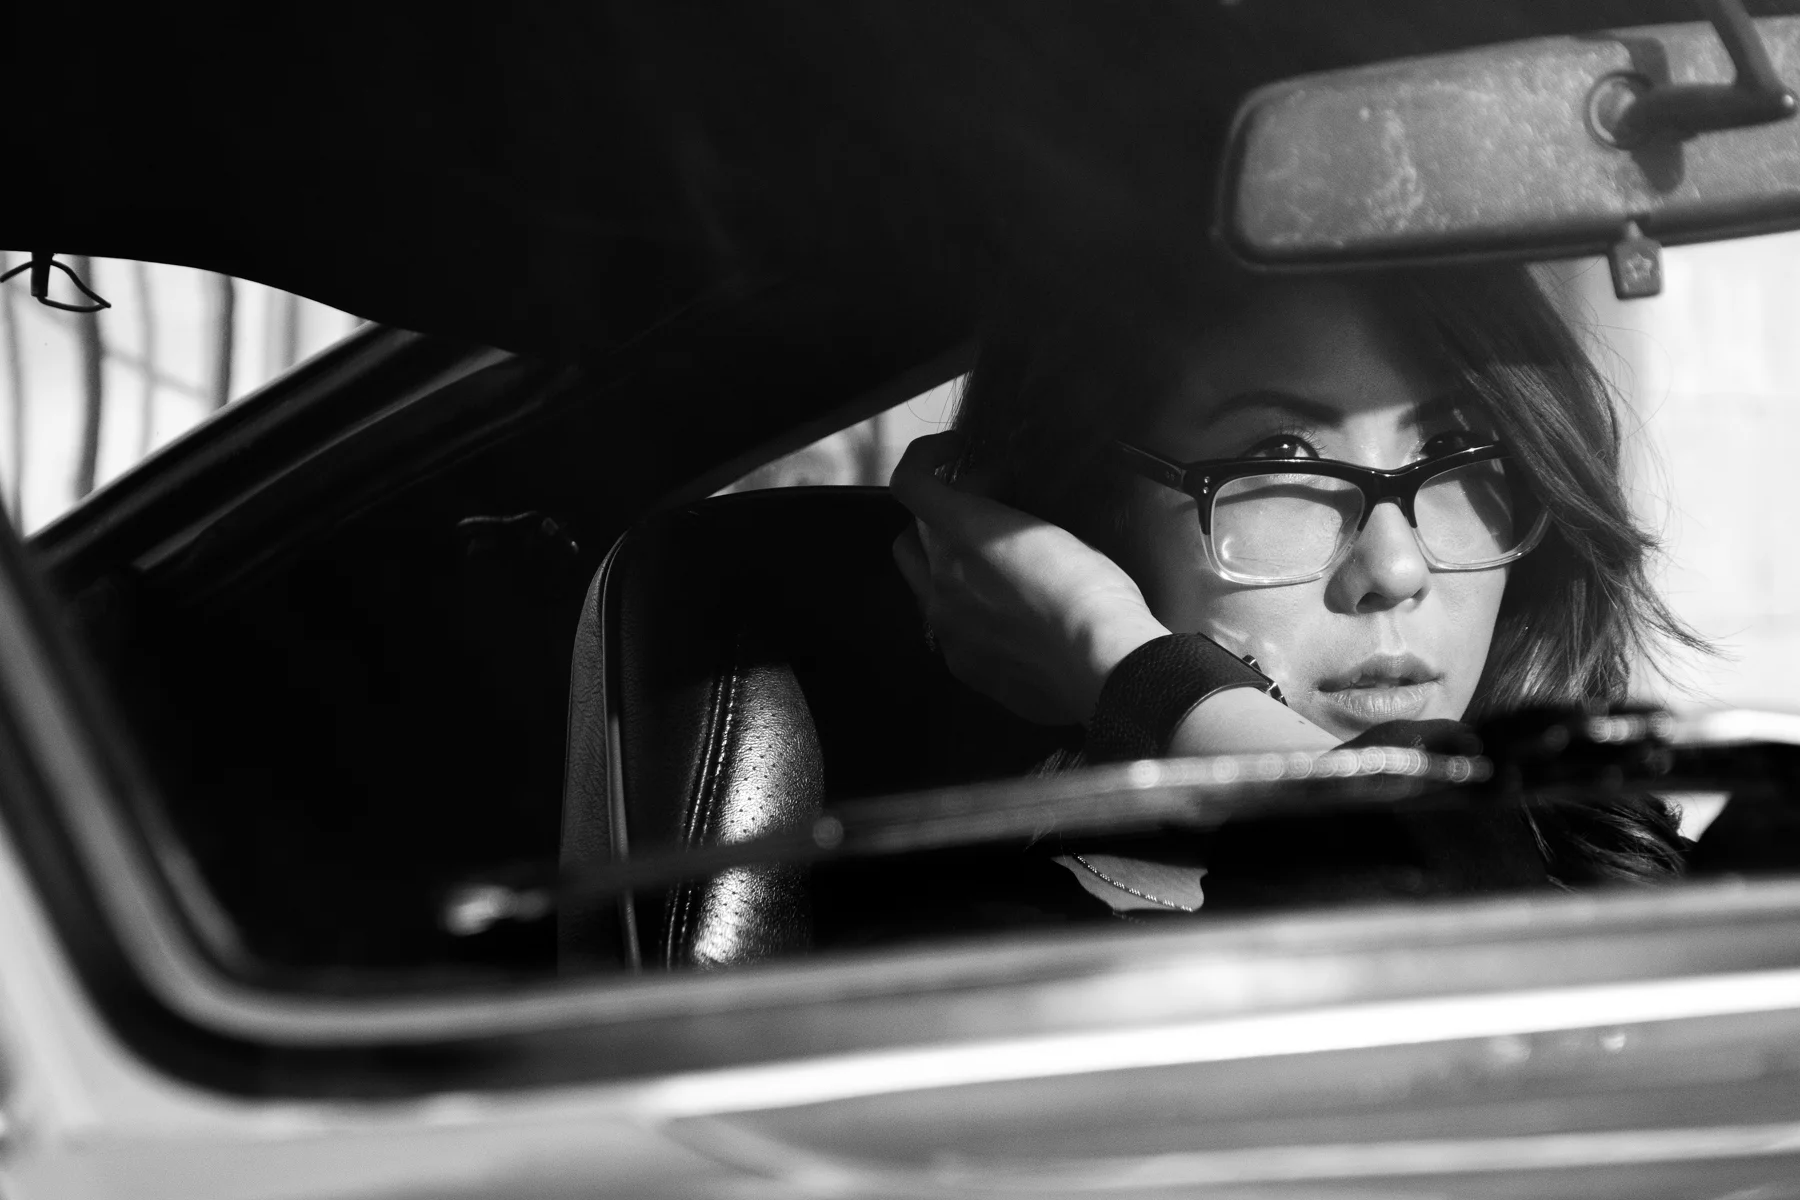
    So I was recently challenged by a fellow Samsung Imagelogger, the talented portrait photographer Jess Anderson, to take the Black & White Photography Challenge. Basically, I had to post 5 black and white images in 5 days. Anyone that knows me or my work knows that color plays an enormous role in the images I choose to make, so this was definitely a bit intimidating. In addition to a few of my favorites from those recent 5 days, what follows are 5 things I learned and experienced in my little black & white journey. One thing that is immediately apparent is that once you lose the luxury of color, your mind shifts, and it has to. It’s not as easy as just hitting the black & white tab in Lightroom or Photoshop or dropping saturation. You can’t make images the way you’ve known and been used to and you are forced to focus on other aspects. The good news is, once the mind-shift happens, a whole new world that you may not have previously paid attention to, pops up into existence. It’s really quite fascinating.

    1. Contrast was HUGE! When you lose the ability to capture color as a main player in an image, you have to look at things completely different, and one of the top factors that can make for a good monochromatic image is contrast. Extreme contrast between shadows and highlights, light areas, dark areas, that’s going to be the main player in the image, no matter the subject. The caveat to add here is that gloomy are also good days to shoot for black and white as well, as the contrast between subjects plays more of a role than the contrast between shadows and highlights. For example, a humanoid dressed in white standing against a dark wall.

    Wasim Muklashy Photography_062614_Samsung NX30_Los Angeles_California_ SAM_5367_1800

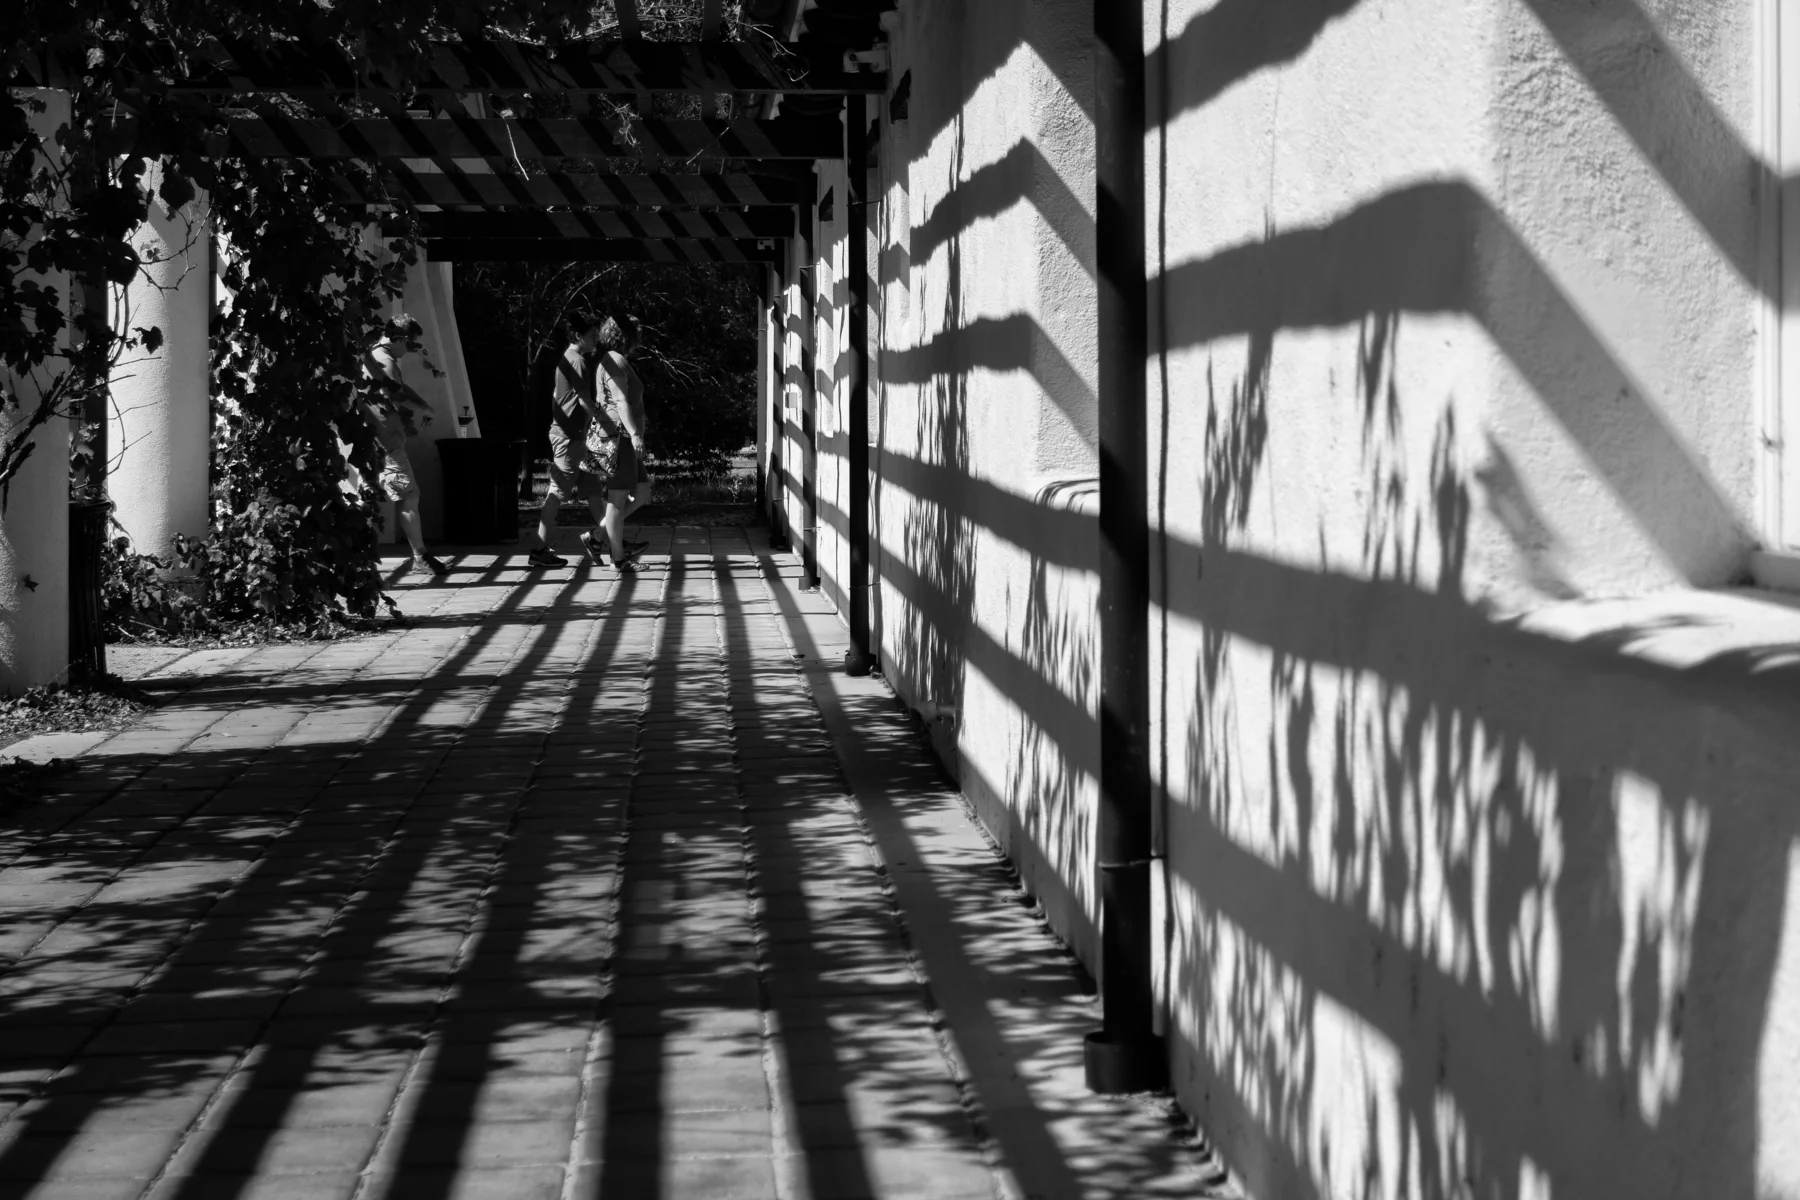
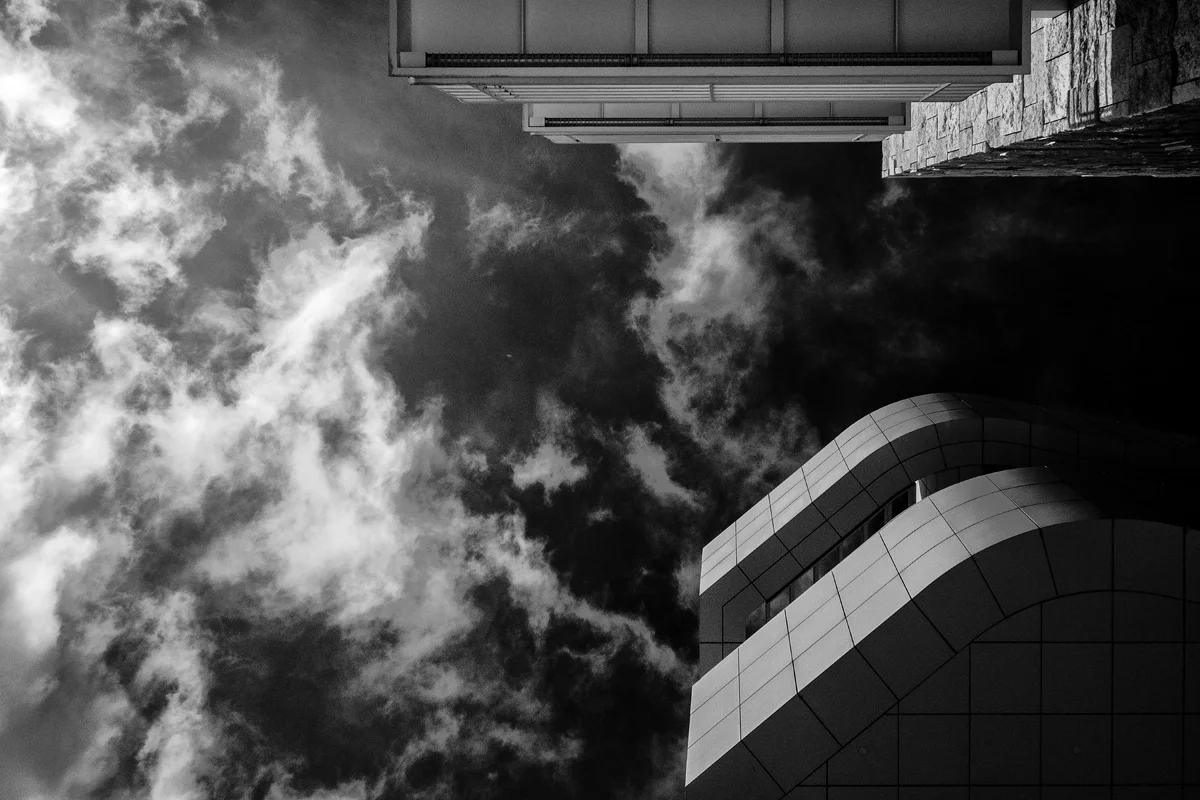
    2. Geometry! Pay attention to leading lines and shapes. They both seemed to play a huge role. If you can find lines that stand out, curves that are apparent through the scene, that is optimal. Additionally, keep an eye out for shapes. Squares, rectangles, triangles, circles, they all stand out in monochromatic situations when an eye is denied the ability to look for color.

    Wasim Muklashy Photography_Samsung NX3000_100714_Santa Monica Mountains_California_ SAM_1165_1800

    3. Light, more than ever, is perhaps your most important player here. It’s a fact that the brightest spot in the image is where the eye is naturally drawn to, so light that falls in between columns in a building, creating a striped pattern across someone’s face, or just a single ray of light at the end of a dark alley falling on a person’s face. You get the idea. Watch the light, where it’s going, what it’s doing, and know that mostly nothing in the shadowy areas is going to be the main subject or player in your image. It’s what’s going to be in that light.

    Wasim Muklashy Photography_Samsung NX3000_Agoura Hills_California_ SAM_1281_1800

    4. ISO is of the utmost importance! Definitely try to shoot at the lowest ISO possible. I learned very quickly that when playing in contrast and with several dark areas in an image, noise is MUCH more apparent. Minimize the noise-reduction-plugin rabbit hole by shooting at as low an ISO as you can.

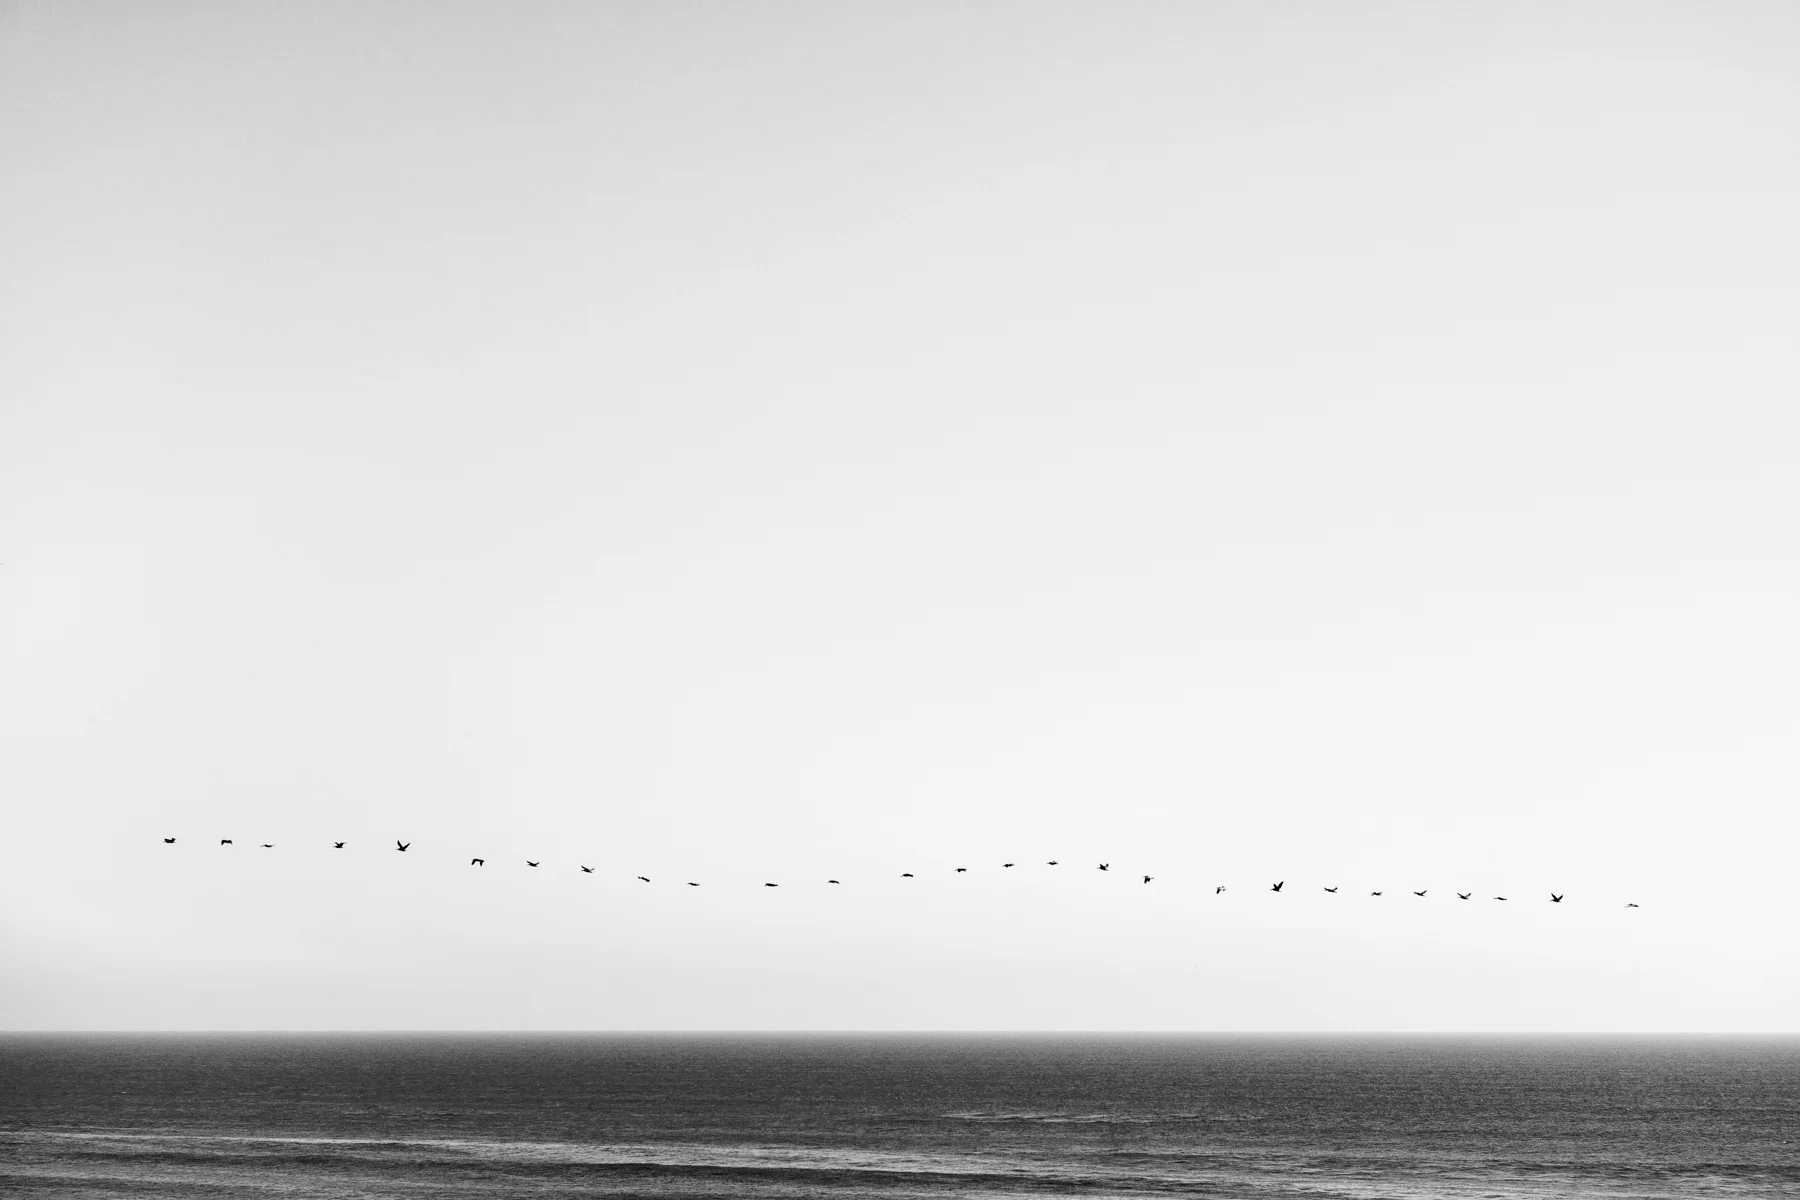
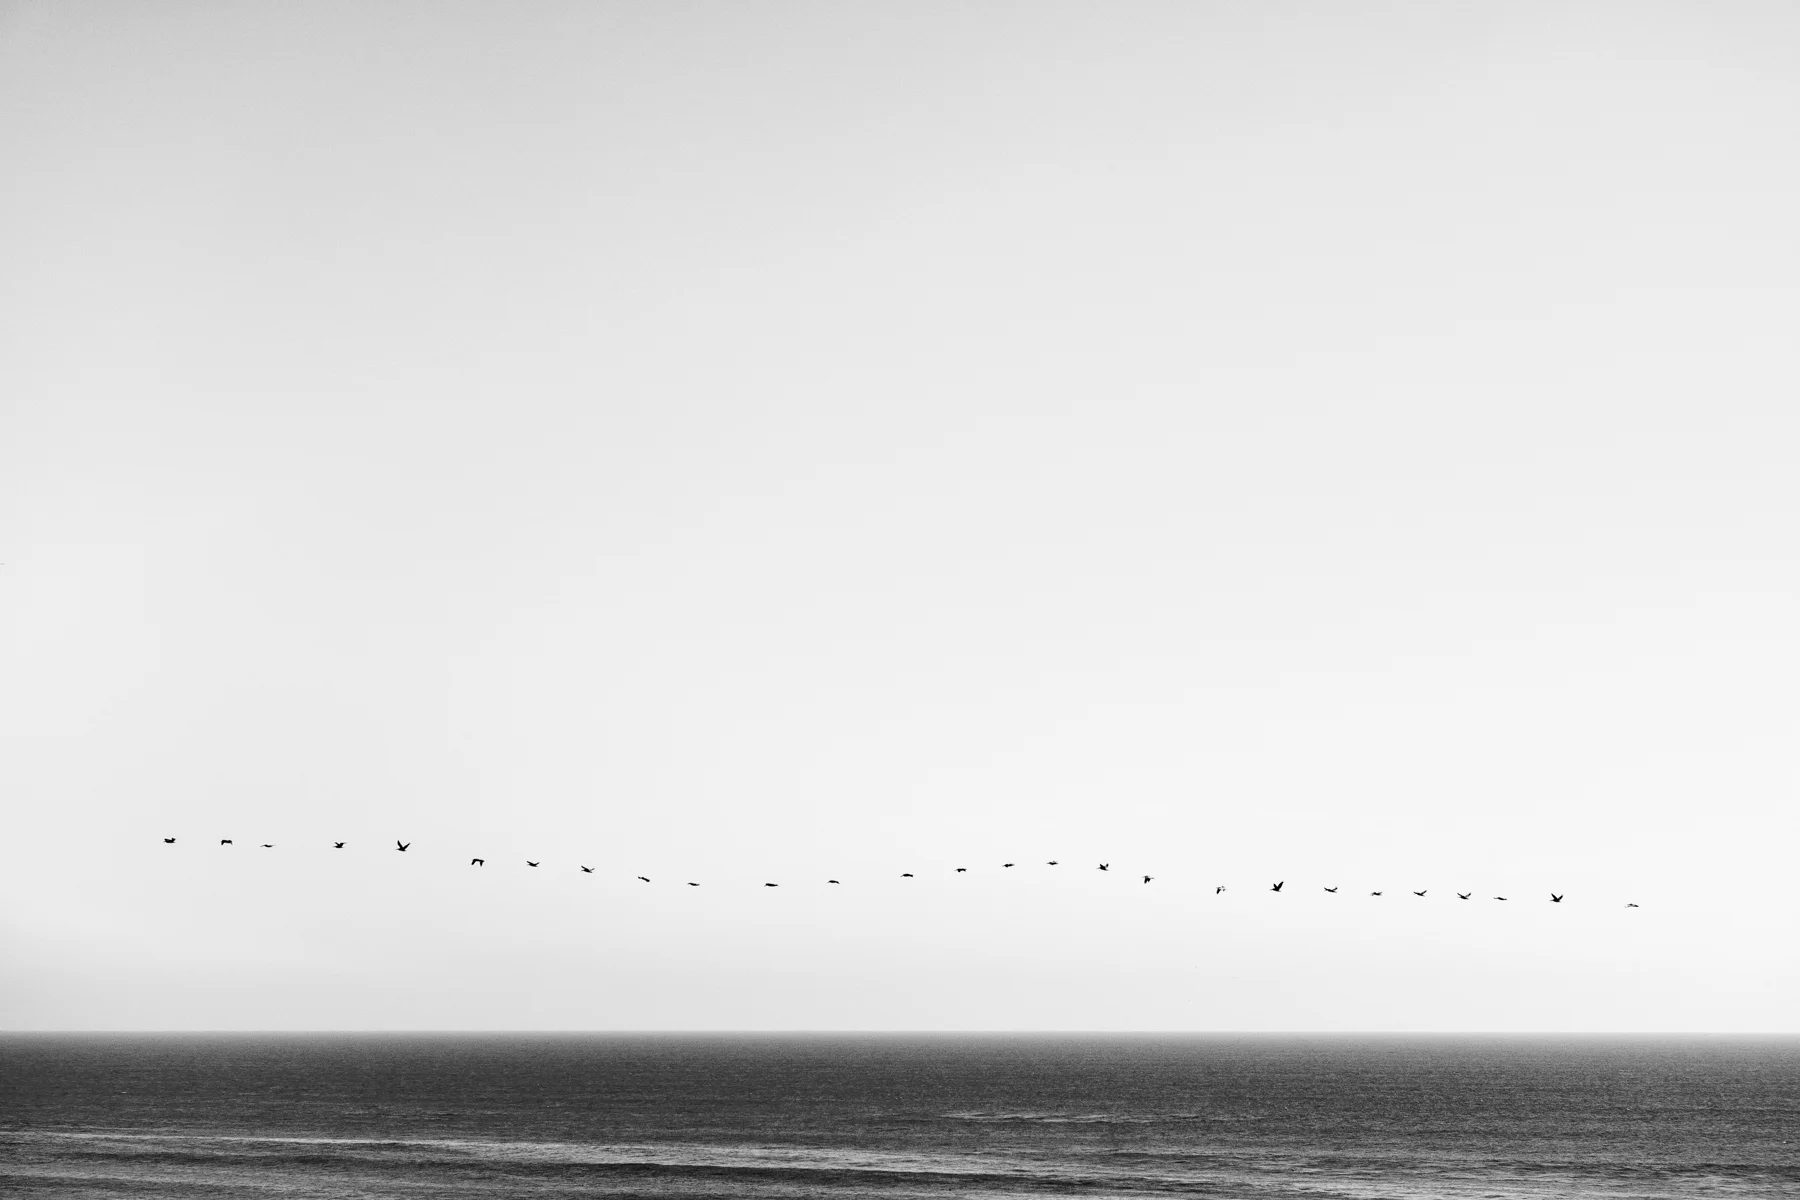
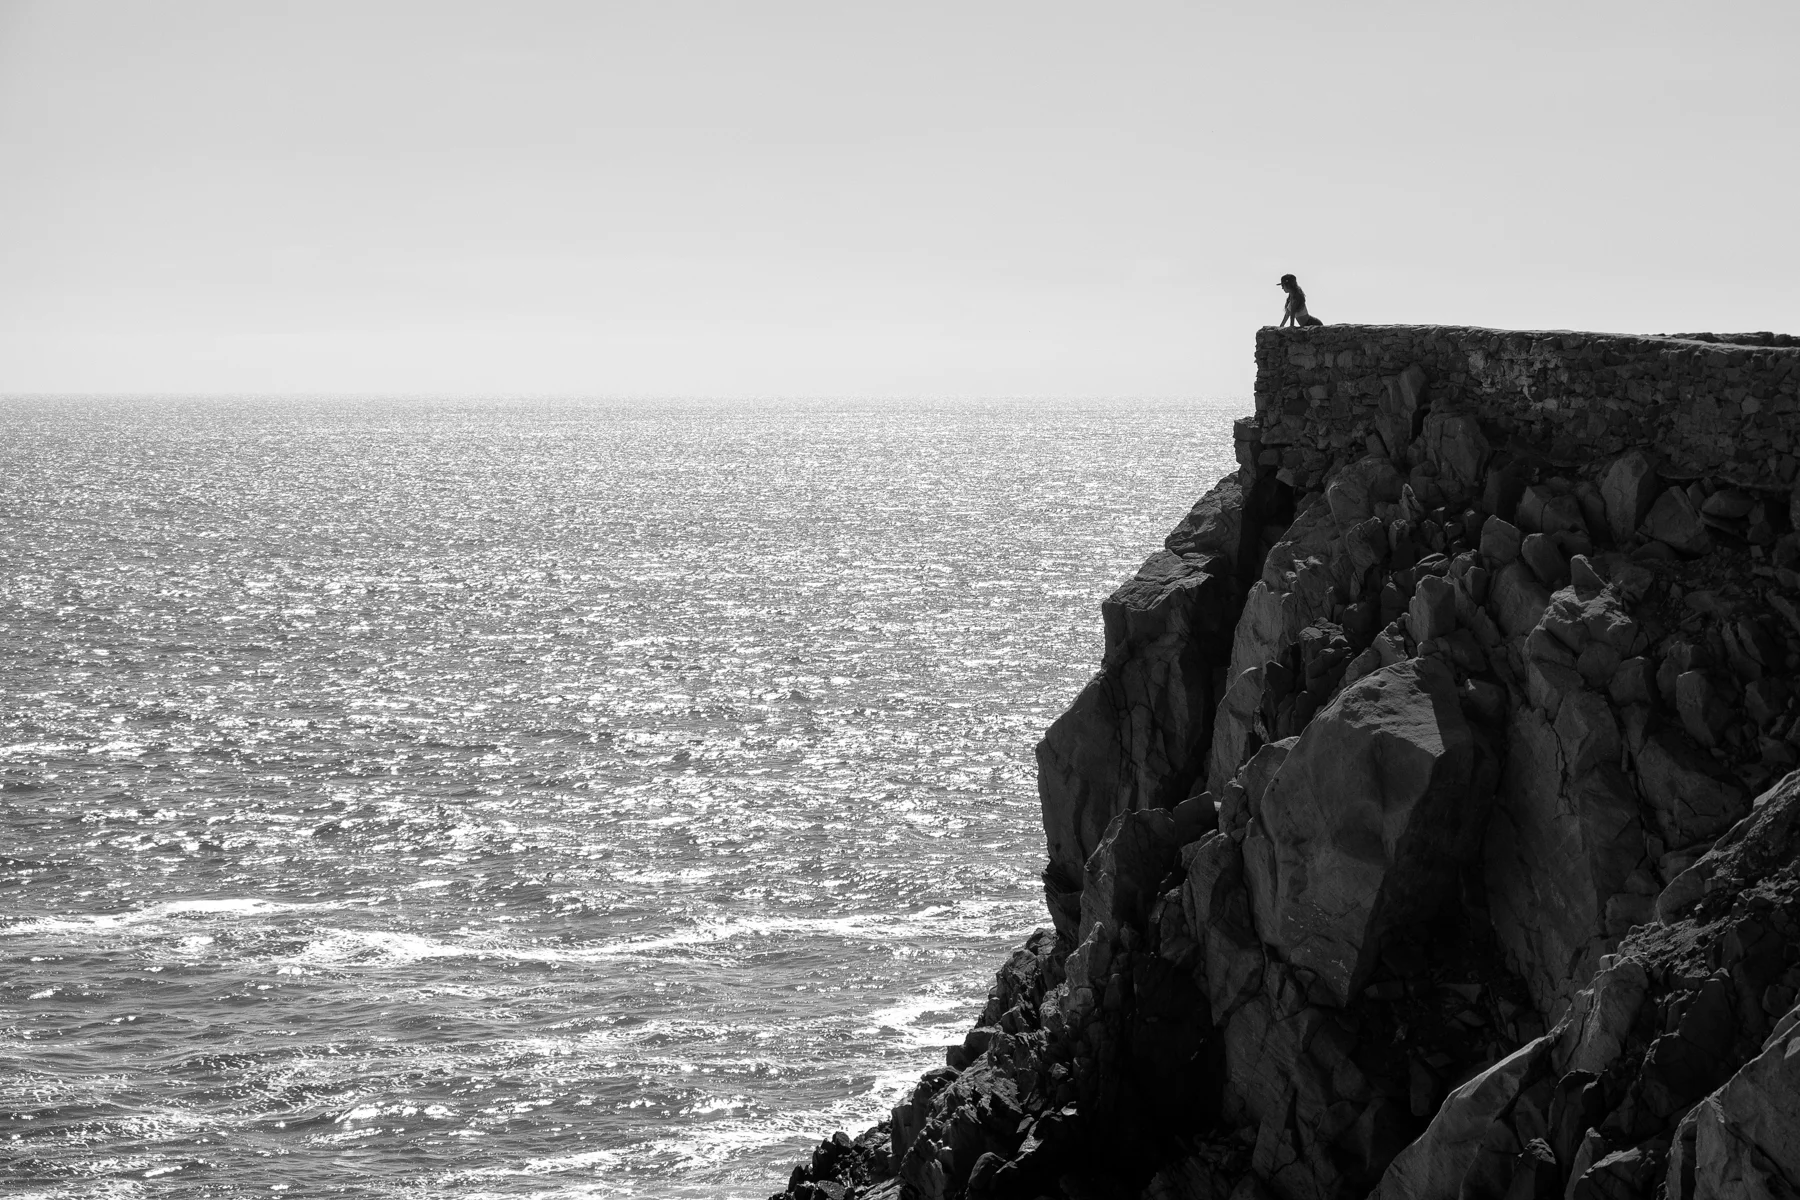
    5. Minimalism can play a great role here. A few of my favorites from those 5 days use a LOT of negative space – the one with the birds and the one of the woman on the cliff edge overlooking the vast Pacific Ocean.

    Wasim Muklashy Photography_062614_Samsung NX30_Los Angeles_California_ SAM_5422_1800

    Bonus Tip: If your camera is capable, shoot in RAW. If you’re used to shooting in JPEG, set it to shoot in RAW+JPEG, but you’ll see how important having that extra RAW flexibility of adjusting shadows and highlights comes into play in post-processing when shooting for black and white. Trust me.

    With that being said, I quite liked the challenge, and I thoroughly enjoyed shooting for black and white, so thank you for that Jess! Don’t be surprised to see me post a few more monochrome images in the future.

    All the images above were taken on mirrorless Samsung NX30 and NX3000 cameras.

    For more of my madness, take your pick:
    Instagram: @wasimofnazareth
    Ello: @wasimofnazareth
    Google+: www.Google.com/+WasimMuklashy
  • What Apple iOS 8 Manual Camera Controls Means For The Masses

    What Apple iOS 8 Manual Camera Controls Means For The Masses

    iphone-ios8-manual-camera-controls-api

    So as we already know, Apple has opened up it’s manual camera controls for developers and users in it’s new iOS 8. What this means for pro photographers is that they can finally take charge of their images similar to the way that they’re used to with their professional gear. What this means for amateur photographers and those who use their iPhone to snap their lives’ memories, is that they’re going to be insanely confused at first and wonder what the hell it all means and why can’t they just point and click like they were used to. But then, as they start to play with it all, they’ll realize they’re getting better images, and start to wonder why. So, to minimize that time between ‘wtf’ and ‘oh wow,’ here is a quick breakdown of the Apple iOS 8 manual camera controls that developers will have access to – what it all means and what it all does:

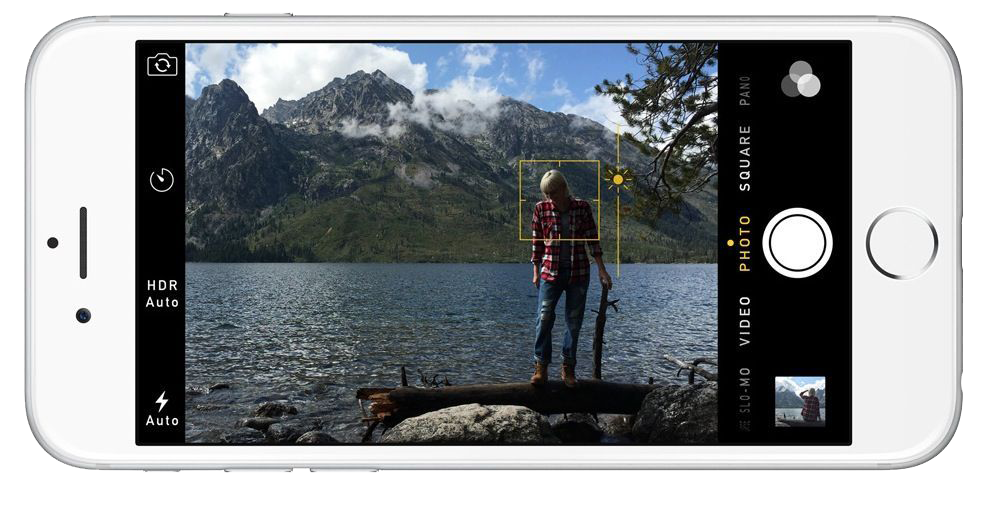
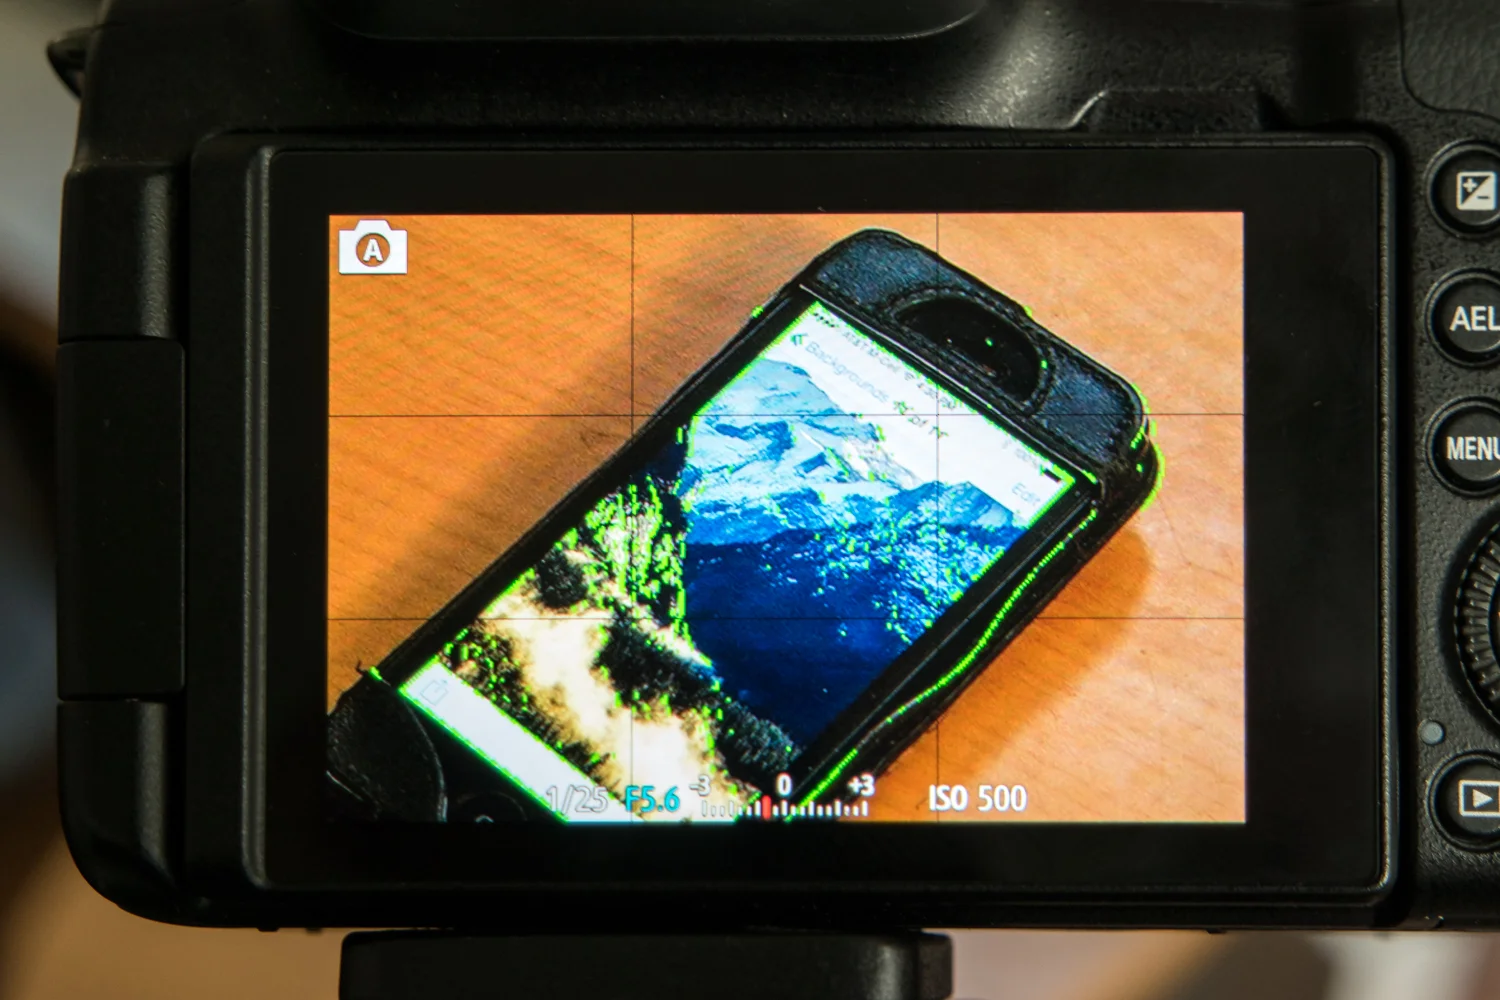
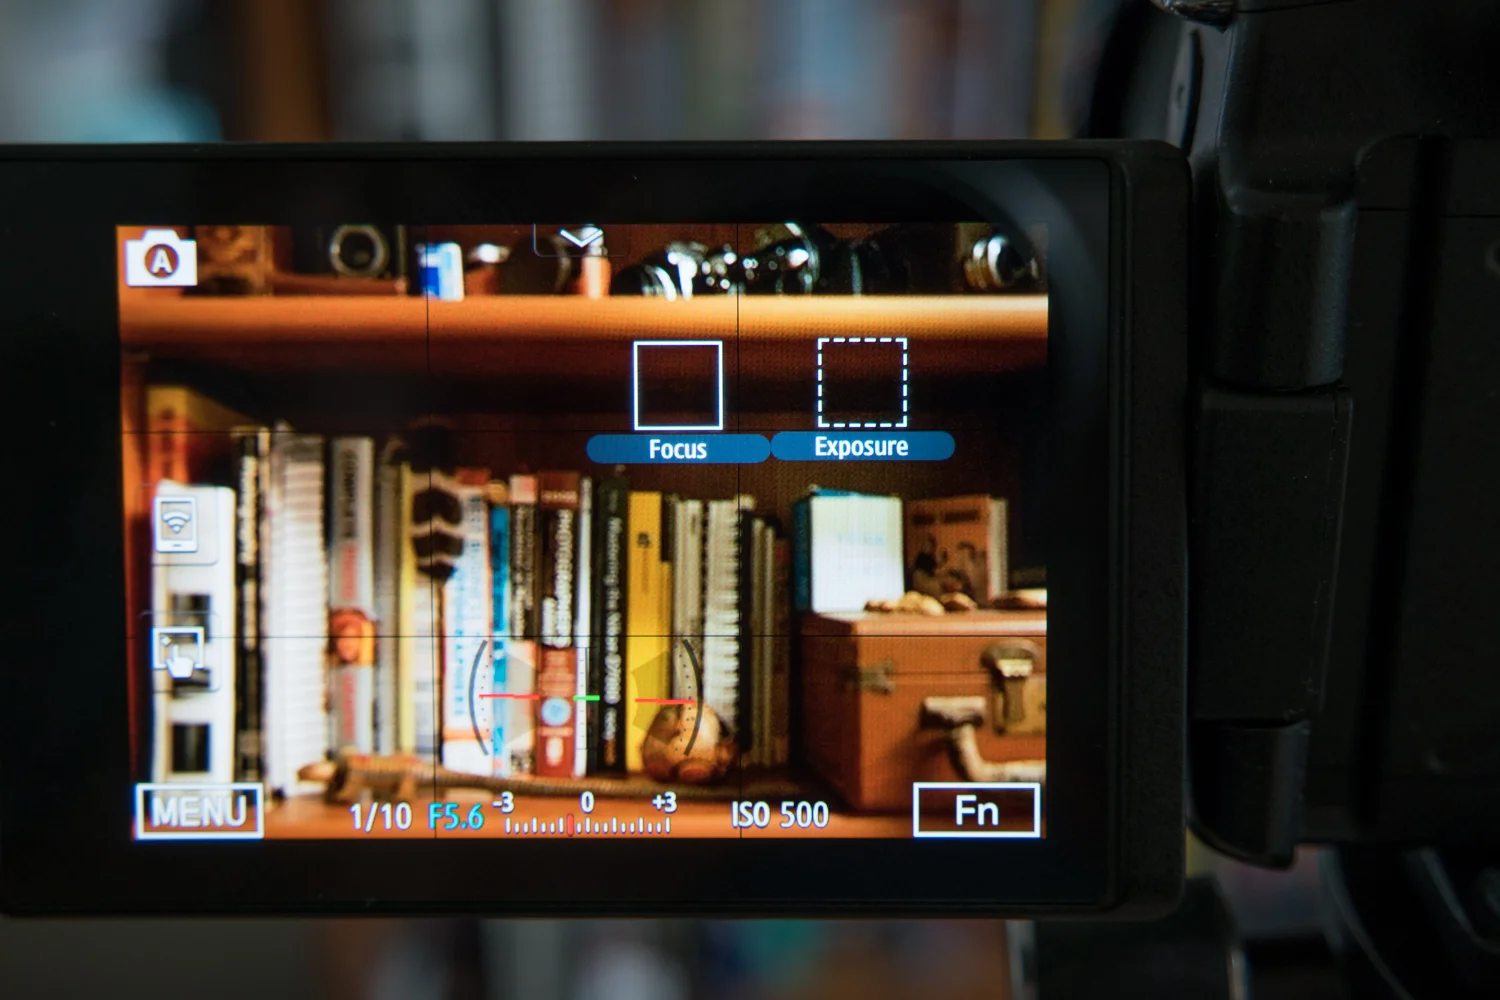
    Manual Focus – As anyone that has used one knows, iPhones already provide a great and mostly accurate focusing system. Chances are, your shot will focus where you want it to and it’ll look great. But sometimes, having that extra control over focus is what can add that extra punch to an image. For example, if you want to have the entire photo blurry for artsy purposes, you’ll need manual focus. If you want to focus on a detail that’s too small for the camera to pick up on, you’ll need manual focus. Apple finally provides that control with iOS 8. The fact that focus peaking is part of it is a HUGE plus. Basically, the screen will show colored pixels on the part that is in focus so you know you’re getting exactly what you want in focus.

    Wasim Muklashy Photography_Focus Peaking Sample_iOS 8_-SAM_0980

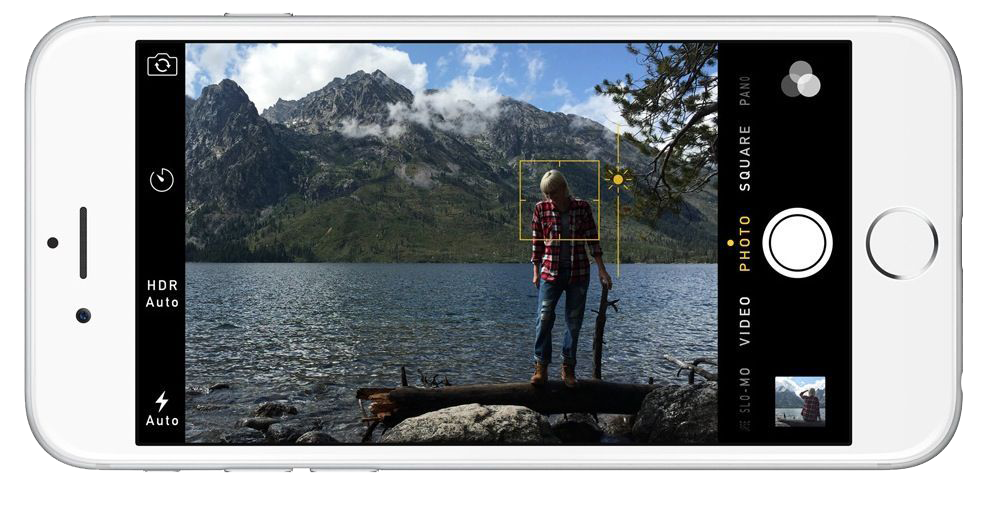
    Manual Exposure –  So as you compose your shot, you can now manually expose by sliding your finger up or down to increase or decrease exposure/brightness. Again, the camera does a great job already, but sometimes you want things brighter or darker, or you want to expose for a certain part of the scene while focusing on another. With iOS 8, you now have that control as well, putting you in charge of exactly what your image will look like, not what Apple thinks your image should look like.

    Wasim Muklashy Photography_Focus Exposure Sample_iPhone 6_iOS 8

    Exposure Compensation – Most professional photographers live by Exposure Compensation. It’s why that little button lies so close to the top of the camera body for easy access on just about every single SLR or DSLR model available. Basically, instead of having to get too deep in the manual settings, if you need the scene just a bit brighter or darker, you can use exposure compensation to slightly make up for how you’d like the image to turn out by nudging it brighter or darker. It’s measured in ‘f-stops’, so basically, if you go up +1, it’ll double the brightness, if you go -1, it’ll halve the brightness.

    ISO – This stands for International Standards Organization. You don’t need to know that. All you need to know is that when you increase the ISO, it increases the light sensitivity on the sensor, meaning, the higher the ISO number, the more light will be exposed to the sensor. Essentially, you can take pictures in lower light using a higher ISO. This also means that the shutter will fire faster, meaning, less time for a moving subject to be blurry, increasing the chance of capturing a sharp image. The trade-off is that, the higher the ISO, the more noise will show up in your images, basically, making them more grainy. However, by having this control manually, you’ll get the option to choose whether or not getting that shot in the bar is truly worth a bit of grain, versus not getting that shot at all.

    Shutter Speed – Plainly put, shutter speed is exactly that…how fast the shutter fires, or, how much time it stays open to let light onto the sensor (take a picture). Some of those applications could range from long-shutter exposures to get that milky water or car-light-stream effects. Up until now, you had to rely on the camera deciding what is the best shutter speed to get a proper exposure for the image you’re capturing, allowing little to creativity and experimentation with slow or fast shutter speeds. With Apple extending the API to include control over shutter speed, third party apps will have an easier task in allowing you to control this critical element of a photographic exposure. Provided you have a tripod, or some method to stabilize the iPhone (since anything slower that 1/60 of a second shutter speed will likely introduce some blur if handheld), you’ll soon be able to get those milky water and car streamy lighty shots on your phone.

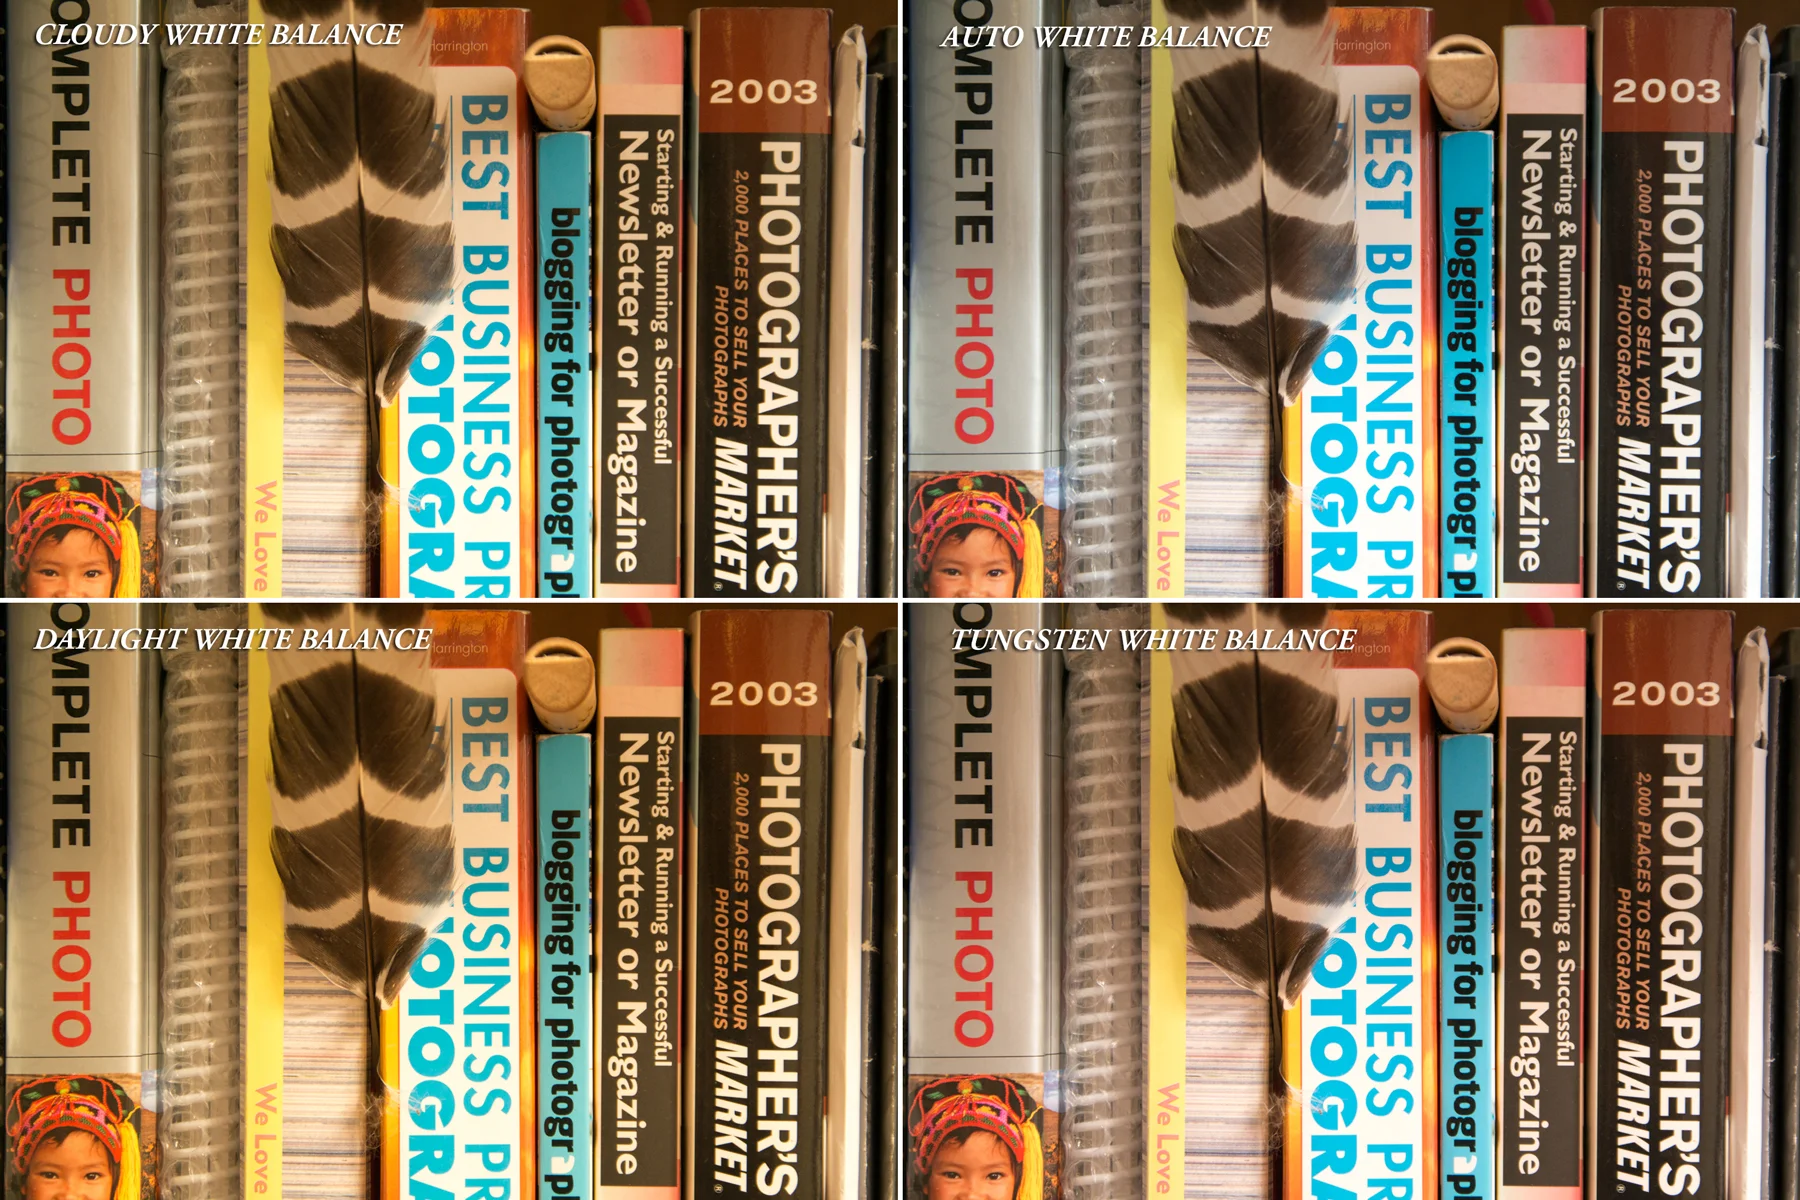
    White Balance – Professional photographers have been fussing over white balance for as long as photography has existed. And now, iOS 8 users who aren’t familiar with the professional world, will find out why for themselves. While cameras have been becoming increasingly better at determining what true white point in an image is in order to give proper color to the rest of the image, they’re still not perfect. And with manual control over white balance, you can determine what sort of setting you’re shooting in, and modify and adjust white balance to make sure the whites are white and the other colors in the image follow suit.

    Wasim-Muklashy-Photography_White-Balance-Sample_iPhone 6_iOS-8

    The best part of all this is that Apple has left the camera open to 3rd party developers as well, so we’re going to start seeing some features that have existed in high-end DSLRs and mirror less cameras, show up on our iPhones. As a matter of fact, as of the writing of this post, ProCam has become the first app to already release a version, ProCam 2, taking advantage of much of these features.

    And to find out why all this matters, check out my take on Why Apple iOS 8 Will Create Better Photographers.

    For more of my madness: Instagram: @wasimofnazareth Twitter: @wasimofnazareth Google+: www.Google.com/+WasimMuklashy Facebook: www.Facebook.com/WasimOfNazareth
  • How To Minimize Reflections In Interior Photography

    How To Minimize Reflections In Interior Photography

    Jun Cha Studio Polarizer How To Minimize Reflections In Interior Photographyformatoriginal

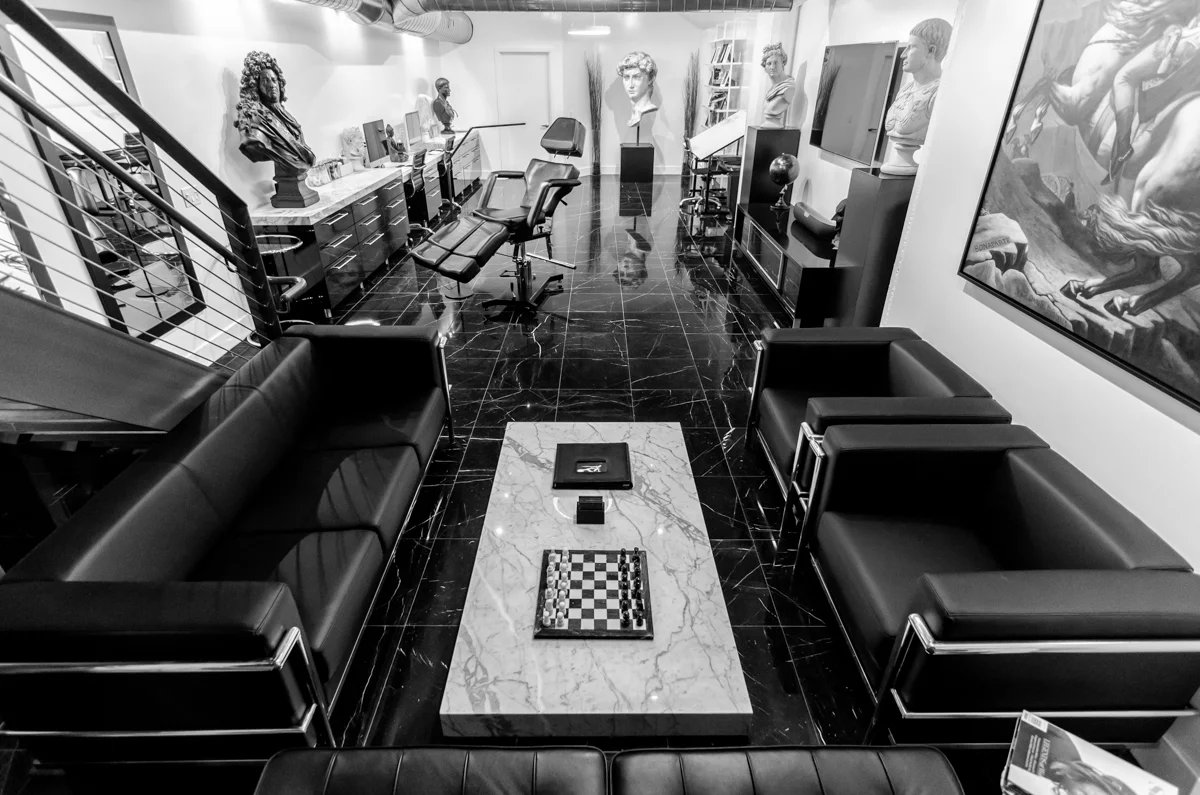
    I was recently commissioned to photograph a live/work space in Downtown LA for insanely talented tattoo artist Jun Cha. It was set up as a loft, with the living quarters upstairs, and his tattoo studio in the commercial space downstairs. The space was absolutely beautiful, and I’ve never quite seen a tattoo studio or parlor as elegant as this was – a gorgeously clean monochromatic space adorned with Greek mythological statues and replica busts of everyone from David to the Virgin Mary, classy leather-bound art books, Roman columns. It was stunning.

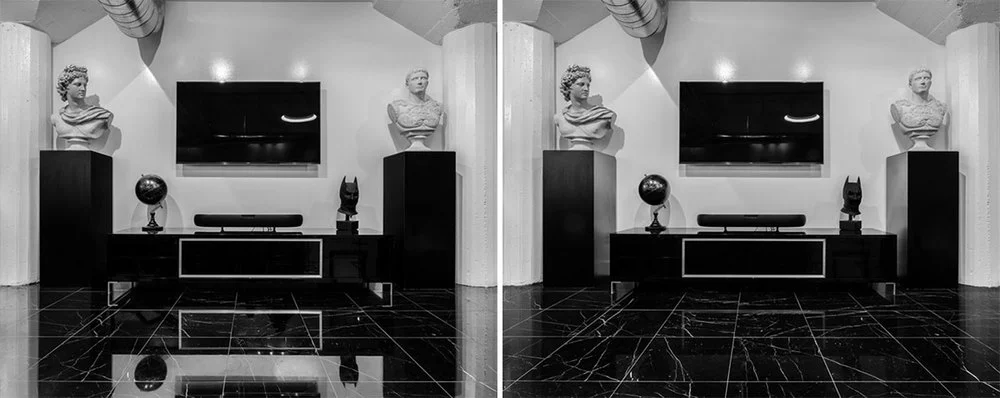
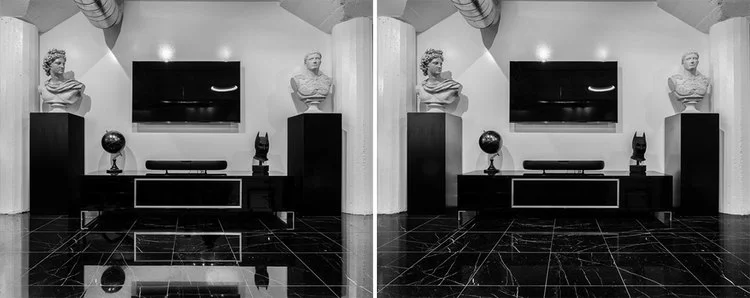
    Cha’s articulate attention to detail in his artwork transferred over to his borderline obsessive attention to every detail in this space. Hell, he even lay the tile down himself, a feat he made sure to remind me was NO small task. And this tile, this gorgeous black tile adorned with extremely contrasting white veins leading from one side of the room to the other, provided me with the biggest challenge of the space. The issue was that it was so highly reflective, and the overhead lights that were in the studio were so predominant, that if you looked at the floor, it was impossible not to see the reflections of these necessary lights.

    Since the main point he understandably continued to hammer home was to ‘make sure to focus on and bring out the detail in the tiles, specifically the white veins,’ I had to figure out how I was going to do this. One thought was to shoot an exposure with the lights off, and one with the lights on, and then paint in the floor in a composite, but that seemed like much more work than it was worth, and the last thing I wanted to do was make it seem unnatural. There had to be a more organic way to do it. Then I thought maybe we’d dim the lights, so at least it would minimize the reflections, but that would still be distracting enough to take away from the focus of what he wanted the images to be…the white veins.

    Immediately following the day that I scouted the location, I found myself on an impromptu trip to the eastern Sierra Nevada mountains, specifically in Mammoth Lakes, Yosemite’s Tuolumne Meadows, and Mono Lake. I know, strange segway right? But this is where it hit me. Yes, Cha’s studio was in the concrete jungle of Downtown Los Angeles, and yes, where I found myself 24 hours later was the complete opposite of that, but I have a set of filters that I use in almost all landscape and outdoor shots, and one of the filters that gets the most action, which I happened to pull out for a sunset on a lake shot, is the circular polarizing filter. Why? well, it’s designed to minimize reflections, especially in water.

    Duh!

    I had found my solution. For the first time in my photographic life, I was going to use the polarizing filter indoors for an architectural interior shoot. And I must say, it worked brilliantly. There were a few instances in which I had to clone out some particularly strong ceiling lights in post, but it was a mere fraction of the retouching job that would have lay ahead without those polarizers. The reflections were 90% gone, the tile was the star of the show, and, most importantly, the client was happy.

    JunCha_Int_CLPL-_1WM5243-Edit-Edit

    So yes, if you happen to be shooting real estate or architectural interiors, and the reflections get to be too much, taking away from the detail of the texture or design, whether it be in tile, or glass, or distressed concrete, or waxy hardwood floors or shiny metal surfaces, don’t be afraid to reach for that polarizer. It can save the day (and the shoot).

    If you want more, click here for 7 Tips For Shooting Real Estate Photography, and click here to learn How To Expose For Interiors And Exteriors.

    And if you’re in need of real estate photography services, whether commercial or residential, please feel free to contact me or check out my Property Photography website.

    And, finally, for more of my madness: Instagram: @wasimofnazareth Twitter: @wasimofnazareth Google+: www.Google.com/+WasimMuklashy Facebook: www.Facebook.com/WasimOfNazareth
  • 5 Photo Projects You Can Start And Finish In A Weekend

    5 Photo Projects You Can Start And Finish In A Weekend

    Wasim-Muklashy-Photography_Photo-Projects_Robin-Becker_Border

    So this one’s going to be a little different. I recently had the insanely humbling experience of being a guest on the popular Improve Photography podcast with Jim Harmer. We recorded the show with the understanding that it could, or could not be, posted. Well, the team at ImprovePhotography.com were gracious enough to post it this week. The topic we discussed was ‘5 Photo Projects You Can Start And Finish In A Weekend,’ and rather than list them here, I’m going to direct you over to the podcast link so you can listen away! There’re some good ones in that sucker I must say!

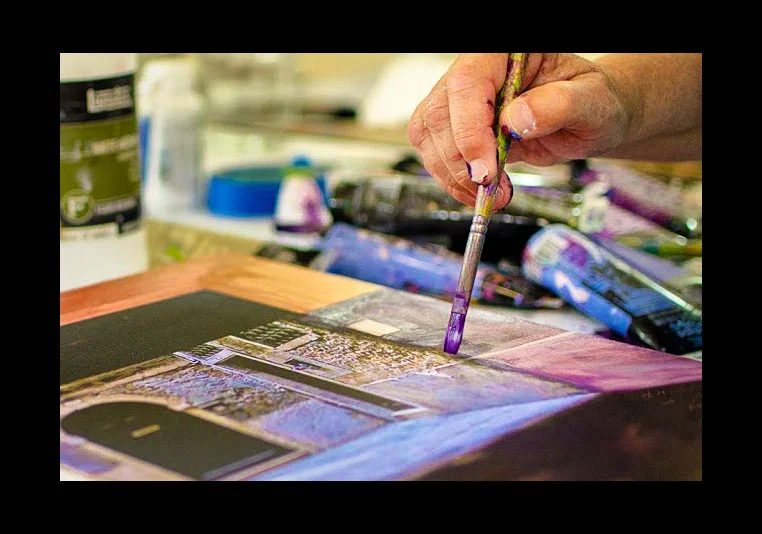
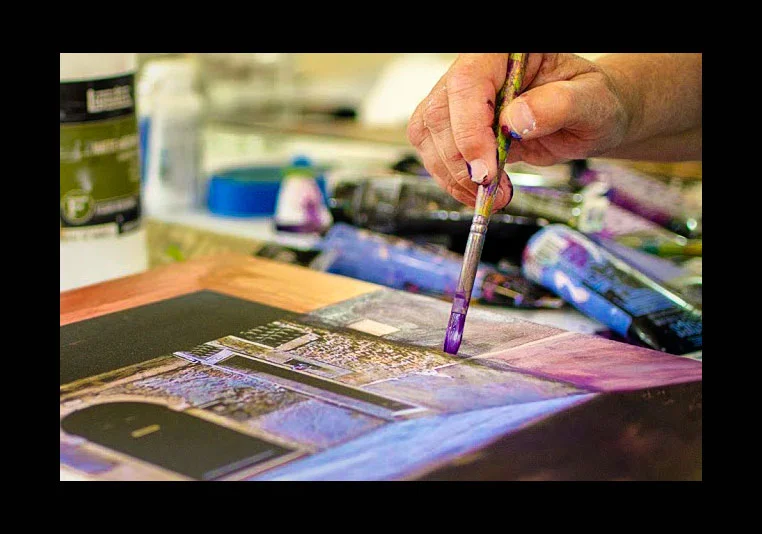
    The image above is of Topanga Canyon artist Robin Becker working. She is a mixed media artist who enhances her photographs with paint. Needless to say, it’s incredibly stunning. Check out her work at www.RobinBeckerArtist.com

    And for more of my madness:
    Instagram: @wasimofnazareth
    Twitter: @wasimofnazareth
    Google+: www.Google.com/+WasimMuklashy
    Facebook: www.Facebook.com/WasimOfNazareth

  • How To Photograph The Super Super Moon!

    How To Photograph The Super Super Moon!

    Wasim Muklashy Photography_Wasim Of Nazareth_Full Moon_Continental Divide_Rocky Mountain National Park_Colorado_-_1WM2334_2400

    So all that hype about the ‘super moon’ that we’ve heard not only this month but last month and sometime back earlier this year as well? Well, this is more of it! Apparently this weekend, on Sunday, August 10, is the superest of all super moons (at least in 2014). Scientists like to get all loose and crazy and call it a ‘perigee full moon,’ basically meaning it’s the closest the moon will be to earth this year. Anyhow, along with all the hype about the super moon itself, for us photographers, comes all the hype about how to photograph the super moon, so here are my obligatory tips on how to photograph the super super moon.

    1. TRIPOD!! USE A TRIPOD!!! This is one you can’t get away from.

    2. Tighten Up! Use as tight a focal length as you have (or can afford). At the very least you’ll want to use a 200mm (remember on a crop sensor, that’s roughly 300mm). If you can get away with it (and your wife /husband or boy/girlfriend won’t kill you, or your creditors aren’t already hot on your tail), get yourself a 400mm or even longer lens.

    3. Spot Meter!!! Only Spot Meter!! The moon is quite the bright bugger, meaning, the camera will have a hard time metering properly as the big bright thing surrounded by darkness will confuse it, making the moon completely washed out, causing your shot to miss out on the details, the contours, the lines, the mountains, the valleys, the moon men curiously pondering the mars rover tracks, wondering if there’s other life ‘out there.’ This is also where you might want to use exposure compensation. Take a few test shots, and if the camera still isn’t metering properly, drop the exposure compensation by a stop or two to -1 or -2 (manually underexposing) to make up for what the camera thinks it’s seeing.

    4. How Low Can You ISO? Use the lowest ISO you can get away with, which, if you refer to tip #3, can be the lowest ISO your camera supports. Shoot using an aperture between f5.6 and f11. That should allow sufficient light to hit the sensor while giving you a crisp image of the moon’s surface, as the middle apertures tend to give you the sharpest images.

    5. Augment Your Reality! Grab an app like PhotoPills or Sun Seeker or Rick Sammon’s Photo Sundial or for Android, there is Sun Surveyor. These are essentially augmented reality apps that you can point at the sky and know exactly where the moon is going to be at exactly what time on exactly what date. Kind of handy eh?

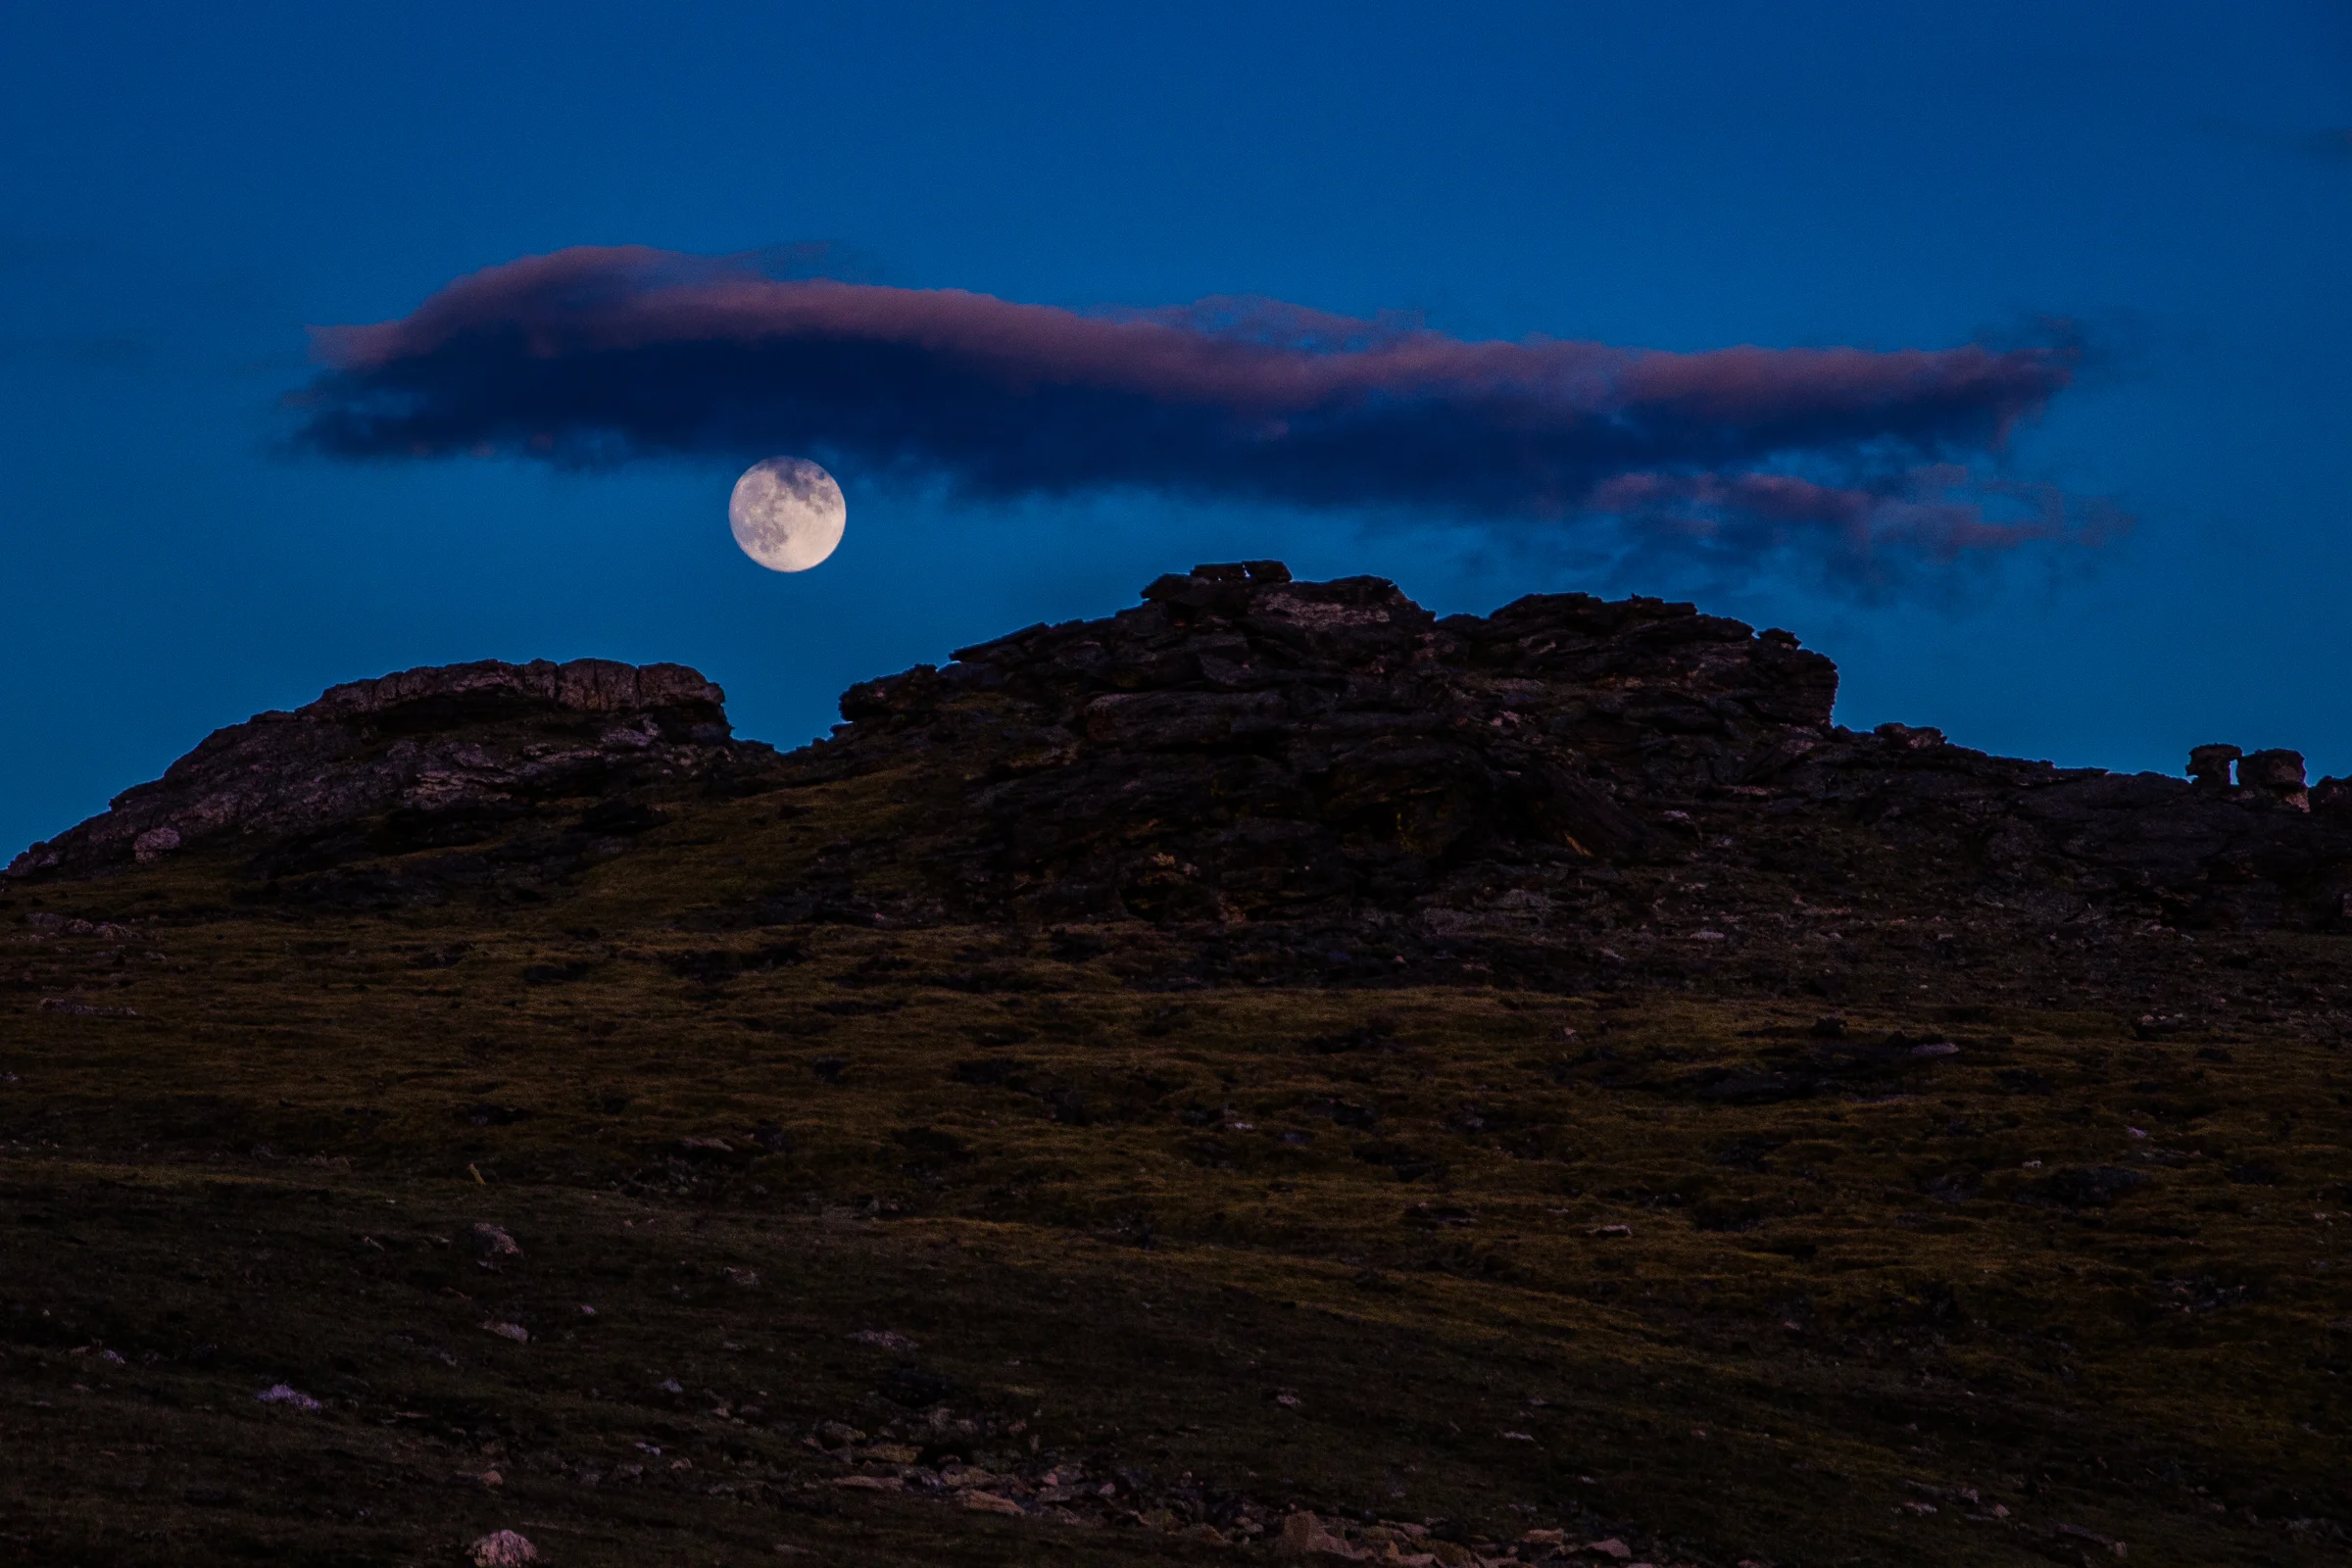
    6. Size Matters! Try to find a foreground, like a hill or a tree or a structure for a sense of scale. Even if it’s just a silhouette of that foreground object. Otherwise it can look just like any other full moon, and when the super moon is essentially called that because of the considerable size difference in comparison to other full moons, it would be pointless. This is easiest achieved with timing, as you’ll want to capture the moon just as it begins to rise above the horizon. If you wait until it’s directly overhead and there are no other elements in the image, it’s just another moon…

    7. Look Up! Don’t forget to look away from the camera. As a photographer, it’s easy to get caught up with what’s inside that little frame of yours, easily forgetting everything surrounding that frame. Stop for a few minutes. Just breathe. Soak it in. At the very least, it’s a nice reminder of you why you do what you do.

    When you’re all done, moon me! Post links to them suckers here, would love to see ’em!

    And for more of my madness:
    Instagram: @wasimofnazareth
    Twitter: @wasimofnazareth
    Google+: www.Google.com/+WasimMuklashy
    Facebook: www.Facebook.com/WasimOfNazareth

  • Cover Your Bases – Here Are Some Of The Best Photographers Insurance Options

    Cover Your Bases – Here Are Some Of The Best Photographers Insurance Options

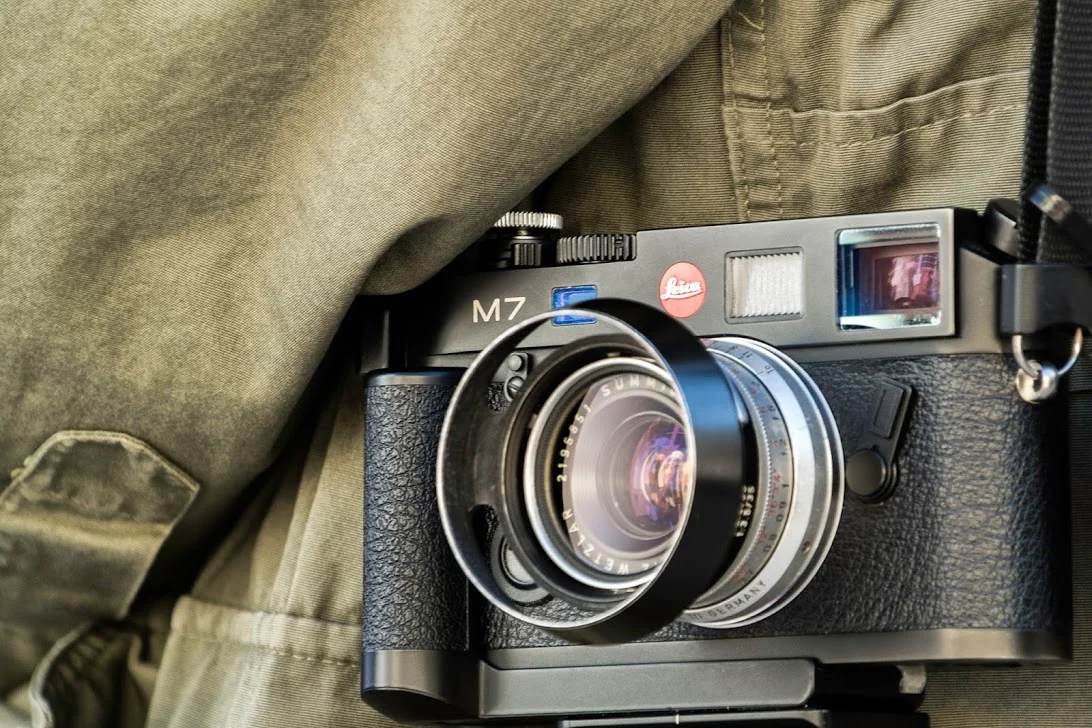
    Wasim of Nazareth_Wasim Muklashy Photography_Leica_M7_SAM_4044-Edit

    Photographers bread and butter depends 100% on their camera and their camera gear, and the simple fact that this gear must be on our backs at all times, very often in sketchy situations and locations, lends to the necessity of insurance for their gear. There are many options for insurance tailored to photographers and creatives, so here are a few of those to check out:

    Professional Photographers of America (PPA). Well known and well-established, the PPA is a great choice for photographers seeking insurance. They’ve been around since 1880. Yes, you read that right EIGHTEEN EIGHTY, and that puts them in a unique position to know and cater to photographers needs since, well, photography existed. The one catch here is that you need to be a PPA member to reap the benefits of PPA photographers insurance. However, with membership dues running between 273-323 per year, that includes a host of additional benefits, it’s a small price to pay to cover up to $15,000 of your equipment. Click here to check em out.

    Hill & Usher – This 20 year old company started off as just a construction-insurance company, and has since expanded to all sorts of industries and niches, including photography with their specialized Insurance for Media Professionals Package Choice. They have options for everything from personal gear to full studio insurance. Premiums range between 4-500 dollars depending on location and other factors including how much coverage you need. Click here for more information.

    Tom Pickard Insurance (TCP Insurance) – Tom Pickard Insurance specialized in Photographer Insurance, with both long term and short term policies available. Long term insurance is about $500 for the year, which includes portfolio and computer equipment coverage, which is very competitive and reasonable. Check them by clicking here.

    Homeowners/ Renters Insurance – Another option is to look into your homeowners or renter’s insurance policies. Oftentimes they cover a good portion of your gear, with some restrictions, and if it’s not on your policy, it’s worth asking, because chances are good they’ll have an offering or be able to refer you. I mean, after all, have you ever heard of an insurance company that would turn down business?

    Additionally, if you’re a member of the American Society of Media Professionals (ASMP), or American Photographic Artists (APA), they also have access to resources to lead you in trusted directions for photographer insurance, so it’s worth asking them before you choose one of the above options.

    And finally, make sure to also register your equipment with Lenstag as an additional useful (and free) precautionary measure. Click here for a bit about that!

    Hopefully this information will help you rest assured that no matter what photography psychotica situation you might find yourself in, someone’s got your back!

    For more of my madness:
    Instagram: @wasimofnazareth
    Twitter: @wasimofnazareth
    Google+: www.Google.com/+WasimMuklashy
    Facebook: www.Facebook.com/WasimOfNazareth